Defining Schema Registry access policies
You must grant your application certain privileges to use the Schema Registry by creating the appropriate policies in Ranger. Learn how to define access policies and permissions for using Schema Registry.
-
Click the Ranger icon (
 ) on the top pane, to open the Ranger web UI.
-
Create a policy to allow access to the schema metadata.
-
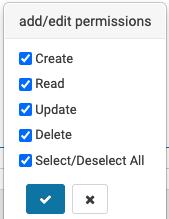
Click Add Permissions, select all the
permissions and click on the tick mark button.
-
Click Add Permissions, select all the
permissions and click on the tick mark button.
-
Create a policy to allow access to the schema versions:
-
Click Add Permissions, select all the
permissions and click on the tick mark button.
-
Click Add Permissions, select all the
permissions and click on the tick mark button.