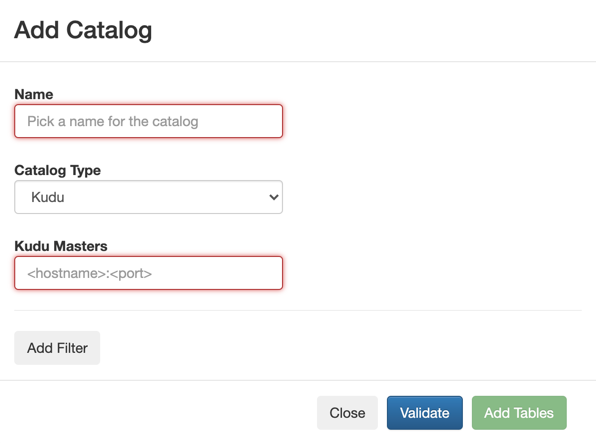
You need to add Kudu as a Catalog using the Streaming SQL Console in SQL Stream
Builder (SSB) to create Kudu tables with Flink DDL.
- Make sure that you have Kudu service on your cluster.
- Make sure that you have the right permissions set in Ranger.
-
Navigate to the Streaming SQL Console.
-
Navigate to , and select the environment where you have created your
cluster.
-
Select the Streaming Analytics cluster from the list of
Data Hub clusters.
-
Select Streaming SQL Console from the list of
services.
The Streaming SQL Console opens in a new window.
-
Click Data Providers from the main menu.
-
Click Register Catalog.
The
Add Catalog window appears.

-
Add a Name to your catalog.
-
Select Kudu from the Catalog Type drop-down.
-
Add the Host URL of Kudu Masters.
-
Go to your cluster in Cloudera Manager.
-
Select Kudu from the list of services.
-
Click on Instances.
-
Copy the Hostname of the Master Default Group.
-
Add the default port of Kudu after the hostname.
Example:
docs-test-1.vpc.cloudera.com:7051
-
Click on Add Filter.
-
Provide a Database and
Table filter if you want to select specific
tables to use from the catalog.
-
Click on Validate.
-
If the validation is successful, click Add Tables.
Kudu is added as a Catalog and ready to be used in Flink
DDL. The already existing tables in Kudu are automatically imported to SSB.

