You can configure the webhook table to perform an HTTP action per message (default)
or to create code that controls the frequency (for instance, every N messages). When
developing webhook sinks, it is recommended to check your webhook before pointing at your
true destination.
Navigate to the Streaming SQL Console.
Navigate to Management Console > Environments, and select the environment where you have created your
cluster.
Select the Streaming Analytics cluster from the list of
Data Hub clusters.
Select Streaming SQL Console from the list of
services.
The Streaming SQL Console opens in a new window.
Open a project from the Projects page of Streaming SQL
Console.
Select an already existing project from the list by clicking the
Open button or Switch button.
Create a new project by clicking the New Project
button.
Import a project by clicking the Import button.
You are redirected to the Explorer view of the project.
Click next to Virtual Tables.
Select New Webhook Table.
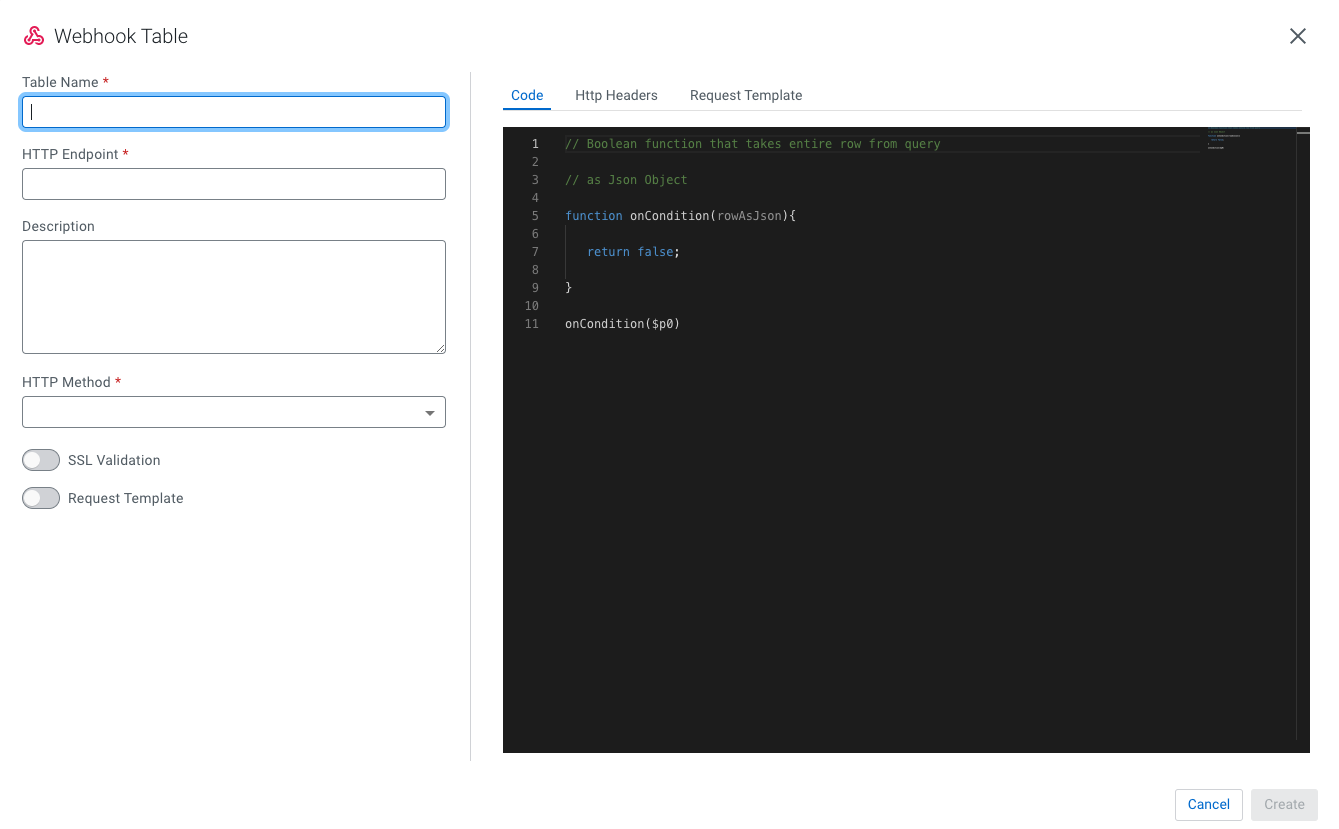
The Webhook Table window appears.
Provide a name to the Table.
Enter an HTTP endpoint. The endpoint must start with http://
or https://.
Add a Description about the webhook sink.
Select POST or PUT in the HTTP
Method select box.
Choose to Disable SSL Validation, if needed.
Enable Request Template, if needed.
If you selected Yes, then the template defined
in the Request Template tab is used for output.
This is useful if the service you are posting requires a particular
data output format. The data format must be a valid JSON format, and use
"${columnname}" to represent fields. For example, a
template for use with Pagerduty looks like
this:
{
   "incident":{
      "type":"incident",
      "title":"${icao} is too high!",
        "body":{
   "type":"incident_body",
         "details":"Airplane with id ${icao} has reached an altitude of ${altitude} meters."
 }
    }
}
In the Code editor, you can specify a code block that controls how the webhook
displays the data.
For a webhook that is called for each message the following code is
used:
// Boolean function that takes entire row from query as Json Object
function onCondition(rowAsJson)
{return true;   // return false here for no-op, or plug in custom
        logic}
onCondition($p0)
Add HTTP headers using the HTTP Headers tab, if
needed.
Headers are name:value header elements. For instance,
Content-Type:application/json, etc.
Click Create.
The Webhook table is ready to be used after the INSERT INTO
statement in your SQL query.
 next to Virtual Tables.