After creating your cluster
As an EnvironmentAdmin, you need to provide access to users to your environment and to the Streaming Analytics cluster by assigning user roles, adding users to Ranger policies, and creating IDBroker mappings.
The cluster you have created using the Streaming Analytics cluster definition is kerberized and secured with SSL. Users can access cluster UIs and endpoints through a secure gateway powered by Apache Knox. Before you can use Flink and SQL Stream Builder, you must provide users access to the Streaming Analytics cluster components.
Retrieving keytab file
As a user, you need to retrieve the keytab file of your profile and upload it to the Streaming SQL Console to be able to run SQL jobs.
- Navigate to , and select the environment where you have created your cluster.
- Click on your profile name.
- Click Profile.
- Click Actions > Get Keytab.
- Choose the environment where your Data Hub cluster is running.
- Click Download.
- Save the keytab file in a chosen location.
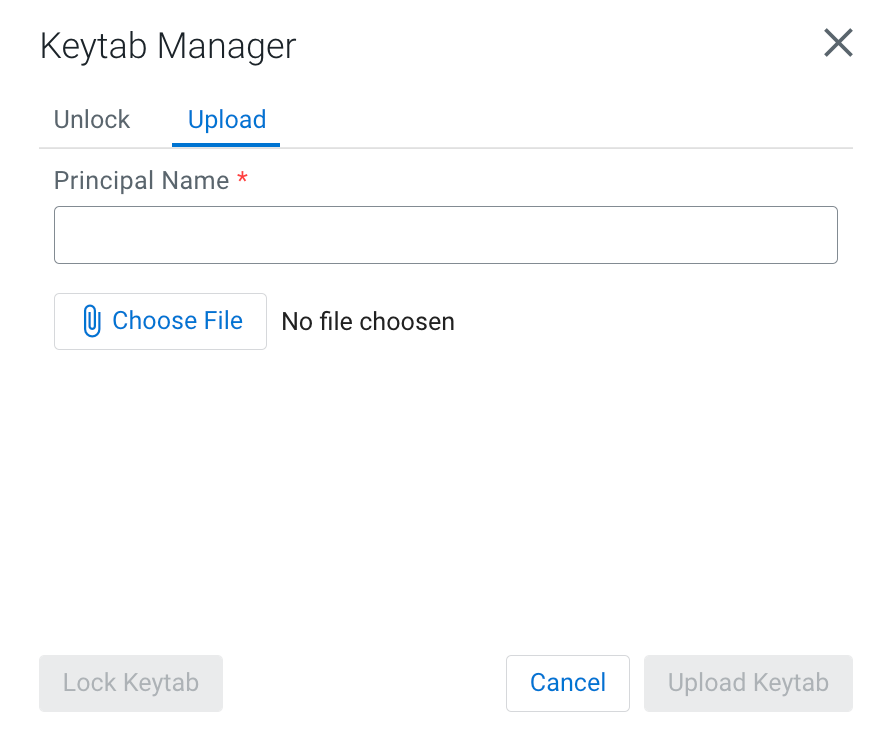
Uploading or unlocking your keytab
When accessing the Streaming SQL Console for the first time in Data Hub, you must upload and unlock the keytab file corresponding with your profile before you can use SQL Stream Builder (SSB).
-
Click Manage keytab.
The Keytab Manager window appears.You can either unlock the keytab already existing on the cluster, or you can directly upload your keytab file in the SQL Stream Builder.
-
Unlock your keytab by providing the Principal
Name and Password, and clicking
Unlock Keytab. The Principal Name and
Password should be the same as the workload username and password set
for the Streaming Analytics cluster.

-
Upload your keytab by clicking on the Upload
tab, uploading the keytab file directly to the Console, and clicking
Unlock Keytab.
In case there is an error when unlocking your keytab, you can get more information about the issue with the following steps:- Retrieve your keytab file.
- Click on your profile name in the Management Console.
- Click Profile.
- Click Actions > Get Keytab.
- Choose the environment where your Data Hub cluster is running.
- Click Download.
- Save the keytab file in a chosen location.
- Manually upload your keytab to the Streaming Analytics
cluster:
scp <location>/<your_keytab_file> <workload_username>@<manager_node_FQDN>:. Password:<your_workload_password> - Access the manager node of your Streaming Analytics
cluster:
ssh <workload_username>@<manager_node_FQDN> Password: <workload_password> - Use
kinitcommand to authenticate your user:kinit -kt <keytab_filename>.keytab <workload_username> - Use the
flink-yarn-sessioncommand to see if the authentication works properly:flink-yarn-session -d \ -D security.kerberos.login.keytab=<keytab_filename>.keytab \ -D security.kerberos.login.principal=<workload_username>
-
Unlock your keytab by providing the Principal
Name and Password, and clicking
Unlock Keytab. The Principal Name and
Password should be the same as the workload username and password set
for the Streaming Analytics cluster.
Configuring Ranger policies for Flink and SSB
You must add your workload username and the SQL Stream Builder (SSB) service user to the Ranger policies that are needed for Kafka, Schema Registry, Hive and Kudu to provide access to topics, schemas and tables used by the components and to be able to execute Flink jobs.
You need to provide access to users and the SSB service by configuring Ranger policies for the Kafka data source and the Schema Registry, Kudu and Hive catalog services. To be able to use Flink, you need to add the workload user or users to the required policies. For SSB, the ssb service user needs to be added to the same policies.
When adding more workload users, instead of adding them one by one, you can create user groups
in Ranger, for example a flink_users group. This way you can assign every user
who will use the Streaming Analytics cluster into a group, and add only that one group to the
Ranger policies.
-
Click Ranger from the Quick Links or select from Services.
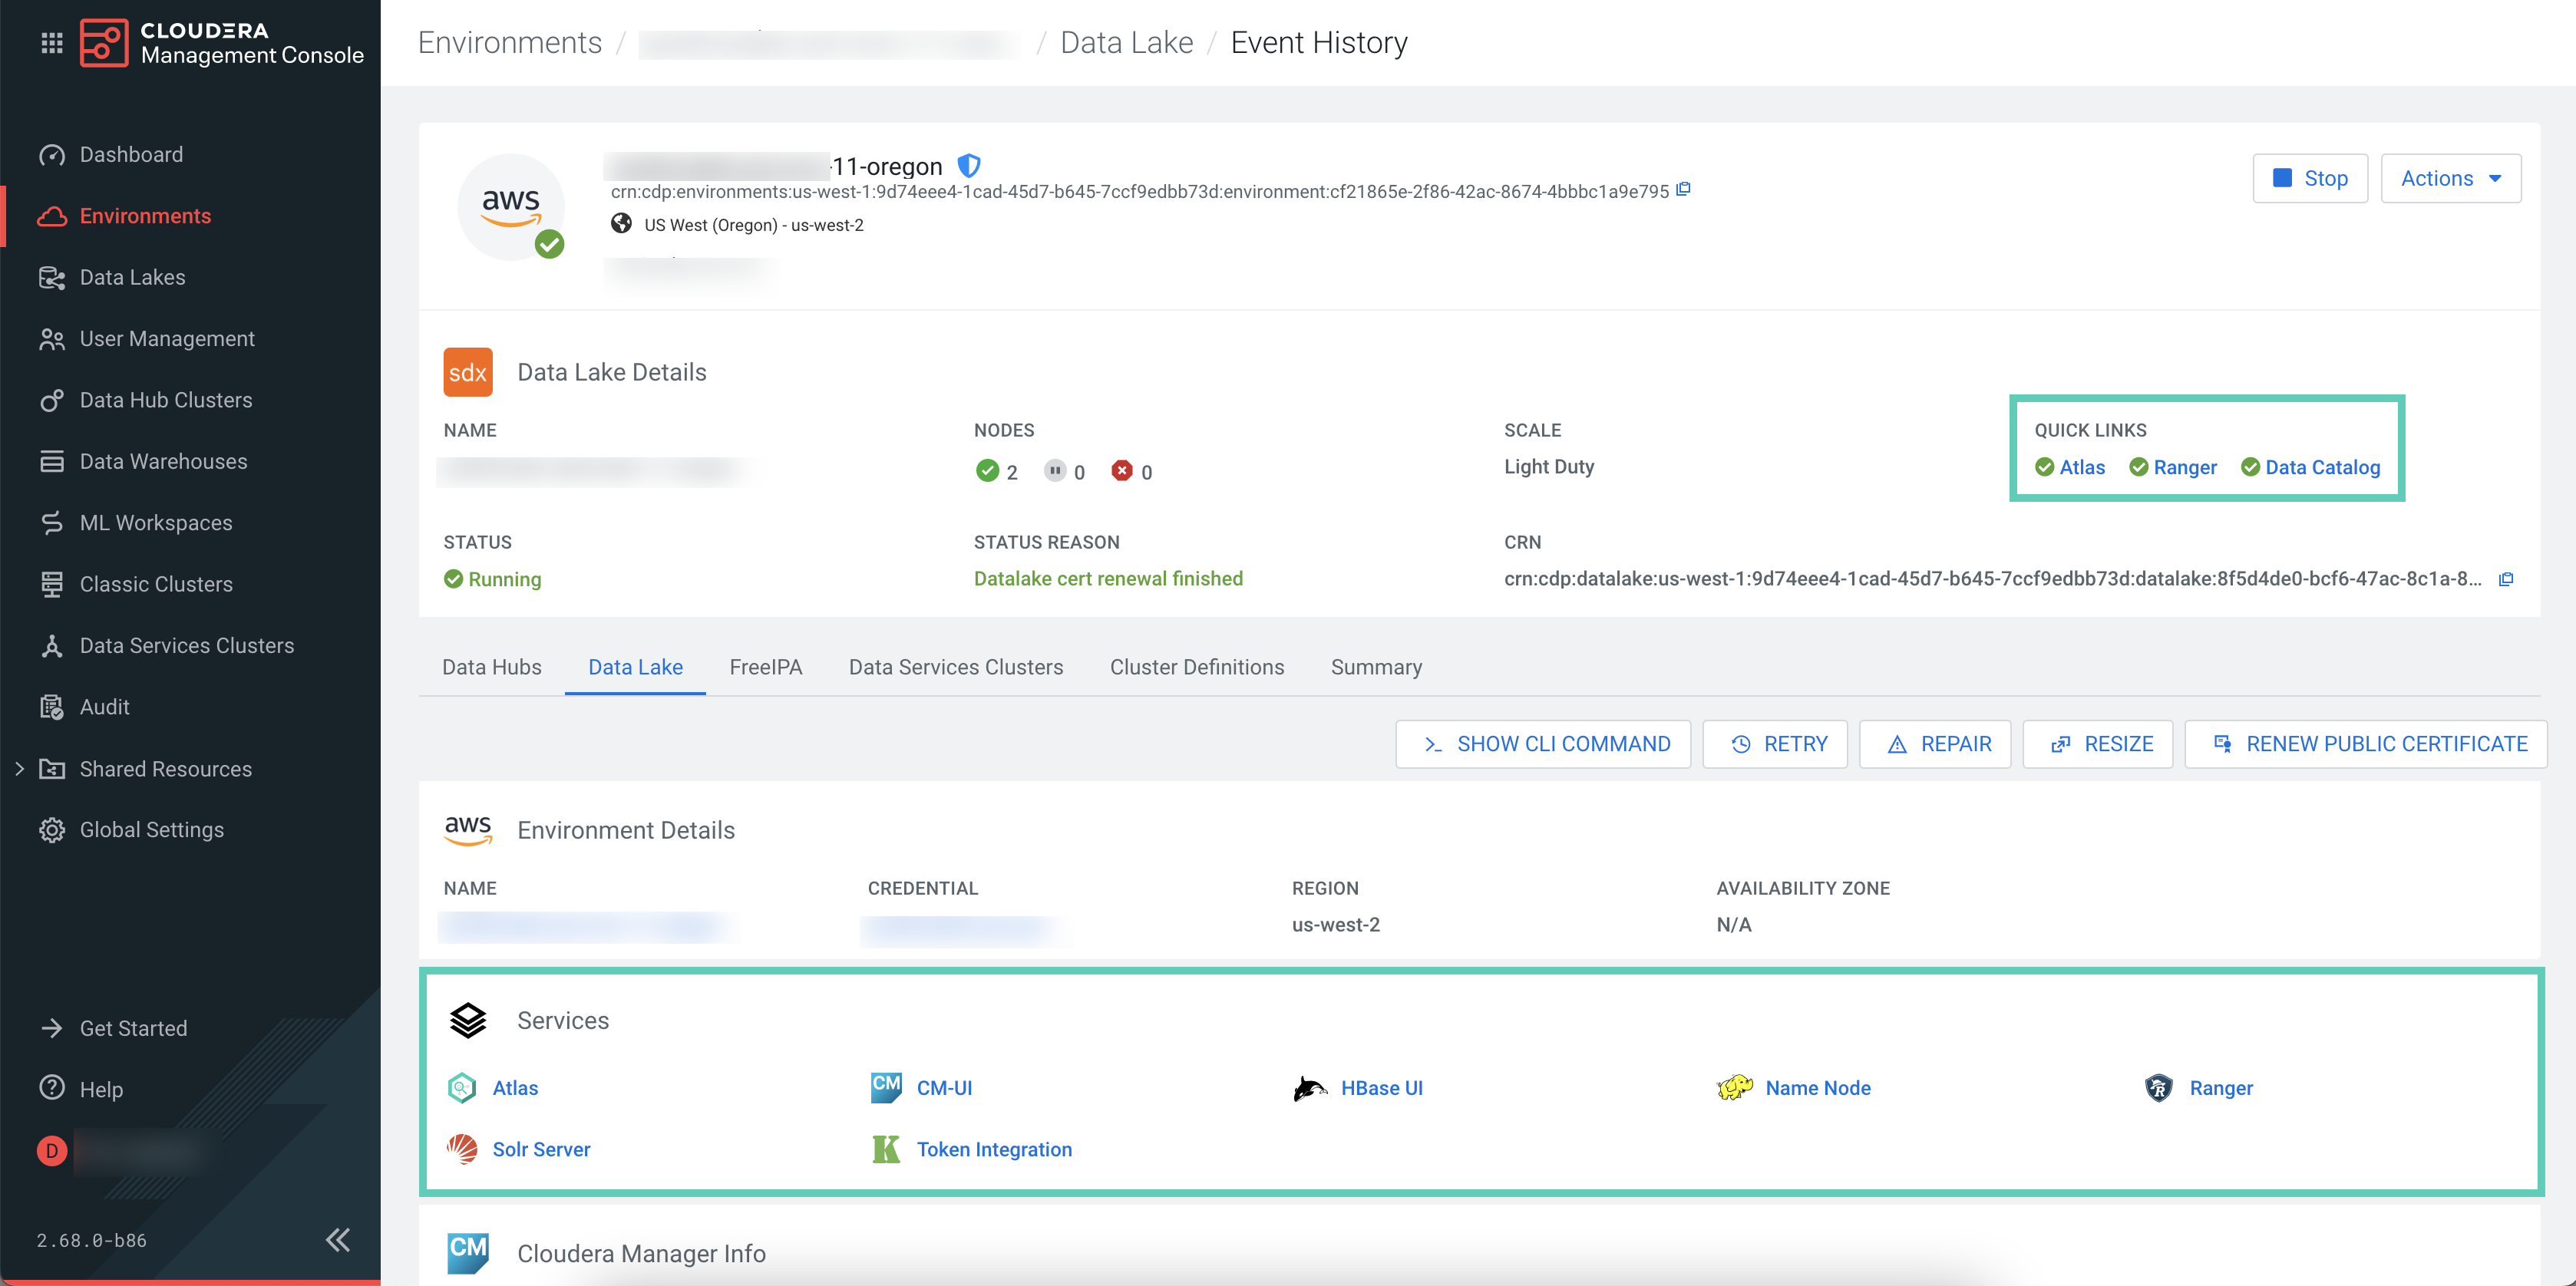 You are redirected to the Ranger Admin Web user interface (UI) where you can add the workload user and SSB service user to the required policies to grant access for Flink and SSB.
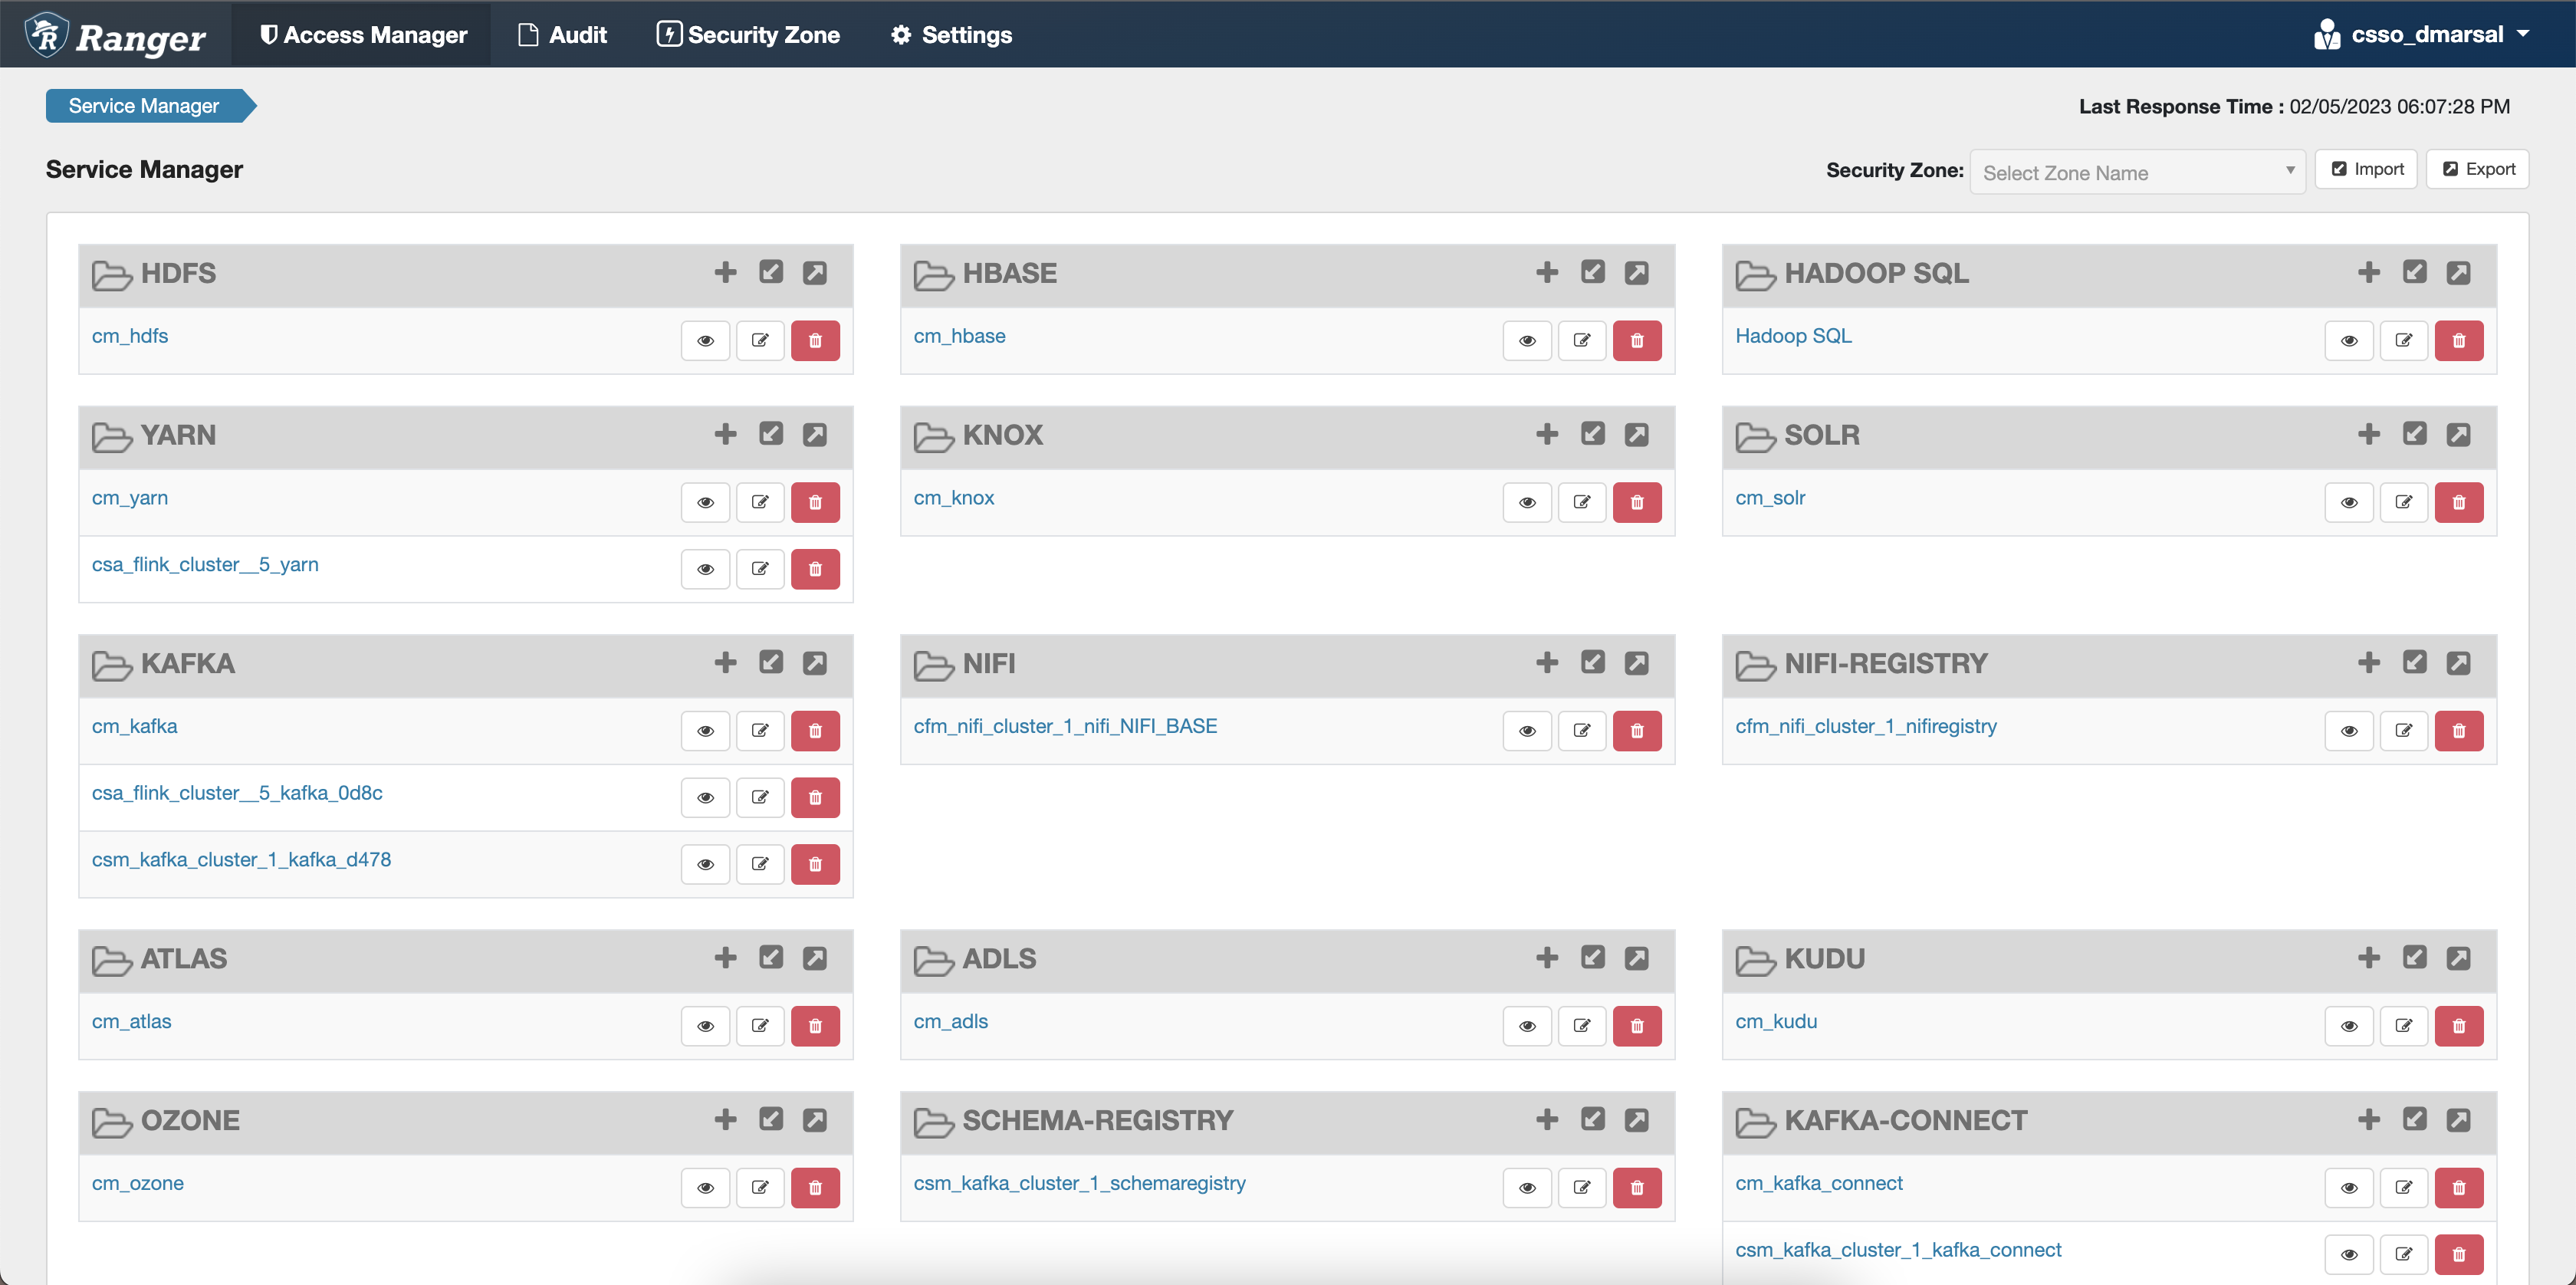
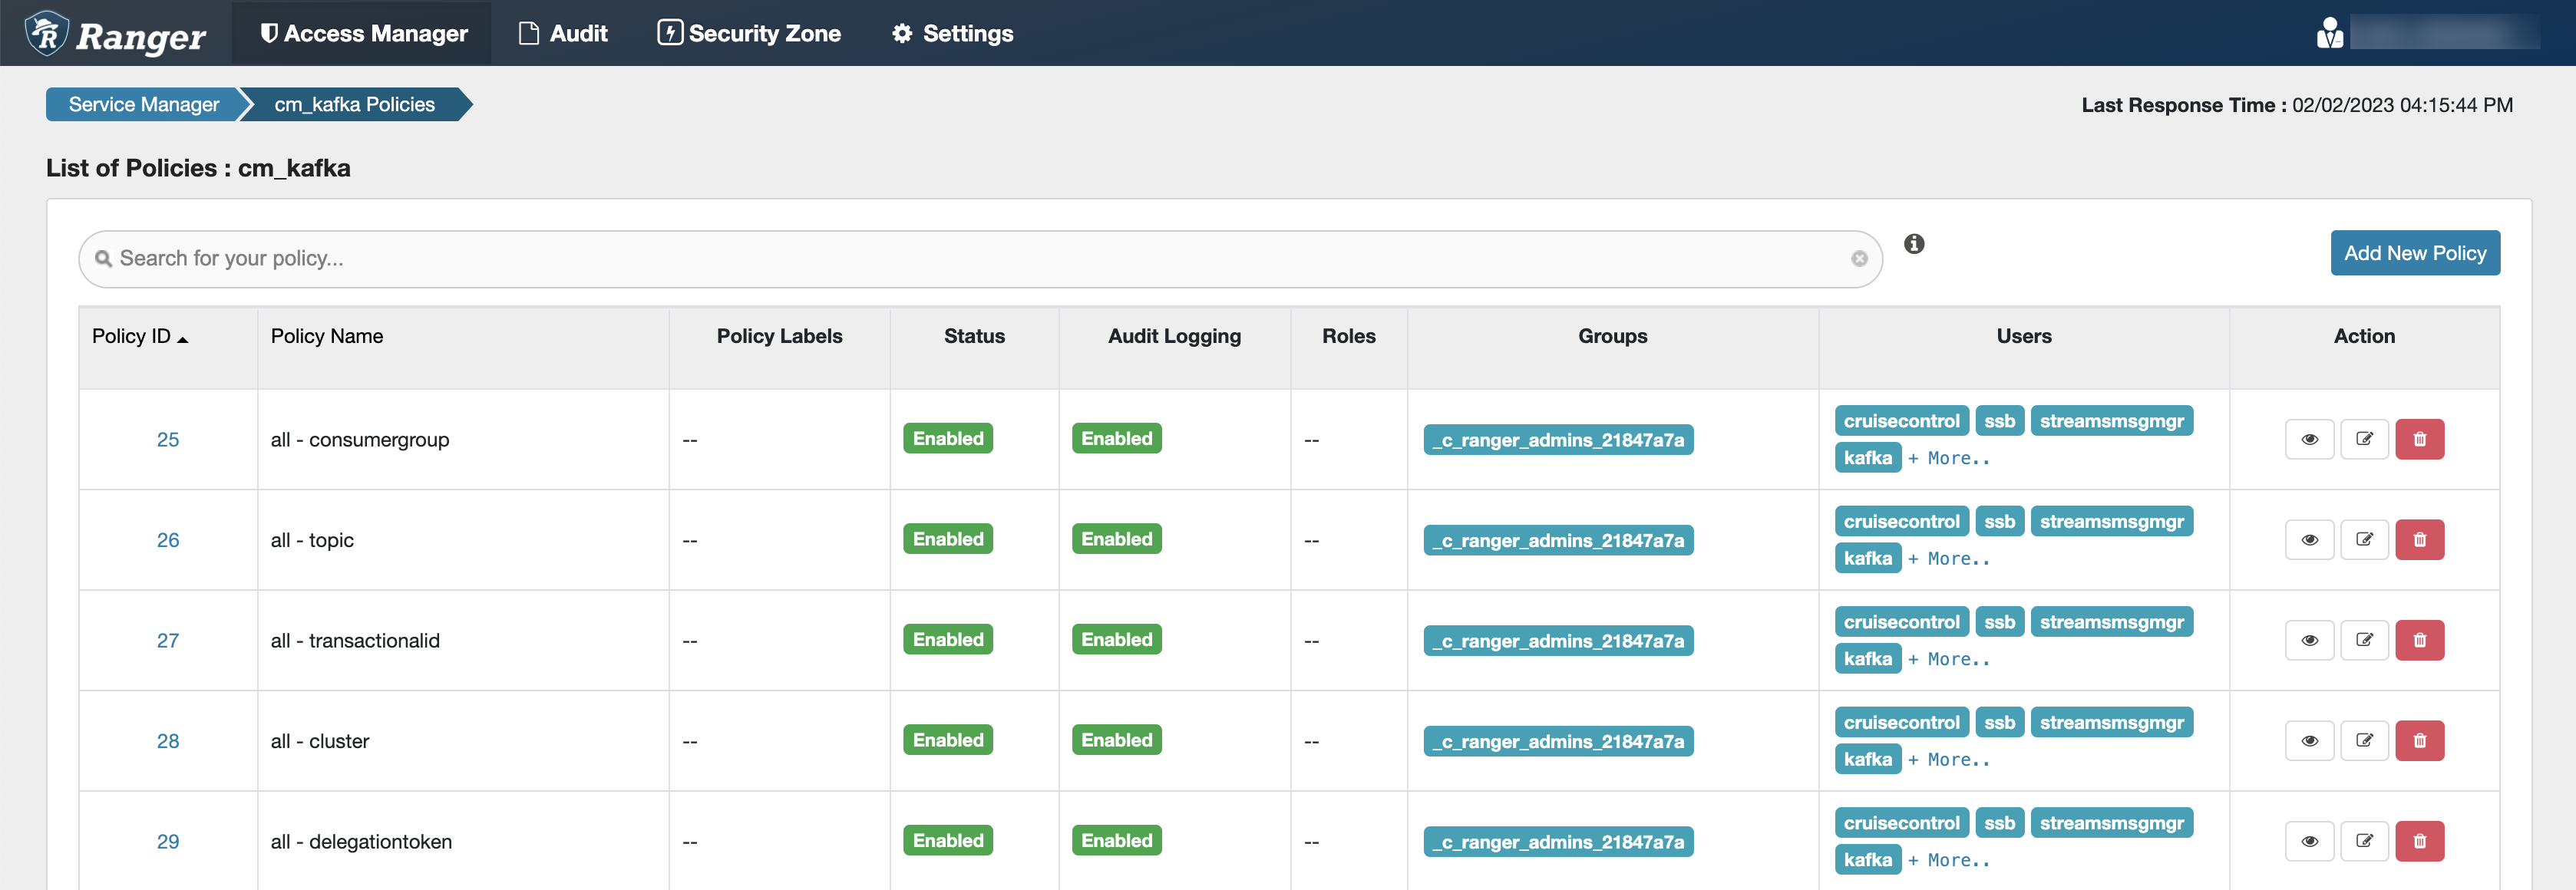
Configuring Kafka policies
After accessing the Ranger Admin Web UI, the workload username or user groups, and the SSB service user needs to be added to the Kafka policies to be able to use Flink and SSB.
- all - topic: Provides access to all topics for users
- all - consumergroup: Provides access to all consumer groups for users
- all - cluster: Provides access to all clusters to users
- all - transactionalid: Provides transactionalid access to users
- all - delegationtoken: Provides delegationtoken access to users
ssb service user is added to the policies of the Kafka service and
to the policies of the created Streams Messaging and Streaming Alaytics clusters.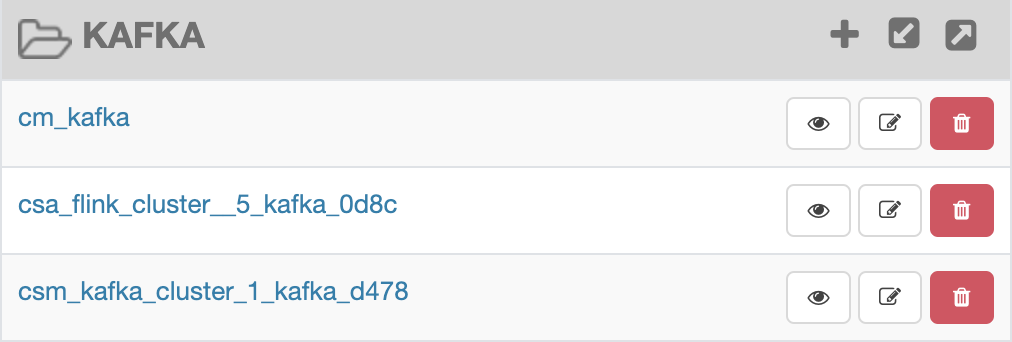
-
Click cm_kafka under Kafka service
on the Service Manager page.
You are redirected to the cm_kafka Policies page.
-
Add the
ssbservice user to the Select User field under the Allow Conditions setting, if it is not configured by default.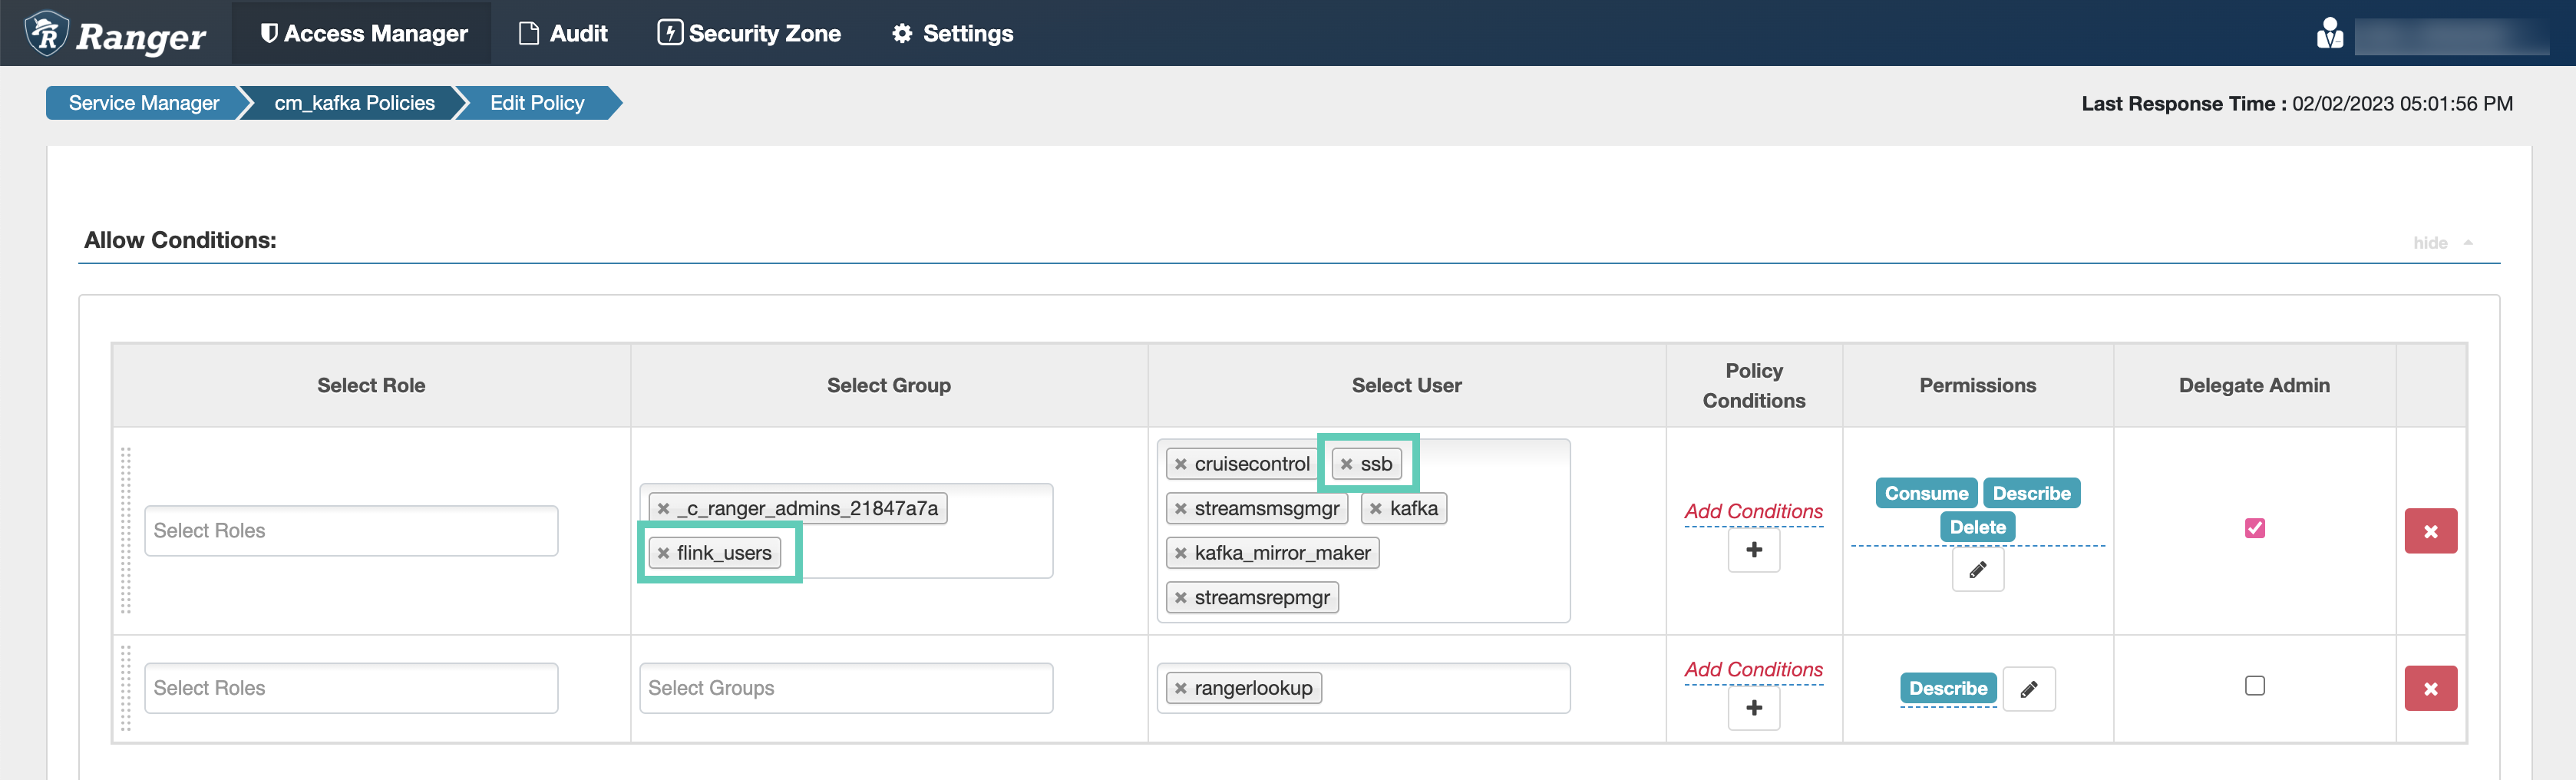
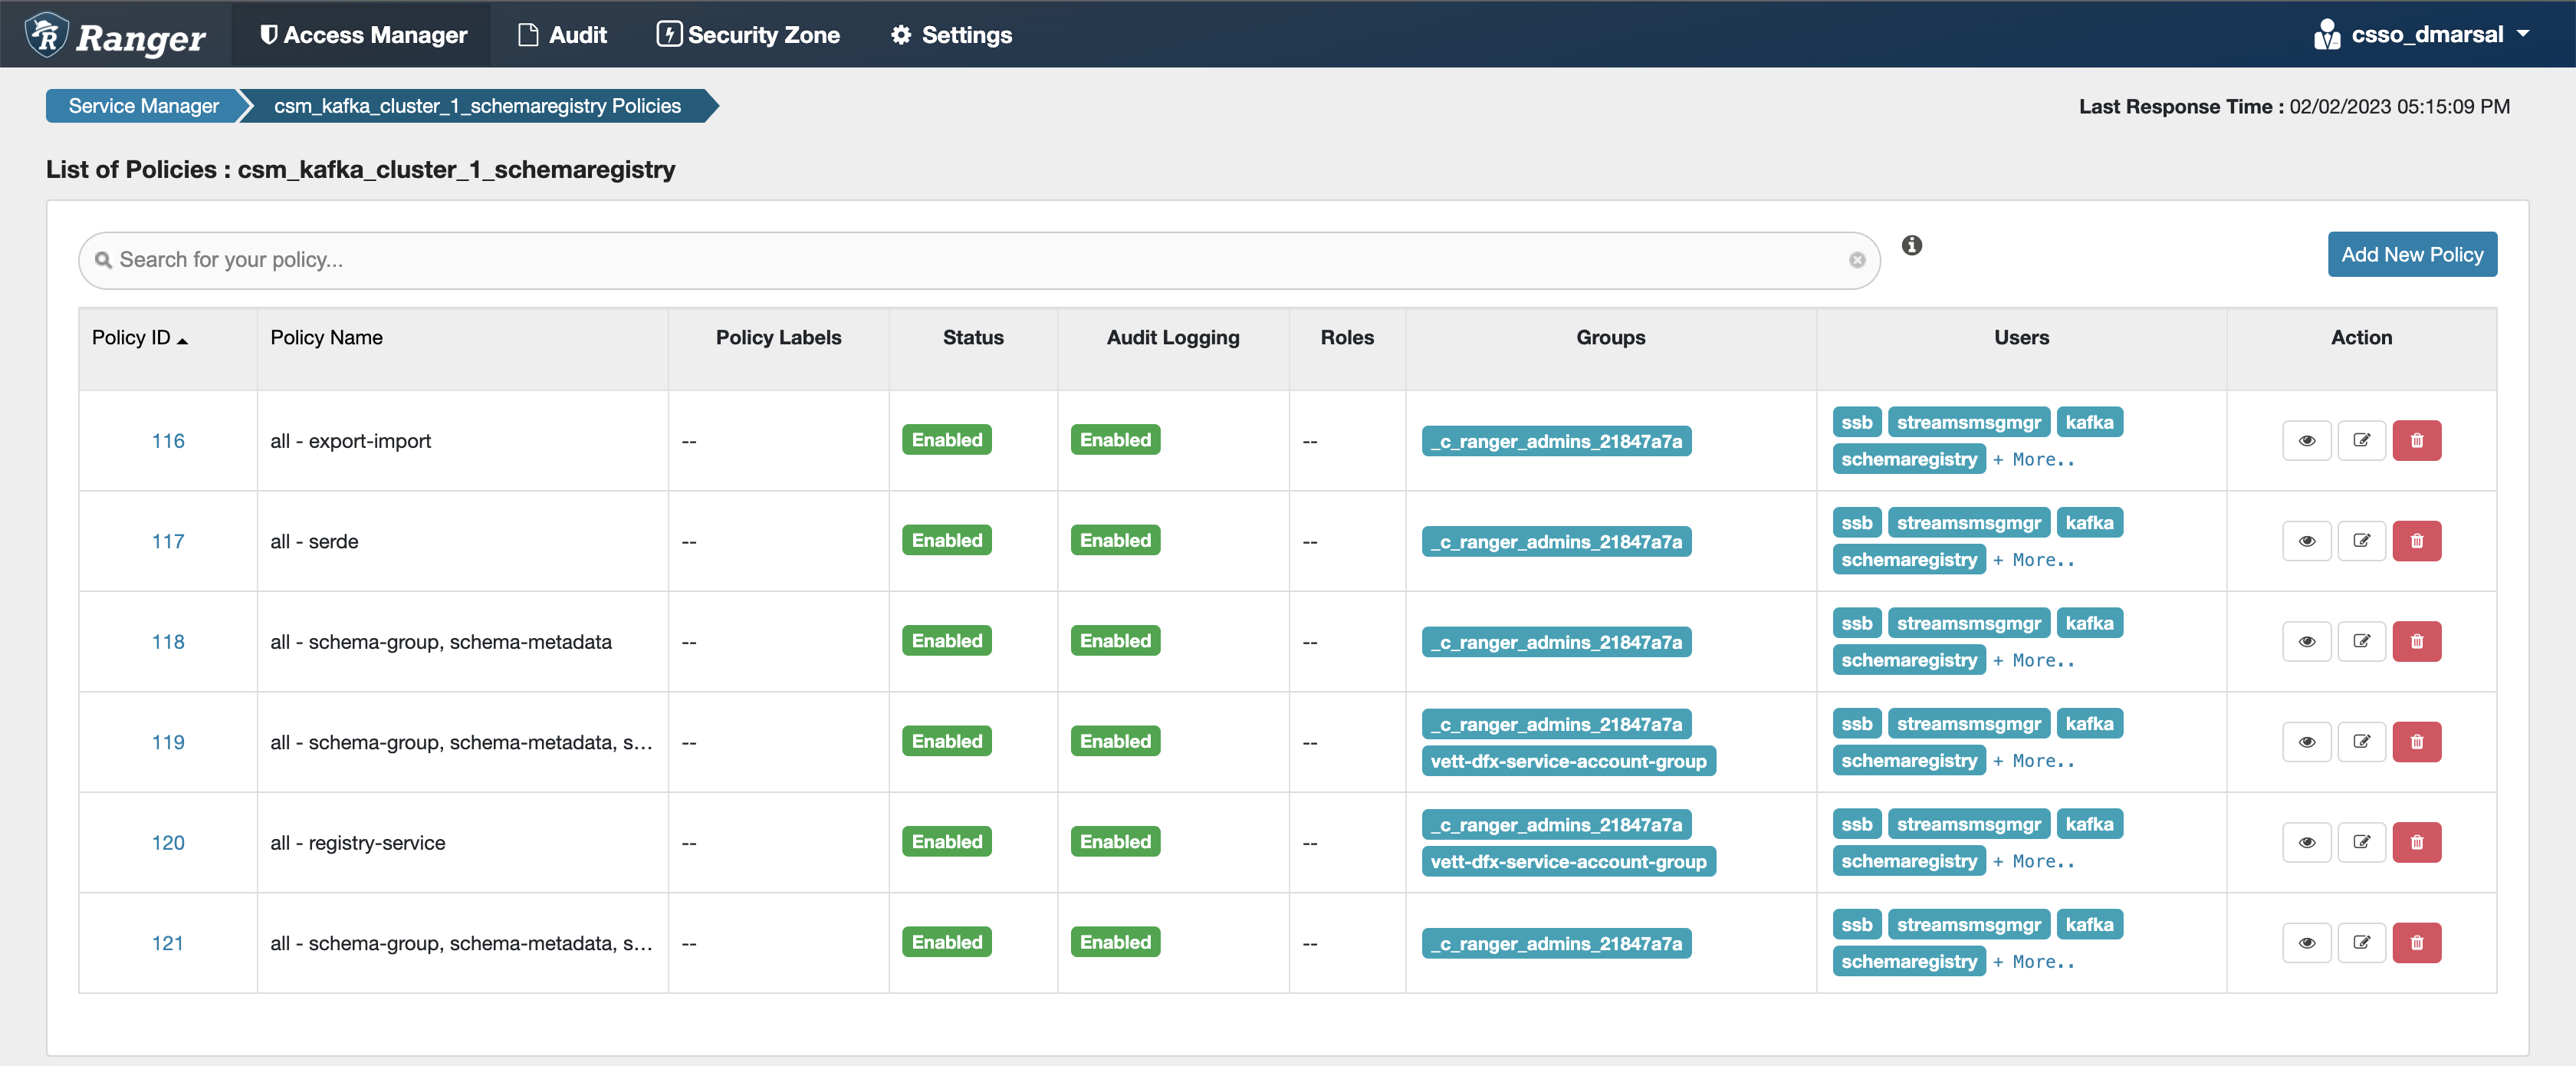
Configuring Schema Registry policies
After accessing the Ranger Admin Web UI, the workload username or user groups, and the SSB service user needs to be added to the Schema Registry policies to be able to use Flink and SSB.
- all - export-import: Provides import and export access for users.
- all - serde: Provides access to store metadata for the format of how the data should be read and written.
- all - schema-group, schema-metadata: Provides access to the schema groups, schema metadata, and schema branch.
- all - schema-group, schema-metadata, schema-branch: Provides access to the schema groups, schema metadata, and schema branch.
- all - schema-group, schema-metadata, schema-branch, schema-version: Provides access to schema groups, schema metadata, schema branch, and schema version.
- all - registry-service: Provides access to the schema registry service, the user can access all Schema Registry entities.
ssb service user is added to the policies of the created Streams
Messaging clusters.
-
Select your Streams Messaging cluster under the Schema
Registry service on the Service Manager
page.
You are redirected to the list of Schema Registry policies page.
-
Add the
ssbservice user to the Select User field under the Allow Conditions setting, if it is not configured by default.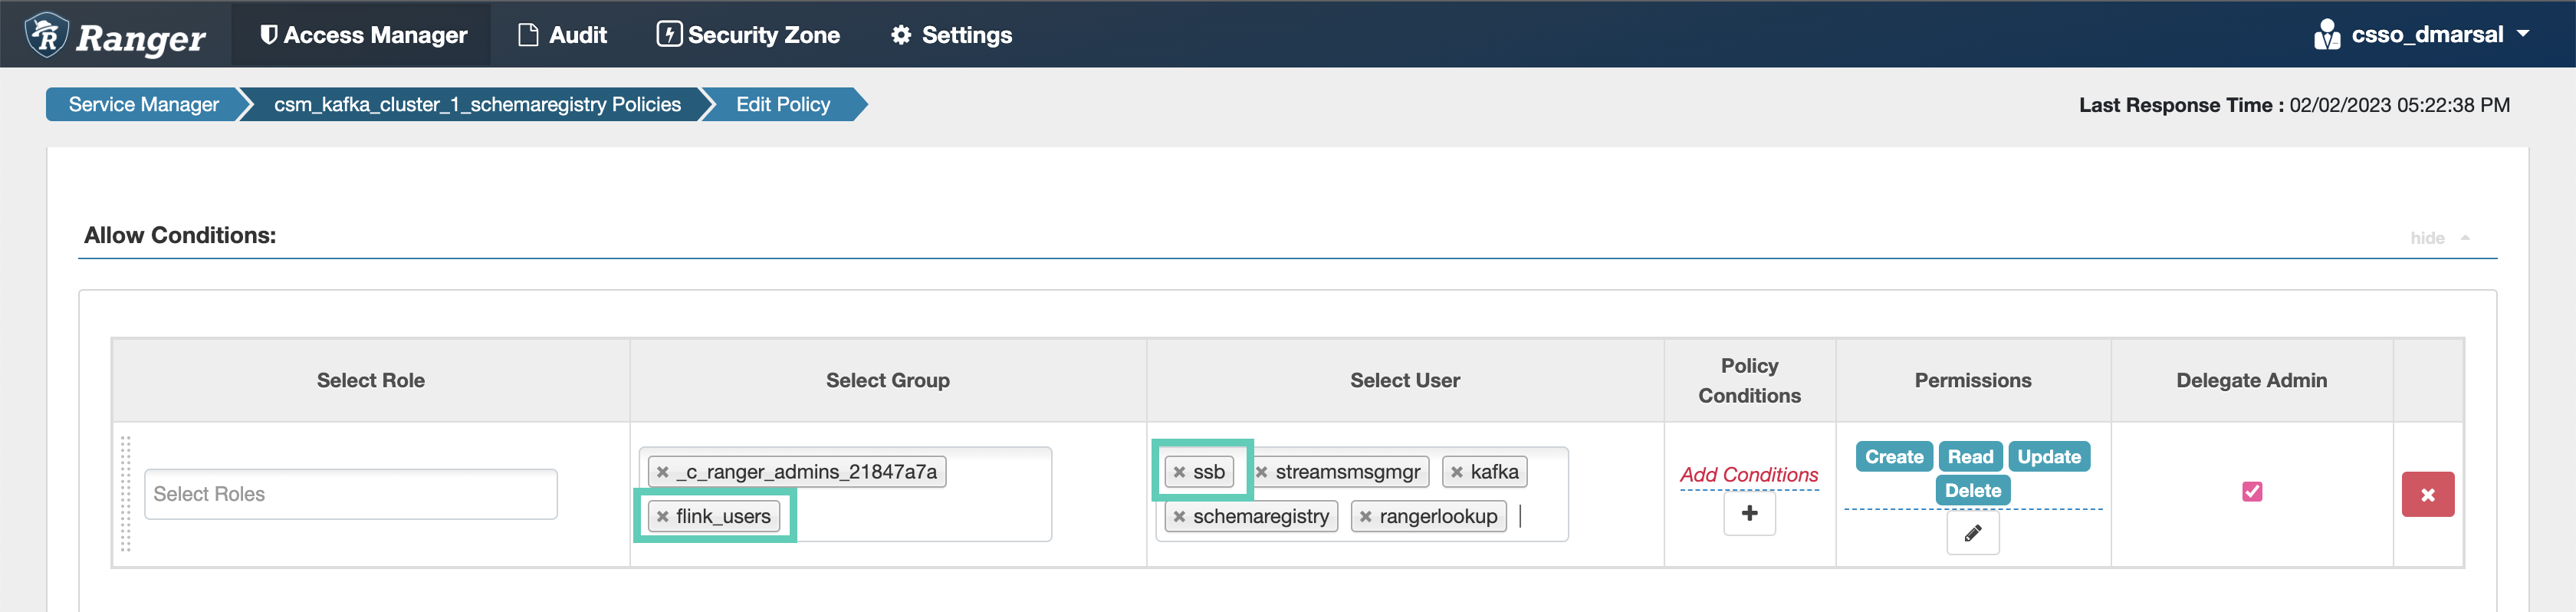
Configuring Hive policies
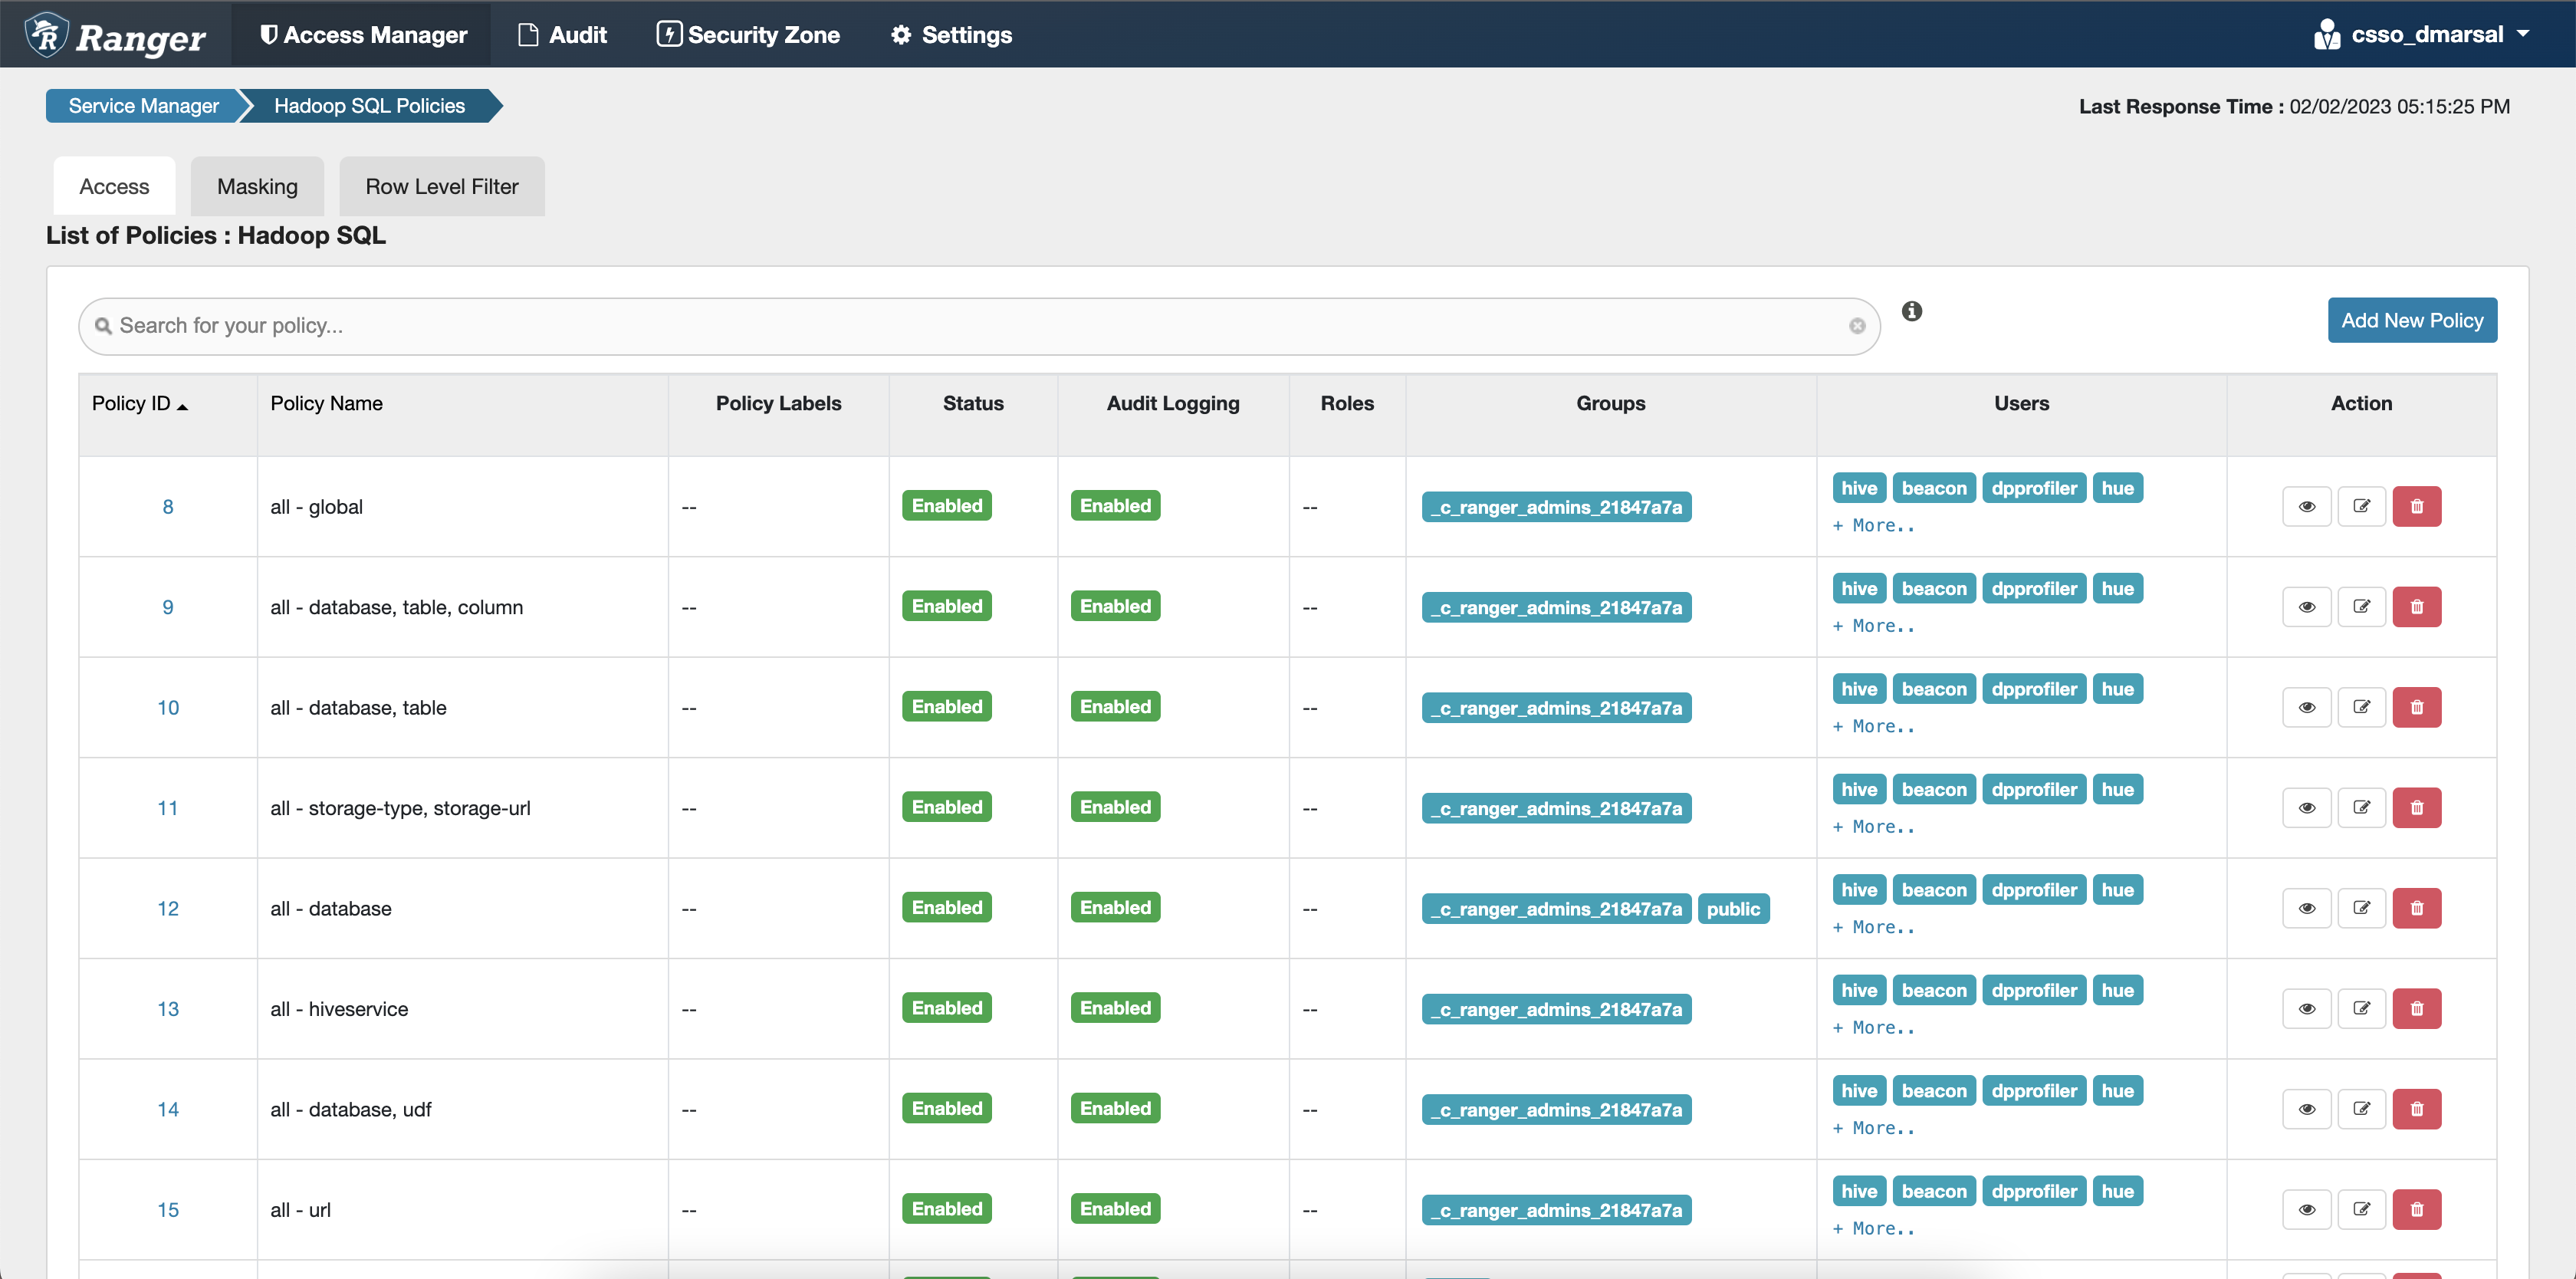
After accessing the Ranger Admin Web UI, the workload username or user groups, and the SSB service user needs to be added to the Hadoop SQL policies to be able to use Flink and SSB with Hive.
- all - global: Provides global access to users.
- all - database, table, column: Provides access to all databases, tables, and columns for users.
- all - database, table: Provides access to all databases and tables for users.
- all - database: Provides access to all databases for users.
- all - hiveservice: Provides hiveservice access to users.
- all - database, udf: Provides database and udf access to users.
- all - url: Provides url access
ssb service user is added to the policies of the Hive service and
the created Operational Database clusters.
-
Click Hadoop SQL under Hadoop SQL
service on the Service Manager page.
You are redirected to the list of Hadoop SQL policies page.
-
Add the
ssbservice user to the Select User field under the Allow Conditions setting, if it is not configured by default.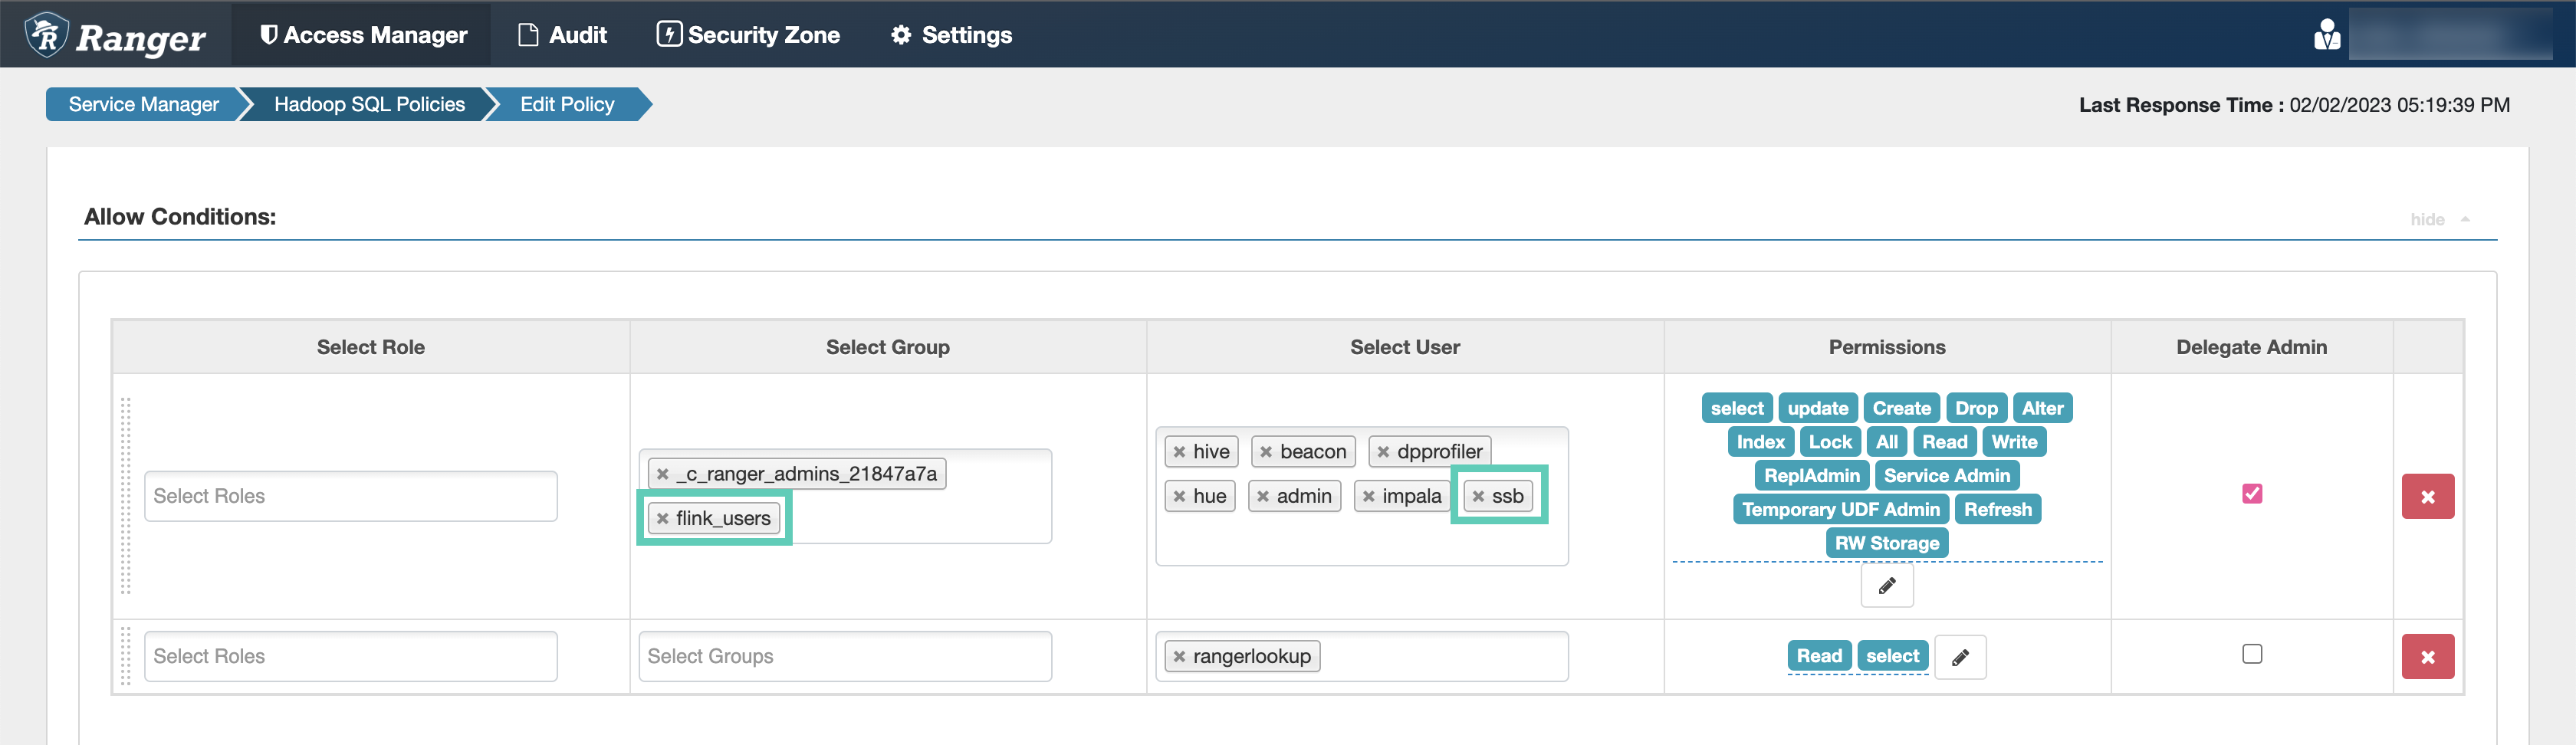
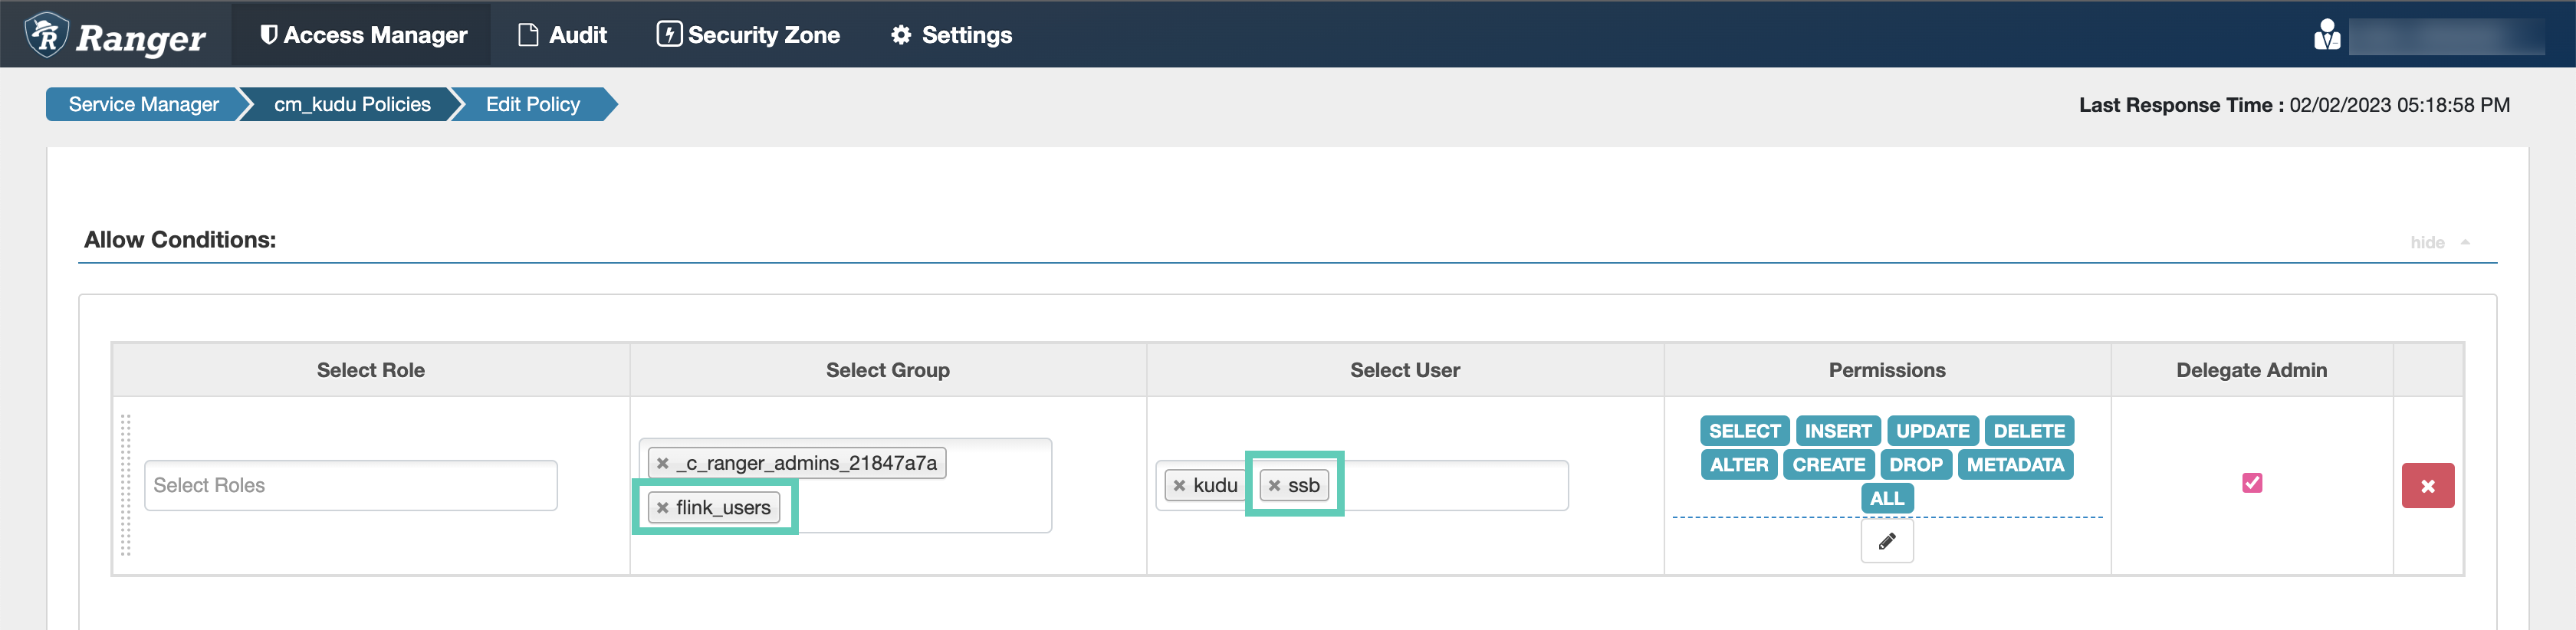
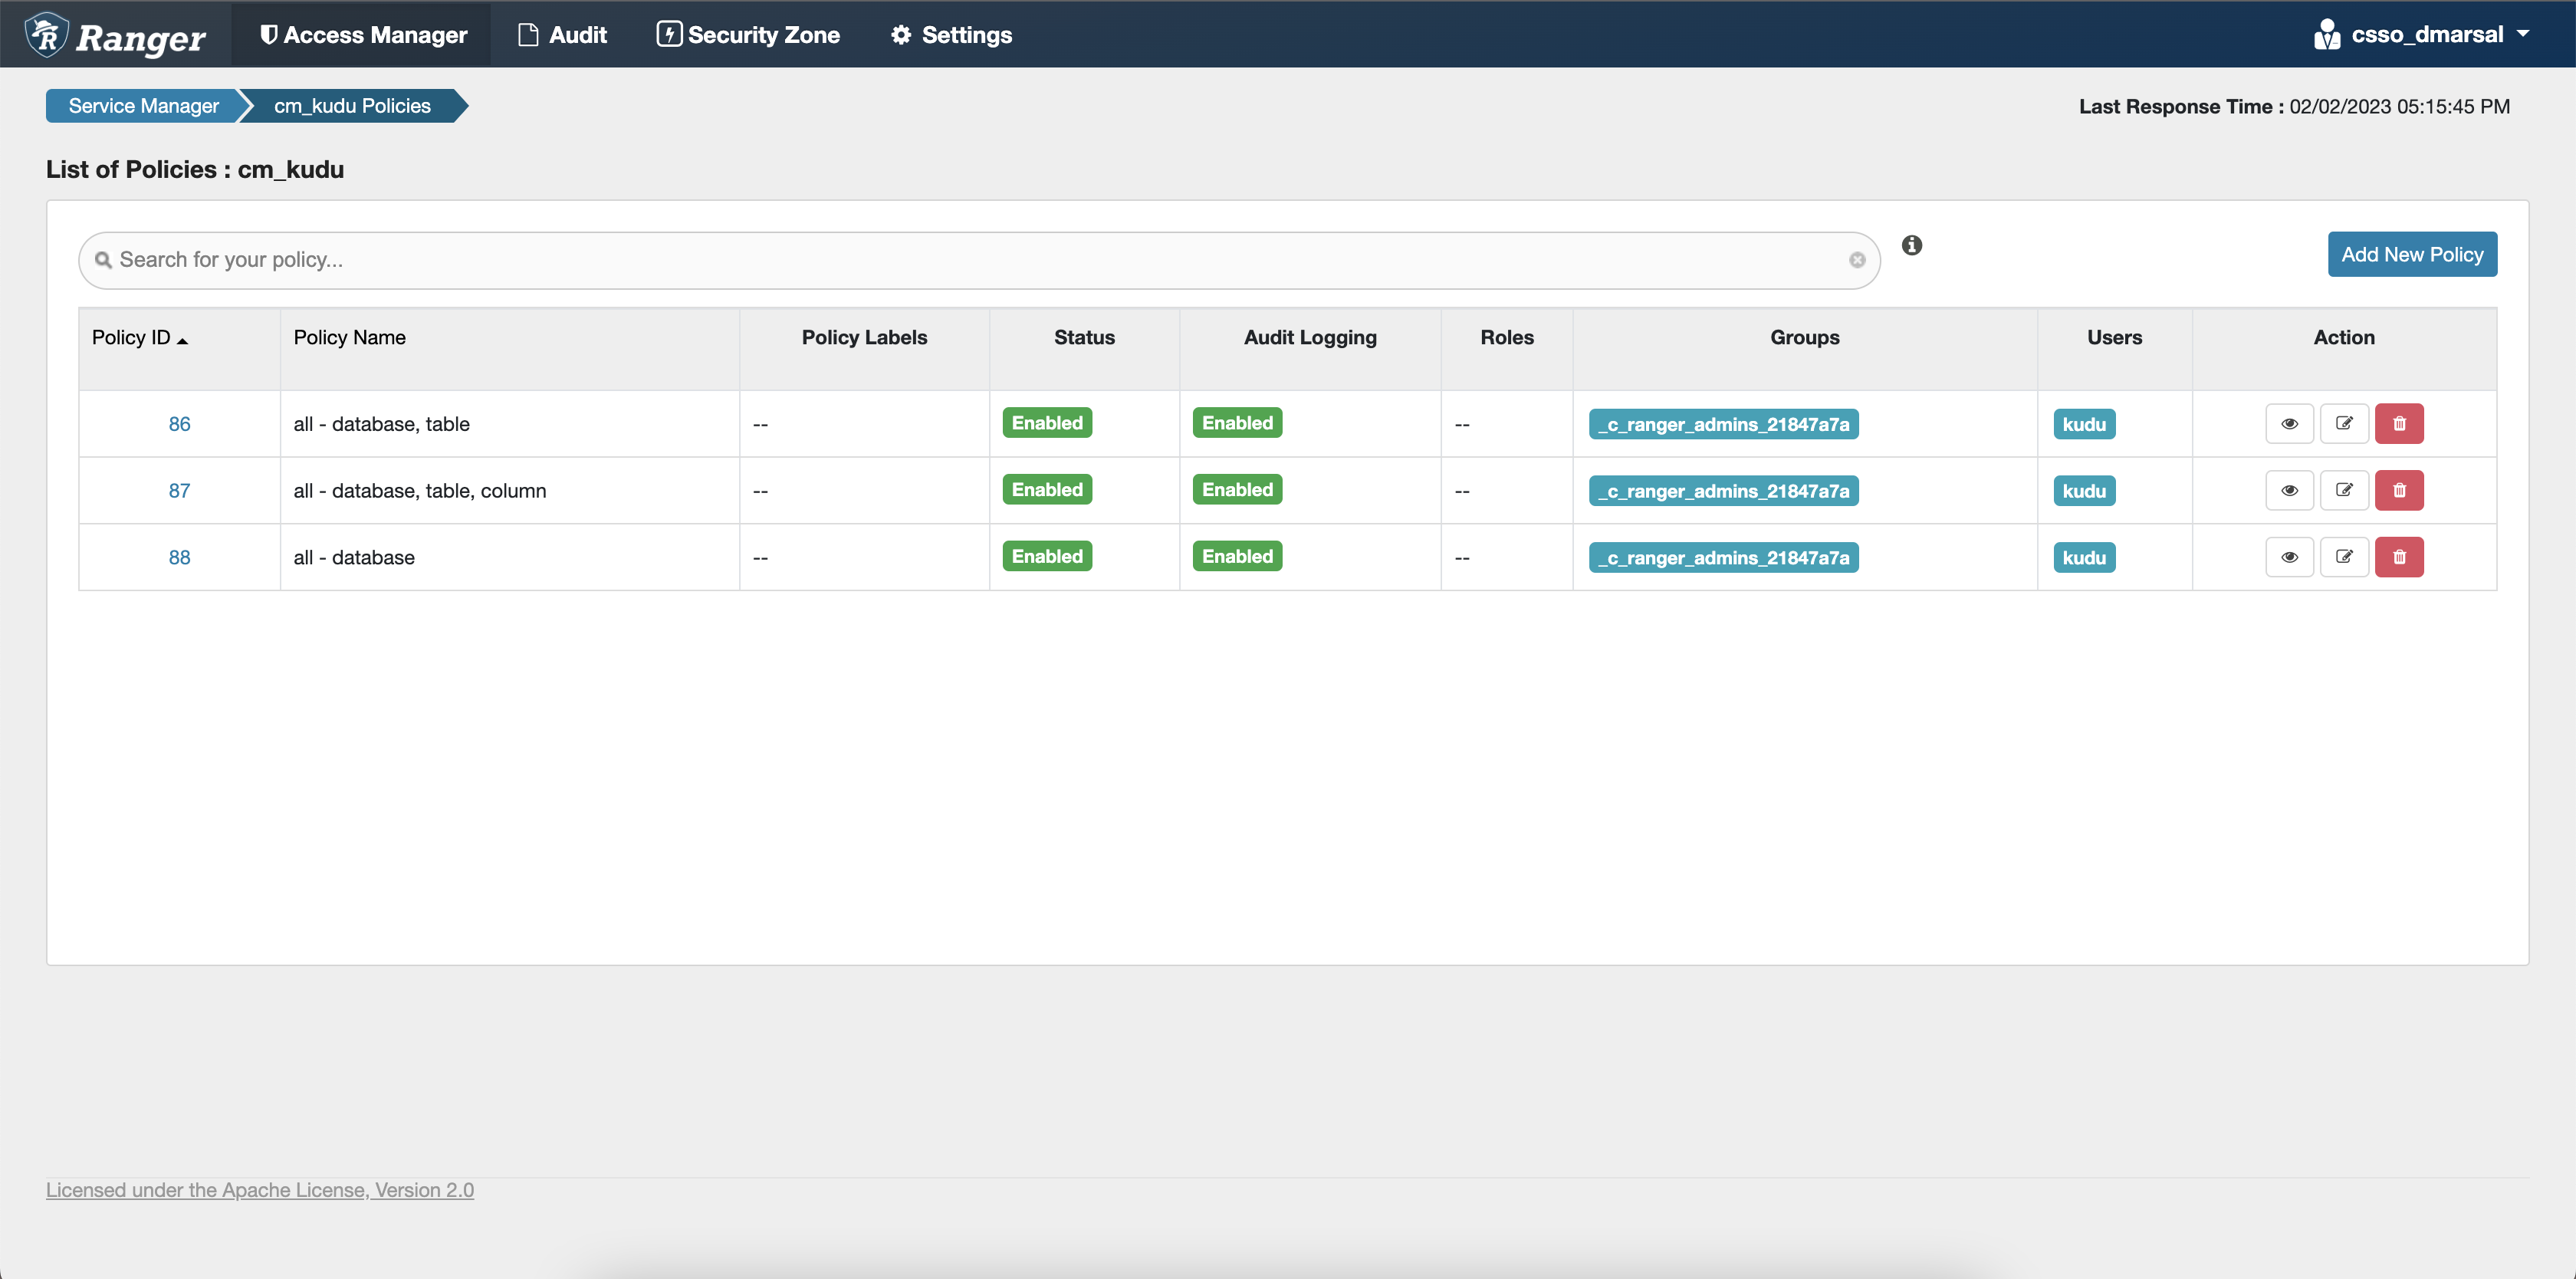
Configuring Kudu policies
After accessing the Ranger Admin Web UI, the workload username or user groups, and the SSB service user needs to be added to the Kudu policies to be able to use Flink and SSB.
- all - database, table: Provides access to all databases and tables for users.
- all - database, table, column: Provides access to all databases, tables, and columns for users.
- all - database: Provides access to all databases for users.
ssb service user is added to the policies of the Kudu service and
the created Real-Time Data Mart clusters.
-
Click cm_kudu under Kudu service on
the Service Manager page.
You are redirected to the cm_kudu Policies page.
-
Add the
ssbservice user to the Select User field under the Allow Conditions setting, if it is not configured by default.