Creating a Hive replication policy

To replicate Hive metadata from on-premises to cloud, you must set the Ranger policy in Ranger, and then create the Hive replication policy in Replication Manager.

The Apache Ranger access policy model consists of the following components:

  • Specification of the resources that you can apply to a replication policy which includes the HDFS files and directories; Hive databases, tables, and columns; and HBase tables, column-families, and columns.

  • Specification of access conditions for specific users and groups.

On the target cluster, the hive user must have Ranger admin privileges. The same hive user performs the metadata import operation.

  1. Log in to the Ranger Admin UI.
  2. In the Hadoop_SQL section, provide the hdfs user permission to "all-database, table, column" in hdfs.
  1. On the Management Console > Replication Manager > Replication Policies, click Add Policy.
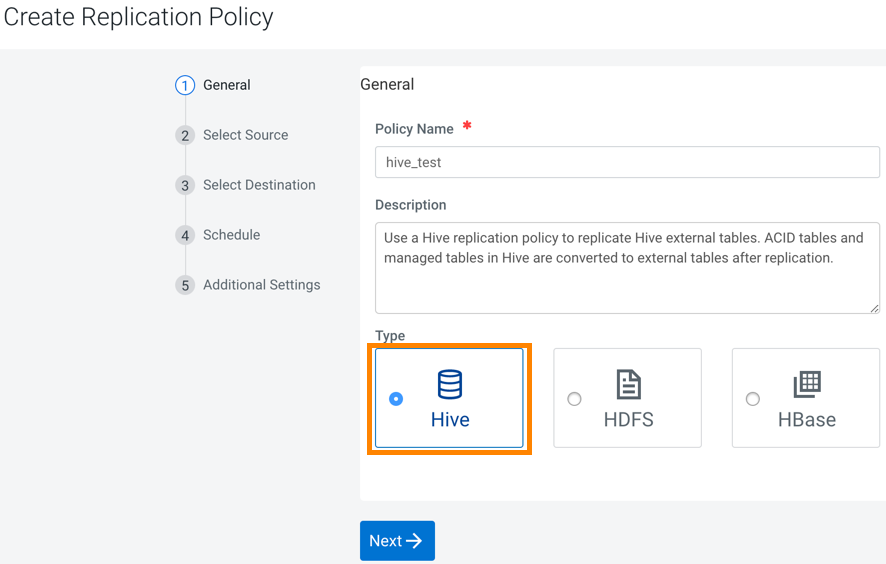
  2. In the Create Replication Policy wizard, select Hive.
  3. Enter the Hive replication Policy Name and Description. Click Next.
  4. Select the Source Cluster.
  5. Enter the database name and table name in Source Databases and Tables. Click the + icon to enter more databases and tables as necessary.
  6. Enter the username in Source User. Ensure that the user has the necessary permissions to replicate data. The user should have Read access to the data.
  7. Click Next.
  8. Select the Destination Data Lake cluster. The Managed Warehouse Path and the Hive External Table Base Directory path for the Data Lake appears.
    1. Administrators can edit the Hive External Table Base Directory field to add another path to override the default storage location for replicated Hive external tables. Before you add another path to override the default storage location, ensure that the following steps are complete in the Ranger UI:
      1. Alter the ranger policy Default: Hive warehouse locations in cm_s3 service to allow the Hive service to access the updated locations of S3 bucket path.
      2. Manually update the Ranger and Sentry permissions.
  9. Select a Cloud Credential on Source. You can also add cloud credentials using the Add Cloud Credentials link.
  10. Enter the source cluster user name in Run as Username.
  11. Click Validate Policy.

    The Replication Manager verifies the data with a status Validate Policy Source and Destination information.

  12. Click Next to schedule the replication policy.
  13. On the Schedule page, choose one of the following options:

    • Run Now (Default) - The replication policy is immediately submitted and processed.
    • Schedule Run - The replication policy can be scheduled to run at specified time interval.
  14. In the Repeat field, you can choose one of the following options:

    • Does Not Repeat
    • Custom - In the Custom Recurrence dialog box, choose the time, date, and the frequency to run the policy.
  15. Click Next.
  16. On the Additional Settings page, enter the values as necessary:
Option Description
YARN Queue Name Enter the name of the YARN queue for the cluster to which the replication job is submitted if you are using Capacity Scheduler queues to limit resource consumption. The default value for this field is default.
Maximum Maps Slots Set the maximum number of map tasks (simultaneous copies) per replication job. The default value is 20.
Maximum Bandwidth Adjust this setting so that each map task is throttled to consume only the specified bandwidth.

Each map task ((simultaneous copy) is restricted to consume only the specified bandwidth. This is not always exact. The map throttles back its bandwidth consumption during a copy in such a way that the net bandwidth used tends towards the specified value. You can adjust this setting so that each map task is throttled to consume only the specified bandwidth so that the net bandwidth used tends towards the specified value. The default value for the bandwidth is 100MB per second for each mapper.

Path Exclusion Enter a regular expression-based path. When you add an exclusion, include the snapshotted relative path for the regex.

For example, to exclude the /user/bdr directory, use the .*/user/\.snapshot/.+/bdr.* regular expression, which includes the snapshots for the bdr directory.

To exclude top-level directories from replication in a globbed source path, you can specify the relative path for the regex without including .snapshot in the path.

For example, to exclude the bdr directory from replication, use the .*/user+/bdr.* regular expression.

You can add more than one regular expression to exclude.

Replication Strategy Choose one of the following replication strategies to determine whether the file replication tasks should be distributed among the mappers statically or dynamically.
  • Static distributes file replication tasks among the mappers up front to achieve an uniform distribution based on the file sizes.
  • Dynamic distributes the file replication tasks in small sets to the mappers, and as each mapper completes its tasks, it dynamically acquires and processes the next unallocated set of tasks.
The default replication strategy is Dynamic.
MapReduce Service Choose the MapReduce or YARN service to use.
Log Path Enter an alternate path for the logs, if required.
Error Handling Select the following options as necessary:
  • Skip Checksum Checks - Determines whether to skip checksum checks on the copied files. If selected, checksums are not validated. Checksums are checked by default.
    Checksums are used for two purposes:
    • To skip replication of files that have already been copied. If Skip Checksum Checks is selected, the replication job skips copying a file if the file lengths and modification times are identical between the source and destination clusters. Otherwise, the job copies the file from the source to the destination.
    • To redundantly verify the integrity of data. However, checksums are not required to guarantee accurate transfers between clusters. HDFS data transfers are protected by checksums during transfer and storage hardware also uses checksums to ensure that data is accurately stored. These two mechanisms work together to validate the integrity of the copied data.
  • Skip Listing Checksum Checks - Whether to skip checksum check when comparing two files to determine whether they are same or not. If skipped, the file size and last modified time are used to determine if files are the same or not. Skipping the check improves performance during the mapper phase. Note that if you select the Skip Checksum Checks option, this check is also skipped.
  • Abort on Error - Whether to abort the job on an error. If selected, files copied up to that point remain on the destination, but no additional files are copied. Abort on Error is not selected by default.
  • Abort on Snapshot Diff Failures - If a snapshot diff fails during replication, the replication policy uses a complete copy to replicate data. If you select this option, the policy aborts the replication when it encounters an error instead.
Preserve Choose the required options to preserve the block size, replication count, permissions (including ACLs), and extended attributes (XAttrs) as they exist on the source file system, or to use the settings as configured on the destination file system. By default source system settings are preserved.

When Permission is selected, and both the source and destination clusters support ACLs, replication preserves ACLs. Otherwise, ACLs are not replicated. When Extended attributes is selected, and both the source and destination clusters support extended attributes, replication preserves them. (This option only displays when both source and destination clusters support extended attributes.)

If you select one or more of the Preserve options and you are replicating to S3 or ADLS, the values all of these items are saved in metadata files on S3 or ADLS. When you replicate from S3 or ADLS to HDFS, you can select which of these options you want to preserve.

Delete Policy Choose the required options to determine whether the files that were deleted on the source should also be deleted from the destination directory. This policy also determines the handling of files in the destination location that are unrelated to the source. Options include:
  • Keep Deleted Files - Retains the destination files even when they no longer exist at the source. This is the default option.
  • Delete to Trash - If the HDFS trash is enabled, files are moved to the trash folder. This is not supported when replicating to S3 or ADLS.
  • Delete Permanently - Uses the least amount of space; use with caution.
Alerts Choose the required options to generate alerts for various state changes in the replication workflow. You can alert on failure, on start, on success, or when the replication workflow is aborted.
Sentry Permissions

Choose the following Sentry permissions as necessary:

  • Include Sentry Permissions with Metadata - Select this option to migrate Sentry permissions during the replication job.
  • Exclude Sentry Permissions from Metadata - Select this option if you do not want to migrate Sentry permissions during the replication job.
  • Skip URI Privileges - Select this option if you do not want to include URI privileges when you migrate Sentry permissions. During migration, the URI privileges are translated to point to an equivalent location in S3. If the resources have a different location in Amazon S3, do not migrate the URI privileges because the URI privileges might not be valid.
Replication Option Specify metadata and data, or metadata only.
Directory for metadata file The folder path in the destination cluster to save the metadata file. If the folder does not exist, Replication Manager creates a new folder.
  1. Click Create.