On the
Parcels page in Cloudera Manager, you can manage parcel installation and activation and
determine which parcel versions are running across your clusters. The Parcels page displays a
list of parcels managed by Cloudera Manager. Cloudera Manager displays the name, version, and
status of each parcel and provides available actions on the parcel.
Cloudera Manager Agent employs the flood - BitTorrent file distribution daemon to distribute
parcels.
When the number of hosts grows large, download of parcels takes place in a consistent manner.
The BitTorrent file distribution helps avoid choking Cloudera Manager with large number of
download requests from agents.
The BitTorrent file distribution attempts to fetch pieces from all registered torrents either
from its peers or from the seed HTTP URL (if provided).
Accessing the Parcels Page
Minimum Required Role:Configurator (also provided by
Cluster Administrator,Limited Cluster Administrator , and
Full Administrator)
Access the Parcels page by doing one of the following:
Click the parcel icon in the top navigation bar.
Click the Hosts in the top navigation bar, then the
Parcels tab.
Use the selectors on the left side of the console to filter the
displayed parcels:
Location selector - View only parcels that
are available remotely, only parcels pertaining to a particular
cluster, or parcels pertaining to all clusters. When you access the
Parcels page, the selector is set to Available Remotely.
Error Status section of the
Filters selector - Limit the list of
displayed parcels by error status.
Parcel Name section of the
Filters selector - Limit the list of
displayed parcels by parcel name.
Status section of the
Filters selector - Limit the list to
parcels that have been distributed, parcels that have not been
distributed (Other), or all parcels.
When you download a parcel, it appears in the list for each cluster
managed by Cloudera Manager, indicating that the parcel is available
for distribution on those clusters. Only one copy of the downloaded
parcel resides on the Cloudera Manager Server. After you distribute
the parcel, Cloudera Manager copies the parcel to the hosts in that
cluster.
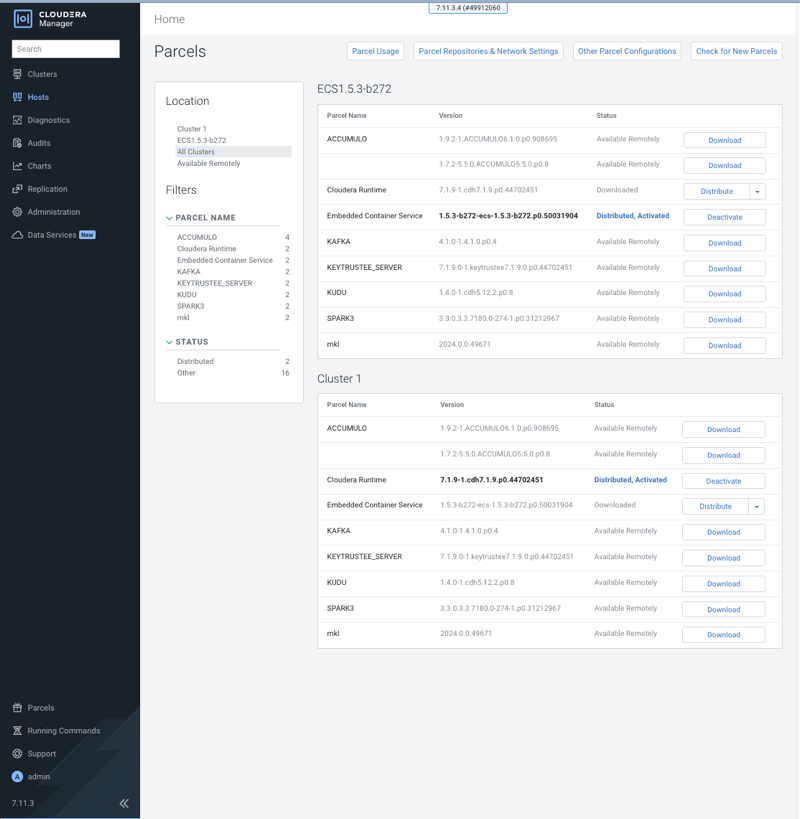
For example, if Cloudera Manager is managing two clusters, the rows
in the All Clusters page list the information about the parcels on the two clusters. The
Status column displays the current status of the parcels. The Version column displays
version information about the parcel. Click the information icon to view the release notes
for the parcel. The last column shows actions you can perform on the parcels, such as
download, distribute, delete, deactivate, and remove from host.
Downloading a Parcel
Minimum Required Role:Cluster
Administrator (also provided by Full
Administrator) This feature is not available when using Cloudera
Manager to manage Data Hub clusters.
Go to the Parcels page. In the Location selector, click
ClusterName or Available
Remotely. Parcels that are available for download display the Available
Remotely status and a Download button.
If the parcel you want is not
shown here—for example, you want to upgrade to a version of CDH that is not the most
current version—you can make additional remote parcel repositories available. You can
also configure the location of the local parcel repository and other settings. See Parcel Configuration Settings.
If a parcel version is not compatible with the Cloudera Manager
version, then the parcel appears with a red error message: Such parcels are also listed when you select the Error status in the Error Status
section of the Filters selector.
Click the Download button of the parcel you want to
download to your local repository. The status changes to
Downloading.
After a parcel has been downloaded, it is removed from the Available
Remotely page.
Distributing a Parcel
Minimum Required Role:Cluster
Administrator (also provided by Full
Administrator) This feature is not available when using Cloudera
Manager to manage Data Hub clusters.
Downloaded parcels can be distributed to the hosts in your cluster
and made available for activation. Parcels are downloaded to the
Cloudera Manager Server, so with multiple clusters, the downloaded
parcels are shown as available to all clusters managed by the
Cloudera Manager Server. However, you select distribution to a
specific cluster's hosts on a cluster-by-cluster basis.
From the Parcels page, in the Location selector, select the
cluster where you want to distribute the parcel, or select
All Clusters. (The first cluster in the
list is selected by default when you open the Parcels page.)
Click Distribute for the parcel you want to distribute. The
status changes to Distributing. During
distribution, you can:
Click the Details link in the Status
column to view the Parcel Distribution
Status page.
Click Cancel to cancel the
distribution. When the Distribute action completes, the button
changes to Activate, and you can click
the Distributed status link to view the
status page.
Distribution does not require Internet access; the Cloudera Manager
Agent on each cluster member downloads the parcel from the local
parcel repository hosted on the Cloudera Manager Server.
If you have a large number of hosts to which
parcels must be distributed, you can control how many concurrent uploads
Cloudera Manager performs. See Parcel Configuration Settings.
To delete a parcel that is ready to be distributed, click the
triangle at the right end of the Distribute
button and select Delete. This deletes the
parcel from the local parcel repository.
Distributing parcels to the hosts in the cluster does not affect the
current running services.
Activating a Parcel
Parcels that have been distributed to the hosts in a cluster are
ready to be activated.
From the Parcels page, in the Location selector, choose
ClusterName or
All Clusters, and click the Activate
button for the parcel you want to activate. This updates Cloudera
Manager to point to the new software, which is ready to run the next
time a service is restarted. A pop-up indicates which services must
be restarted to use the new parcel.
Choose one of the following:
Restart - Activate the parcel and
restart services affected by the new parcel.
Activate Only - Active the parcel. You
can restart services at a time that is convenient. If you do not
restart services as part of the activation process, you must
restart them at a later time. Until you restart services, the
current parcel continues to run.
Click OK.
Activating a new parcel also deactivates the previously active parcel
for the product you just upgraded. However, until you restart the
services, the previously active parcel displays a status of Still
in use because the services are using that parcel, and you
cannot remove the parcel until it is no longer being used.
If the parcel you activate updates the software for only a subset of
services, even if you restart all of that subset, the previously
active parcel displays Still in use until you restart the
remaining services. For example, if you are running HDFS, YARN, Oozie,
Hue, Impala, and Spark services, and you activate a parcel that
updates only the Oozie service, the pop-up that displays instructs you
to restart only the Oozie and Hue services. Because the older parcel
is still in use by the HDFS, YARN, Impala, and Spark services, the
parcel page shows that parcel as Still in use
until you restart these remaining services.
Sometimes additional upgrade steps may be
required. In this case, instead of Activate, the button will say Upgrade.
Deactivating a Parcel
You can deactivate an active parcel; this updates Cloudera Manager to
point to the previous software version, which is ready to run the next
time a service is restarted. From the Parcels page, choose
ClusterName or
All Clusters in the Location selector, and
click the Deactivate button on an activated parcel.
To use the previous version of the software, restart your services.
Removing a Parcel
From the Parcels page, in the Location selector, choose
ClusterName or
All Clusters, click the to the
right of an Activate button, and select Remove from
Hosts.
Deleting a Parcel
From the Parcels page, in the Location selector, choose
ClusterName or
All Clusters, and click the to the
right of a Distribute button, and select Delete.
Changing the Parcel Directory
The default location of the parcel directory is /opt/cloudera/parcels. To relocate distributed parcels to a different directory,
do the following:
Stop all services in the cluster by performing the following
steps:
On the Cloudera Manager home page, navigate to the Status
tab, click to the right of the cluster name and select Stop
from the list view.
Start all services in the cluster by performing the following
steps:
On the Cloudera Manager home page, navigate to the Status
tab, click to the right of the cluster name and select Start
from the list view.
Click Start.
Click Close.
Troubleshooting
If you experience an error while performing parcel operations, click
the red 'X' icons on the parcel page to display a message that
identifies the source of the error.
If a parcel is being distributed but never
completes, make sure you have enough free space in the parcel download
directories, because Cloudera Manager will try to download and unpack
parcels even if there is insufficient space.

 to the right of the cluster name and select Stop
from the list view.
to the right of the cluster name and select Stop
from the list view.