Configure High Availability for Ranger KMS with KTS
Use the following steps to configure high availability for Ranger KMS with Key Trustee Server as the backing key store.
-
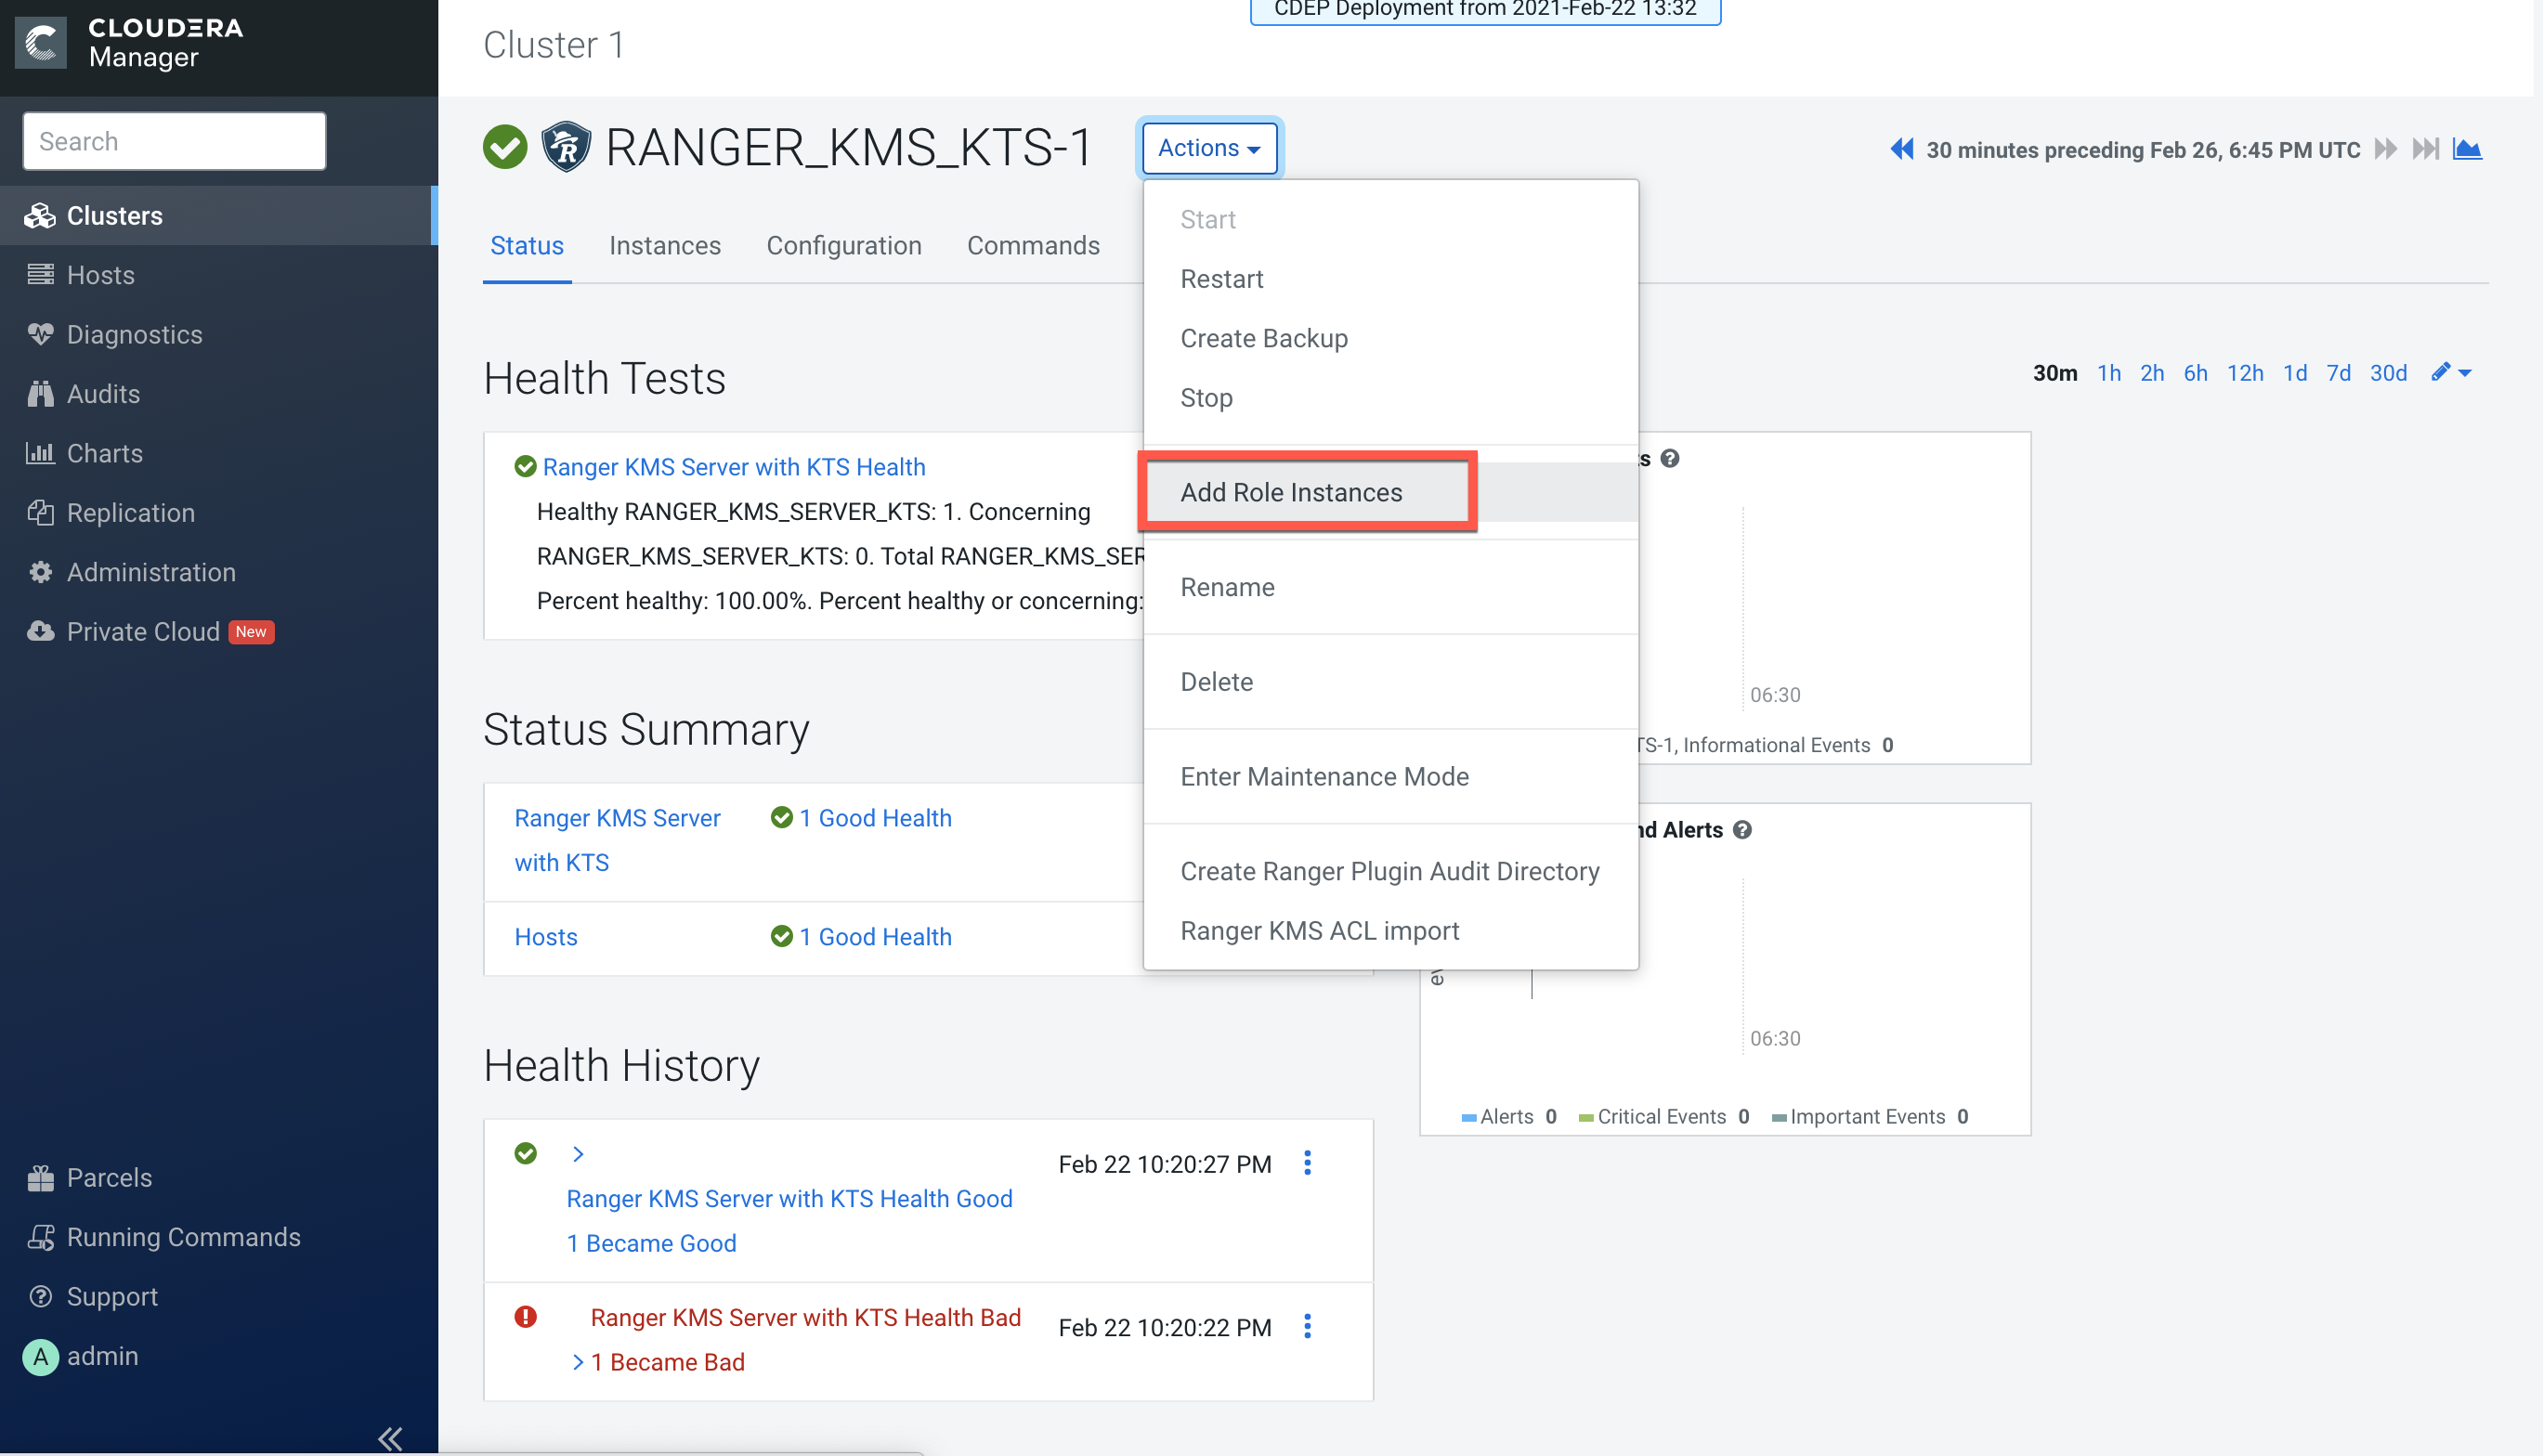
In Cloudera Manager, select Ranger KMS KTS, then select Actions > Add Role
Instances.
-
On the Assign Roles page, click Select hosts.

-
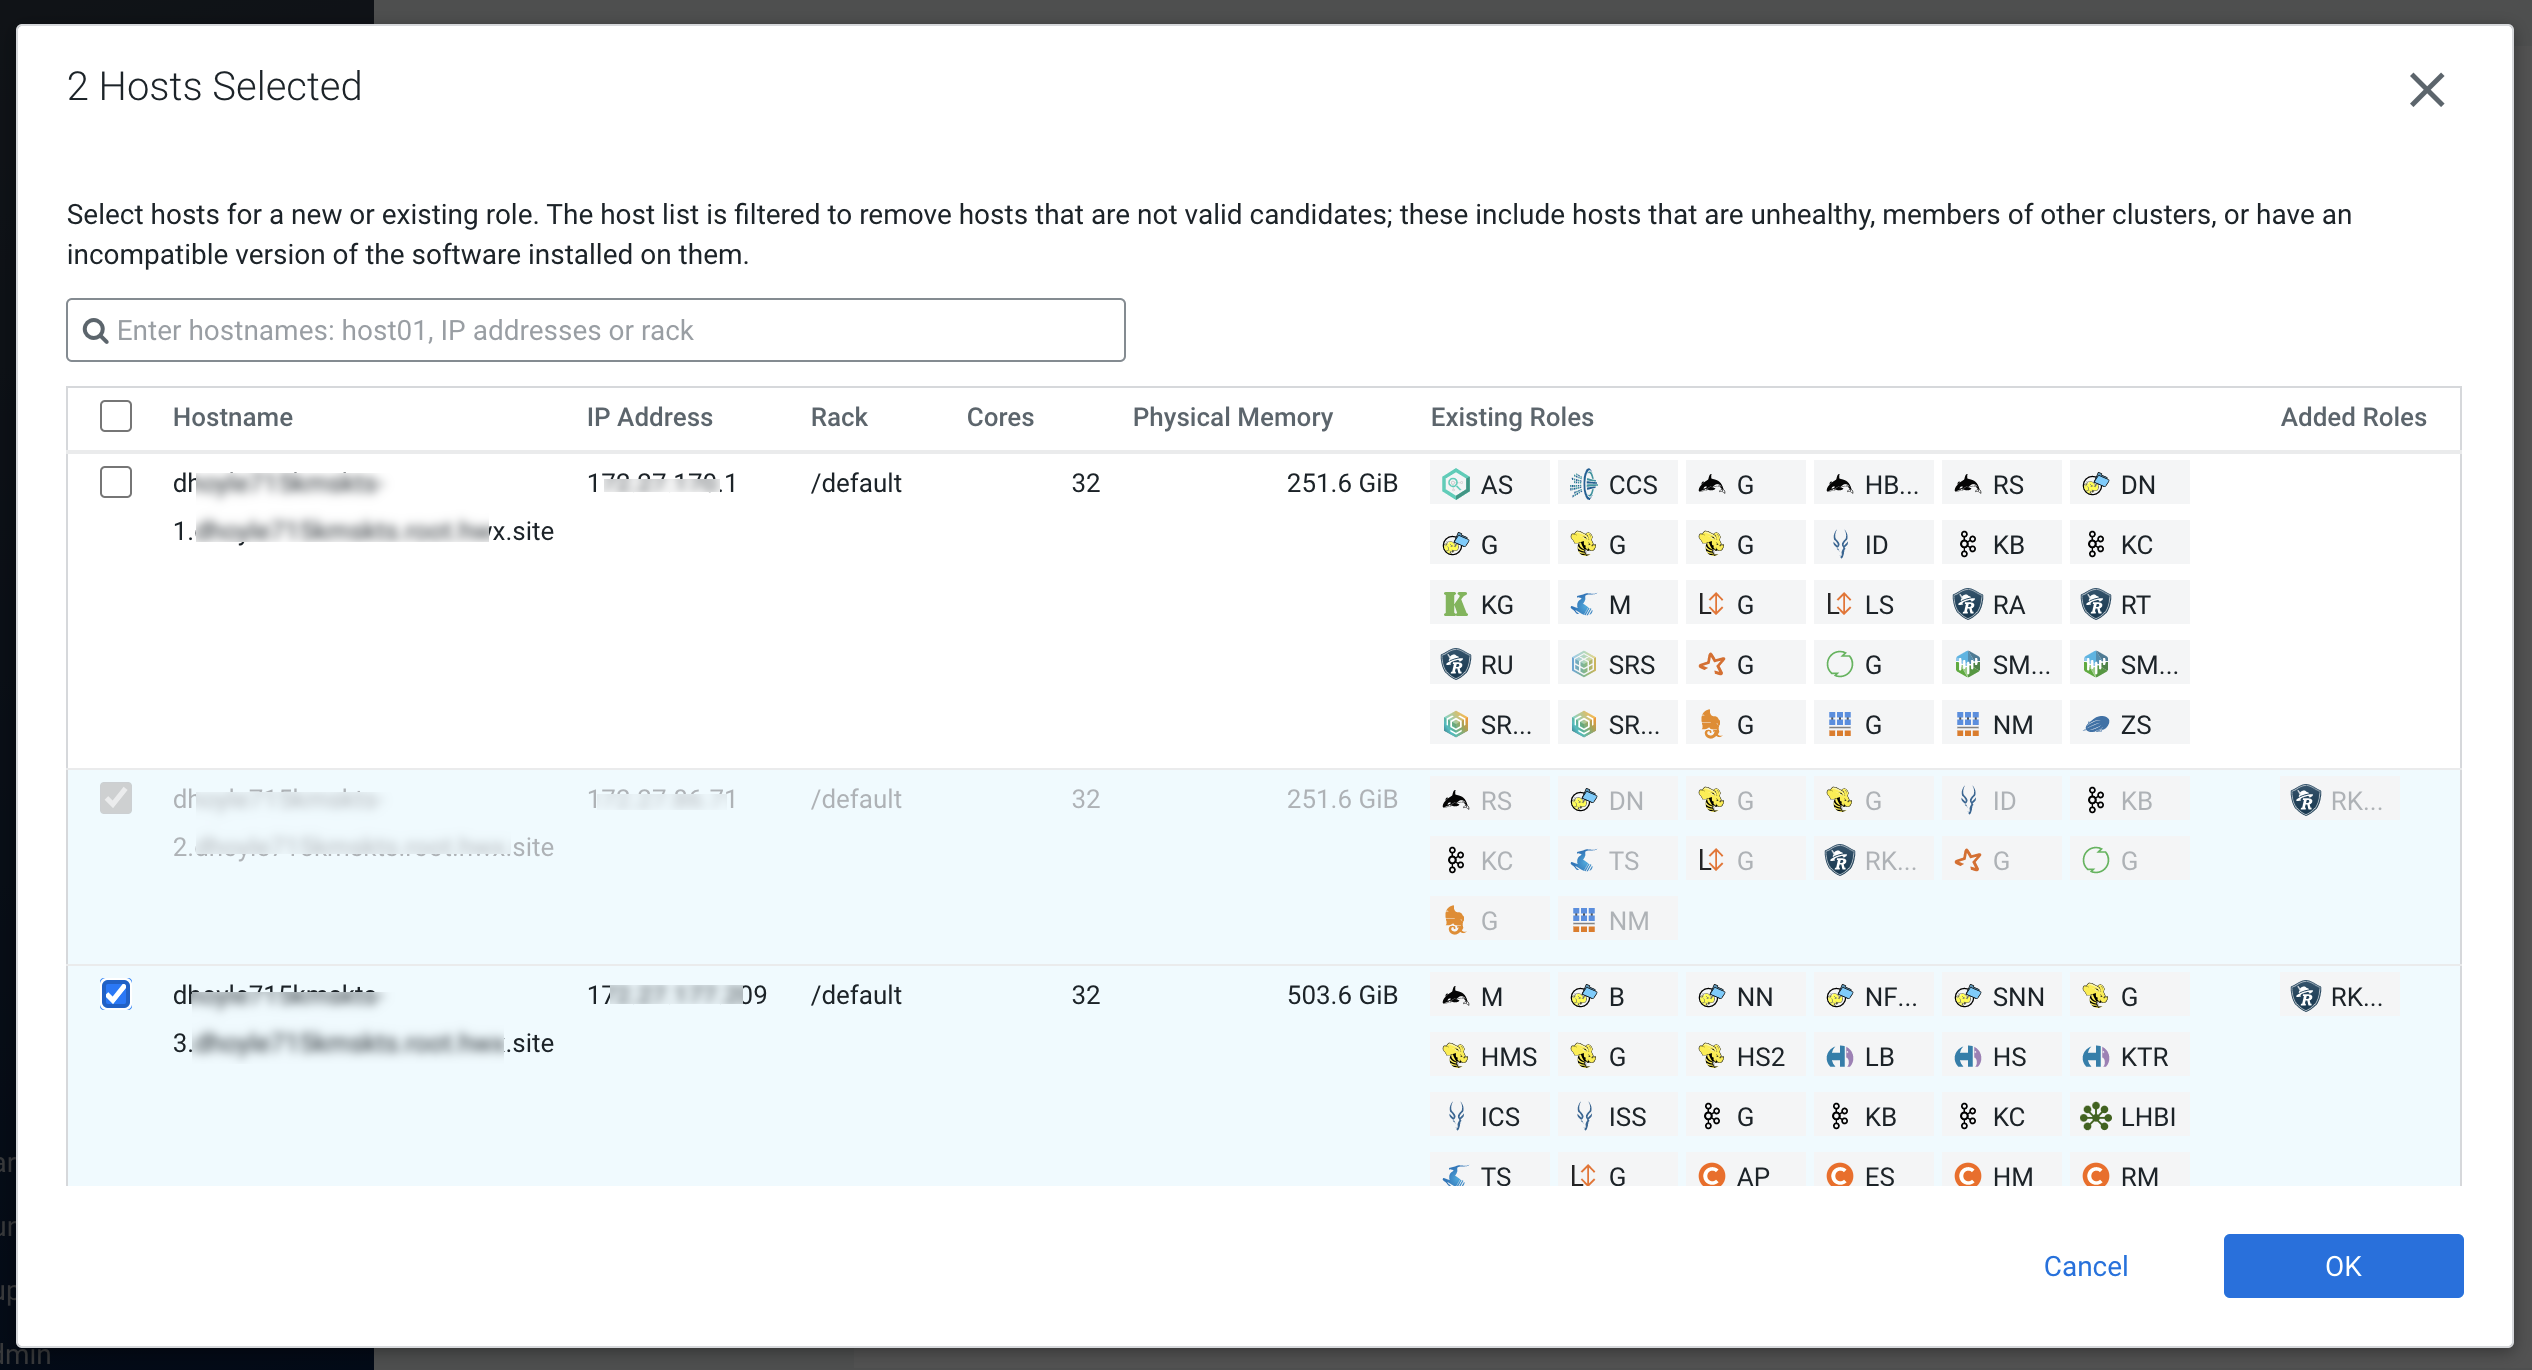
On the selected hosts page, select a backup Ranger KMS KTS host. A Ranger KMS
KTS (RK) icon appears in the Added Roles column for the selected host. Click
OK to continue.
-
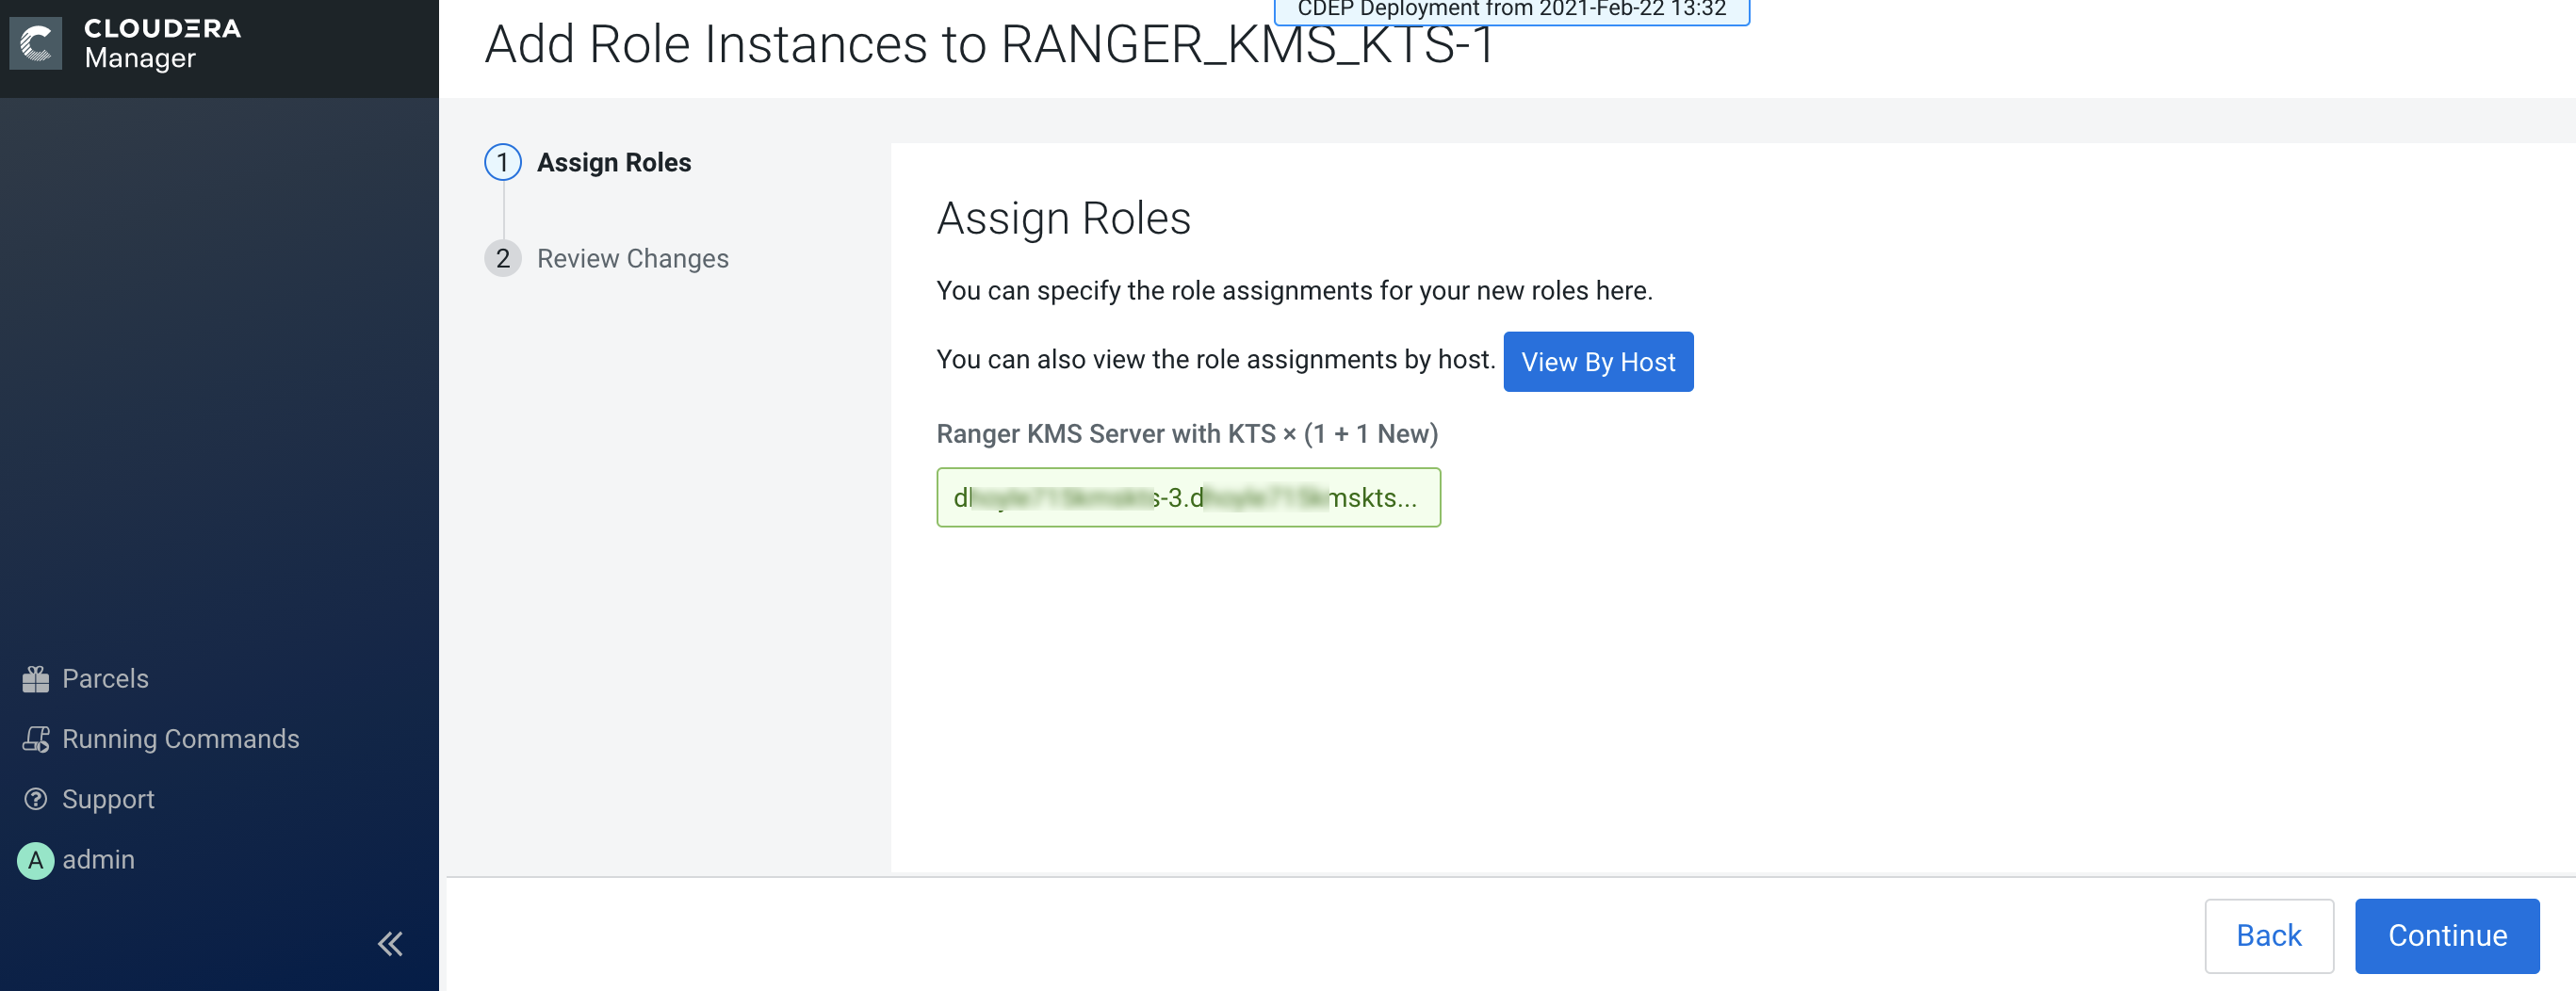
The Assign Roles page is redisplayed with the new backup host. Click
Continue.
-
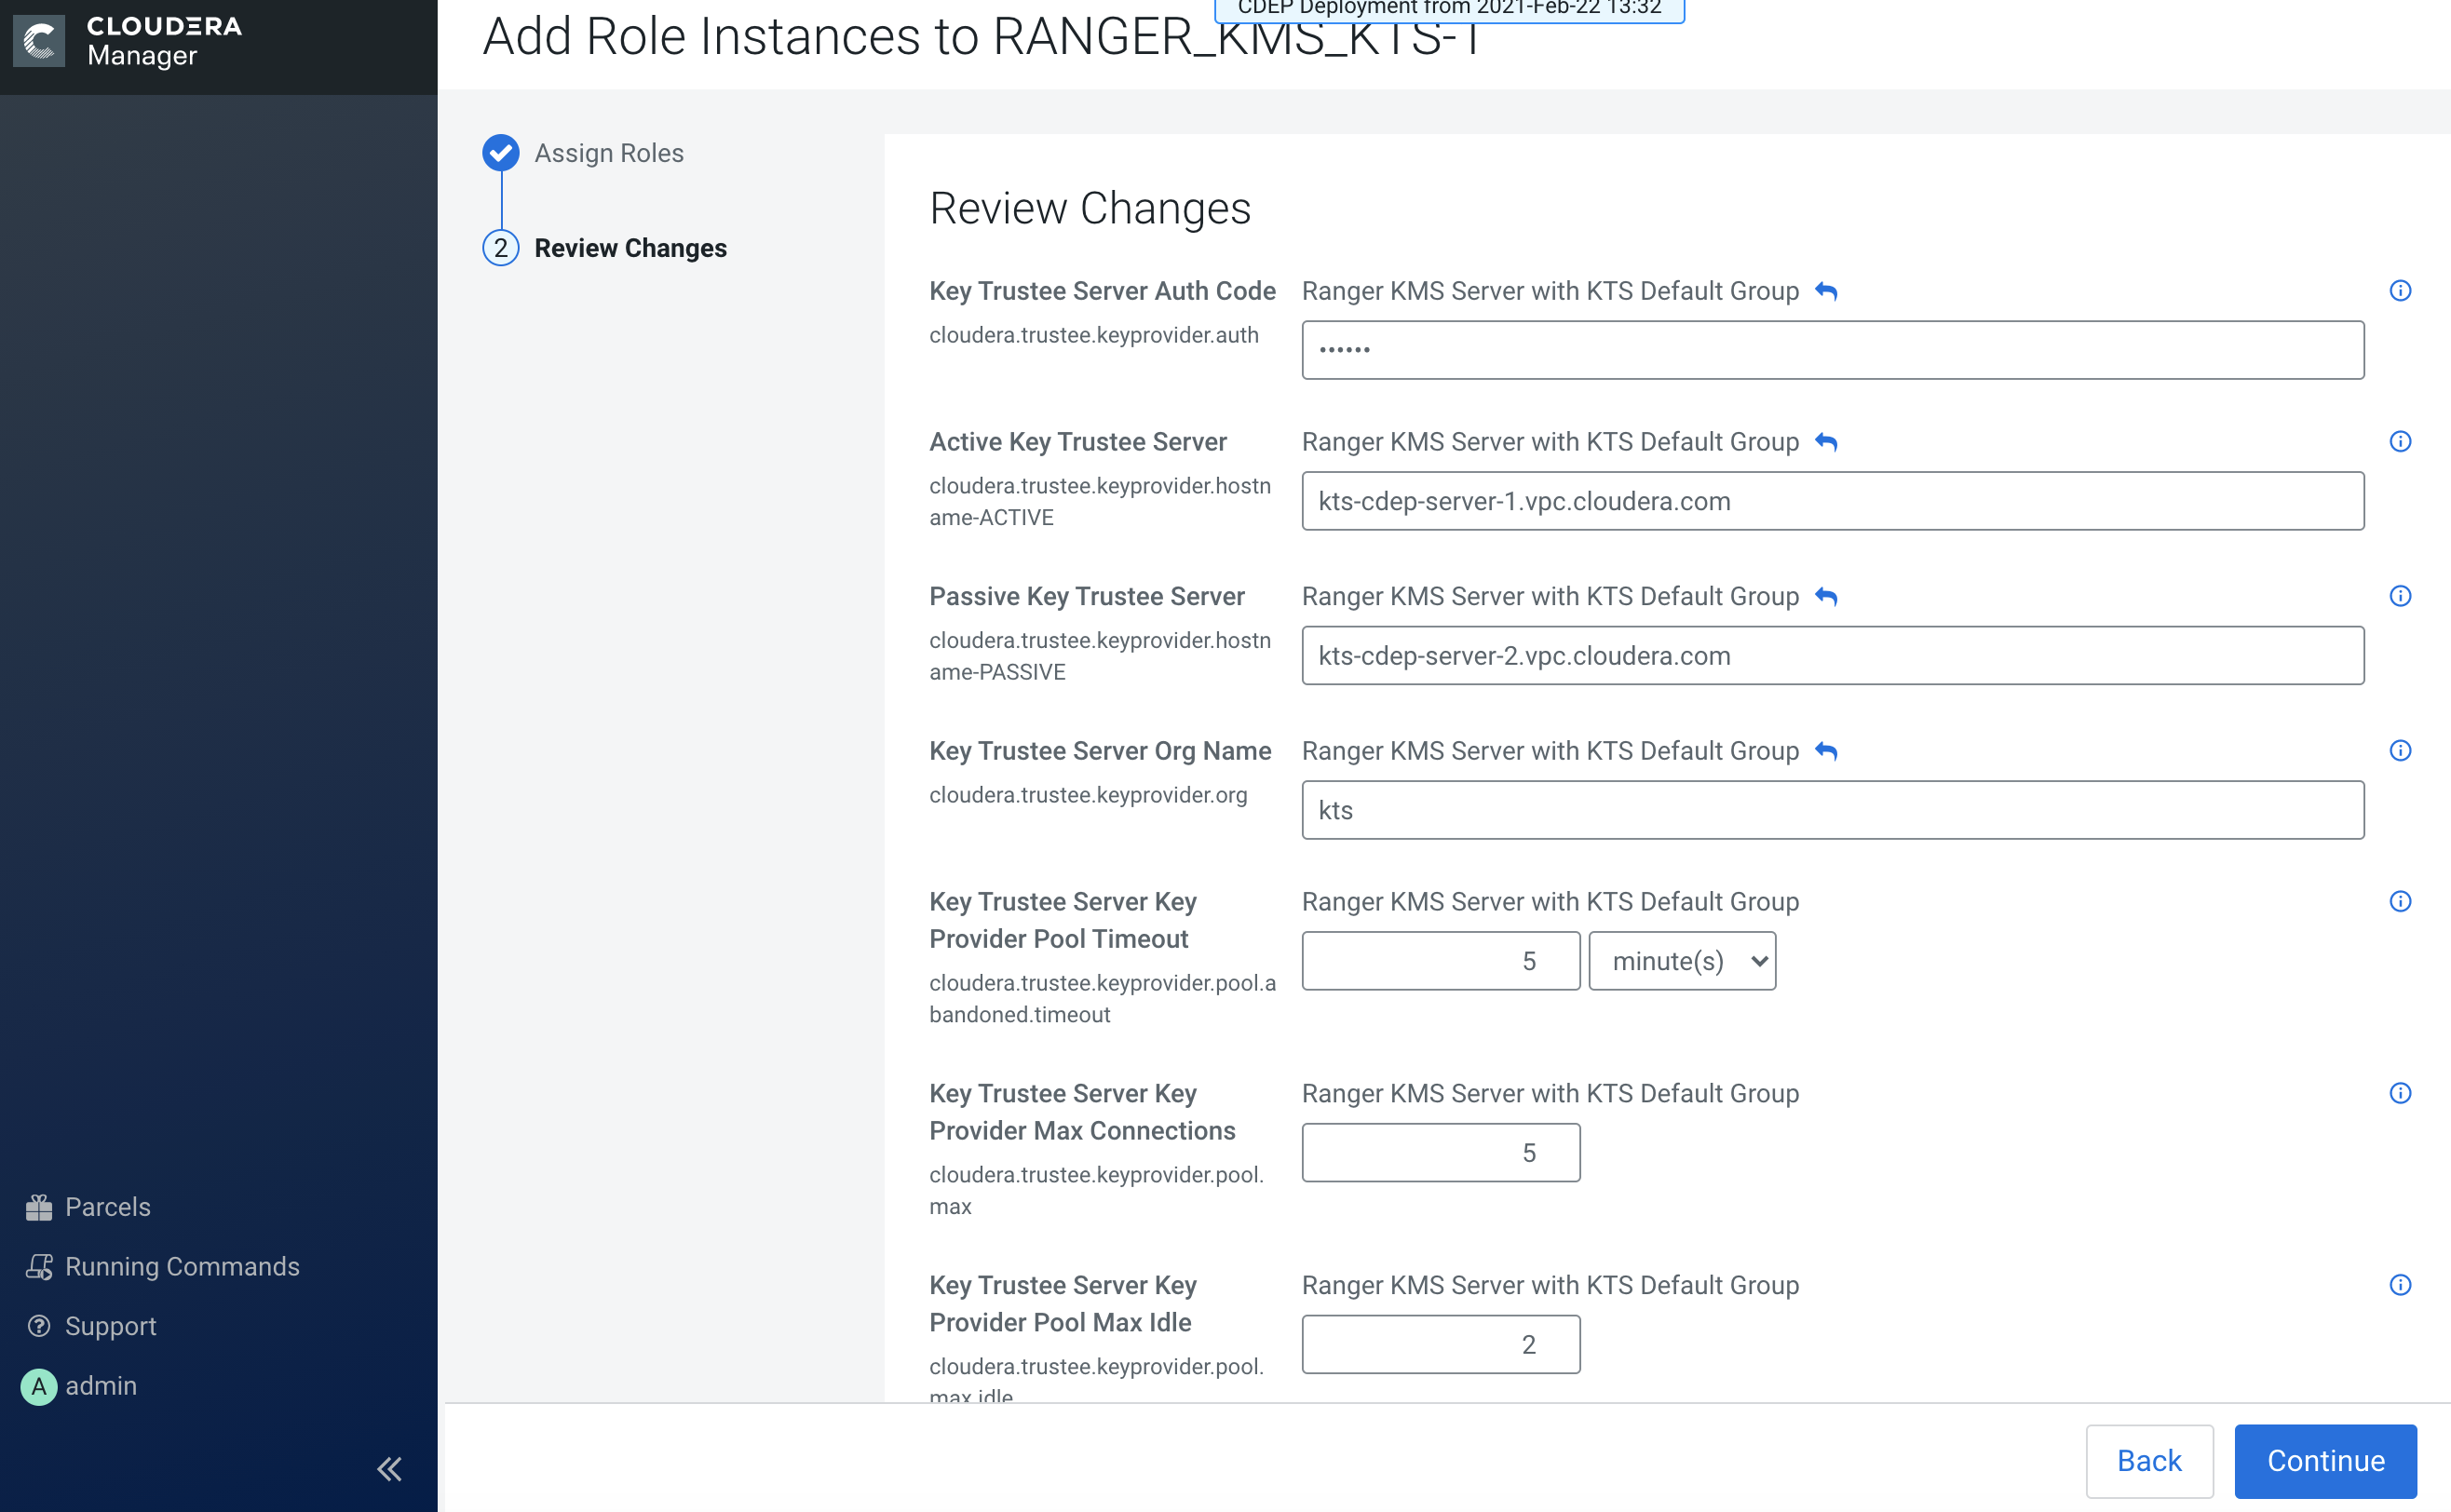
Review the settings on the Review Changes page, then click Continue.
-
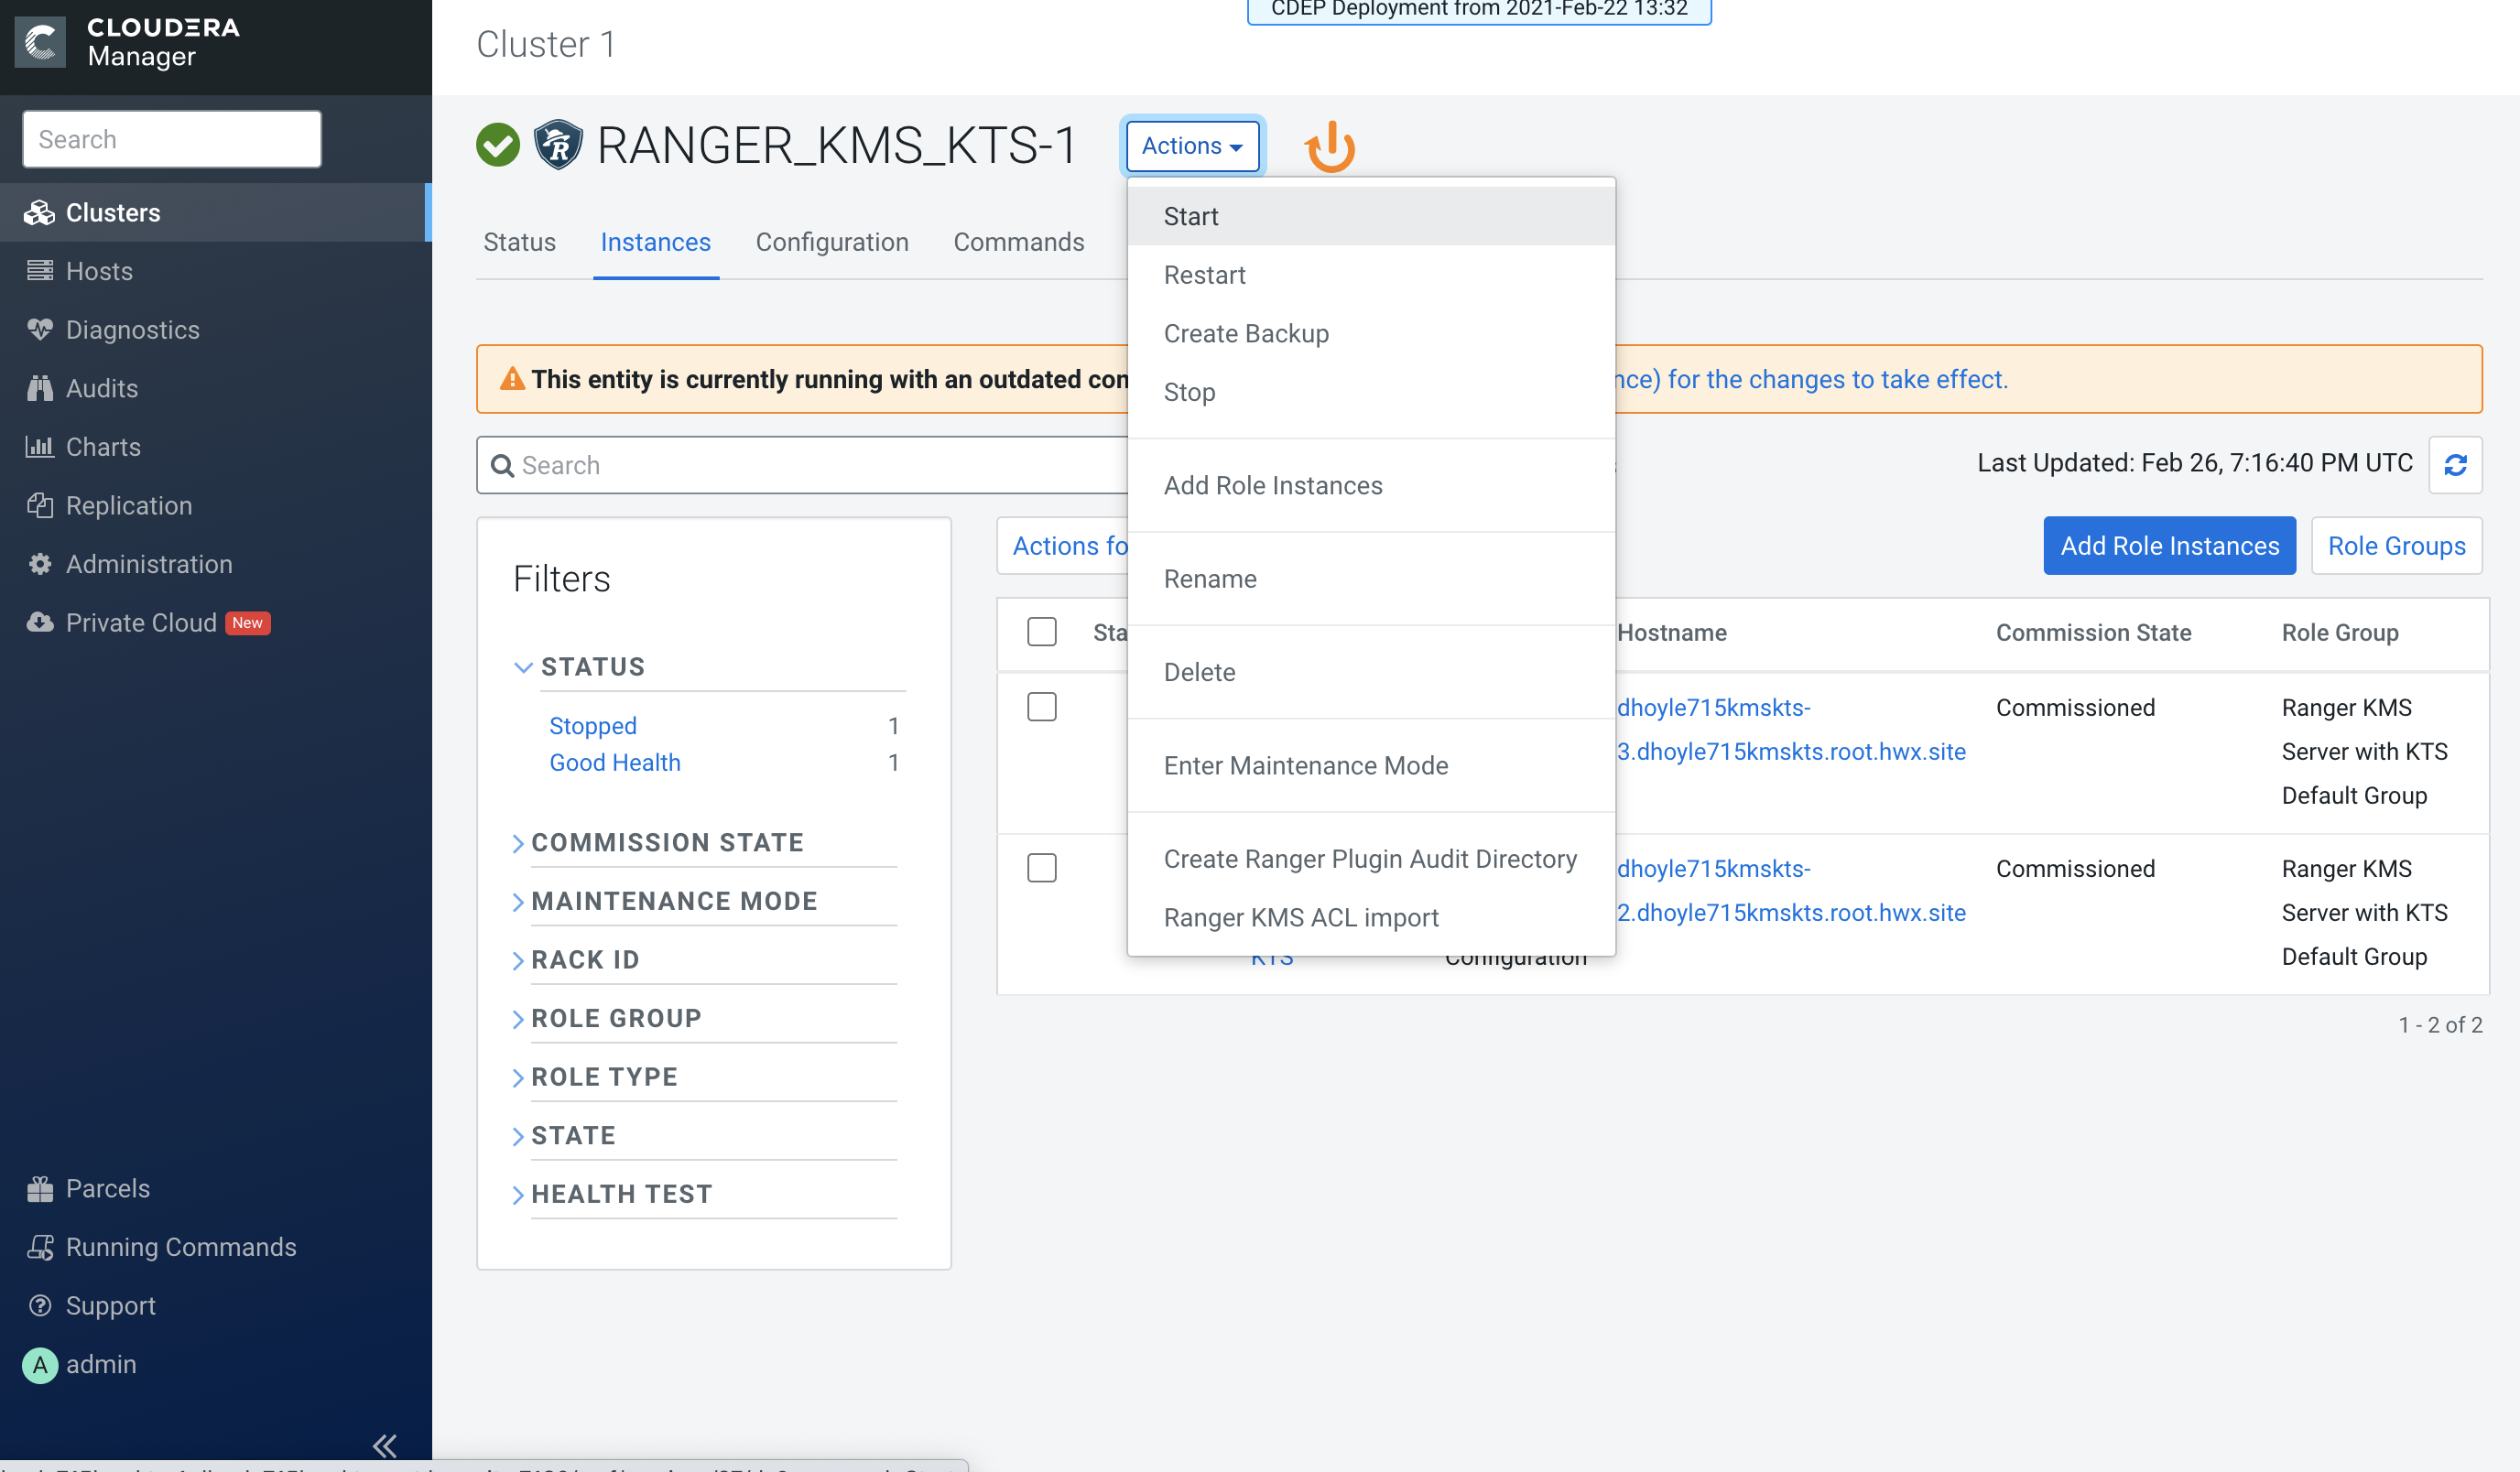
The new role instance appears on the Ranger KMS KTS page. If the new Ranger KMS
with KTS instance was not started by the wizard, you can start the service by
clicking Actions > Start in the Ranger KMS with Key Trustee Server
service.
-
If necessary, synchronize the KMS KTS private key.
Check the
catalina.outfile in the Ranger KMS KTS log directory for the following error:java.io.IOException: Unable to verify private key match between KMS hosts. Verify private key files have been synced between all KMS hosts. Aborting to prevent data inconsistency.To determine whether the KMS KTS private keys are different, compare the MD5 hash of the private keys. On each Ranger KMS KTS host, run the following command:
md5sum /var/lib/kms-keytrustee/keytrustee/.keytrustee/secring.gpgIf the output is different on both instances, Cloudera recommends following security best practices and transferring the private key using offline media, such as a removable USB drive. For convenience (for example, in a development or testing environment where maximum security is not required), you can copy the private key over the network by running the following
rsynccommand on the original Ranger KMS KTS host:rsync -zav /var/lib/kms-keytrustee/keytrustee/.keytrustee root@ktkms02.example.com:/var/lib/kms-keytrustee/keytrustee/. - Restart the Ranger KMS KTS service.
-
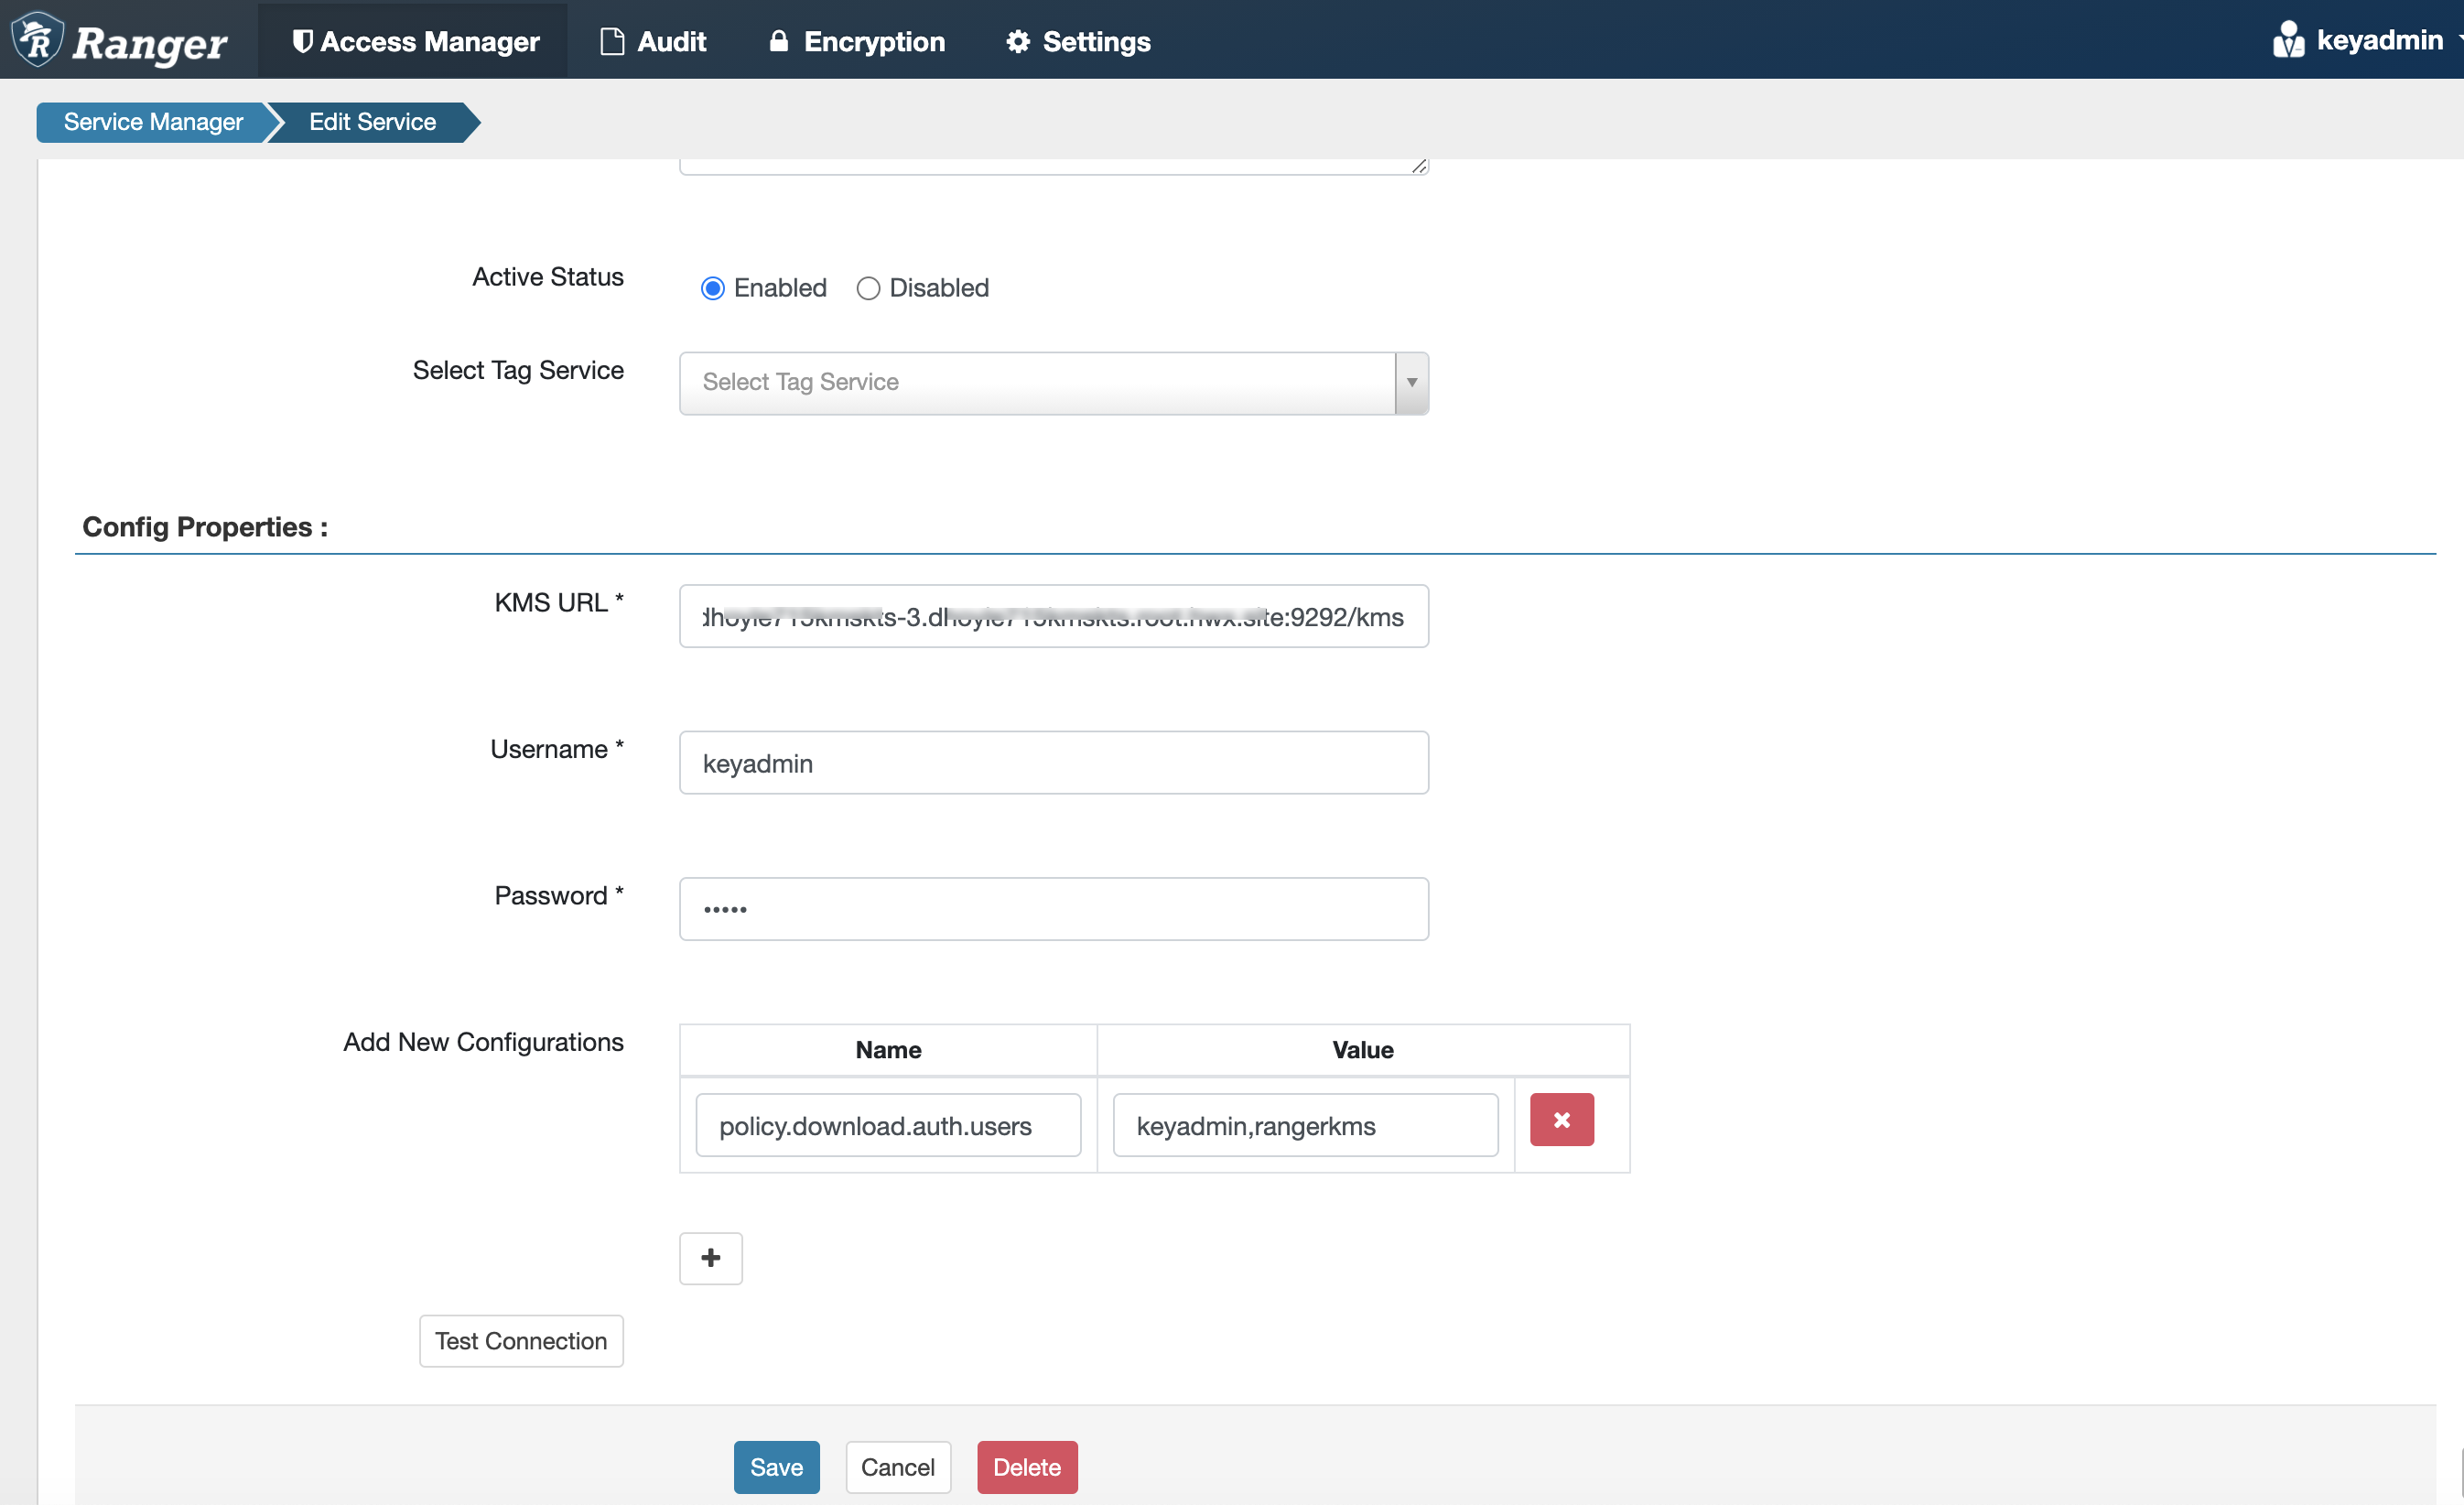
In Cloudera Manager, select the Ranger service, click Ranger Admin Web
UI, then log in as the Ranger KMS user (the default credentials are
keyadmin/admin123). Click the Edit icon for the cm_kms service, then update the
KMS URL property.
- Add the new KMS host using the following format:
kms://http@<kms_kts_host1>;http@<kms_kts_host2>:<kms_port>/kms - The default port is 9292. For example:
kms://http@kms_kts_host1;http@kms_kts_host2:9292/kms - If SSL is enabled, use
httpsand port 9494. For example:kms://https@kms_kts_host1;https@kms_kts_host2:9494/kms
Click Test Connection to confirm the settings, then click Save to save your changes.
- Add the new KMS host using the following format:
-
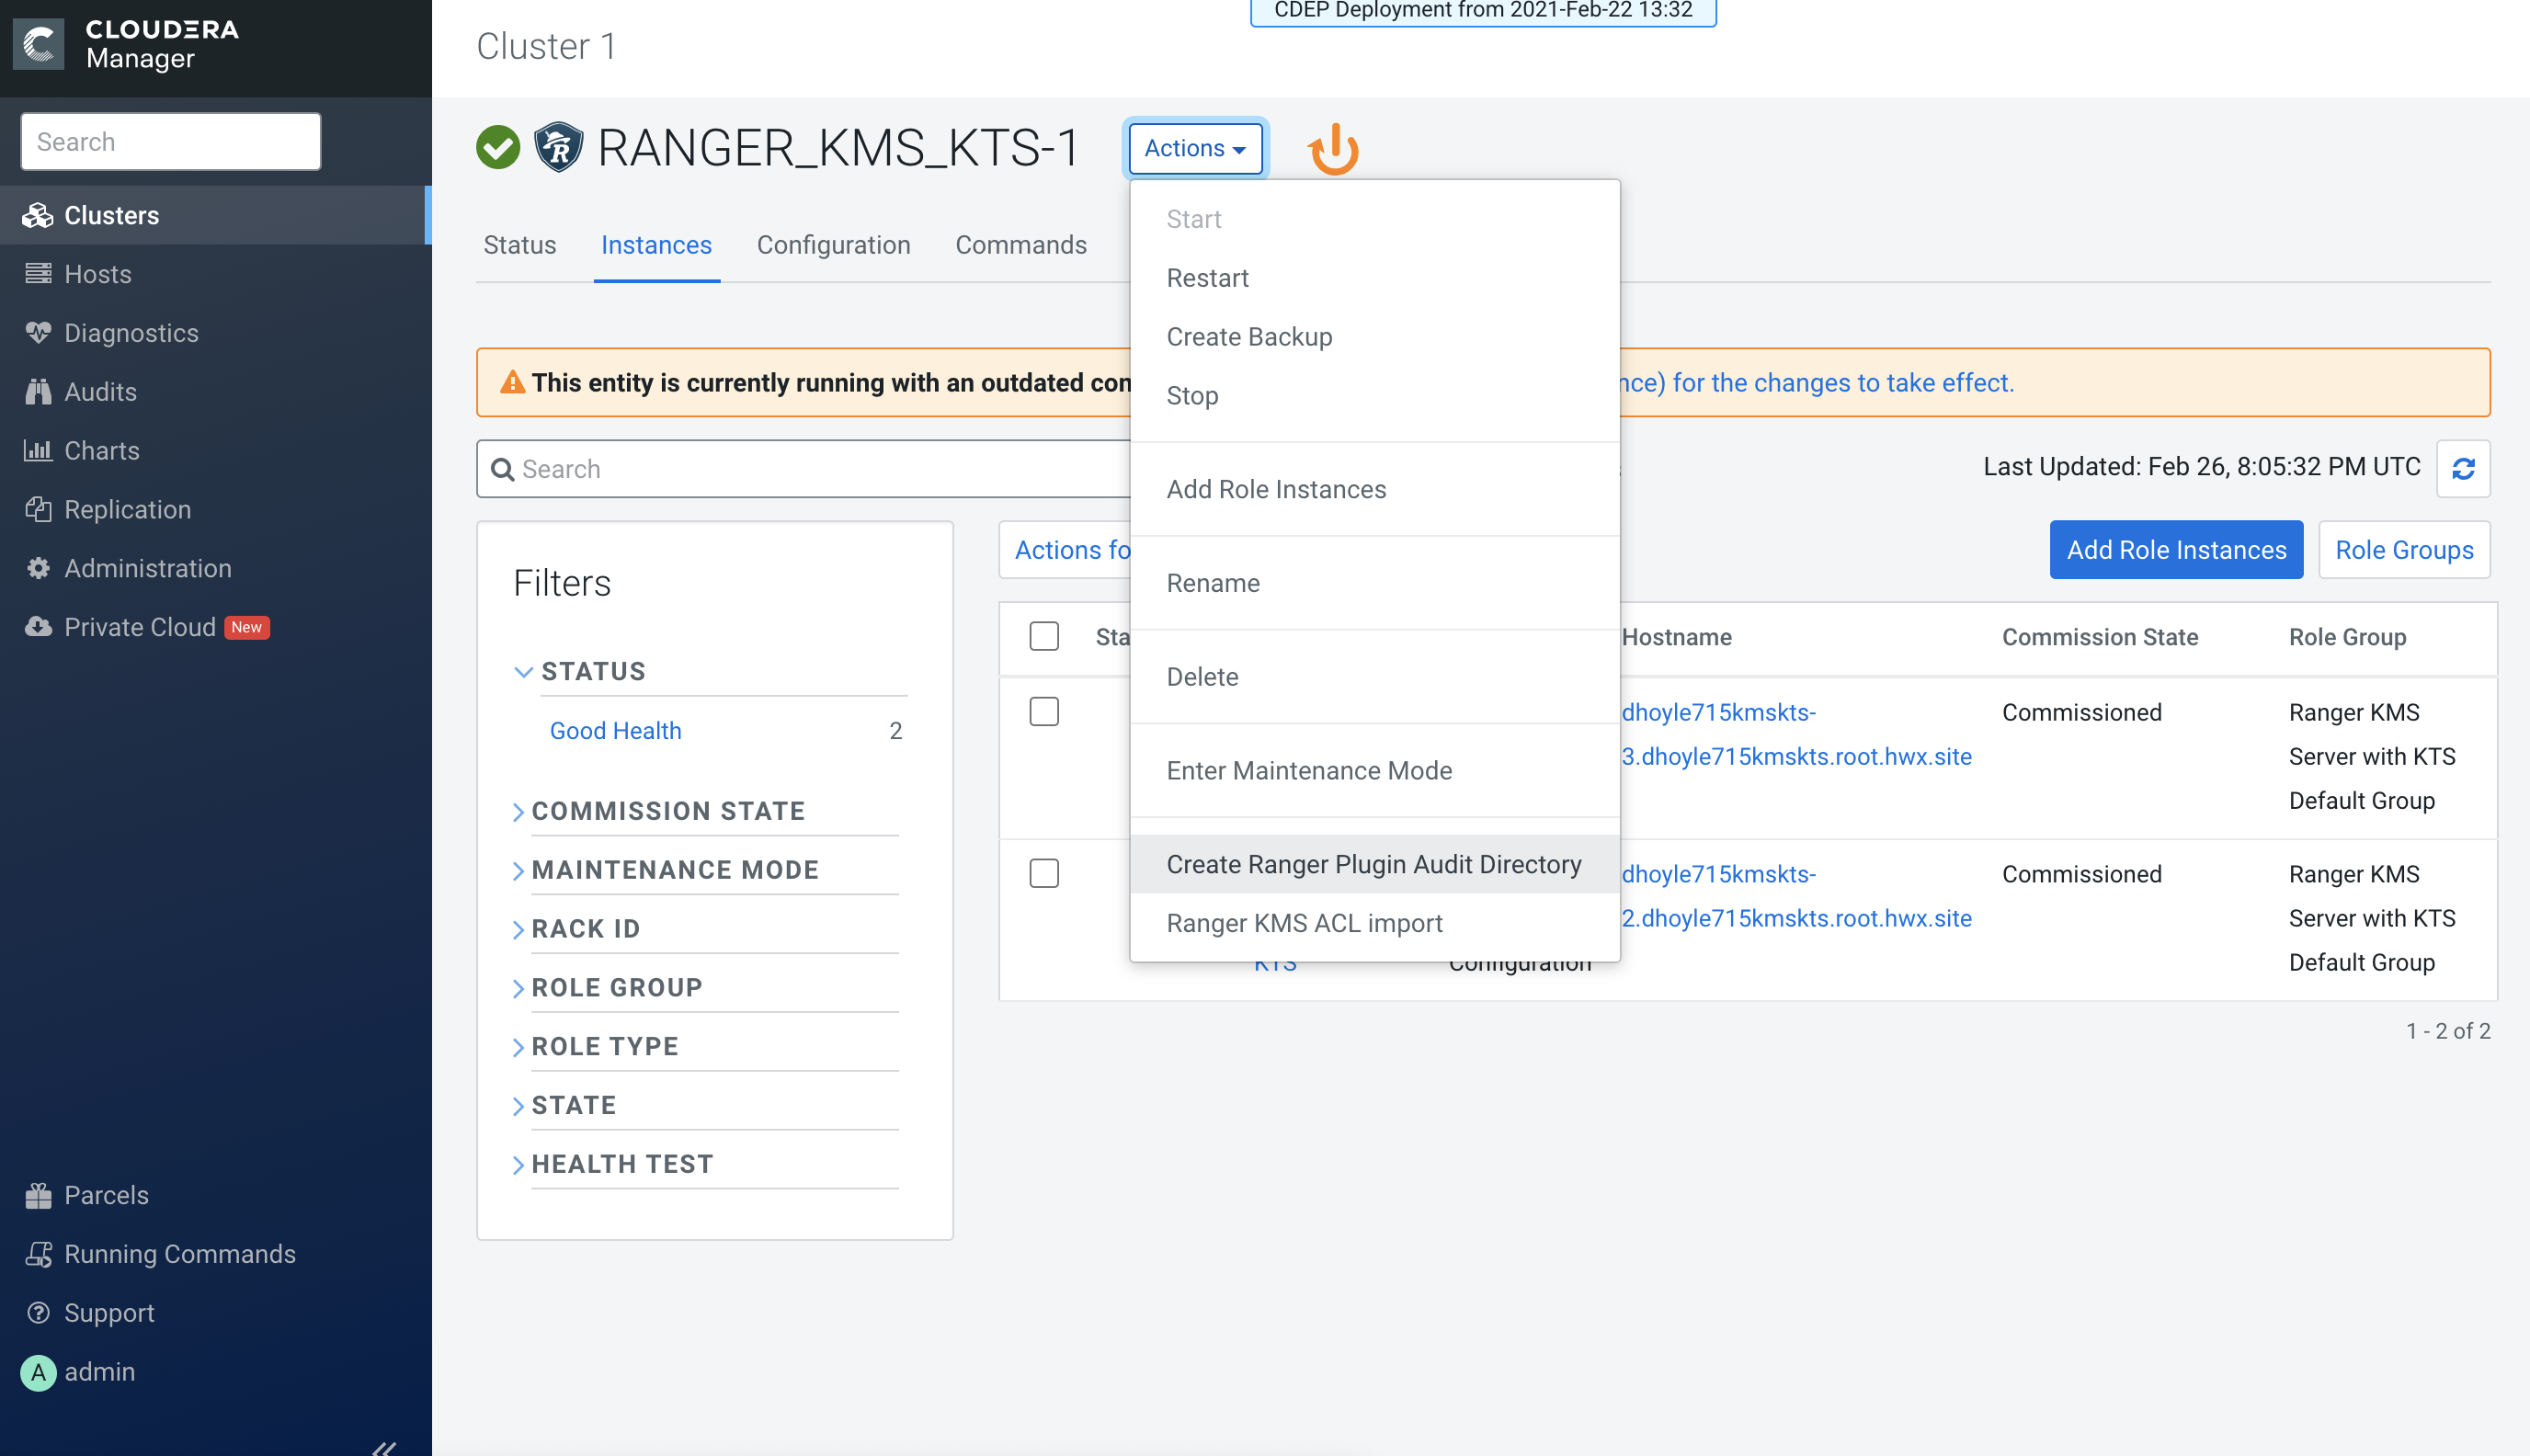
In Cloudera Manager click the Ranger KMS KTS service, then select Actions >
Create Ranger Plugin Audit Directory.
-
In Cloudera Manager, select Ranger KMS KTS, then click Configuration.
-
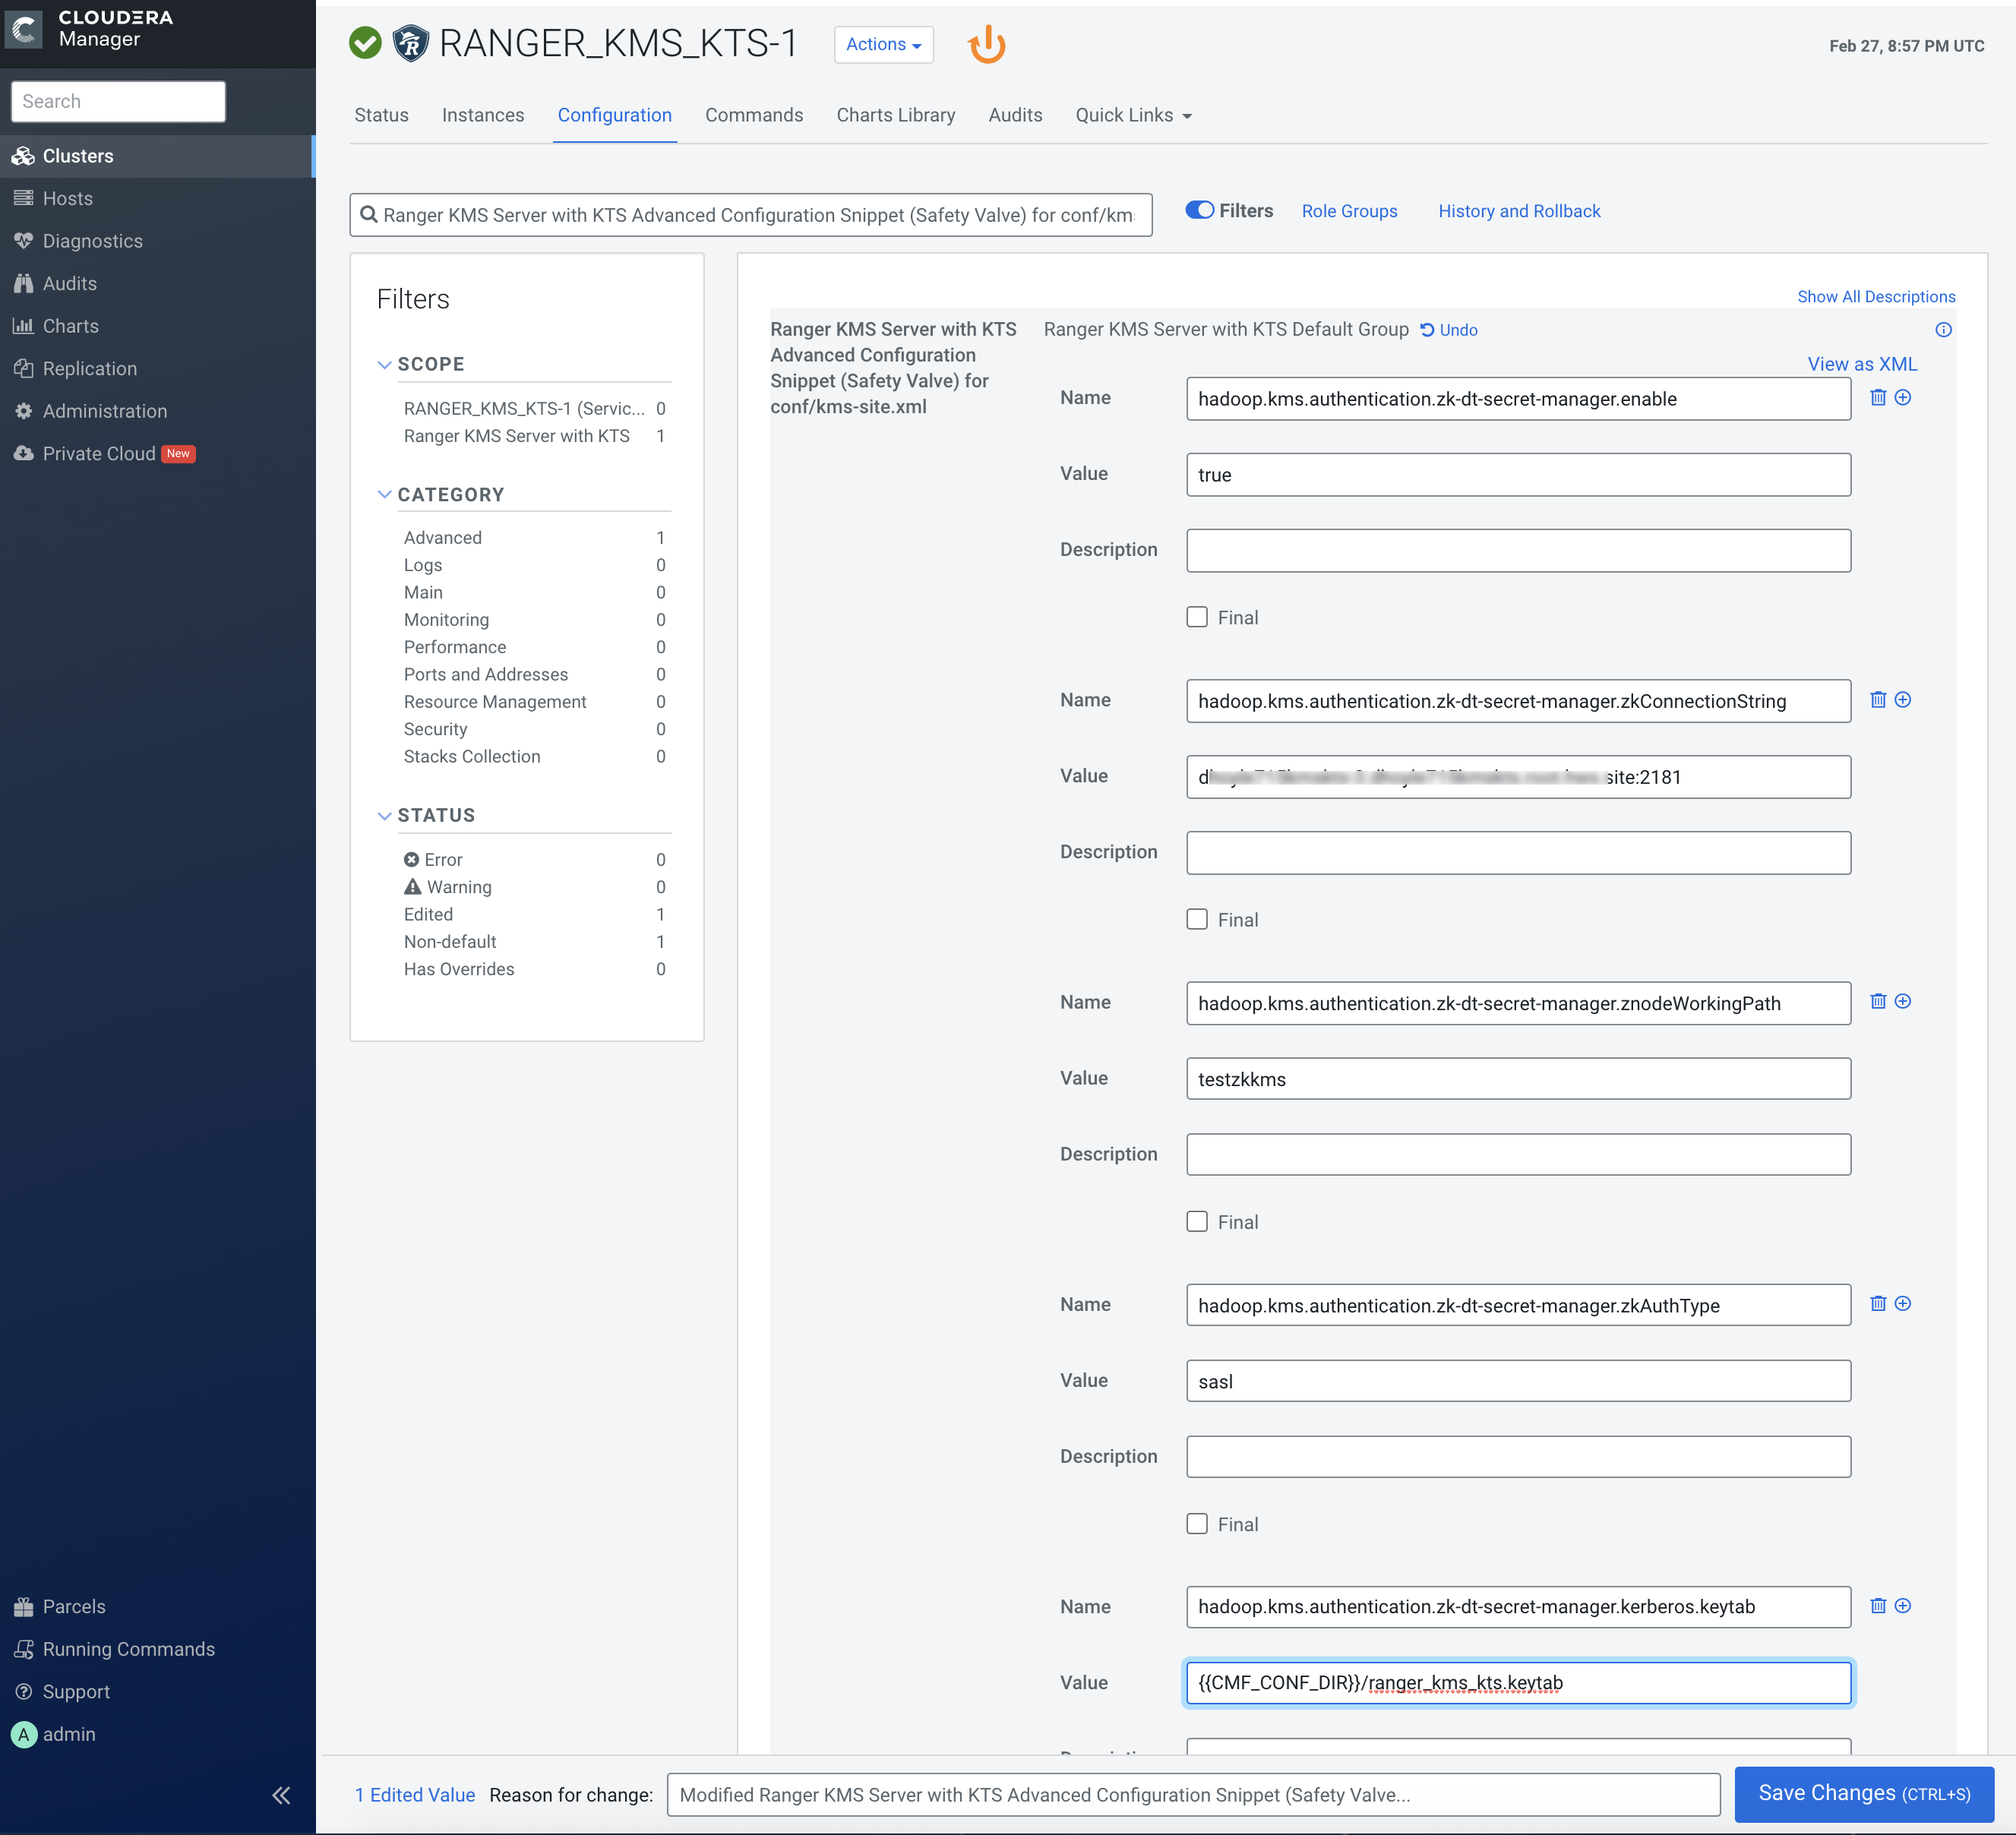
Use the Add (+) icons for the Ranger KMS Server with KTS Advanced
Configuration Snippet (Safety Valve) for conf/kms-site.xml property to
add the following properties, then click Save Changes.
- hadoop.kms.authentication.zk-dt-secret-manager.enable = true
- hadoop.kms.authentication.zk-dt-secret-manager.zkConnectionString = <Zookeeper hostname>:2181
- hadoop.kms.authentication.zk-dt-secret-manager.znodeWorkingPath
= <provide a znode working path other than /zkdtsm to
avoid collision>
For example:
hadoop.kms.authentication.zk-dt-secret-manager.znodeWorkingPath = testzkkms
- hadoop.kms.authentication.zk-dt-secret-manager.zkAuthType = sasl
- hadoop.kms.authentication.zk-dt-secret-manager.kerberos.keytab = {{CMF_CONF_DIR}}/ranger_kms_kts.keytab
-
Use the Add (+) icons for the Ranger KMS Server with KTS Advanced
Configuration Snippet (Safety Valve) for conf/kms-site.xml property to
add the following properties, then click Save Changes.
-
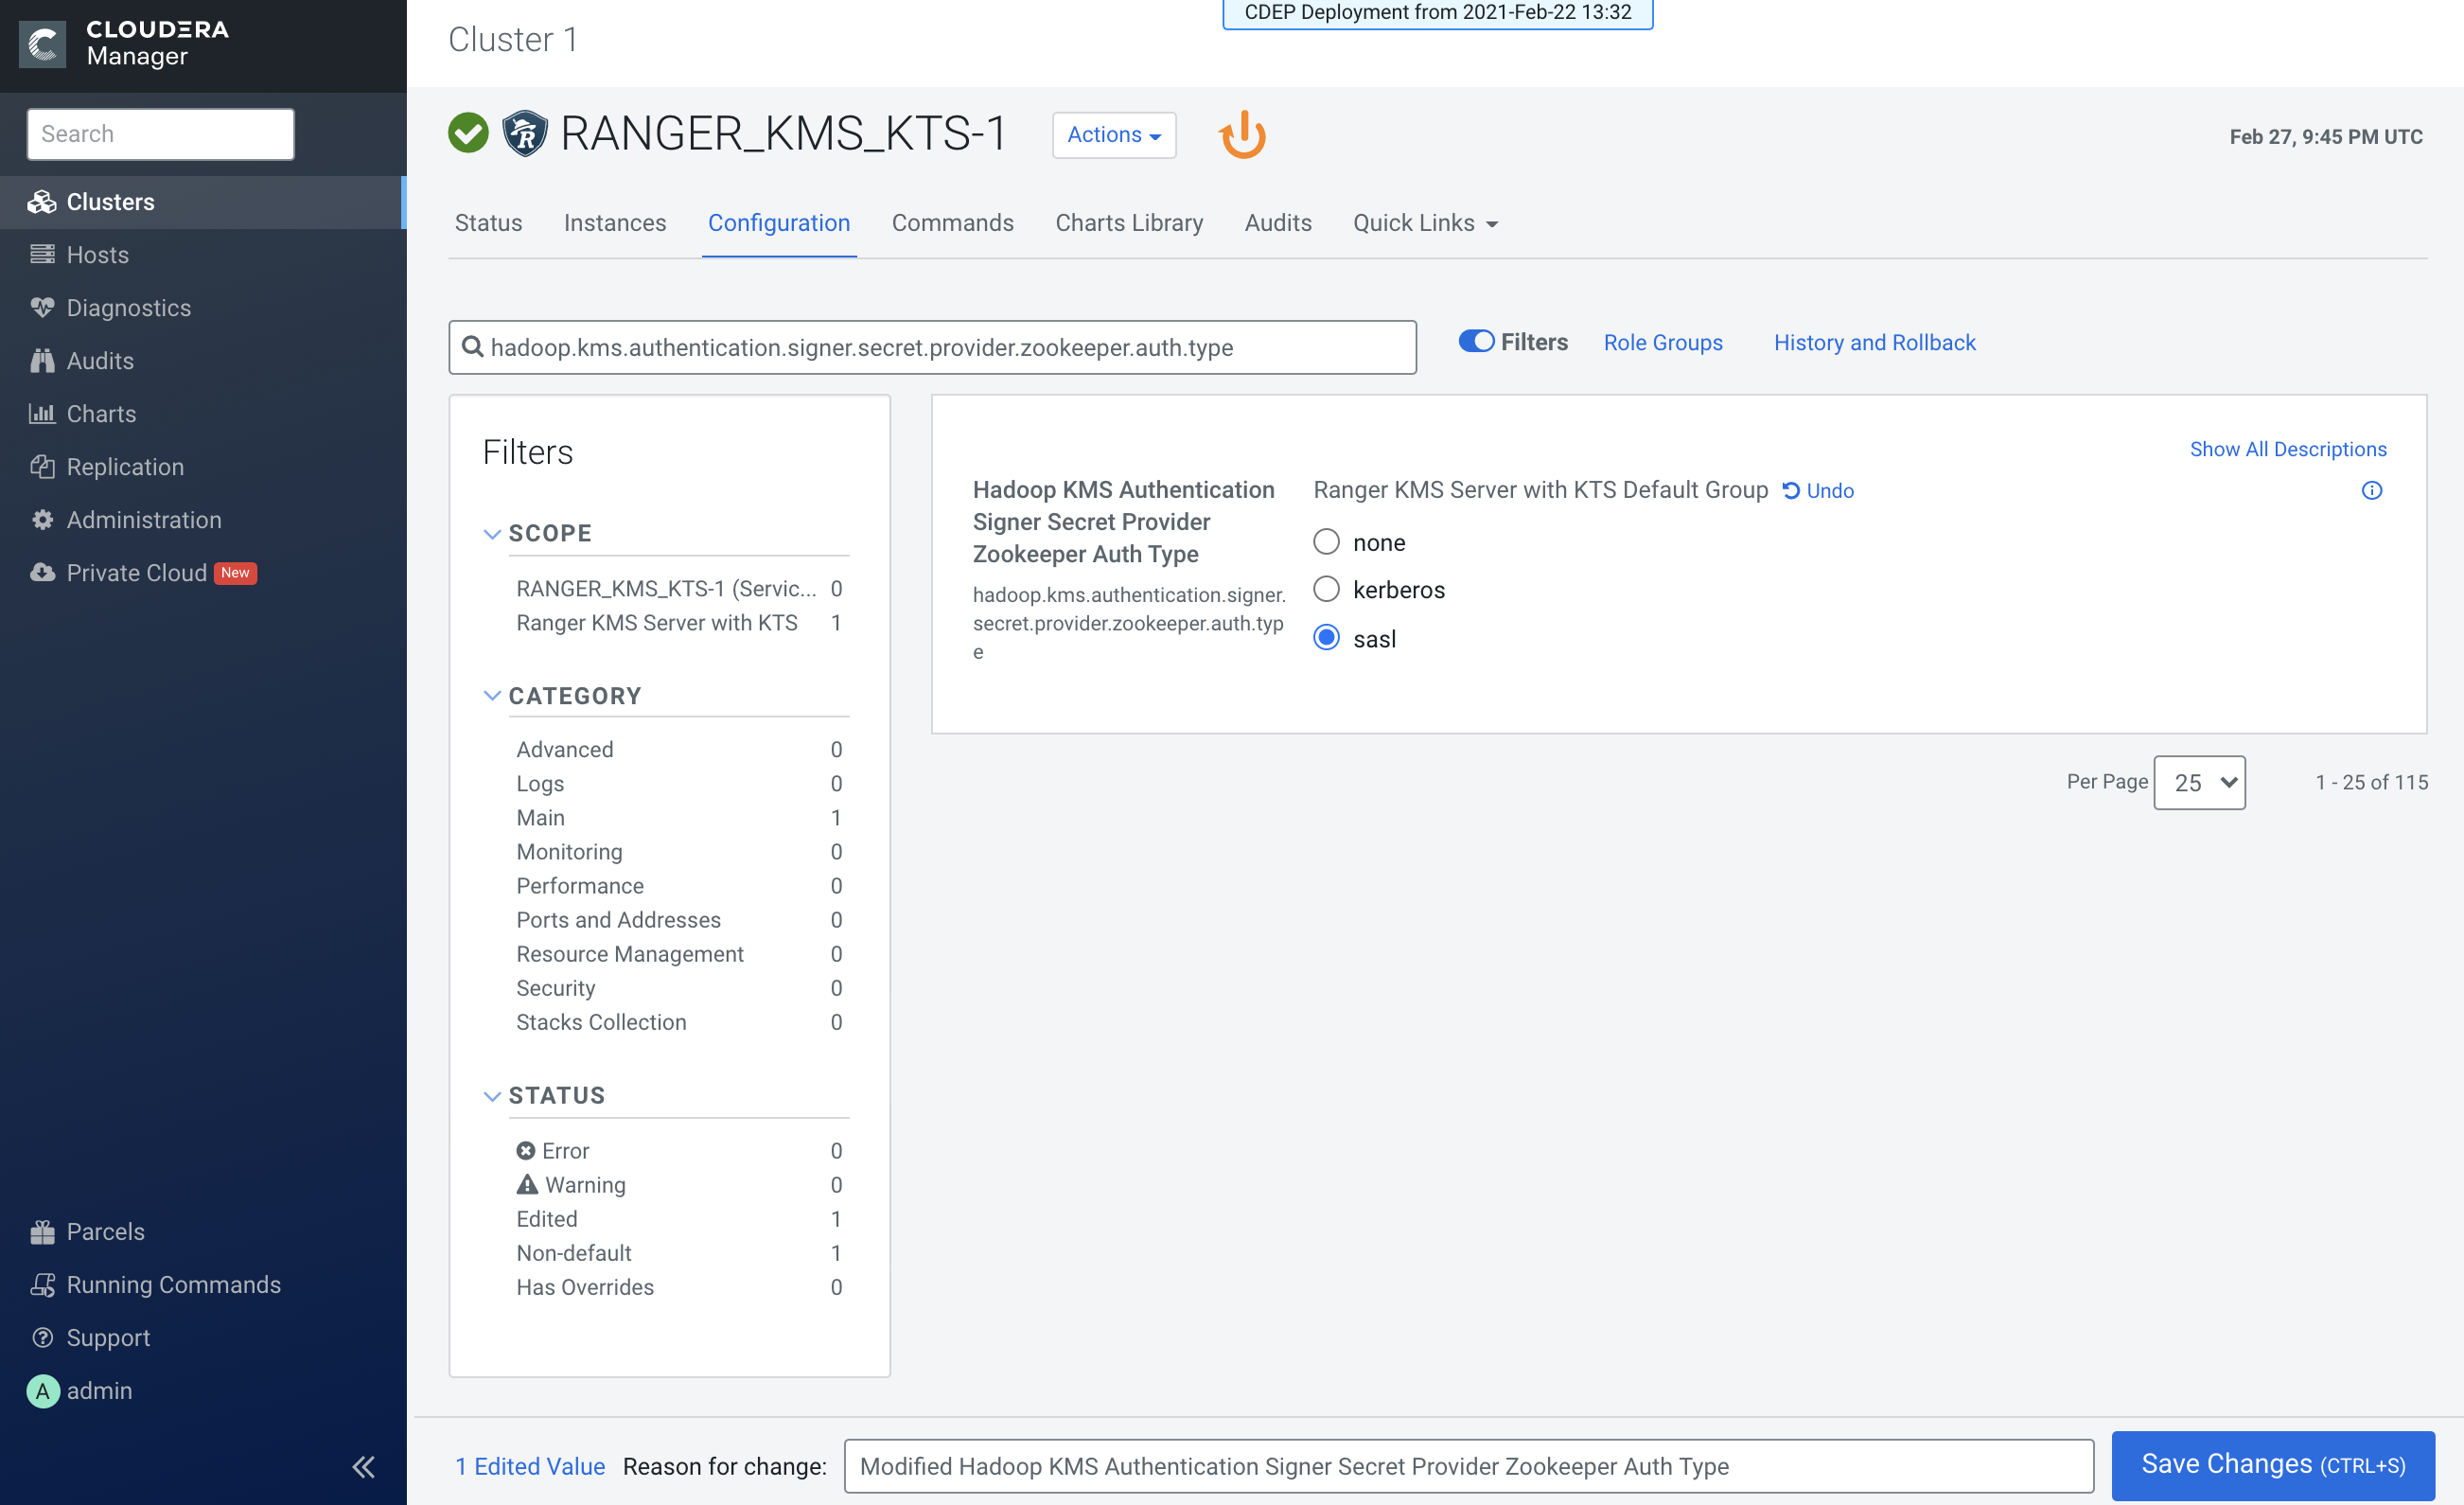
Update the following Ranger KMS configuration properties, then click Save
Changes.
- hadoop.kms.authentication.signer.secret.provider.zookeeper.auth.type = sasl
-
Click the Stale Configuration Restart icon.
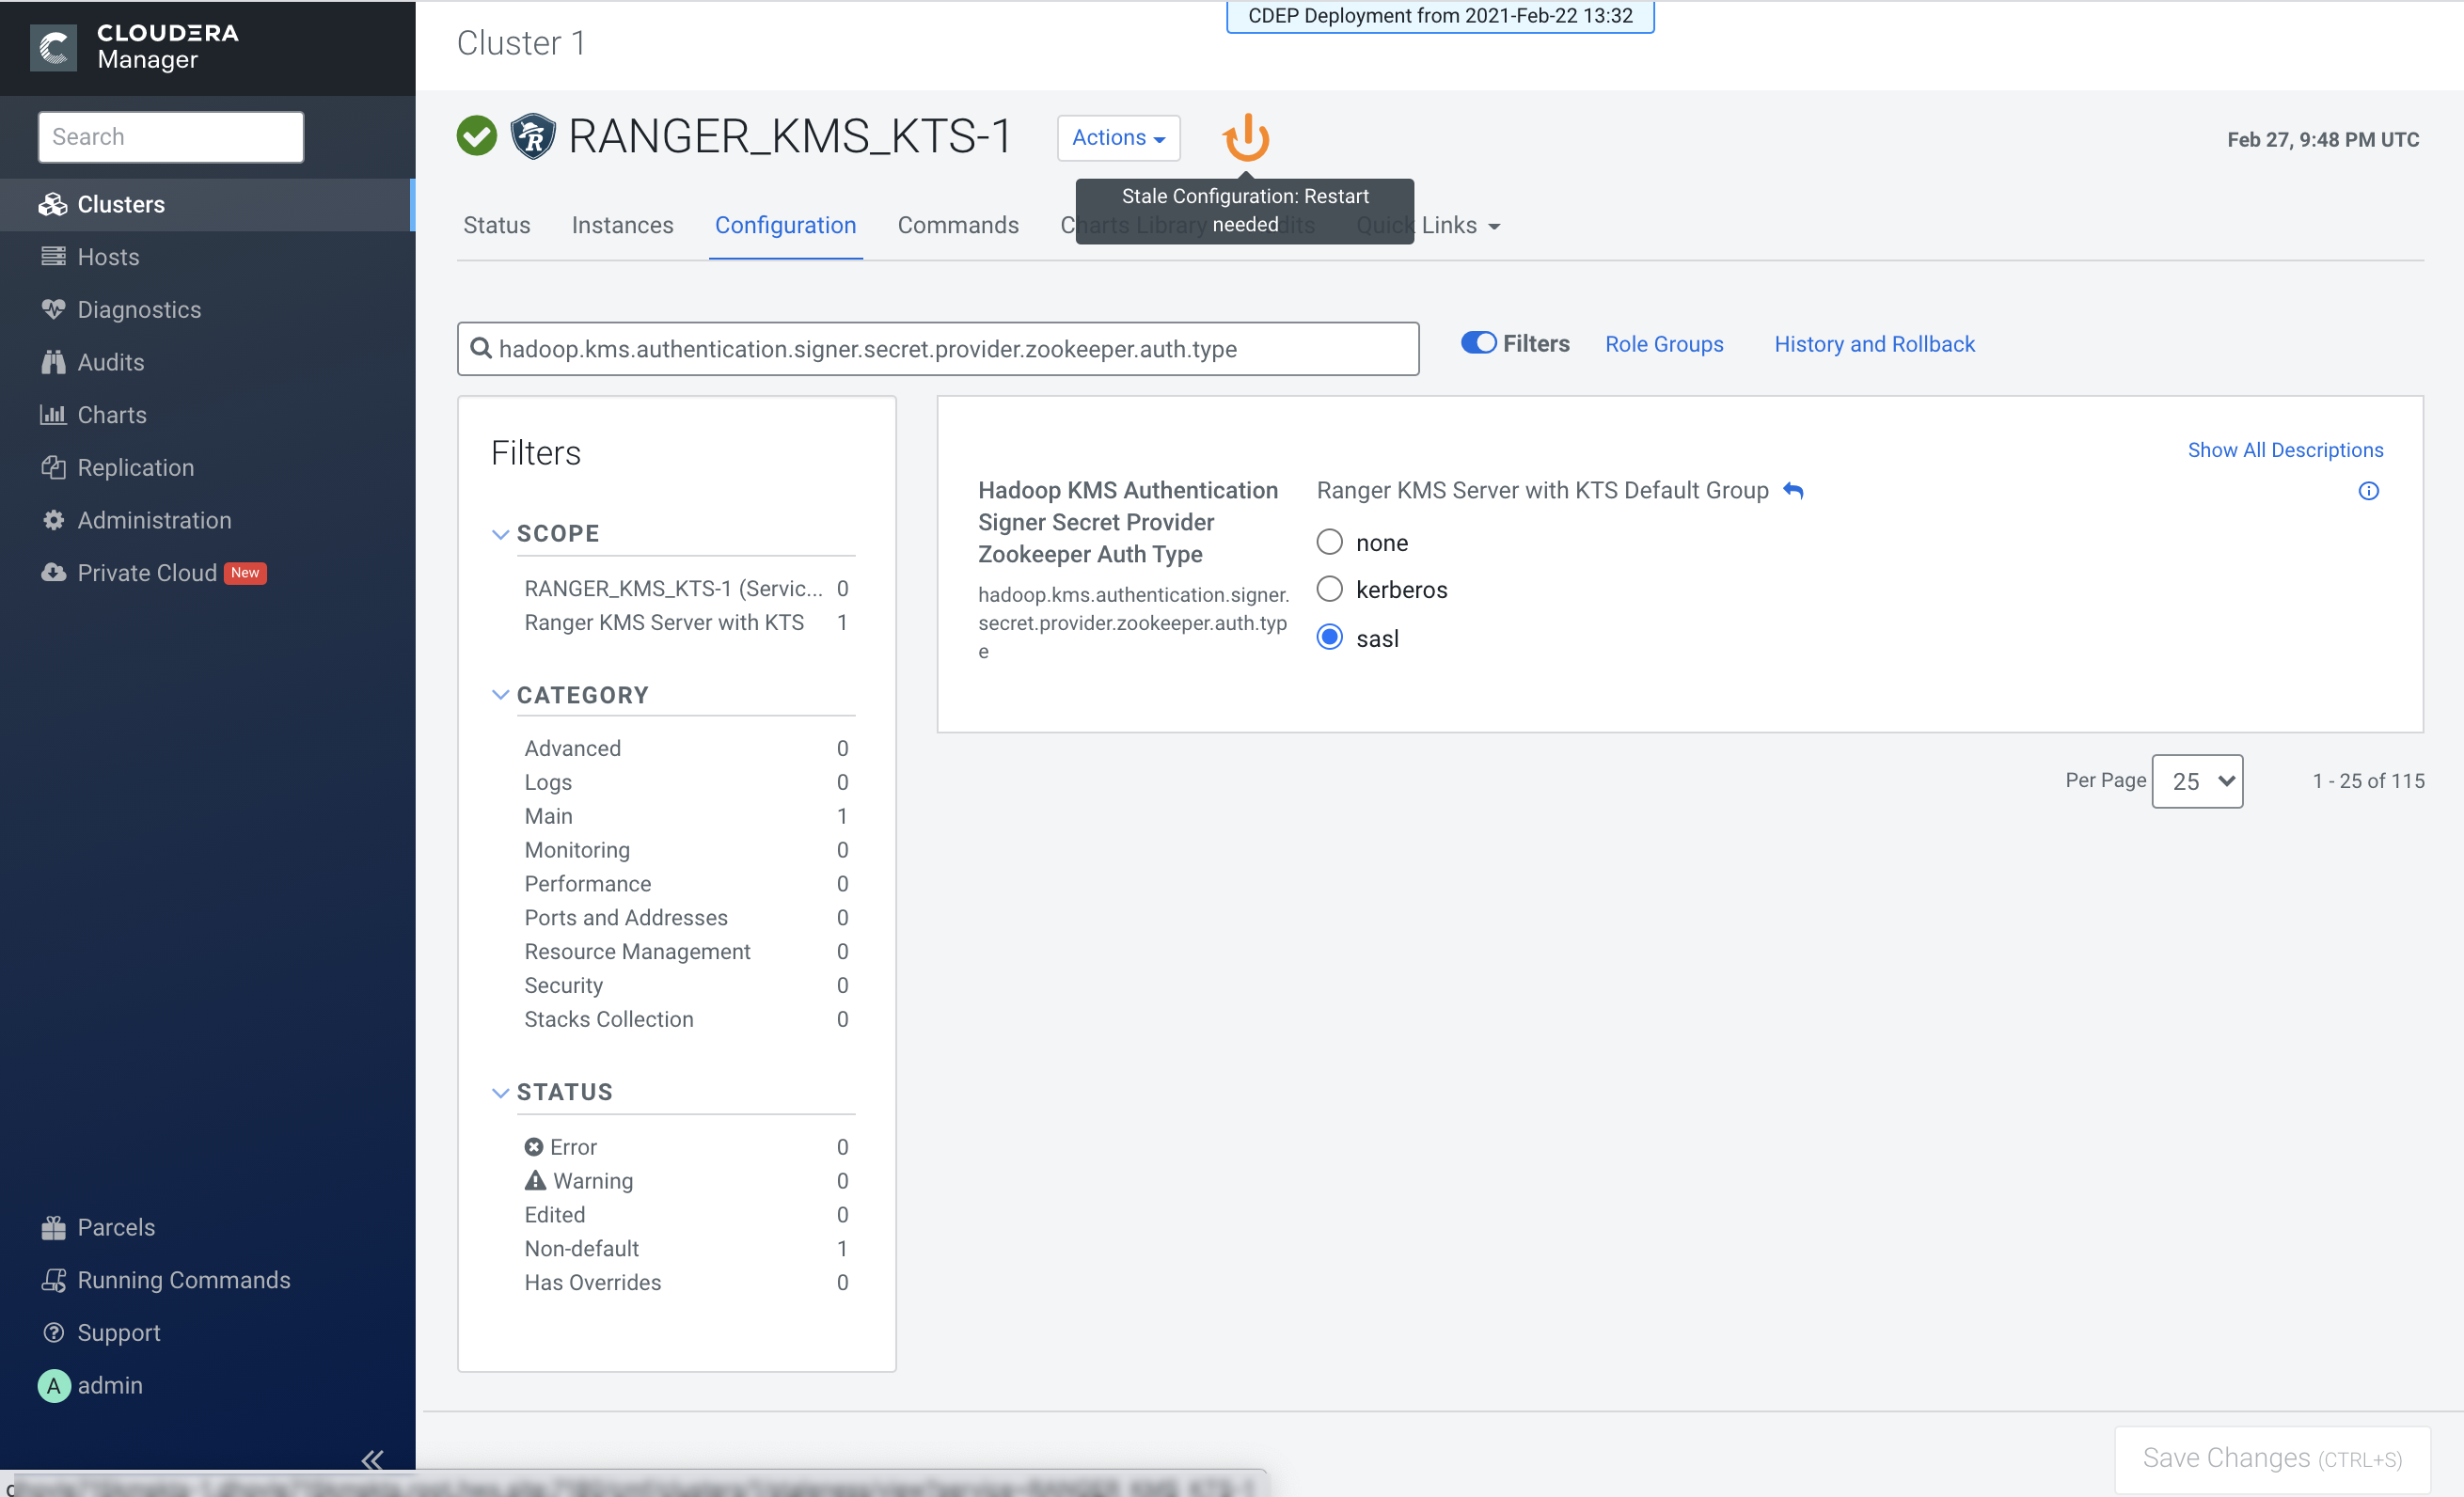
- On the Stale Configurations page, click Restart Stale Services.
- On the Restart Stale Services page, select the Re-deploy client configuration checkbox, then click Restart Now.
- A progress indicator page appears while the services are being restarted. When the services have restarted, click Finish.
