View HDFS replication policy details
The Replications Policies page displays a row of information about each replication policy which includes recent messages about the last replication job run.
You can limit the replication jobs that are displayed by selecting filters on the left. If you do not see an expected policy, adjust or clear the filters. Use the search box to search the list of replication policies for path, database, or table names.
| Column | Description |
|---|---|
| ID | Internally generated ID number for the replication policy. Provides a
convenient way to identify a policy. Click the ID column label to sort the replication policies table by ID. |
| Name | Unique name you specify when you created the replication policy. Click the Name column label to sort the replication policies table by name. |
| Type | Shows HDFS or Hive as the replication policy type. |
| Source | Source cluster for the replication. |
| Destination | Target cluster for the replication. |
| Throughput | Average throughput per mapper/file of all the files written. |
| Progress | Current replication job status. |
| Completed | Time stamp when the replication job completed. Click the Completed column label to sort the replication policies table by time. |
| Next Run | Date and time for the next scheduled replication which depends on the schedule
parameters you specified during policy creation. Hover over the date to view
additional details about the scheduled replication. Click the Next Run column label to sort the replication policies table by the next run date. |
| Actions | Click:
|
When a replication job is in progress, the Last Run column shows a spinner and progress bar, and each stage of the replication task is indicated in the message beneath the job's row. Click Command Details to view the command run details. If the job is successful, the number of files copied is indicated. If there have been no changes to a file at the source since the previous job, then that file is not copied. As a result, after the initial job, only a subset of the files may actually be copied, and this is indicated in the success message. Click to view more information about the completed job.
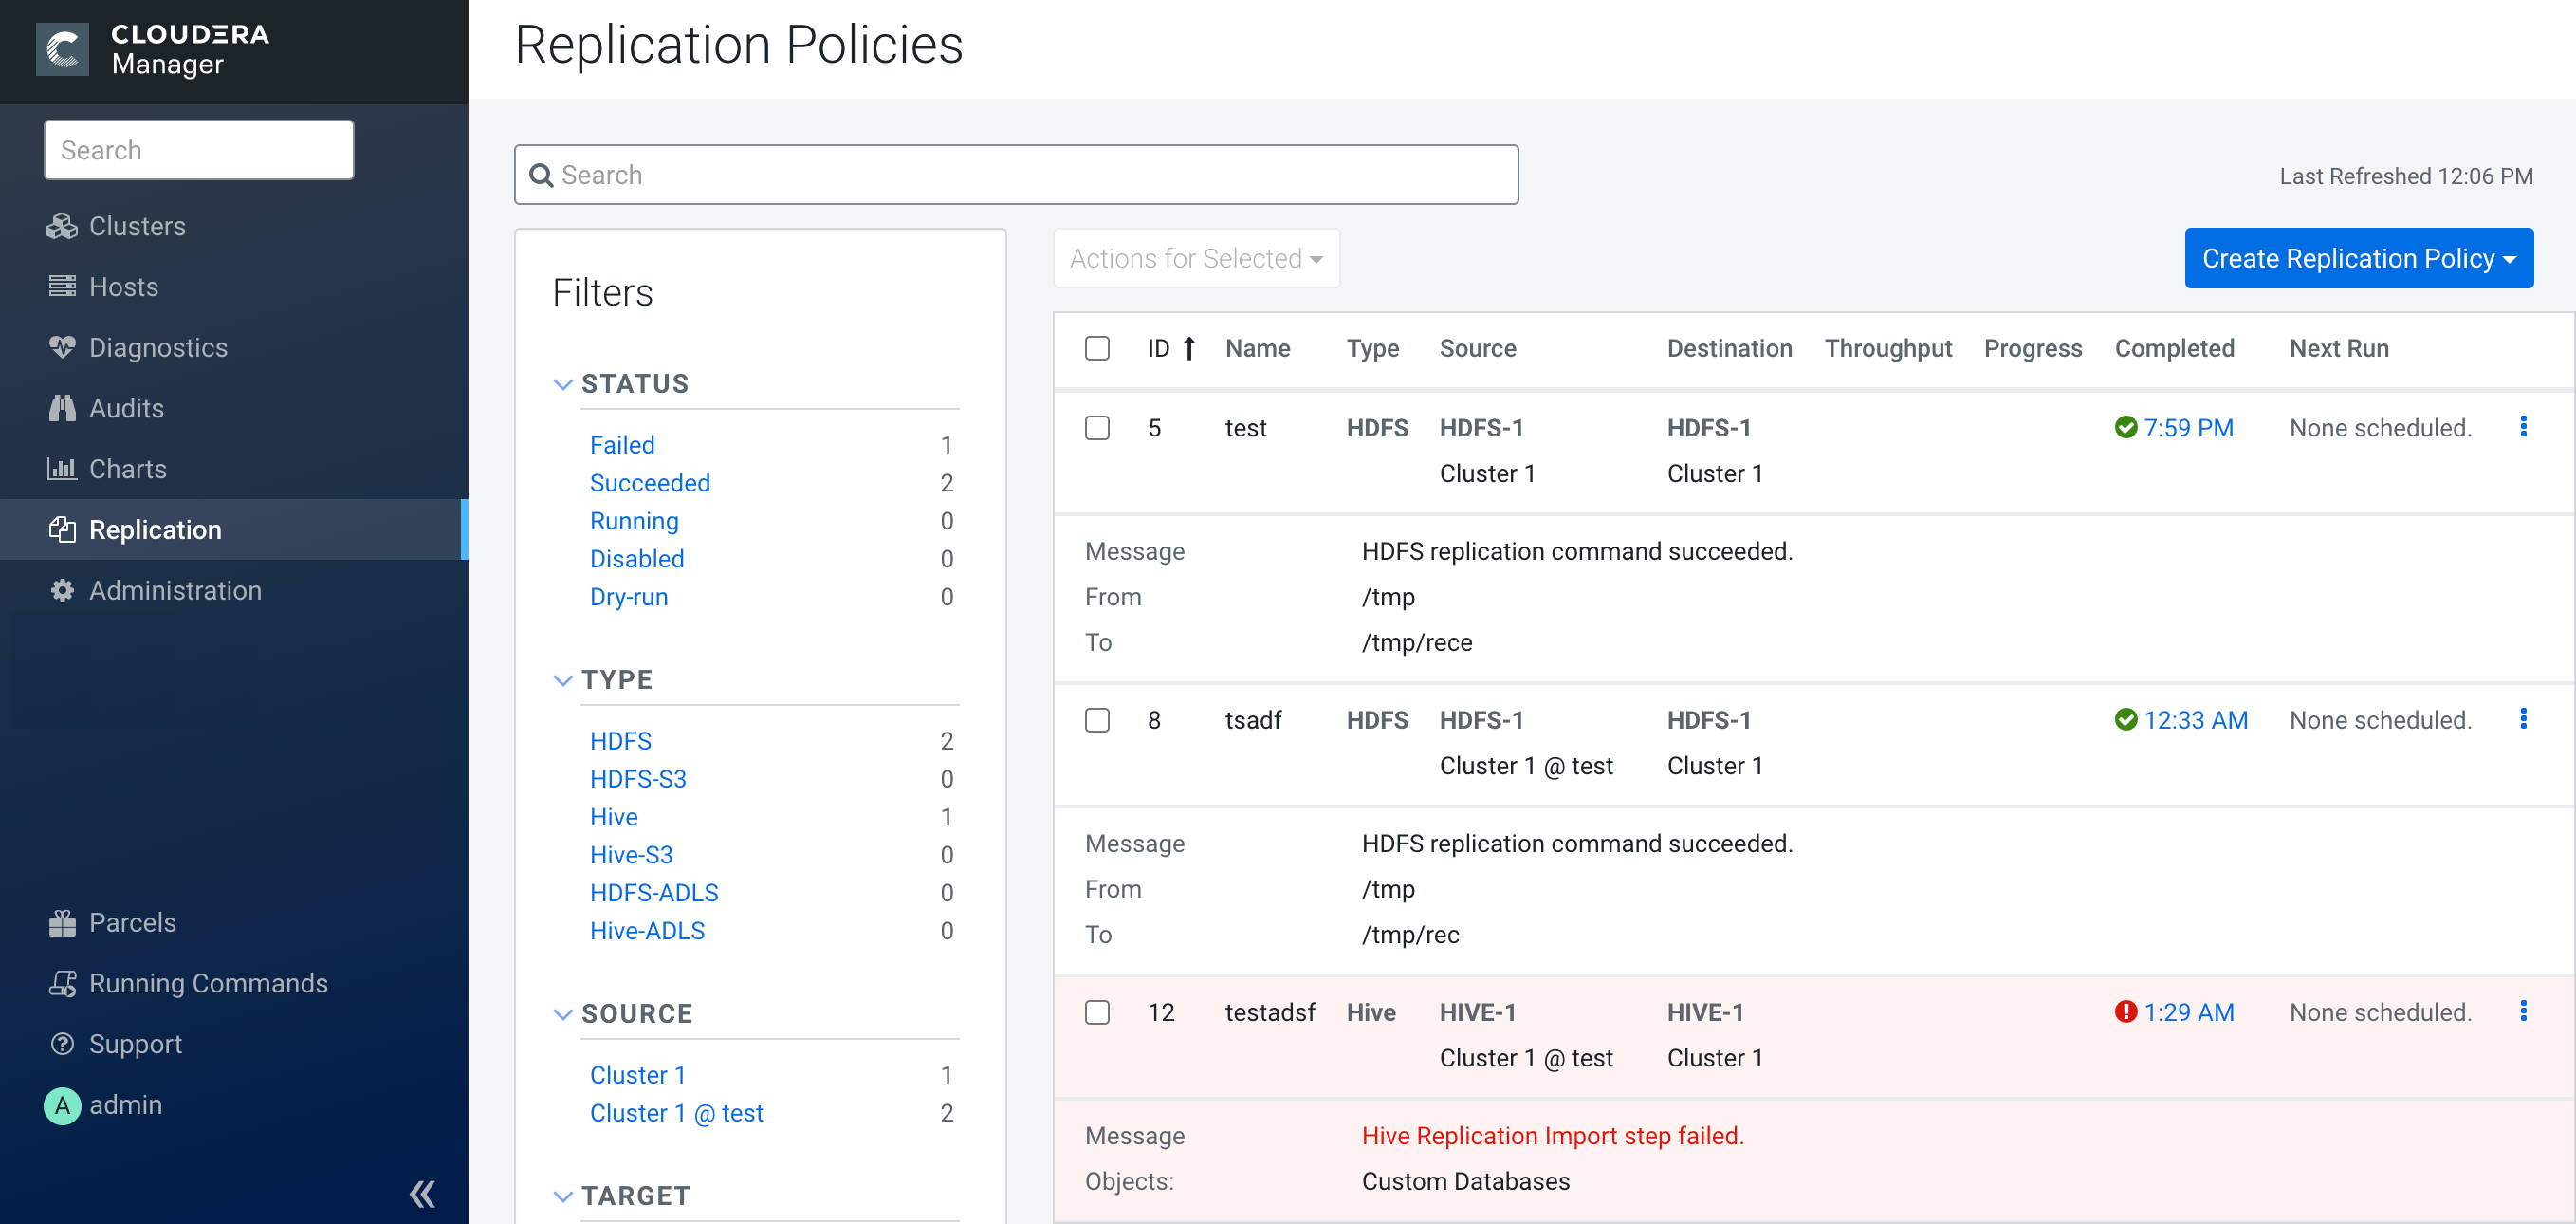
The following sample image shows the Replication Policies page in Cloudera Manager: