Starting Hive using a password
You start the Hive shell using a Beeline command to query Hive as an end user authorized by Apache Ranger. As administrator, you set up the end user in the operating system and in Ranger.
Before starting Hive for the first time, check that you are covered
by Ranger policies required for basic operations as shown in the following steps. All users need
to use the default database, perform operations such as listing
database names, and query the information schema. The preloaded default database
tables columns and information_schema database Ranger policies cover group public
(all users). If these policies are disabled, you cannot use the default database,
perform basic operations such as listing database names, or query the information
schema. For example, if the default database tables columns policy is disabled, the
following error appears if you try to use the default database:
hive> USE default;
Error: Error while compiling statement: FAILED: HiveAccessControlException
Permission denied: user [hive] does not have [USE] privilege on [default]-
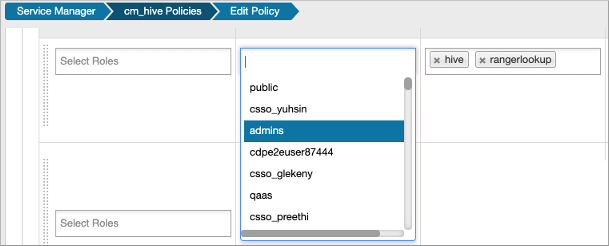
On the far right, click , and in Allow Conditions, edit
all - database, table,
                        column
.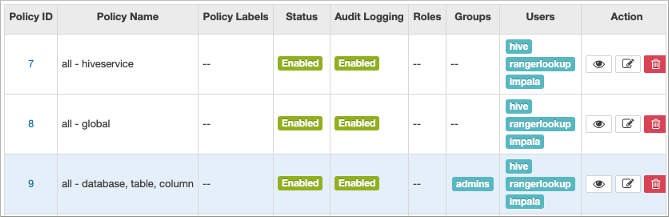
-
Add your user or group name to Hive policies to grant full access to
Hive.
For example, add the admins group name to the list of groups that can access Hive.
-
Check that the preloaded
default database tables columnsandinformation_schema databasepolicies are enabled for group public.
-
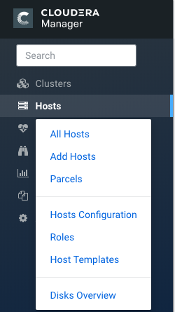
In Cloudera Manager, click .
-
Using the fully qualified domain name or IP address a node in your cluster from and looking through the list of roles to find
HS2 (Hive
                        on Tez HiveServer2)
. For example: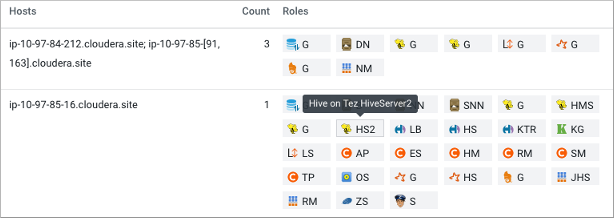 This node has the HiveServer role, so you can use the name or IP address in Beeline.