Creating a new Dynamic Configuration
In Cloudera Manager, using the YARN Queue Manager UI you can create new Dynamic Configurations that will be used by the Dynamic Queue Scheduling feature.
-
Configure Queues.
When configuring queues for the Dynamic Configuration, you can either change a queue's configuration or include its current values.
-
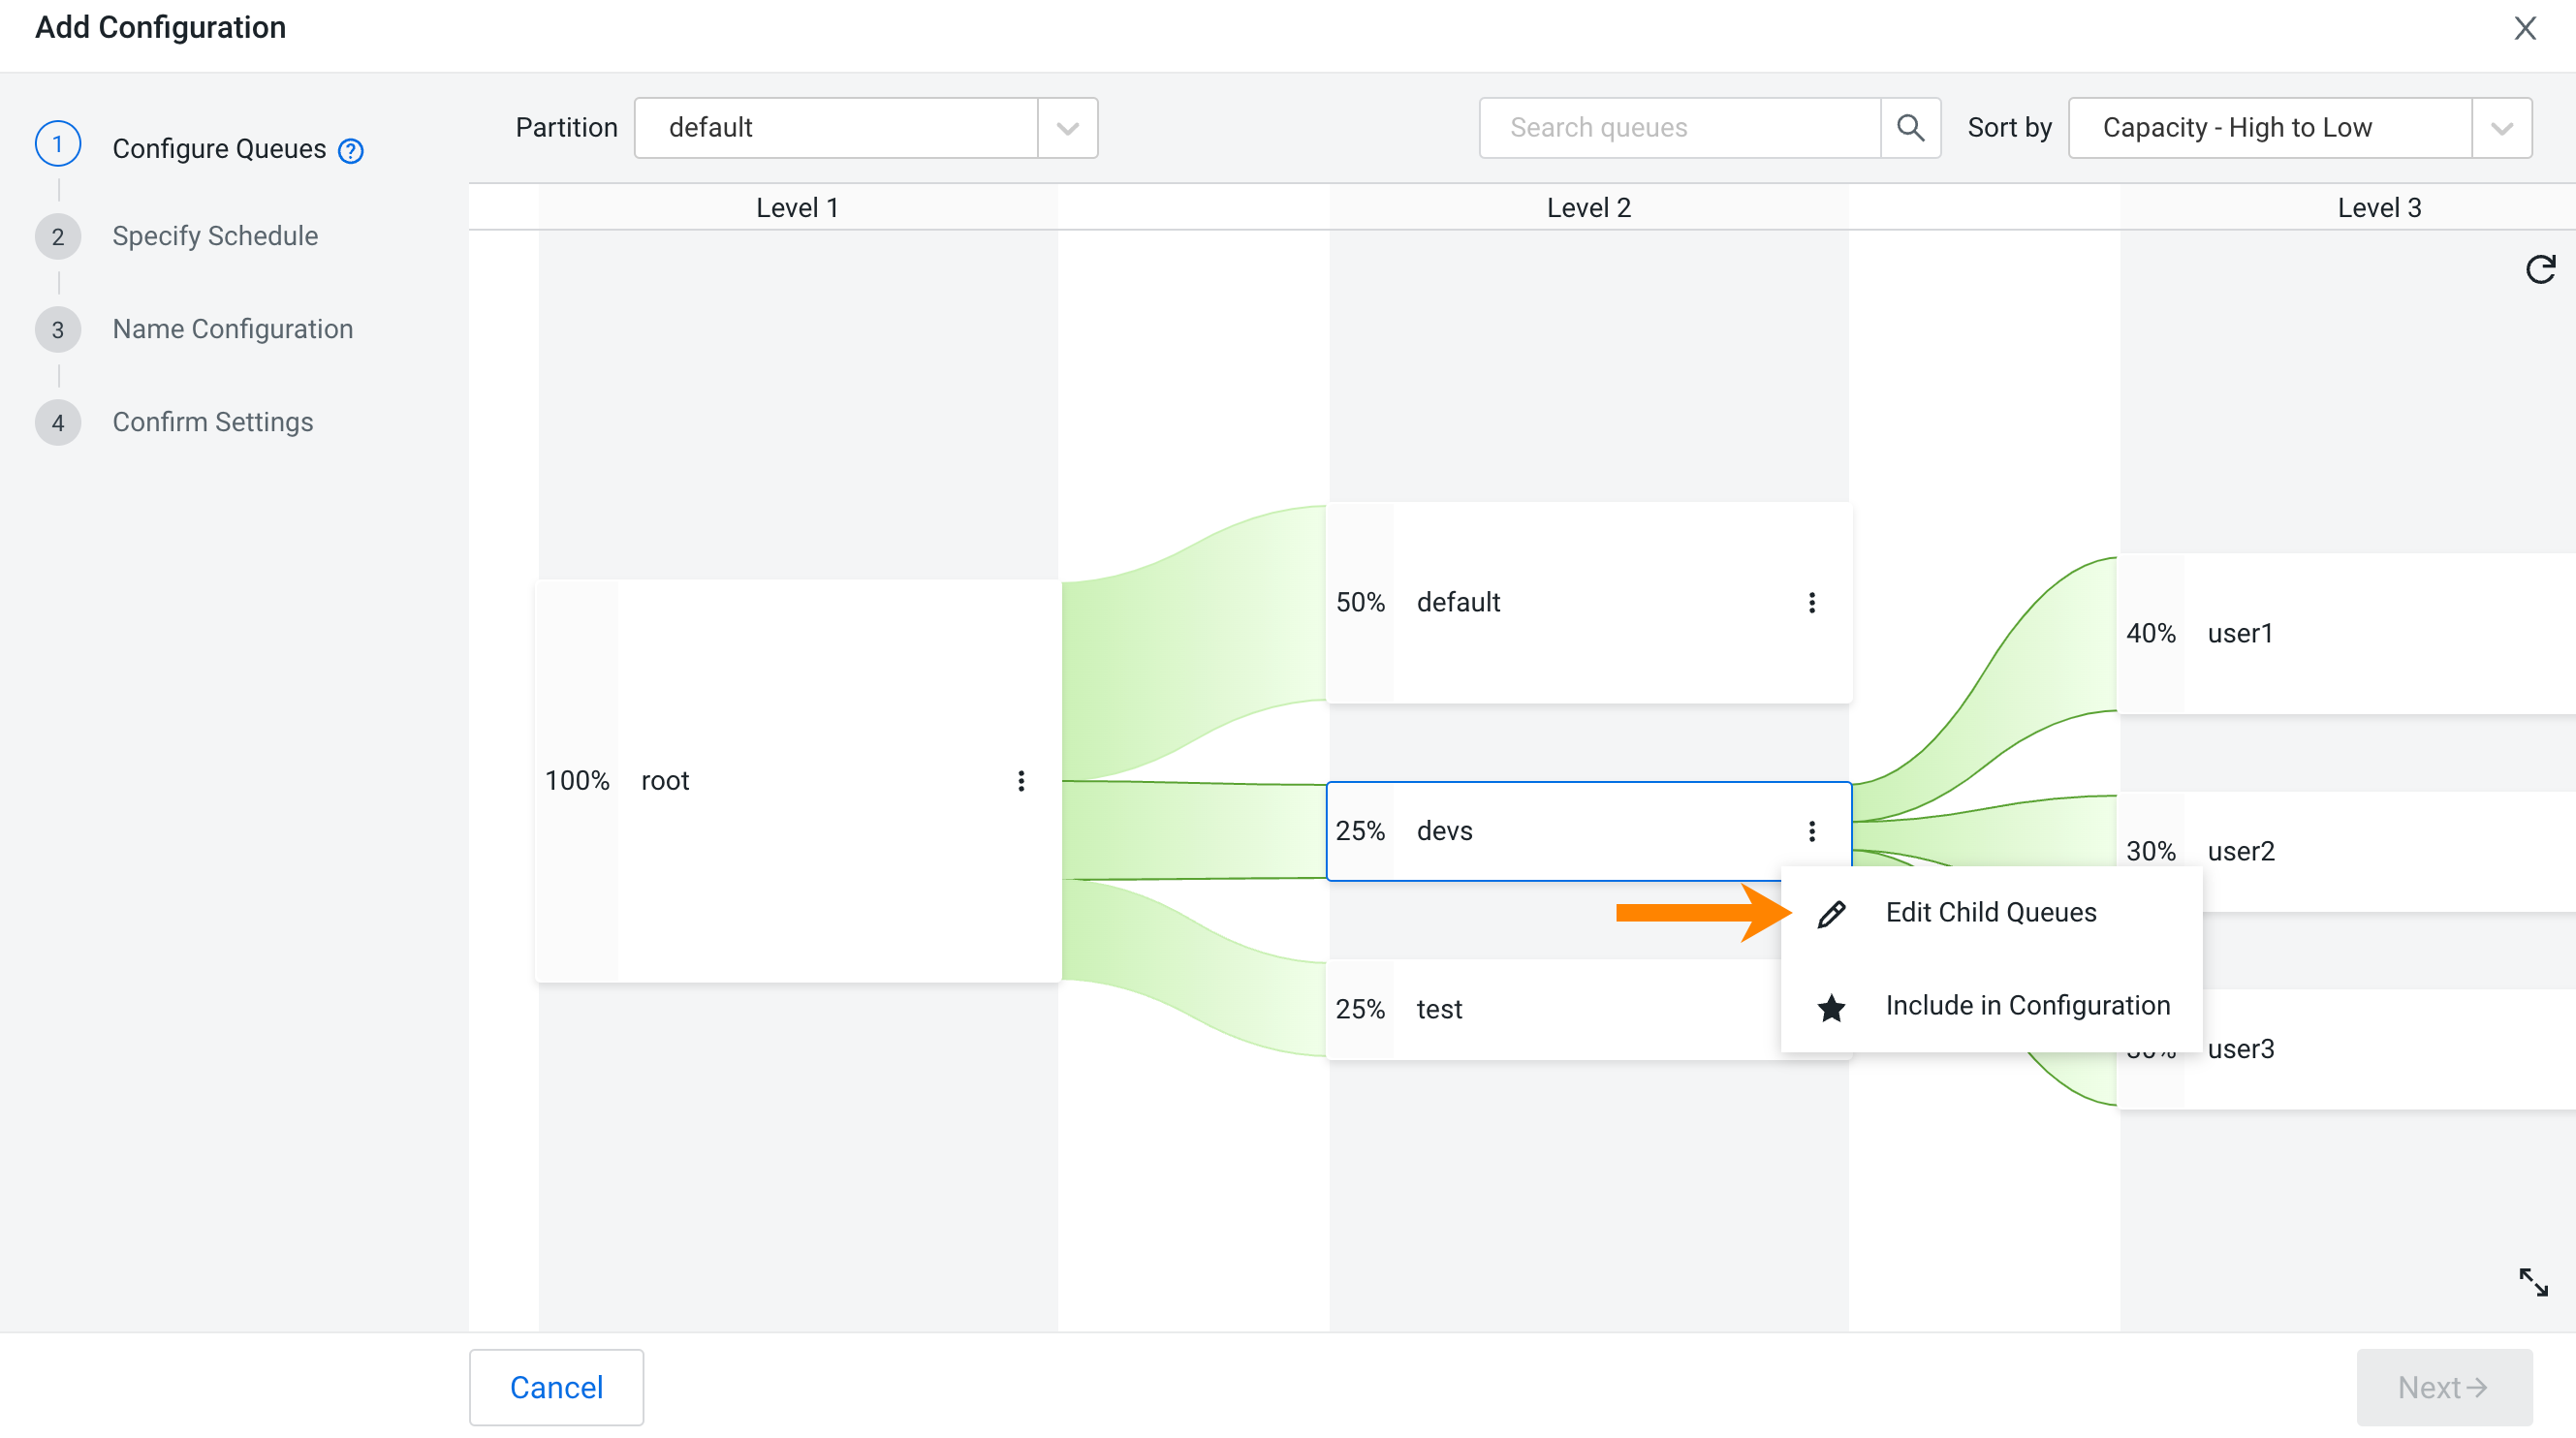
Changing queue configuration:
Edit child queues by clicking the three vertical dots next to the parent queue's name and select Edit Child Queue.
After you edit the child queues, they are included in the Dynamic Configuration which is indicated by a blue background. In relative resource allocation mode if one queue is included in the configuration at a certain level, all other queues on that level (siblings) are also included.
A blue asterisk next to the queue’s name indicates that you have changed the properties of that queue to create the Dynamic Configuration.
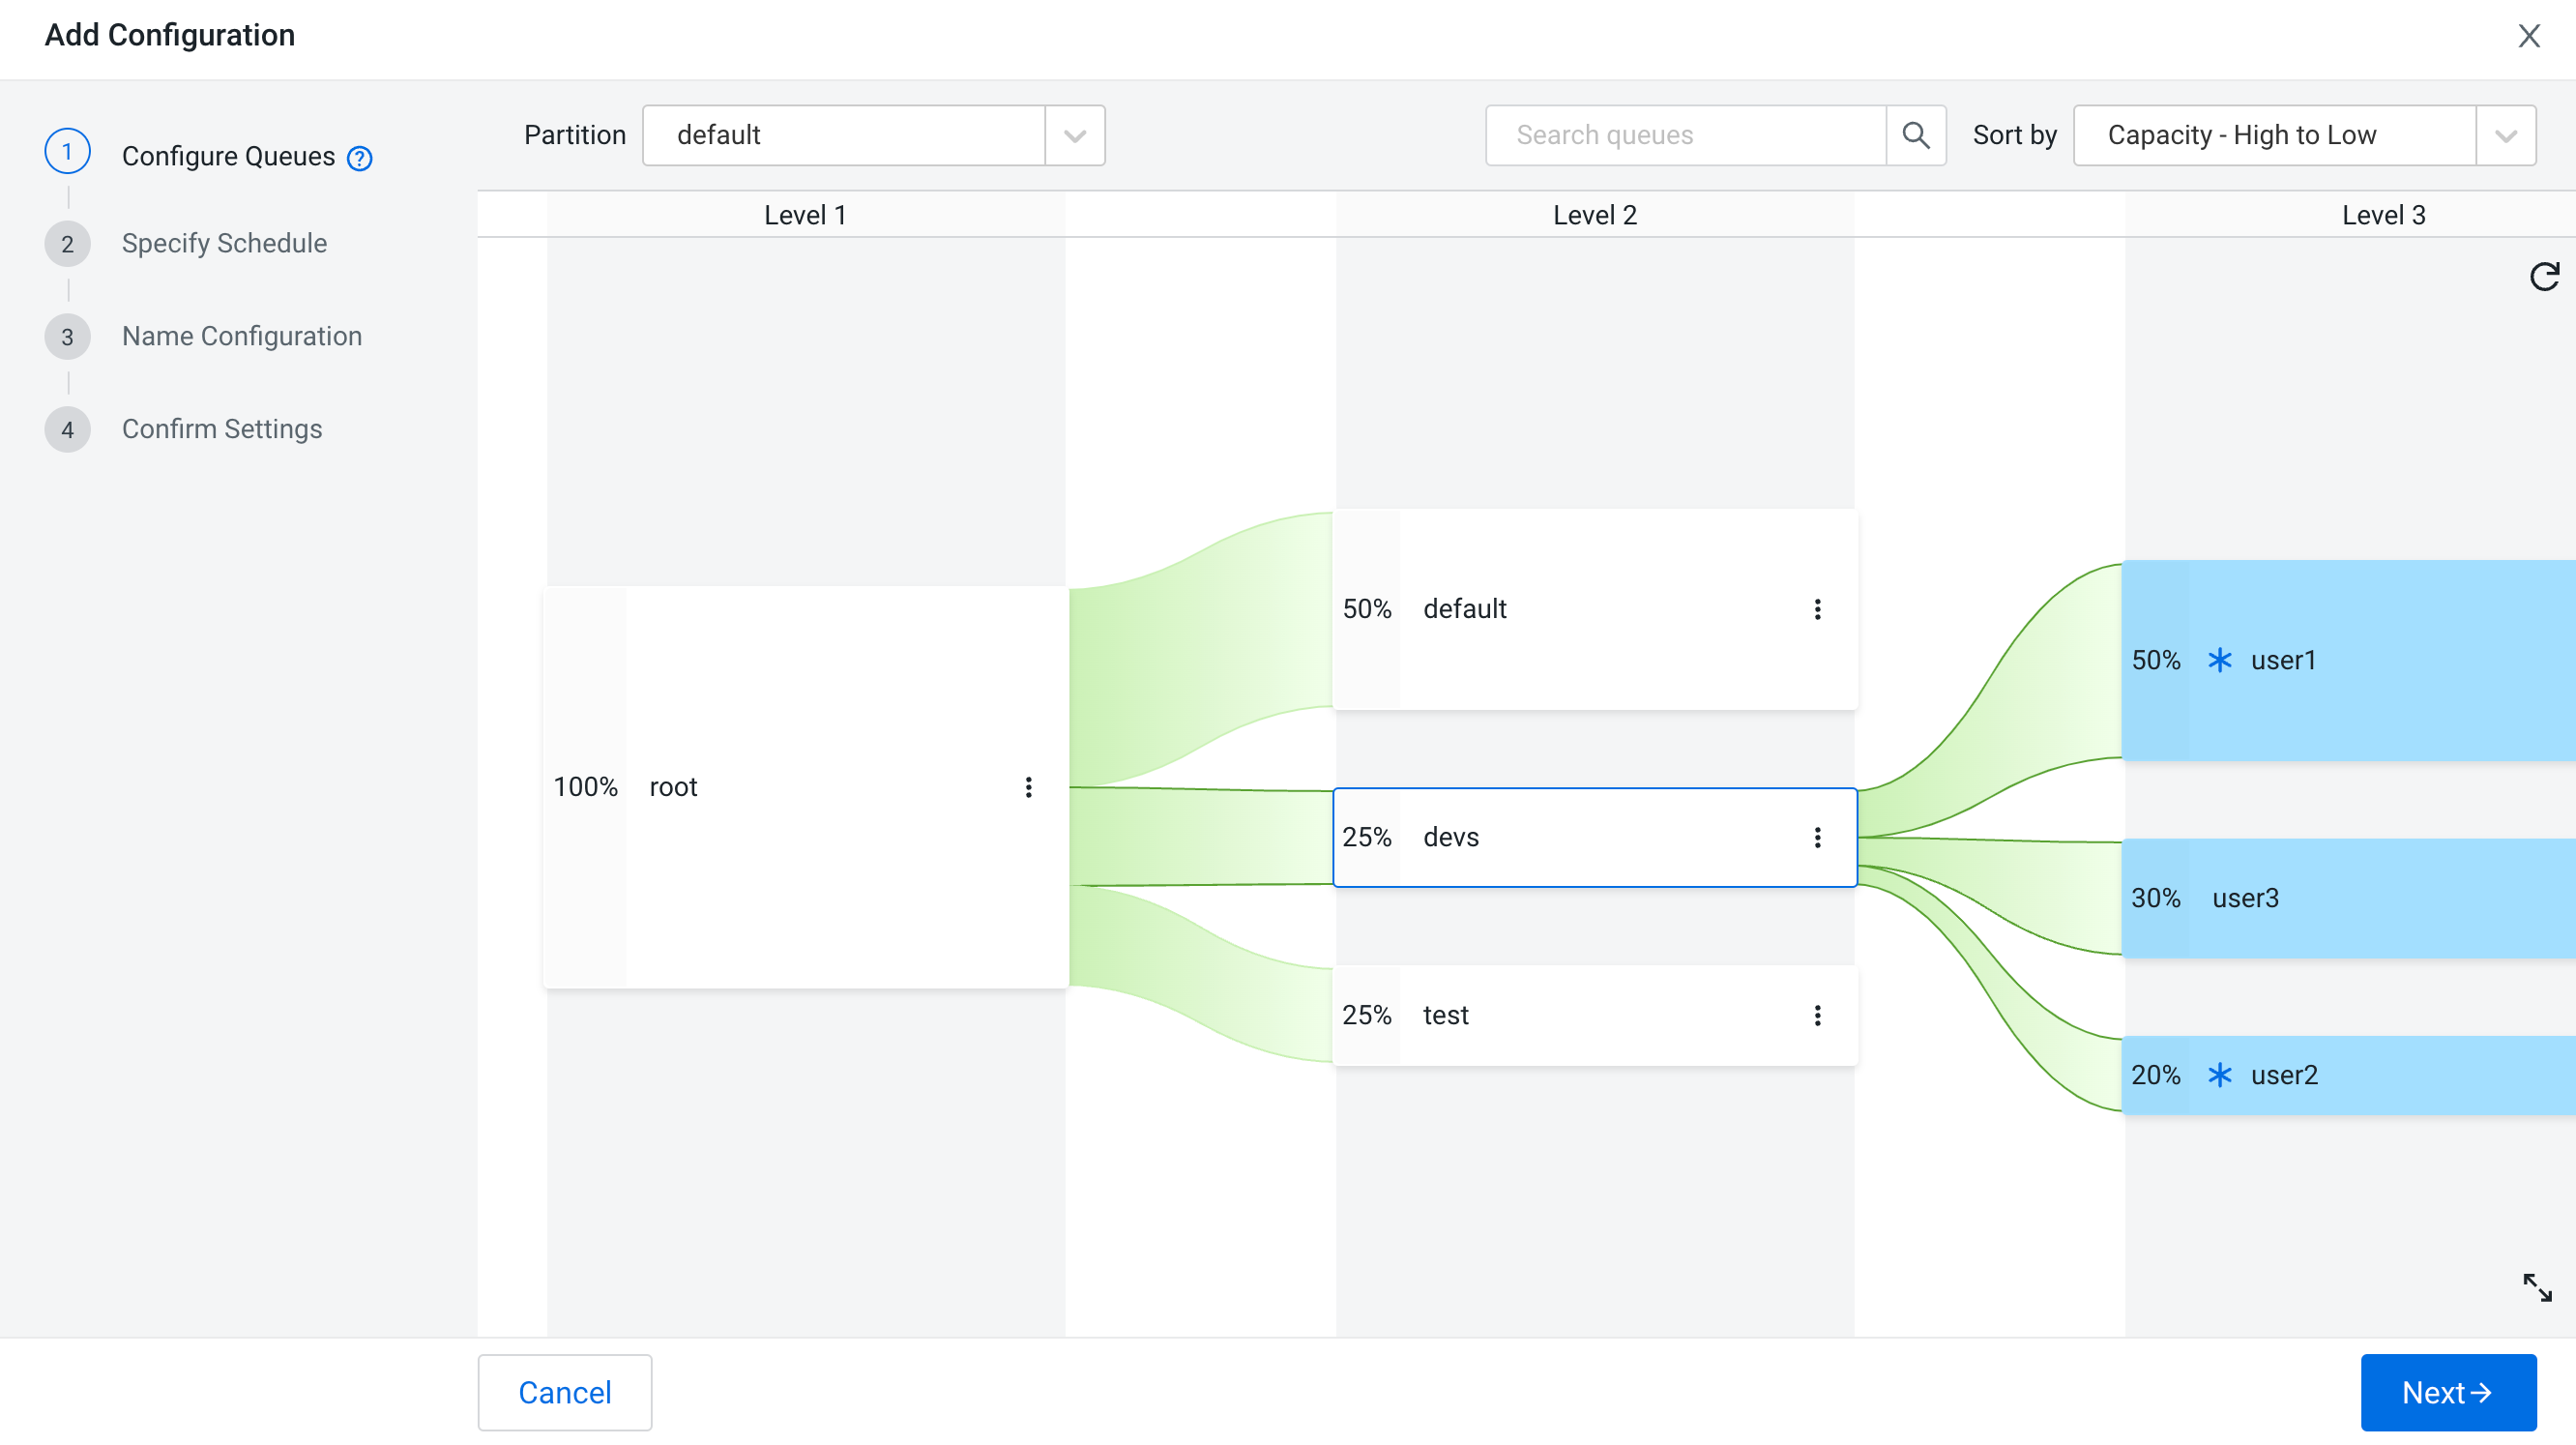
In this example the user1 and user2 queue’s capacity properties were changed from 40% to 50% and from 30% to 20% respectively. The user3 queue has the same setting as it had in the configuration that is the base of the Dynamic Configuration that is currently being created.
-
Including the current values in the dynamic configuration:
Click the three vertical dots next to the queue which you want to include in the configuration and click Include in Configuration.
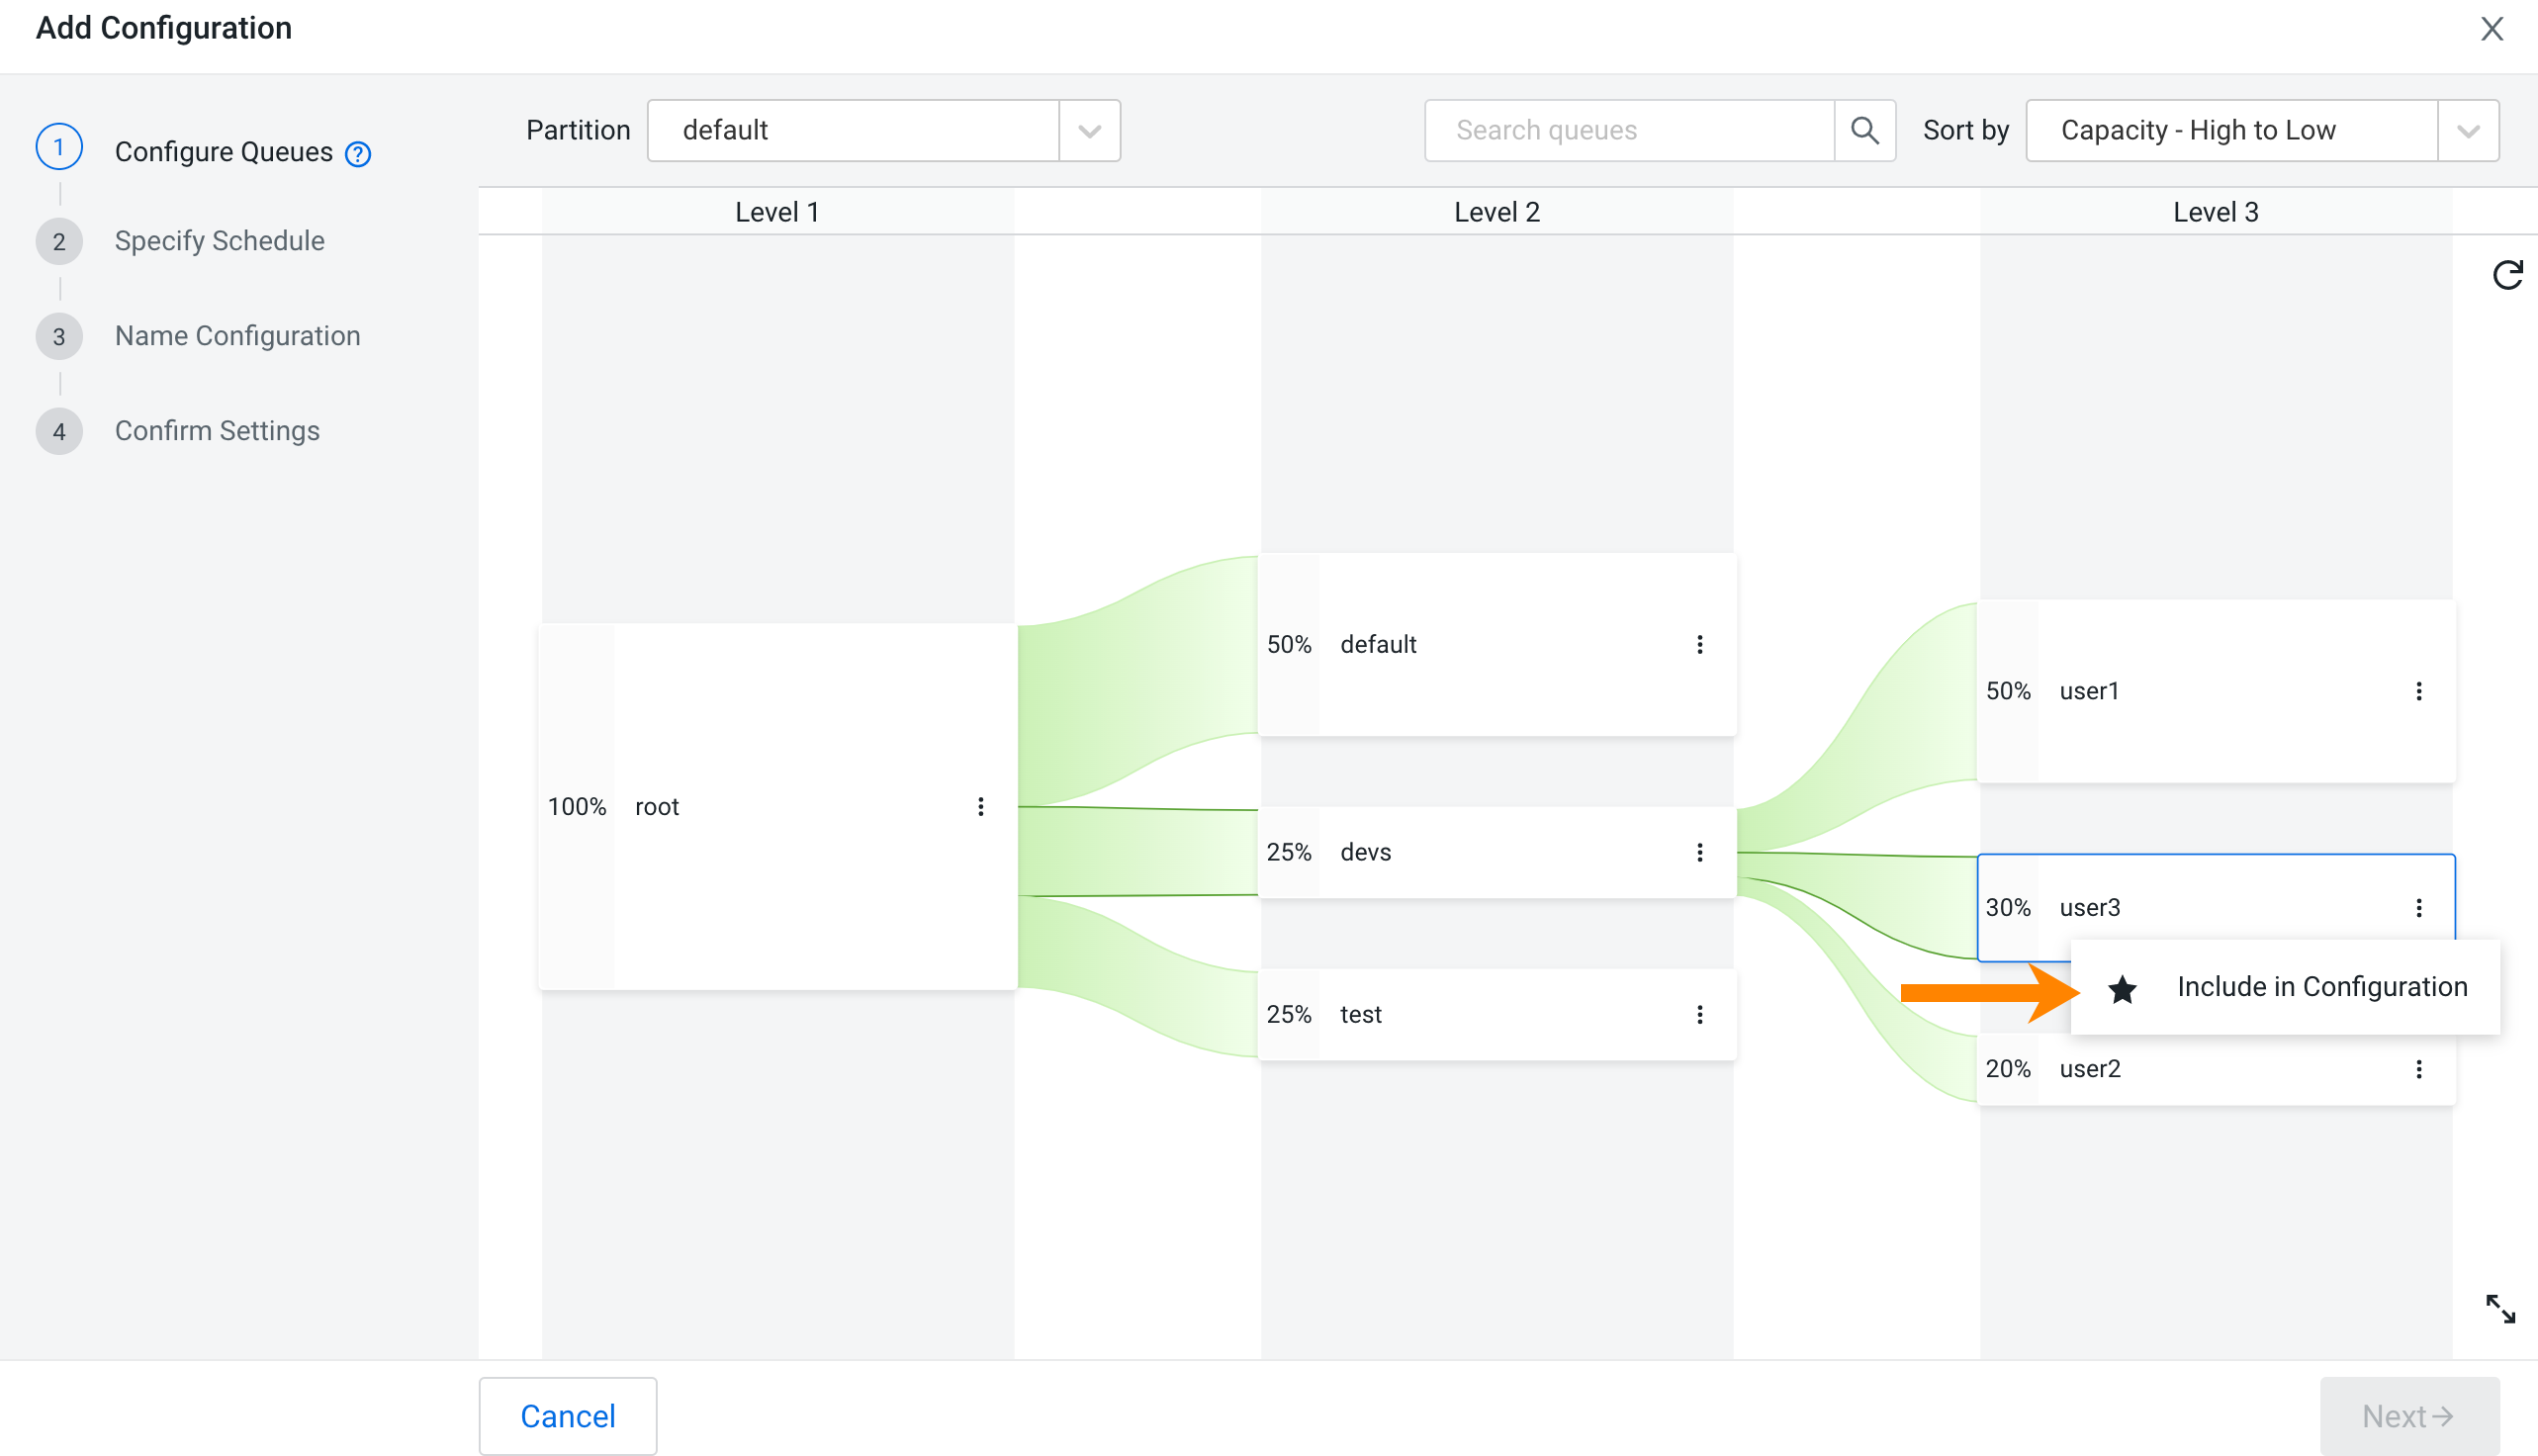
As a result, in relative resource allocation mode the selected queue and its sibling queues are included in the configuration with their current resource configuration. In absolute resource allocation mode, only the selected queue is added to the configuration.
As there was no change in the queue’s resource configuration, no asterisk was added next to the queue’s name.
-
Changing queue configuration:
-
Specify Schedule.
Set up a schedule to control how frequently the Dynamic Configuration is applied.
The time and frequency can be configured using the various options available on the page. Once an option is selected a note appears on the top of the window that tells you the exact time and frequency when the schedule is applied.
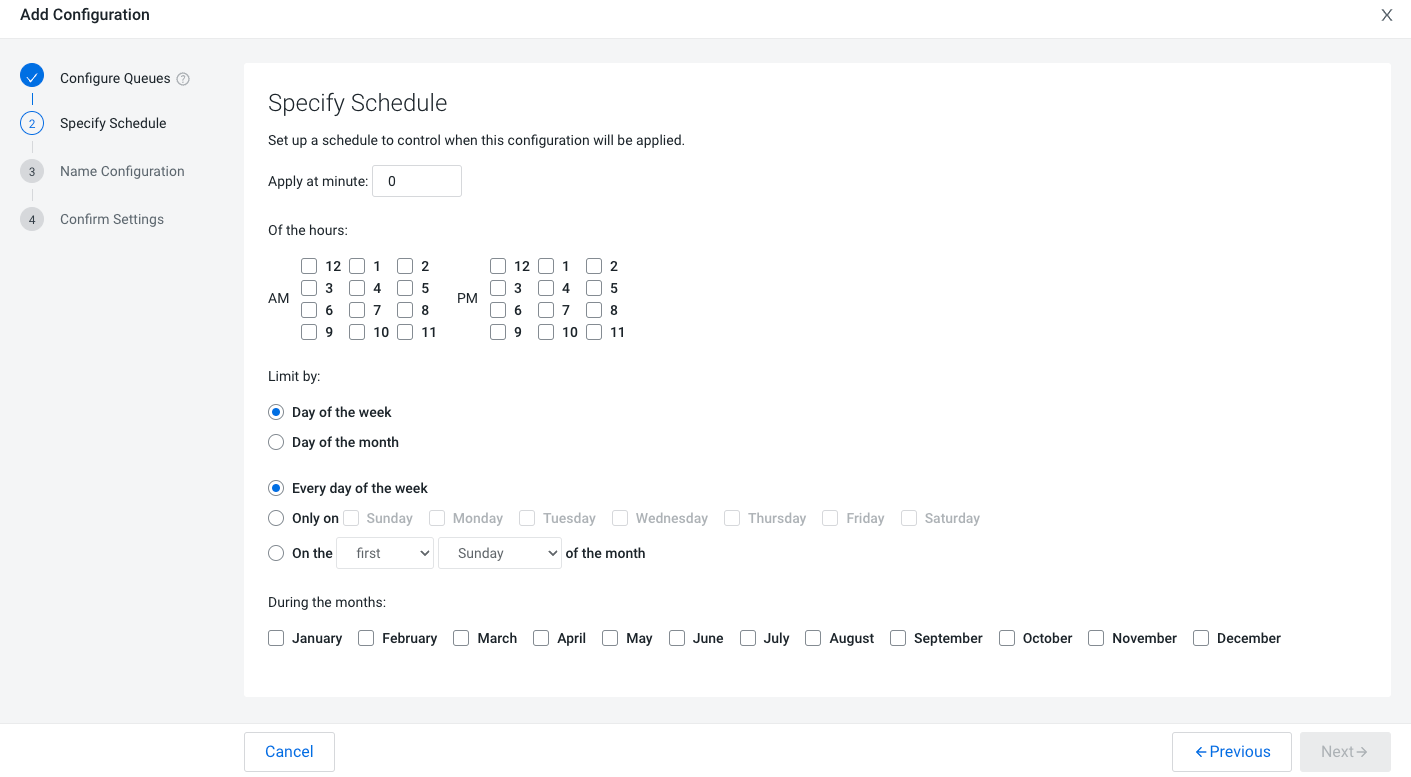
Using the Apply at minute: and Of the hours: options, you can set the exact time when a configuration should be applied. The Of the hours: section allows multiple values to be selected simultaneously. The Apply at minute: option however only accepts a single value. This means that while you can specify a schedule to apply at 6:00 AM and at 8:00 AM, you can't specify a schedule to apply for example at 6:00 AM and 8:15 AM. If you use the default 0 value for the Apply at minute: option, and you do not select any hours, then the configuration will be applied at every hour.
You can configure the schedule on a weekly or a monthly basis, by selecting either Limit by: Day of the week or Limit by: Day of the month.
If you select Day of the week, you can choose from the following options:
- Every day of the week
- Only on: The configuration is applied on selected day or days of the week.
- On the [***FIRST-LAST***] [***MON-SUN****] of the month: The configuration is applied on the selected day.
If you select Day of the month, you can choose from the following options:
- Every day of the month
- Every # days starting on day # of the month: The configuration is applied on the specified days based on the configured starting day and frequency.
- On day(s): The configuration is applied on the specified days. This option accepts integers 1-31. You can specify a single integer to select a single day, specify a range to select multiple days, or you can also add a combination of the two. For example, 1-5, 8, 11-13.
- # day before the last day of the month
- On the weekday nearest day # of the month
- On the last weekday of the month
In addition, you can specify month or months when the schedule is applied. If you do not specify any month, the schedule is applied in every month.
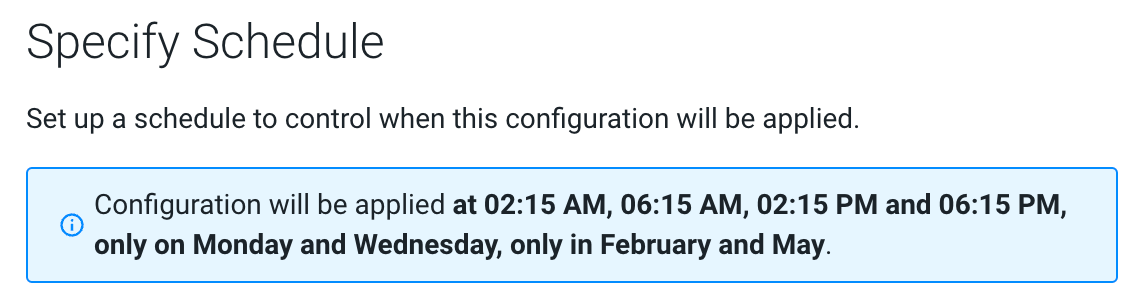
Consider the following example:- Apply at minute: 15
- Of the hours: AM 2, 6 and PM 2, 6
- Limit by: Day of the week
- Only on: Monday, Wednesday
- During the months: February, March
Then the configuration will be applied at 02:15 AM, 06:15 AM, 02:15 PM and 06:15 PM, only on Monday and Wednesday, only in February and May. The UI will display the schedule: