Impala client packages
Learn about how to install the Impala shell, a command-line interface for running SQL queries, and the necessary development files for building custom C++ User-Defined Functions (UDFs).
Installing the Impala Shell Client
The Impala shell is available as a client package for various operating systems, such as RPMs for Red Hat/CentOS/SUSE and DEBs for Ubuntu. It can be installed using native package managers and supports multiple connection scenarios, including various security protocols.
Prerequisites: You must ensure that the official repository for your operating system is properly configured on your target host.
- Install the RPM.
- For Red Hat / CentOS
7:
sudo yum install impala-shell-client - For Red Hat
9:
sudo dnf install impala-shell-client - For SUSE 12 / SUSE
15:
sudo zypper install impala-shell-client - For Ubuntu 20 / Ubuntu
22:
sudo apt-get update
sudo apt-get install impala-shell-client
- For Red Hat / CentOS
7:
- Verify the
installation:
which impala-shellimpala-shell --version - Connect to an Impala Coordinator.
- If the client node is within the cluster:
- Find the connection string example from the Status tab on
your Impala cluster page within Cloudera Manager.
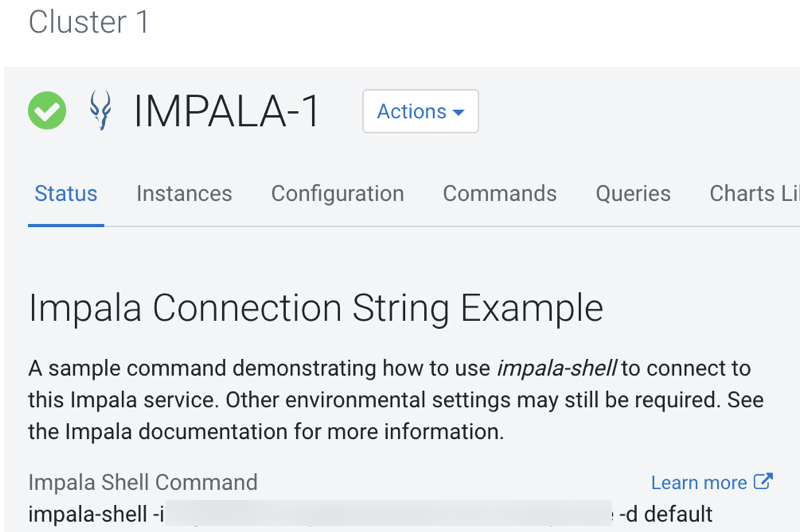
- Run the shell command on the client node, replacing
<impala-coordinator-host>with your coordinator's hostname:impala-shell -i <impala-coordinator-host> -d defaultResult:Starting Impala Shell with no authentication using Python <python-version> Opened TCP connection to <impala-coordinator-host>:21050 Connected to <impala-coordinator-host>:21050 Server version: impalad version <build-version> Query: use `default` *********************************************************************************** Welcome to the Impala shell. ... You can run a single query from the command line using the '-q' option. *********************************************************************************** Query: use `default` [<impala-coordinator-host>:21050] default> - If Kerberos is enabled, ensure a valid Kerberos ticket has been obtained for the Impala user on the client node. For more, see Enabling Kerberos Authentication for CDP.
- If SSL is enabled, ensure that the CA certificate file exists at the configured path on the client node.
- Find the connection string example from the Status tab on
your Impala cluster page within Cloudera Manager.
- If the client node is outside the cluster:
- Without SSL and Kerberos:If the Impala cluster does not use SSL or kerberos, you can connect directly with a simple command:
impala-shell -i <impala-coordinator-host> -d default - With SSL and Kerberos:
If SSL and kerberos are enabled, direct access to Impala from outside the Cloudera Manager cluster may not be possible due to security restrictions.
- Using Knox as a gateway (if enabled):If Knox is available, you can connect through Knox + LDAP authentication using the following command:
This approach uses HS2 HTTP protocol through Knox gateway, with LDAP credentials and SSL encryption.impala-shell -i <impala-coordinator-host>:8443 \ --protocol=hs2-http \ --ssl \ -l -u <username> \ --ldap_password_cmd='echo -n <password>' \ --http_path=gateway/cdp-proxy-api/impala
- Without SSL and Kerberos:
- If the client node is within the cluster:
Installing the Impala UDF Development Client
To develop Impala User-Defined Functions (UDFs) in C++, you need to install the Impala development headers and library files. The following steps guide you through downloading, installing, and verifying these files on your target host.
Prerequisites: You must ensure that the official repository for your operating system is properly configured on your target host.
- Install the downloaded package.
- For Red Hat / CentOS
7
sudo yum install impala-udf-devel-client - For Red Hat
9
sudo dnf install impala-udf-devel-client - For SUSE 12 / SUSE
15
sudo zypper install impala-udf-devel-client - For Ubuntu 20 / Ubuntu
22
sudo apt-get update
sudo apt-get install impala-udf-dev-client
- For Red Hat / CentOS
7
- Verify the installation by checking for the presence of UDF headers and library
files.
ls /usr/include/impala_udf/udf.h ls /usr/lib64/libImpalaUdf* # Or, on some systems: ls /usr/lib/libImpalaUdf*Result: The Impala UDF development headers (/usr/include/impala_udf/udf.h) and library files (/usr/lib64/libImpalaUdf*) are successfully installed.
To learn how to use these headers and libraries to develop Impala UDFs in C++, see User-defined functions (UDFs)