Ranger administrator users can create a Security Zone using the Ranger
Admin Web UI.
In Ranger Admin Web UI > Service Manager, click Security Zone.
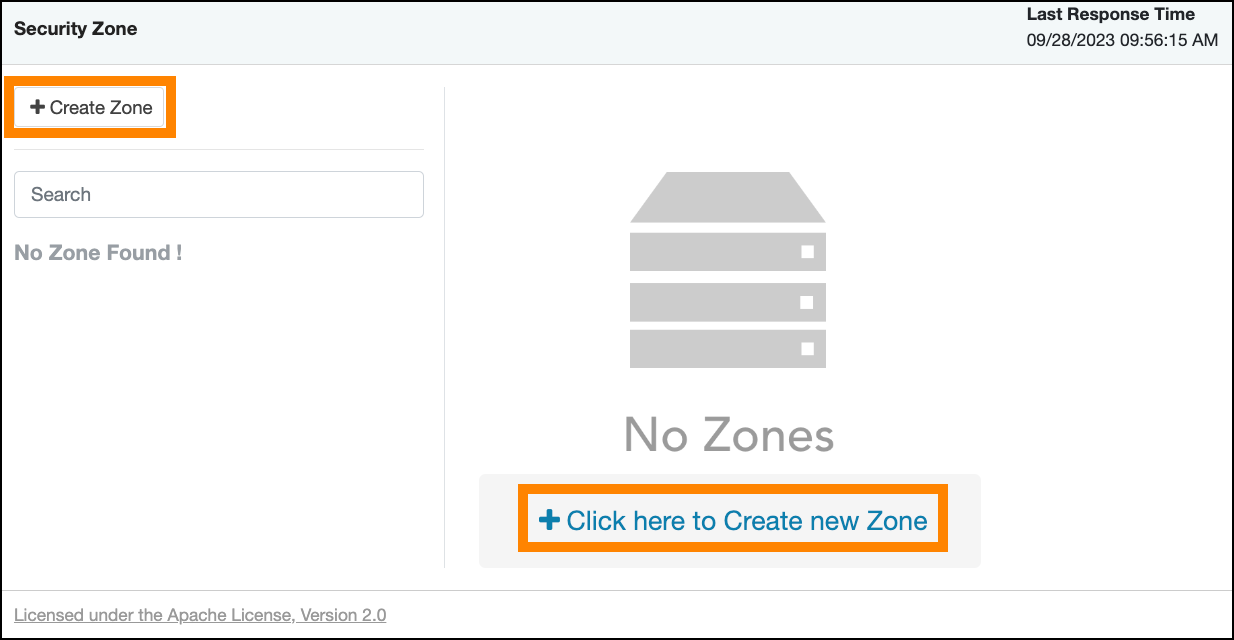
Security Zone displays existing security zones. If no zone
exists, two options for creating a new zone display.
On Security Zone, click + Create (new)
Zone.
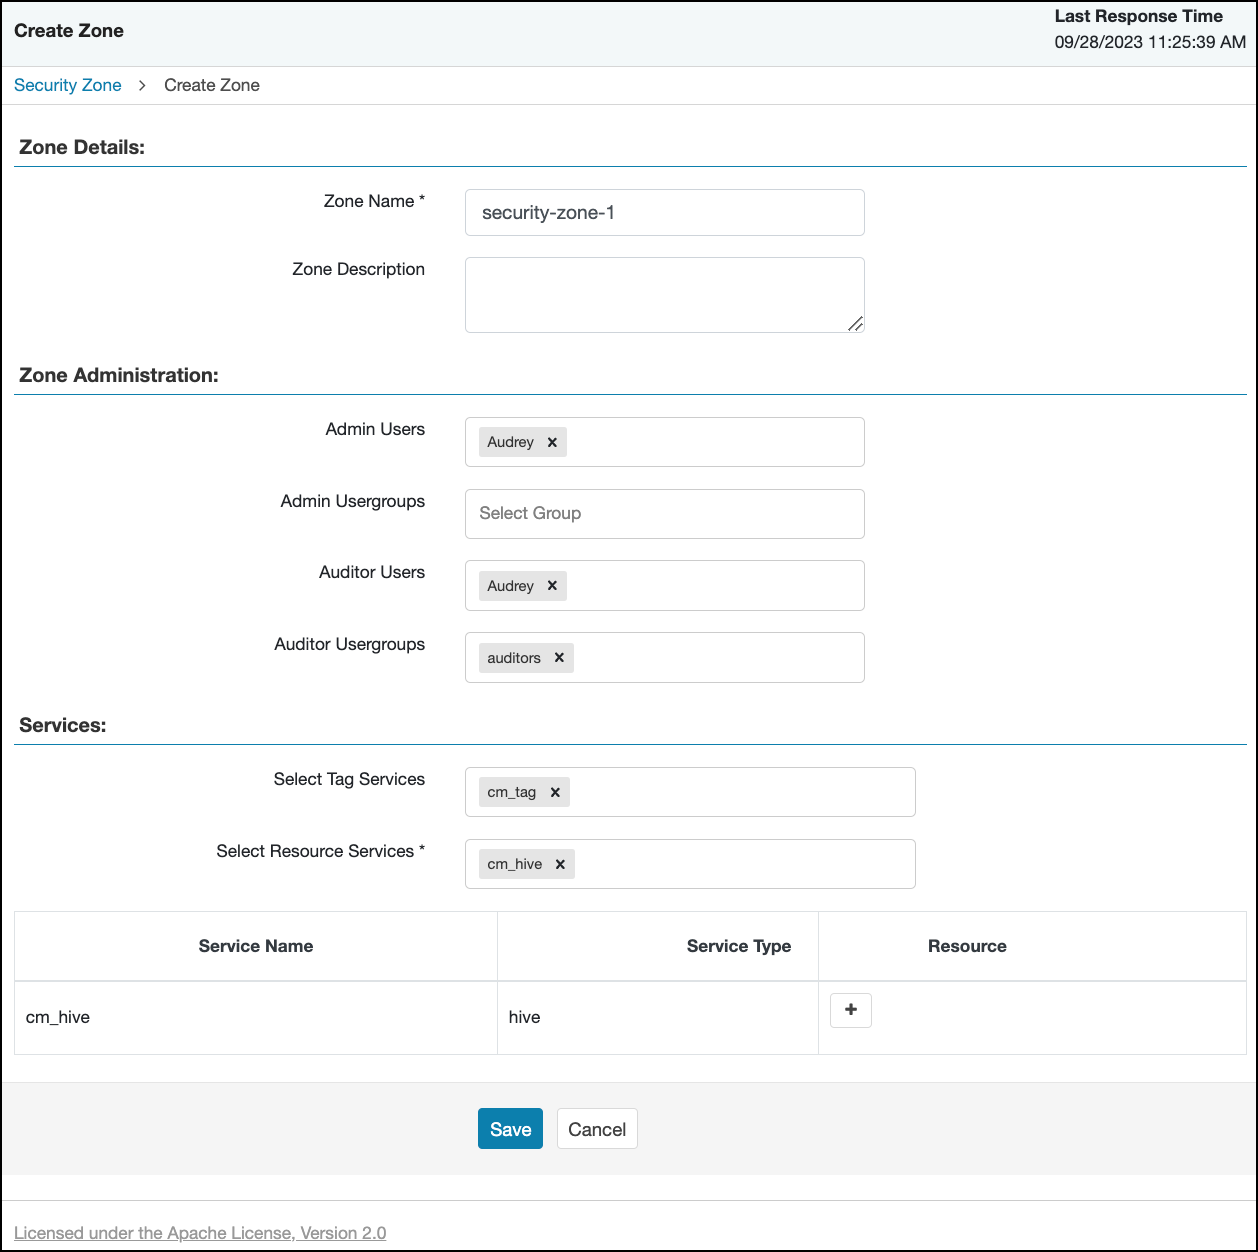
Create Zonedisplays options for creating a new security
zone.
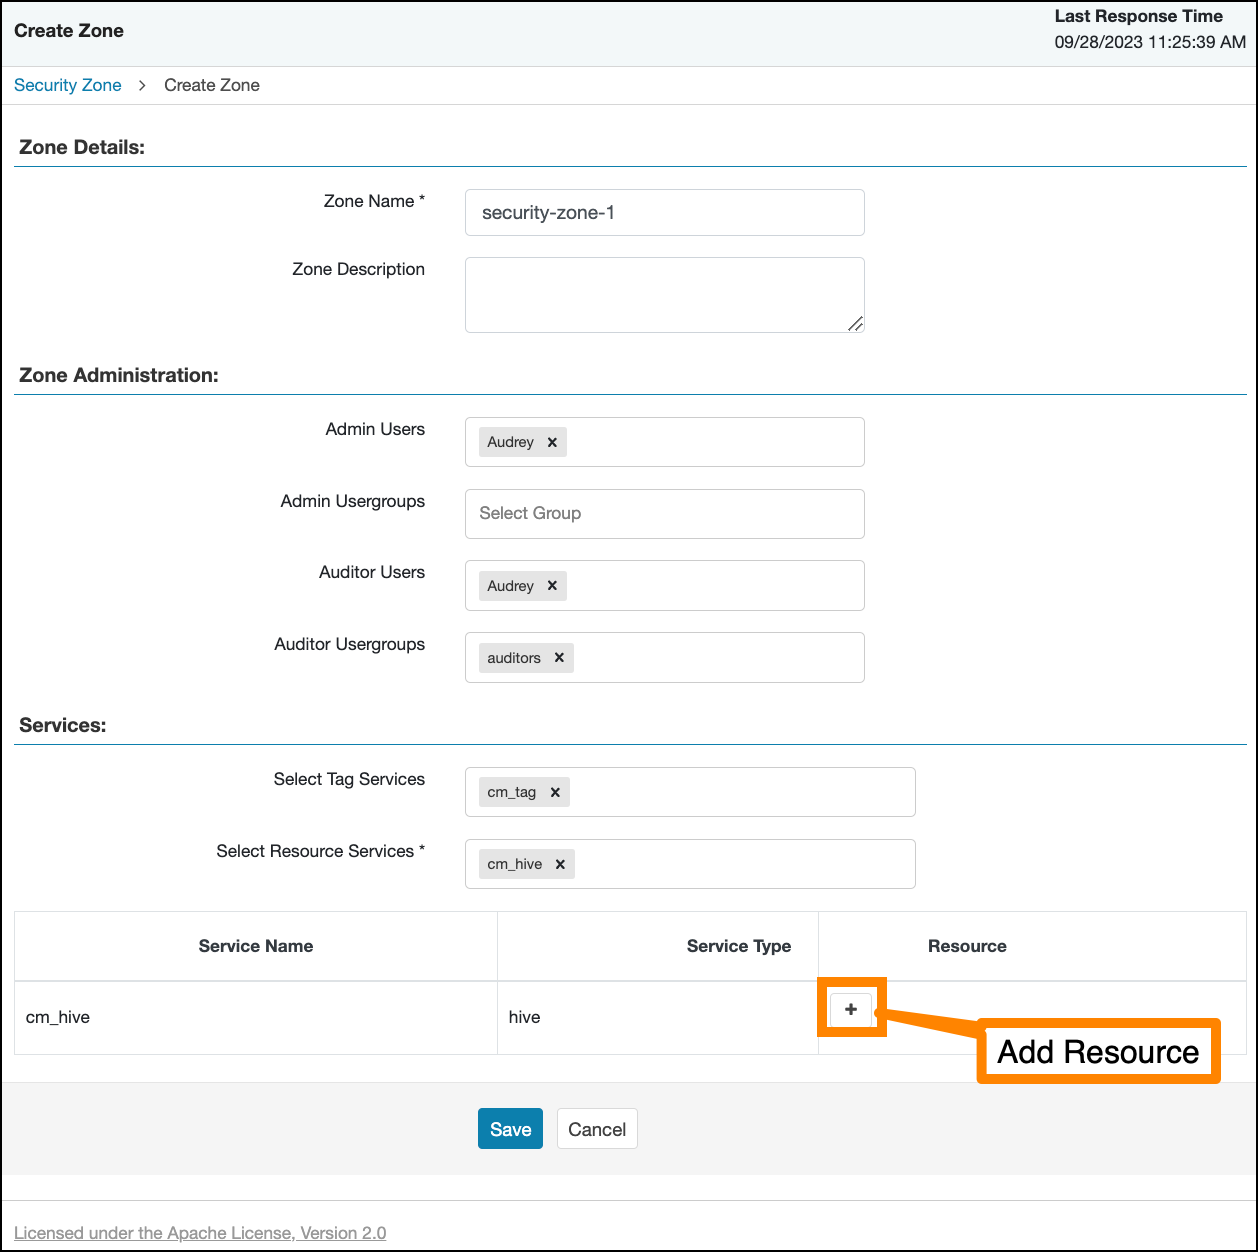
On Create Zone, enter the following information:
Table 1. Zone Details
Field
Description
Zone Name
The security zone name.
Zone Description
An optional description.
Table 2. Zone Administration
Field
Description
Admin Users
The Admin users for the security zone.
Admin Usergroups
The Admin user groups for the security zone.
Auditor Users
The Auditor users for the security zone.
Auditor Usergroups
The Auditor user groups for the security zone.
Table 3. Services
Label
Description
Select Tag Services
Select tag-based services for the security zone.
Select Resource Services
Select resource-based services for the security zone.
Selected services are listed in Services. To add resources
for each selected service, click + in the
Resource column for the applicable service.
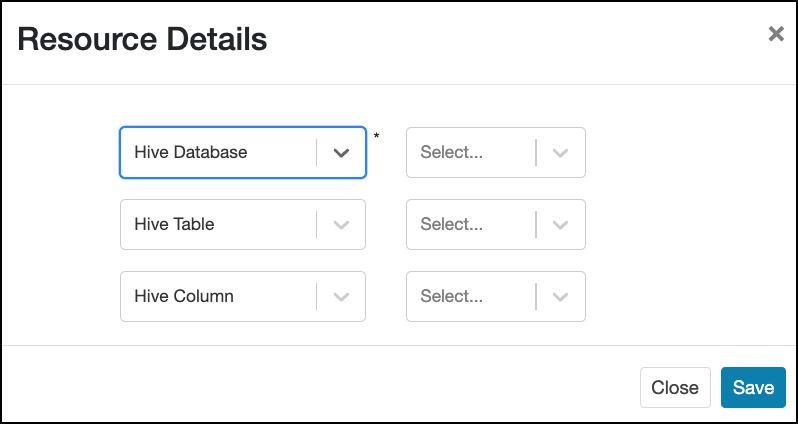
Use Resource Details to specify resources for the service,
then click Save.
Selected resources appear as Resources for each
Service in Create Zone.
Click Save at the bottom of Create
Zone to save the new security zone.
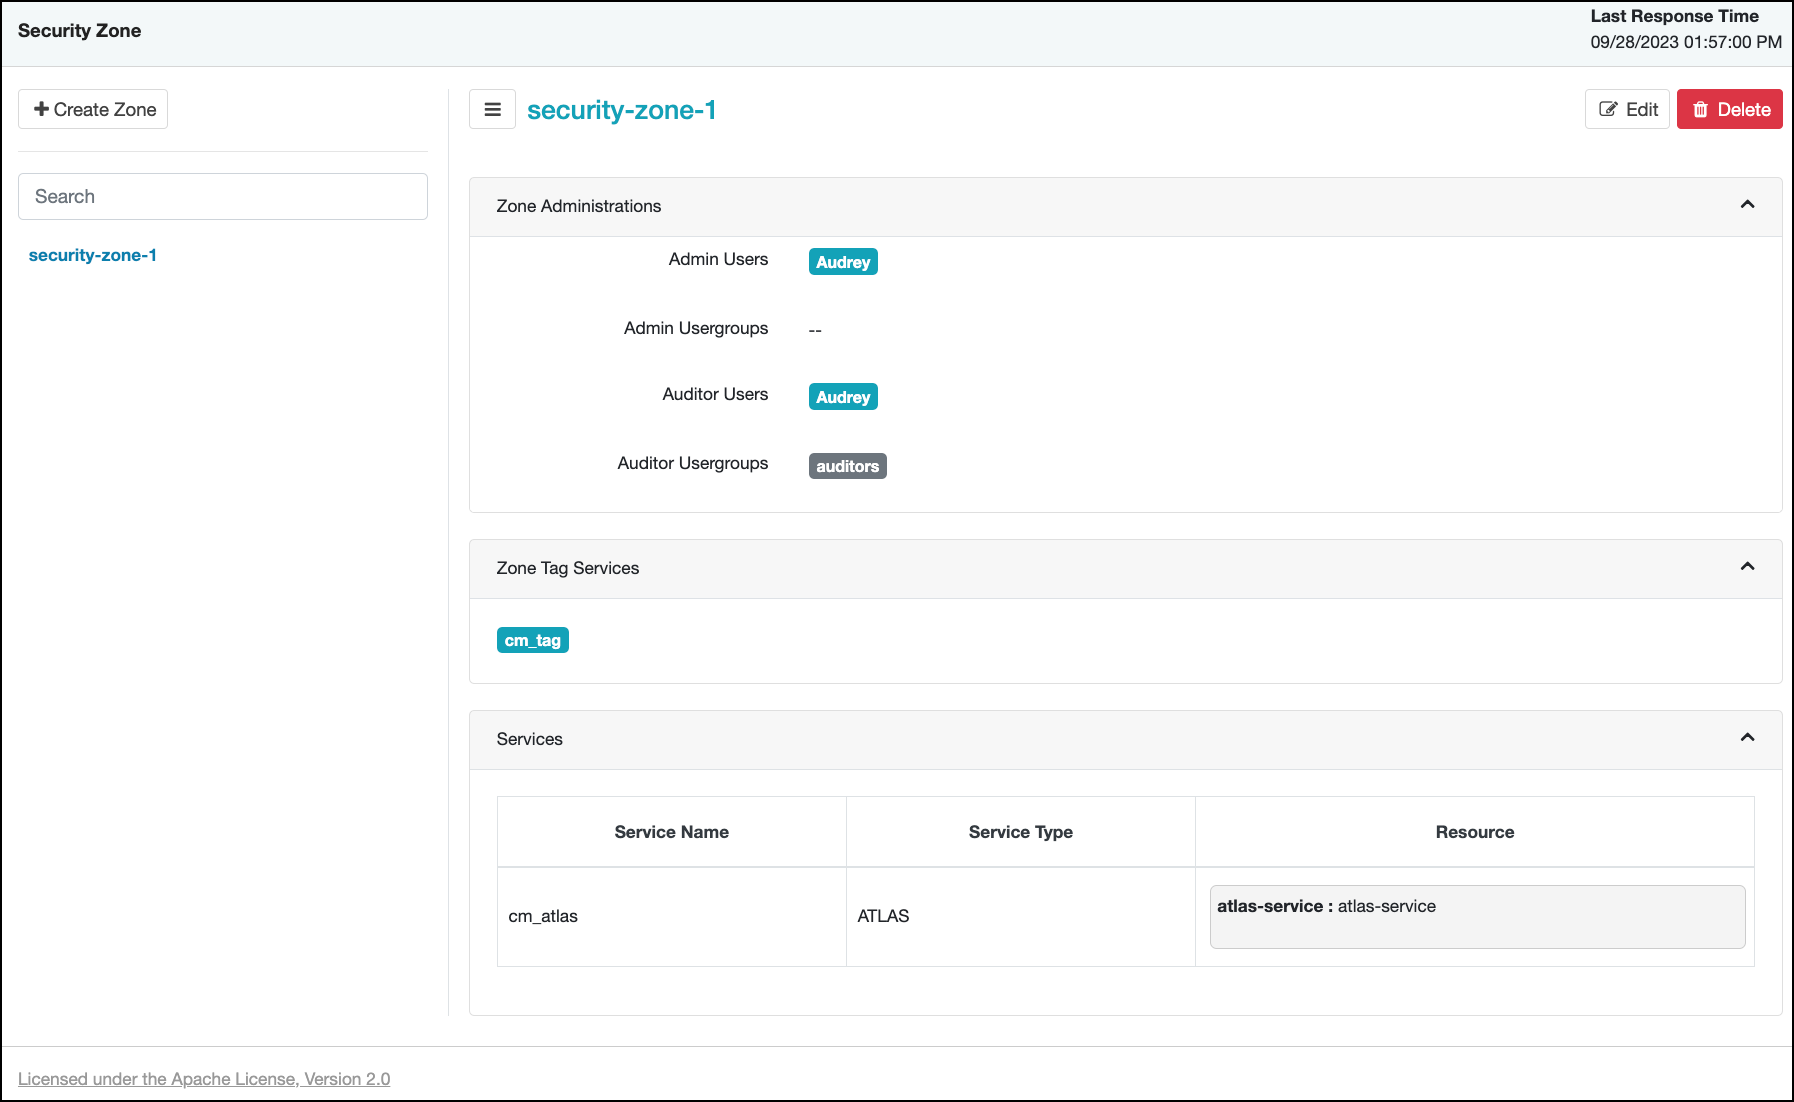
The new security zone is listed on the Security Zone page.
To edit a security zone, click the security zone name in the Security Zones list,
then click Edit.
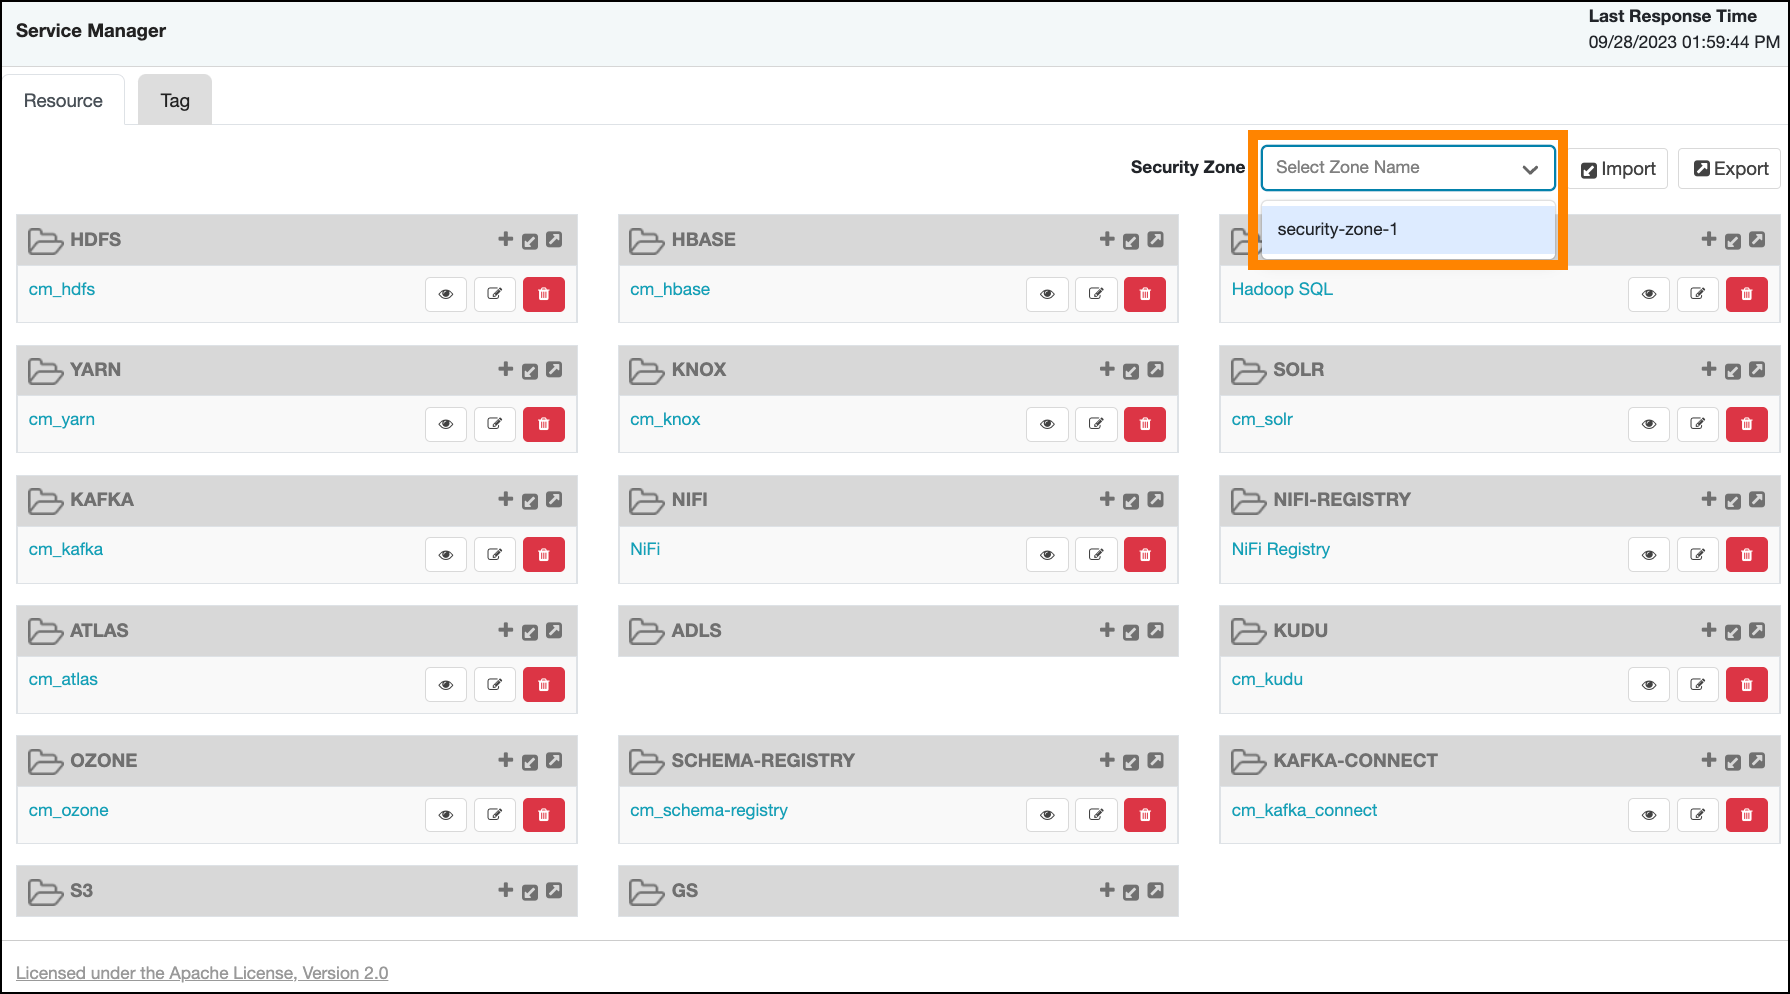
After security zones have been created, you can use the Security Zone selection box
on the Service Manager page to display the services assigned to the selected security
zone. A Zone Name column appears in the table on Audit > Access, and also in Service Manager > Reports.
 Selected resources appear as Resources for each Service in Create Zone.