Integrating Ranger KMS DB with SafeNet Keysecure HSM
How to integrate Ranger KMS DB with SafeNet Keysecure HSM.
This task describes how to integrate Ranger KMS DB with Safenet Keysecure Hardware Security Module (HSM). This process includes setting up the SafeNet KeySecure Management Console, and configuring Ranger KMS to communicate with the Keysecure instance.
Creating the user on SafeNet keysecure
-
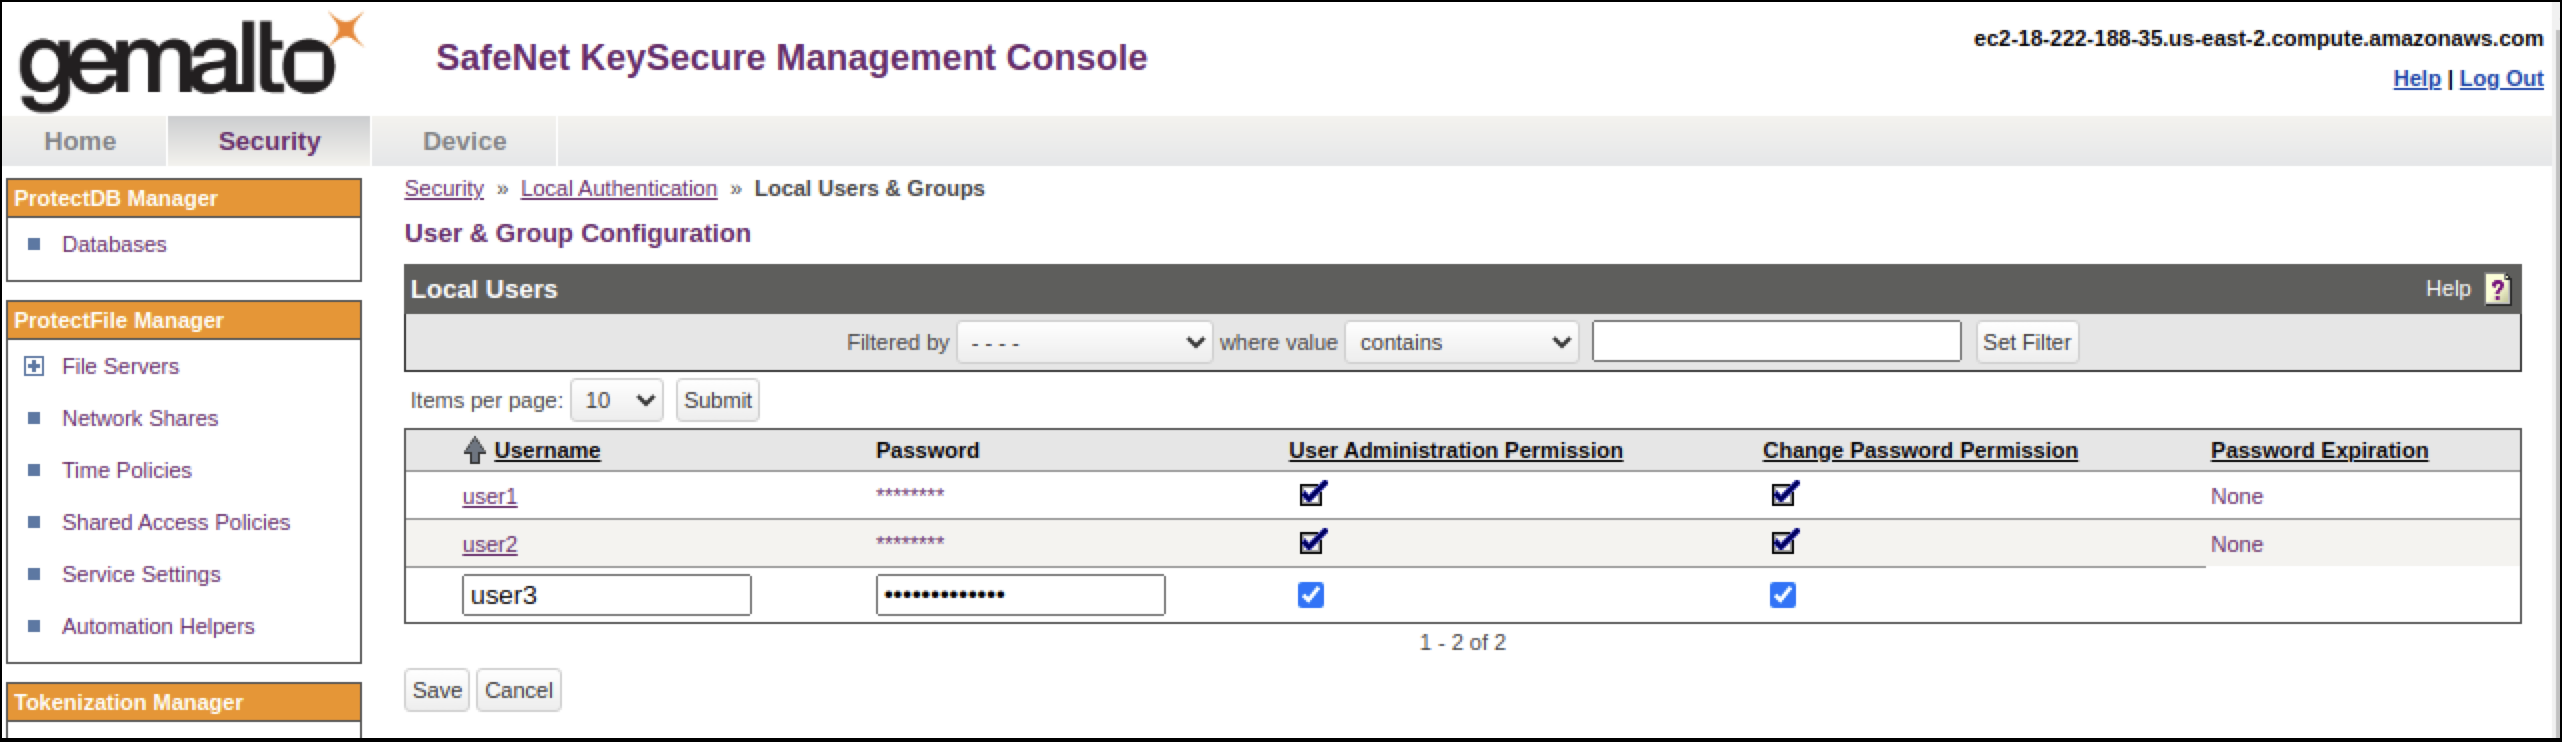
Log in to keysecure as an user with admin privileges.
- Go to the Security tab.
- Go to the Users & Groups section.
- Click Local Authentication, and click Add to add a new user.
- Check both ‘User Administration Permission’ and ‘Change Password Permission’ when adding the new user.
- Save changes.
Creating device on SafeNet KeySecure
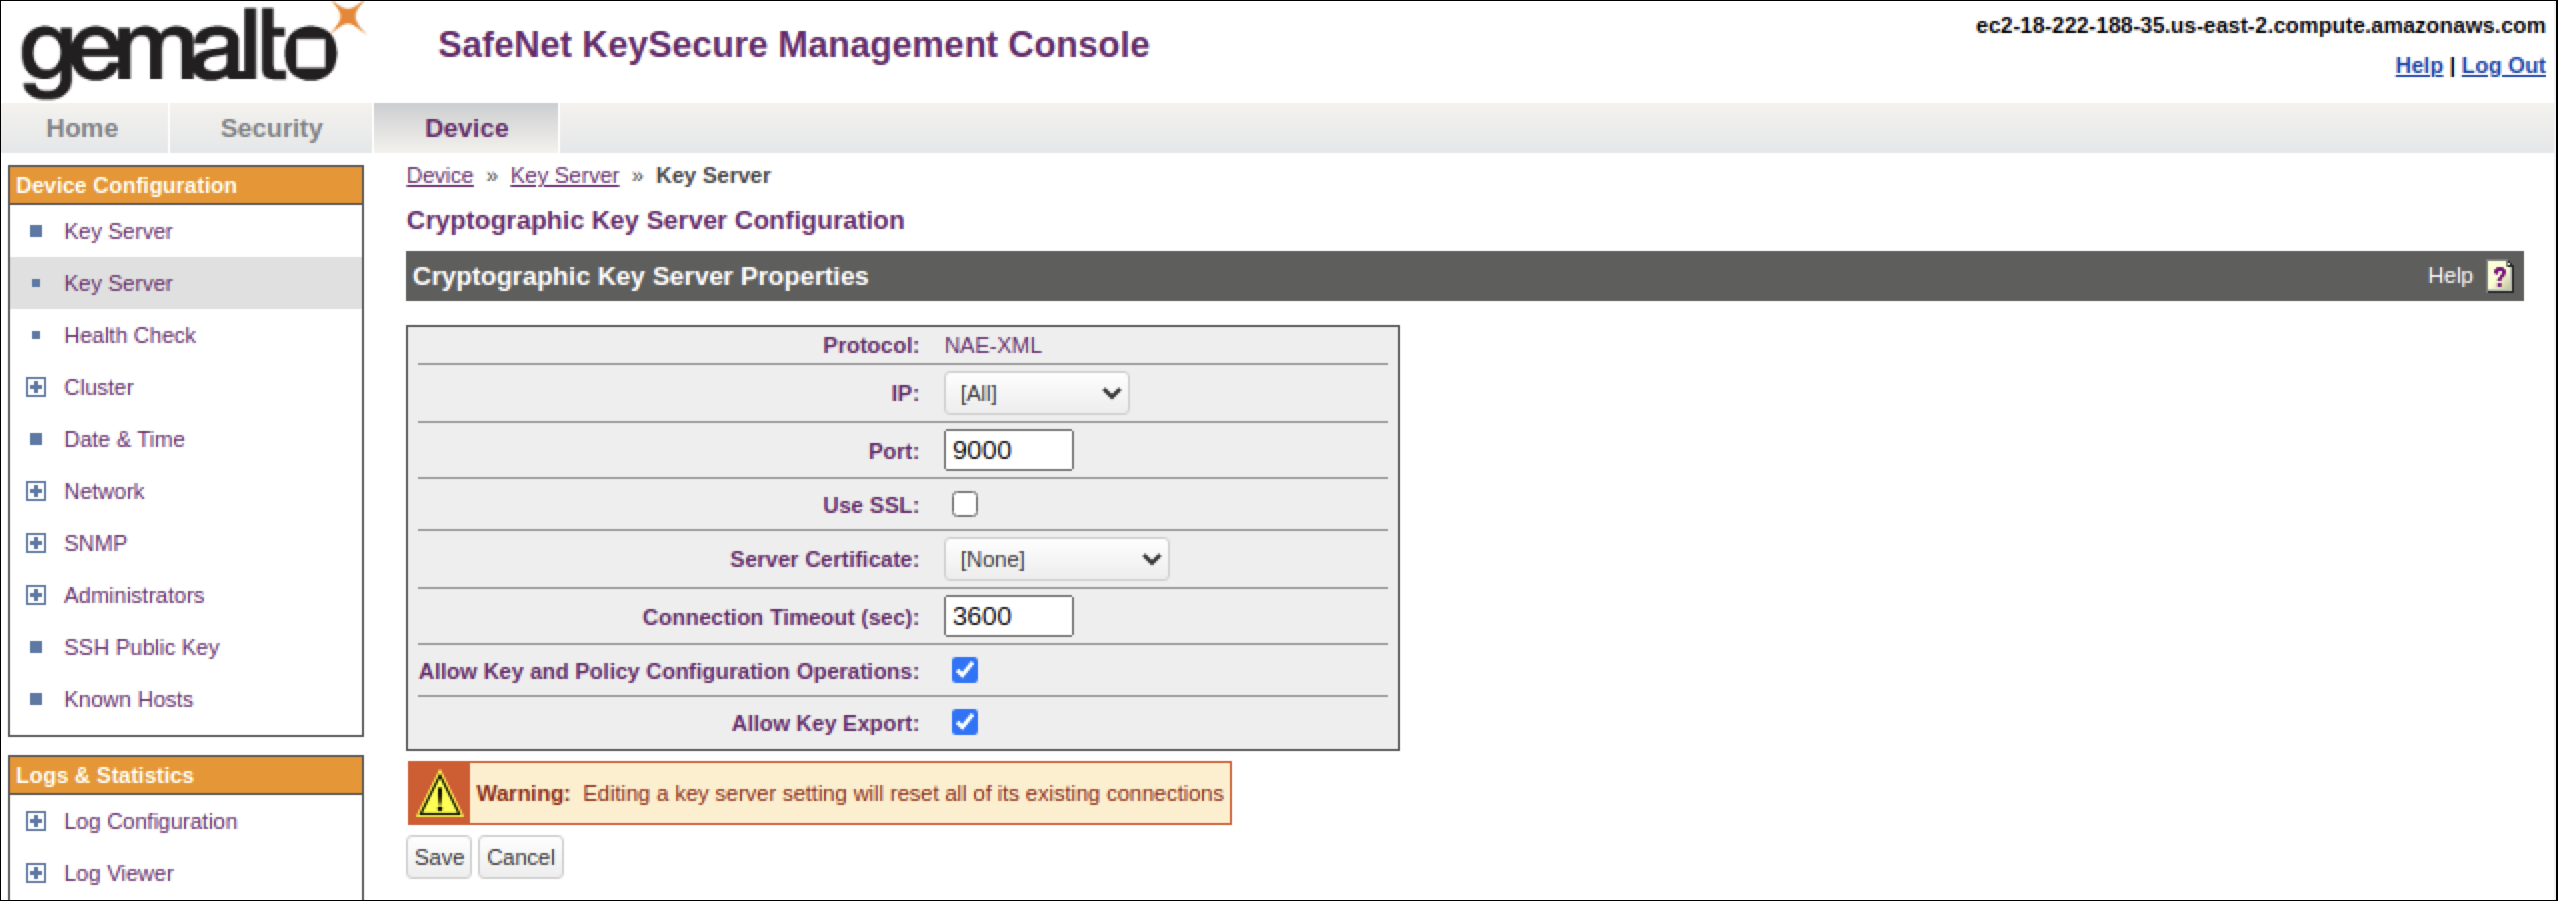
- Log in to Keysecure with user having admin privilges.
- Go to protocol.
- Click
- Select
Allow
Key and Policy Configuration Operations and
Allow
Key Export
.
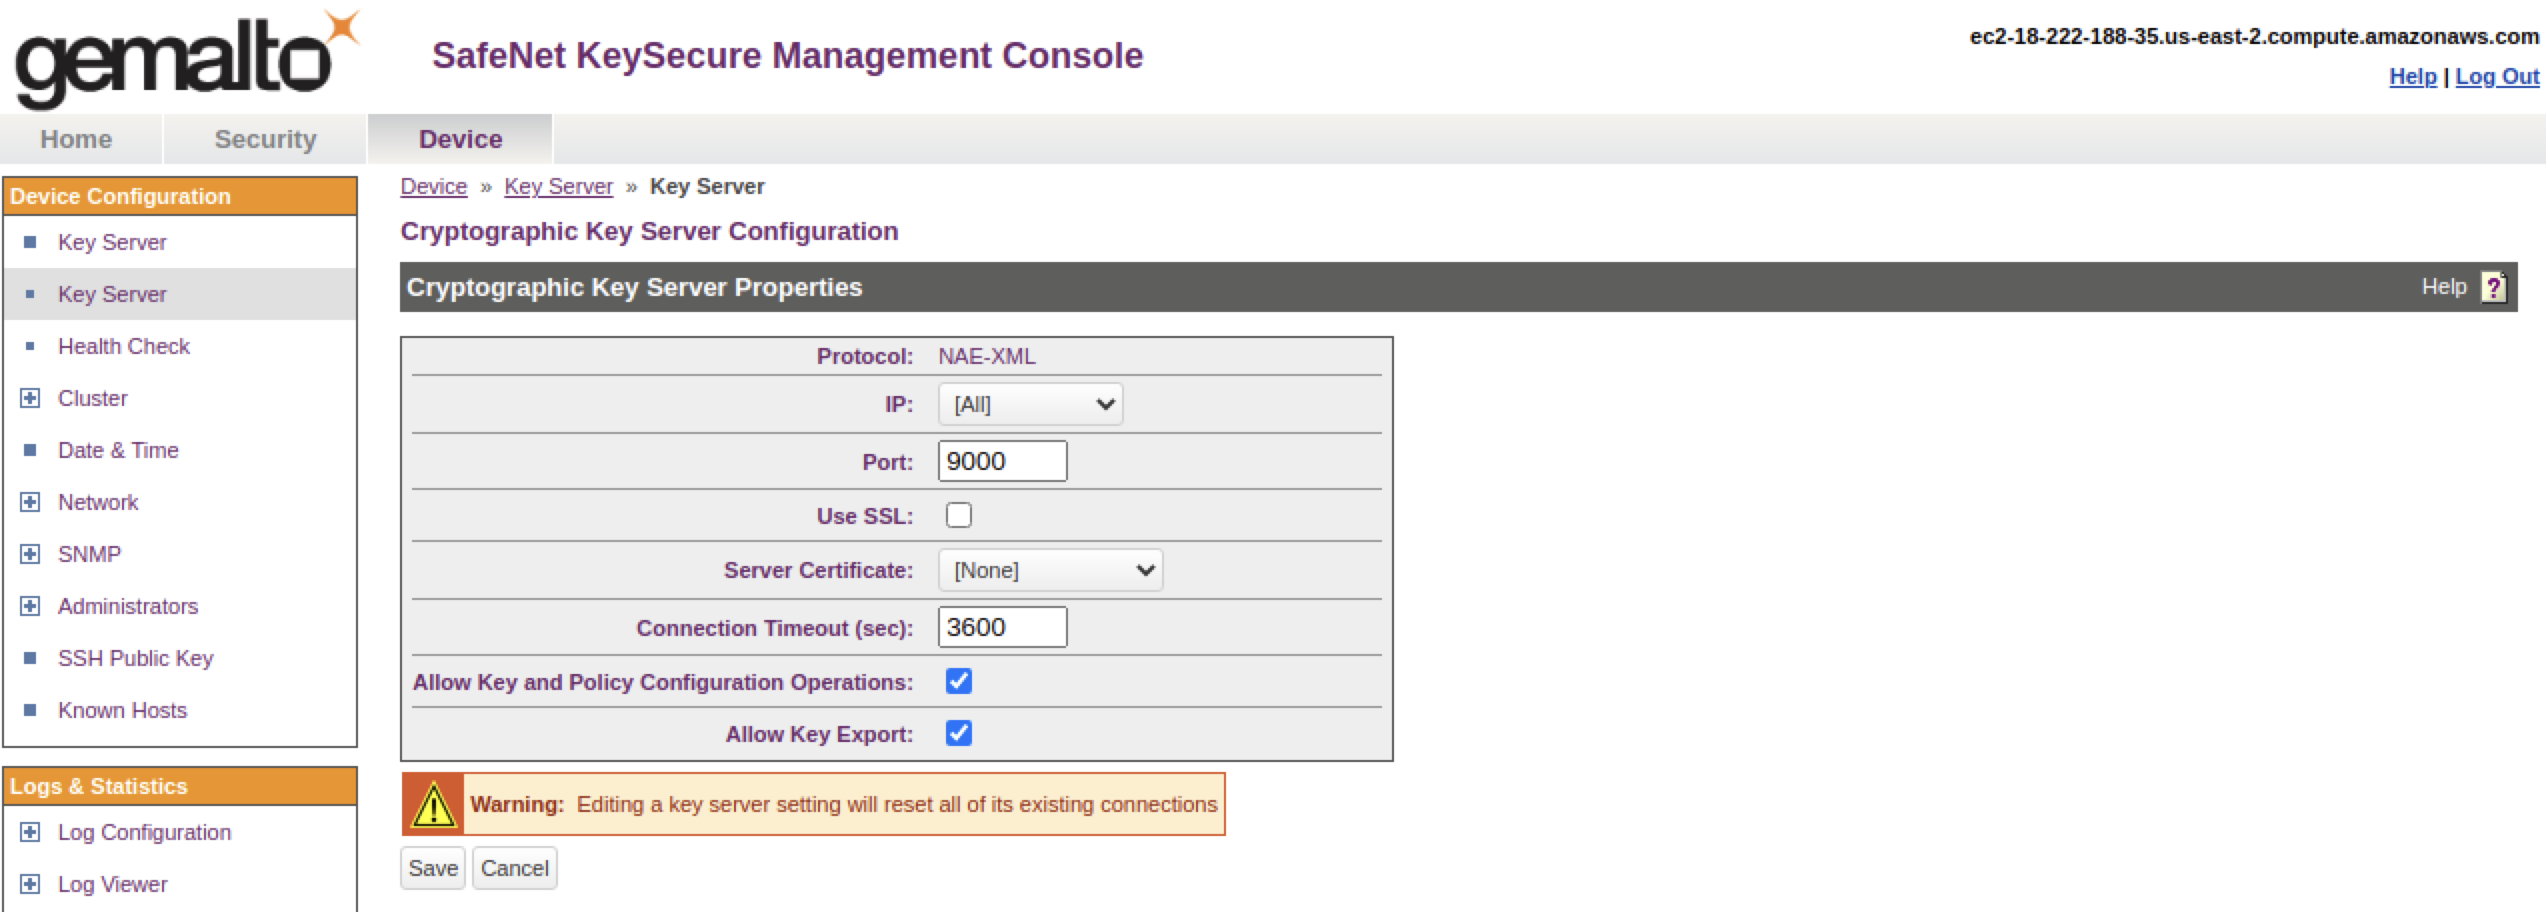
- Save changes.
Configure SSL on Safenet Keysecure (NAE-XML)
Creating a local CA
- Log in to the Management Console as an administrator with Certificate Authority (CA) access control.
- Navigate to the Security, CAs & SSL Certificates section and click o Local CA's.
- Enter the required details and select Self-signed Root CA as the Certificate
Authority Type.
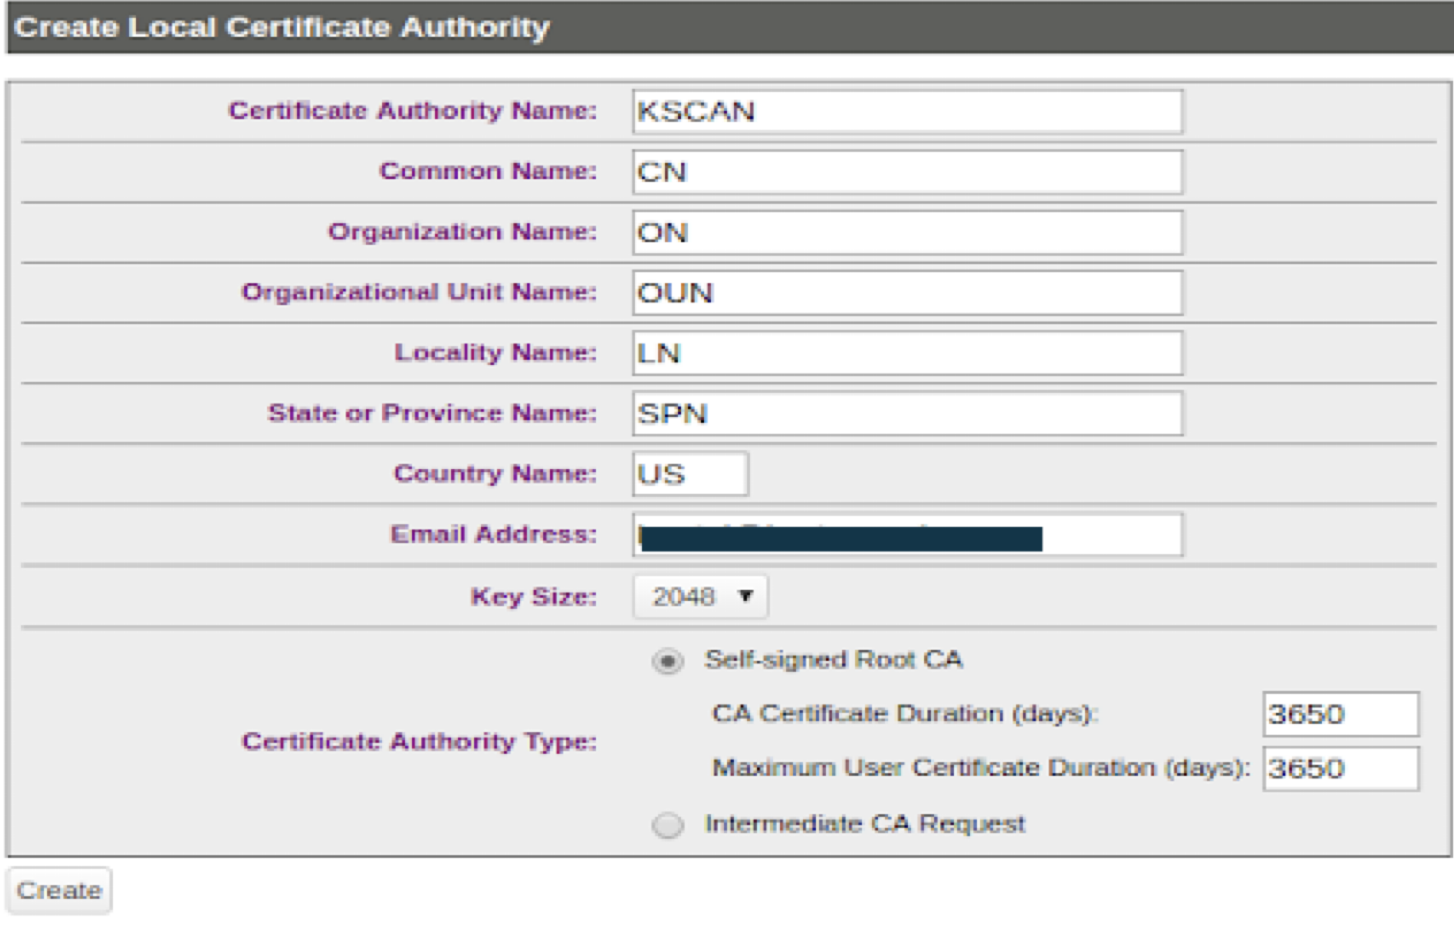
- Click Create.
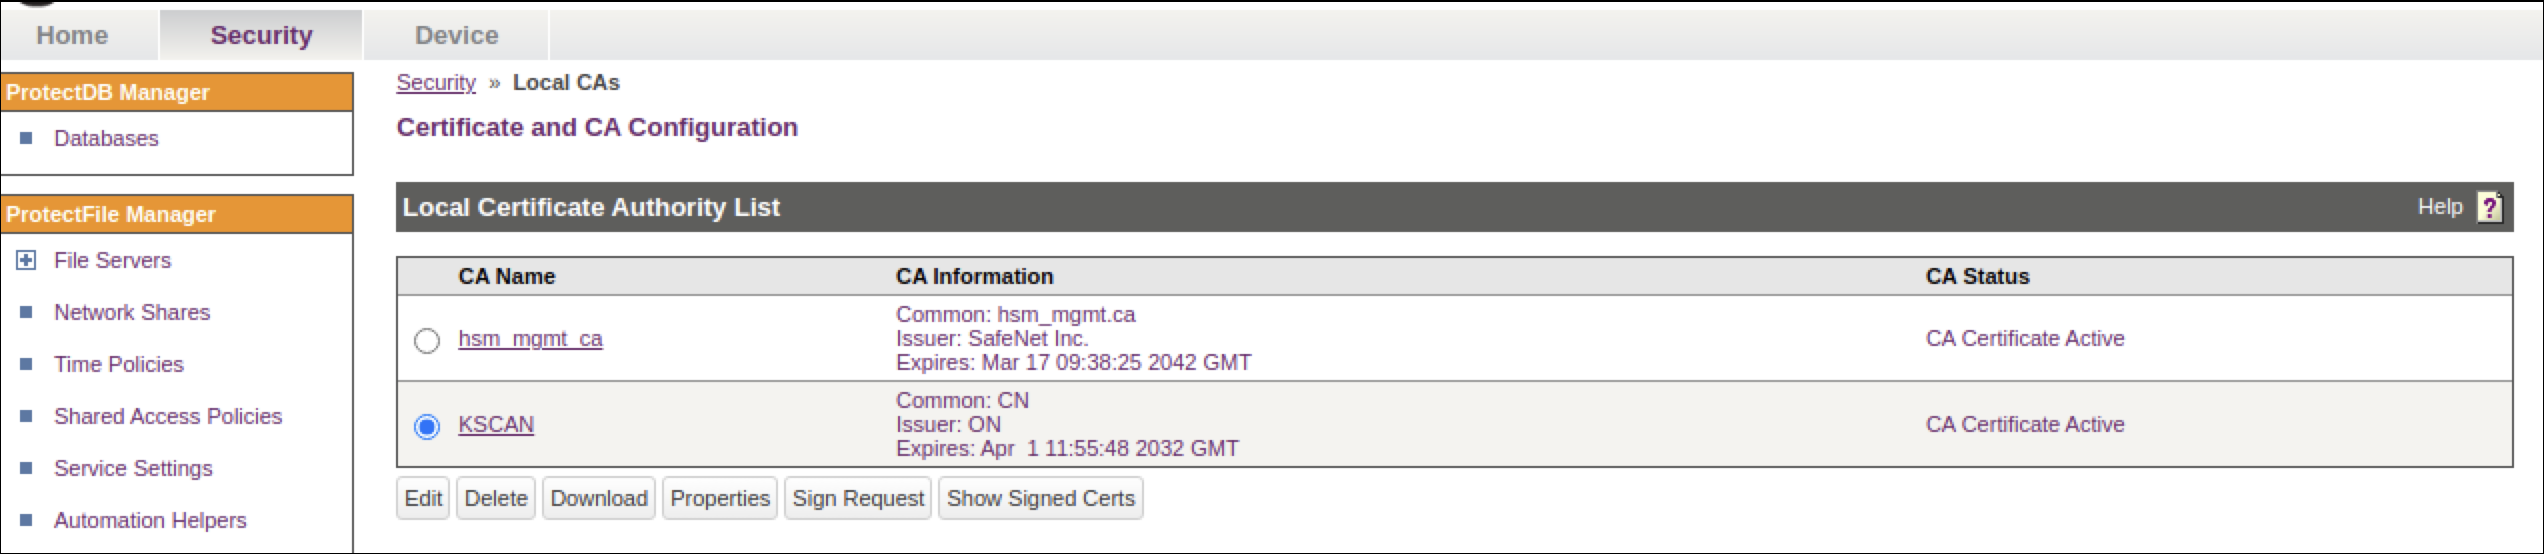
The Local CA is visble.
Creating a Server Certificate Request on the Management Console
- Log on to the Management Console as an administrator with Certificate Authority (CA) access control.
- Go to the Security tab and on the left side panel .
- Navigate to the Device CAs & SSL Certificates section.
- Click
SSL certificates
and modify the fields as needed.
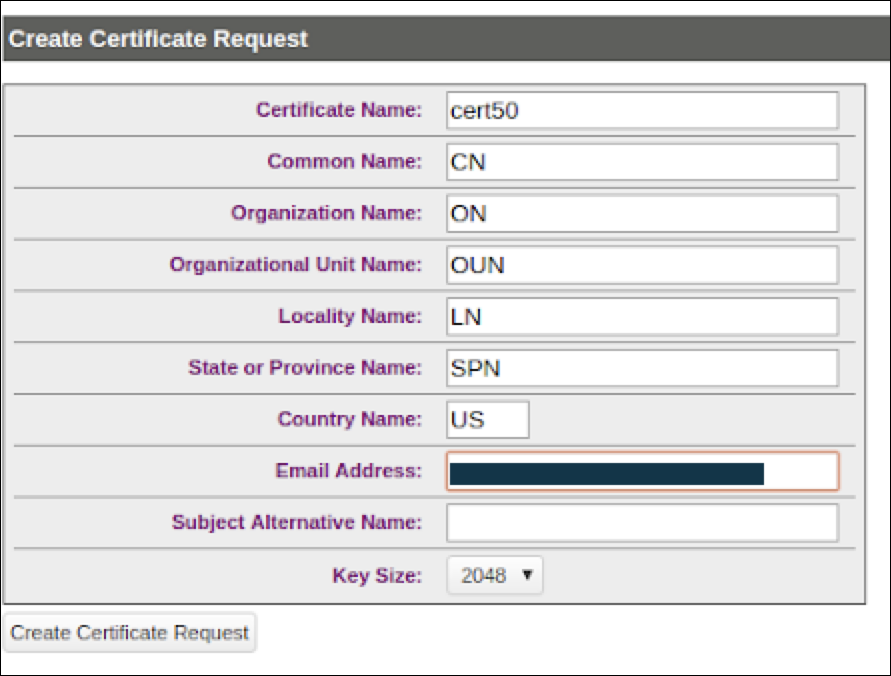
- Click
Create
Certificate Request.
This creates the certificate request and places it in the Certificate List section of the Certificate and CA Configuration page. The new entry shows that the Certificate Purpose is Certificate Request and that the Certificate Status is Request Pending.

Signing a Server Certificate Request with a Local CA
- Log on to the Management Console as an Administrator with Certificates and Certificate Authorities (CA) access controls.
- Navigate to the Security Tab -> Device, CAs and SSL Certificates section.
- Click SSL Certificates .
- Select the certificate request (cert50) and click Properties.
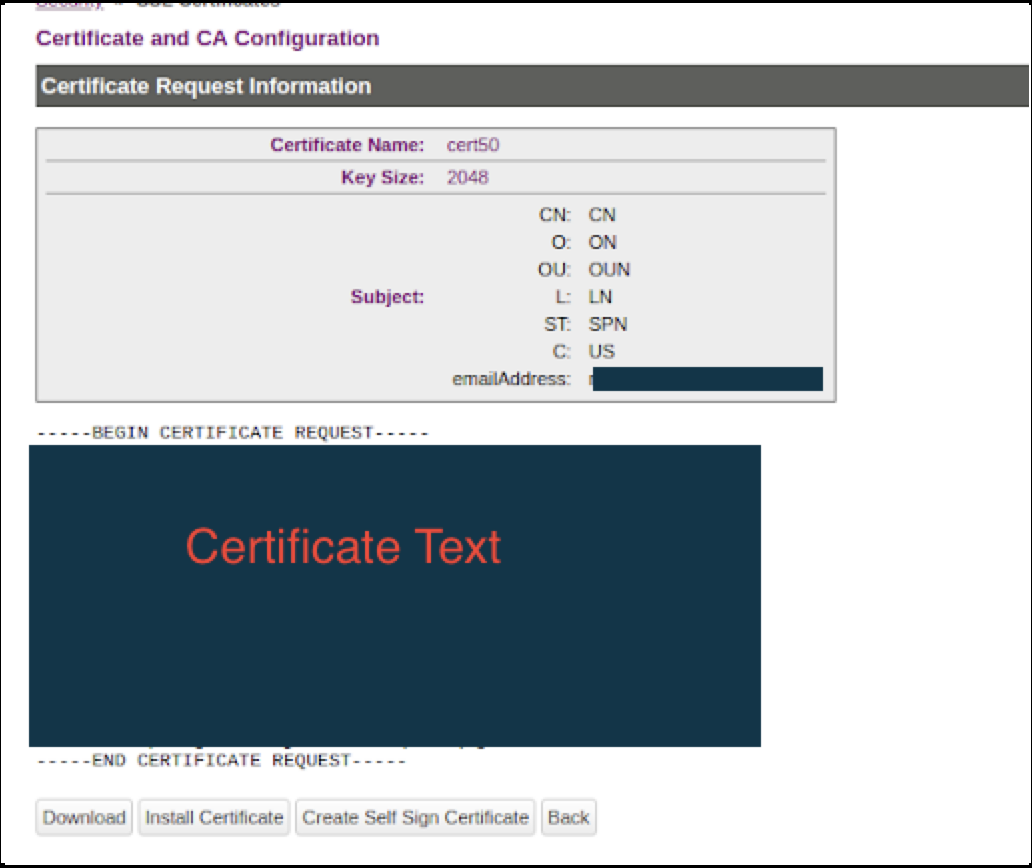
- Copy the text of the certificate request. The copied text must include the header (-----BEGIN CERTIFICATE REQUEST-----) and footer (-----END CERTIFICATE REQUEST-----).
- Navigate to the Security Tab -> Device, CAs & SSL Certificates section.
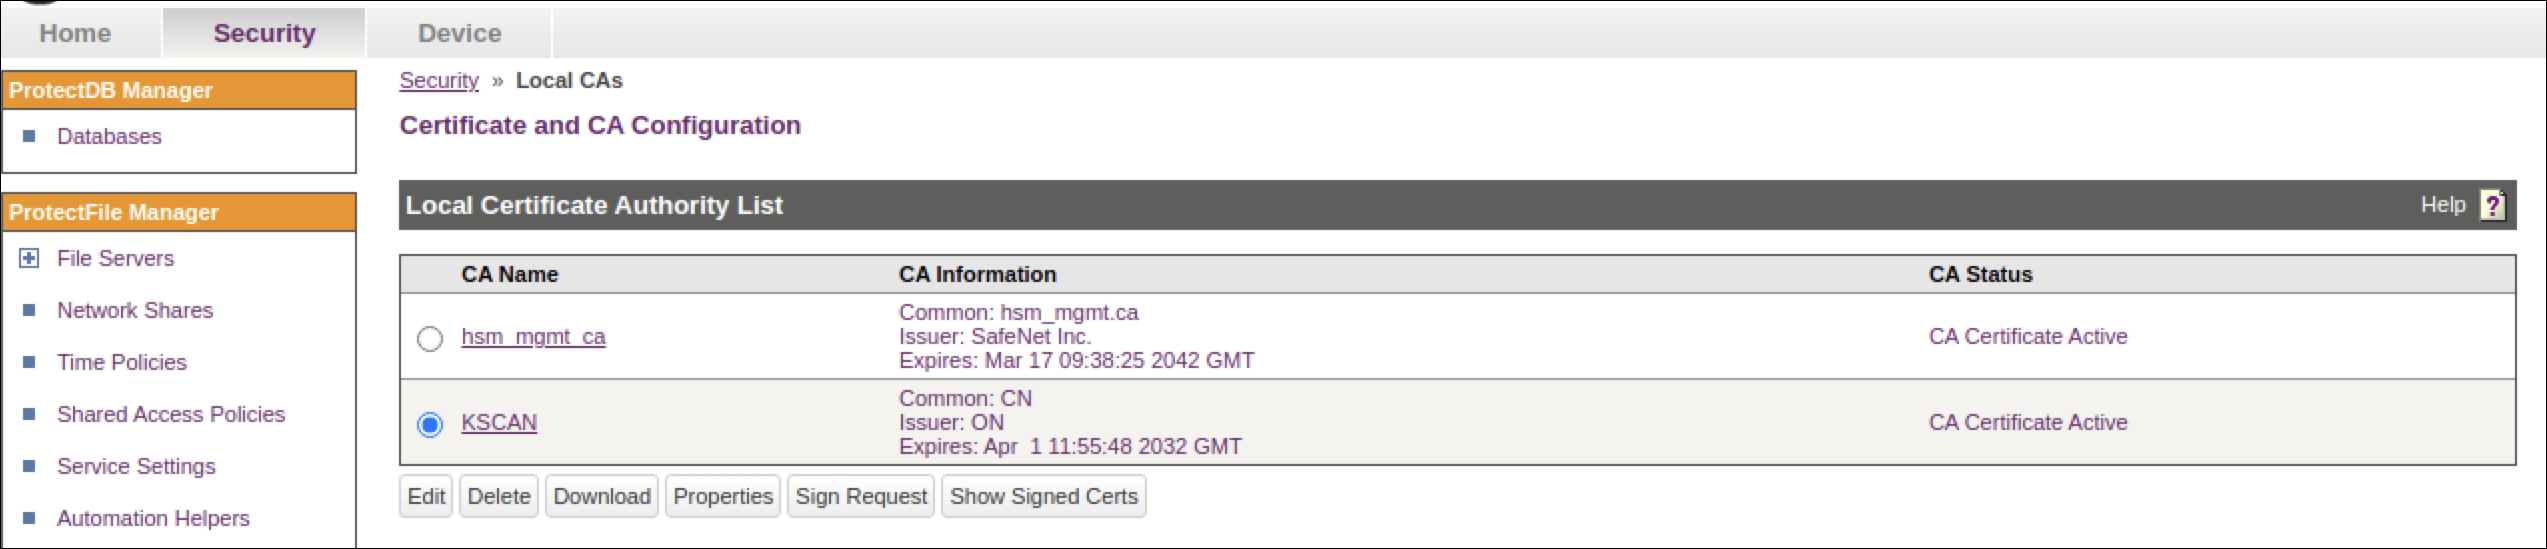
- Click Local CAs and select the CA name from the list.
- Click Sign Request to access the Sign Certificate Request
section.
- On the Sign Certificate Request screen, select Server as certificate Purpose.
- Enter the validity of the certificate for Certificate Duration (days).
- Paste the
copied
text
from the server certificate request, including the header
and footer in Certificate Request.
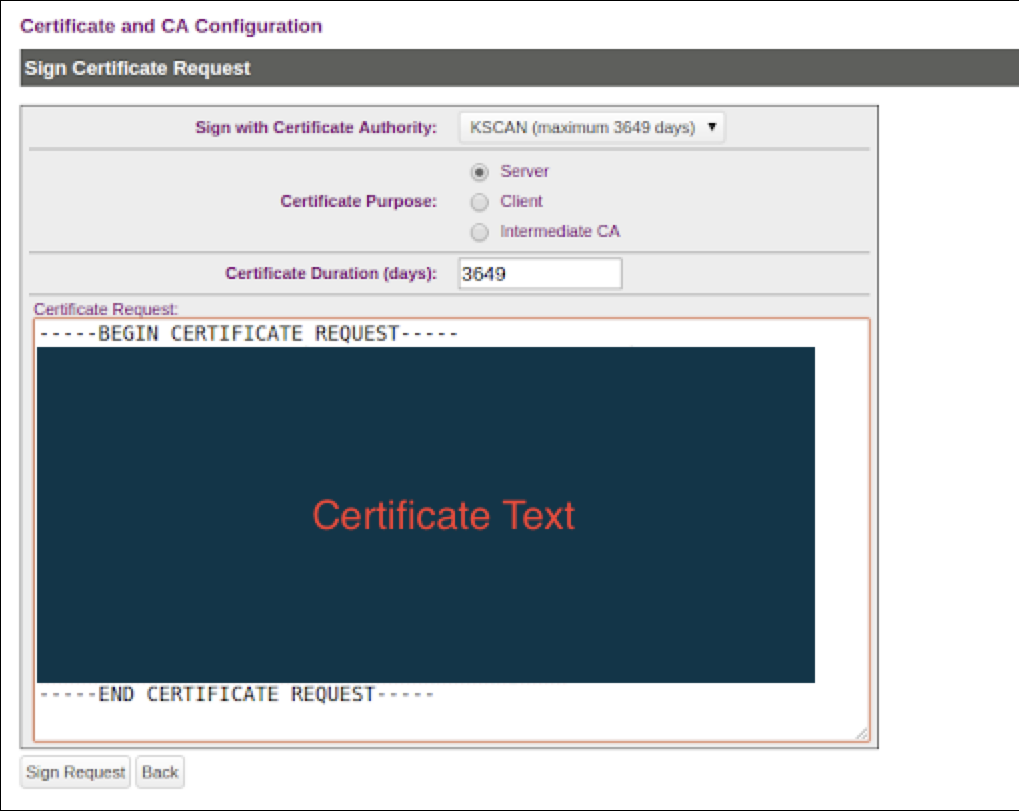
- Click Sign Request. This takes you to the CA Certificate Information section.
- Copy the actual (for eaxample,. KSCAN) certificate text. The copied text must include the header (-----BEGIN CERTIFICATE-----) and footer (-----END CERTIFICATE-----).
- Navigate back to the Certificate List section (Device, CAs & SSL Certificates) and click SSL Certificates.
- Select your certificate request and click properties.
- Click Install Certificate.
- Paste the
certificate
as
the
Certificate
Response.
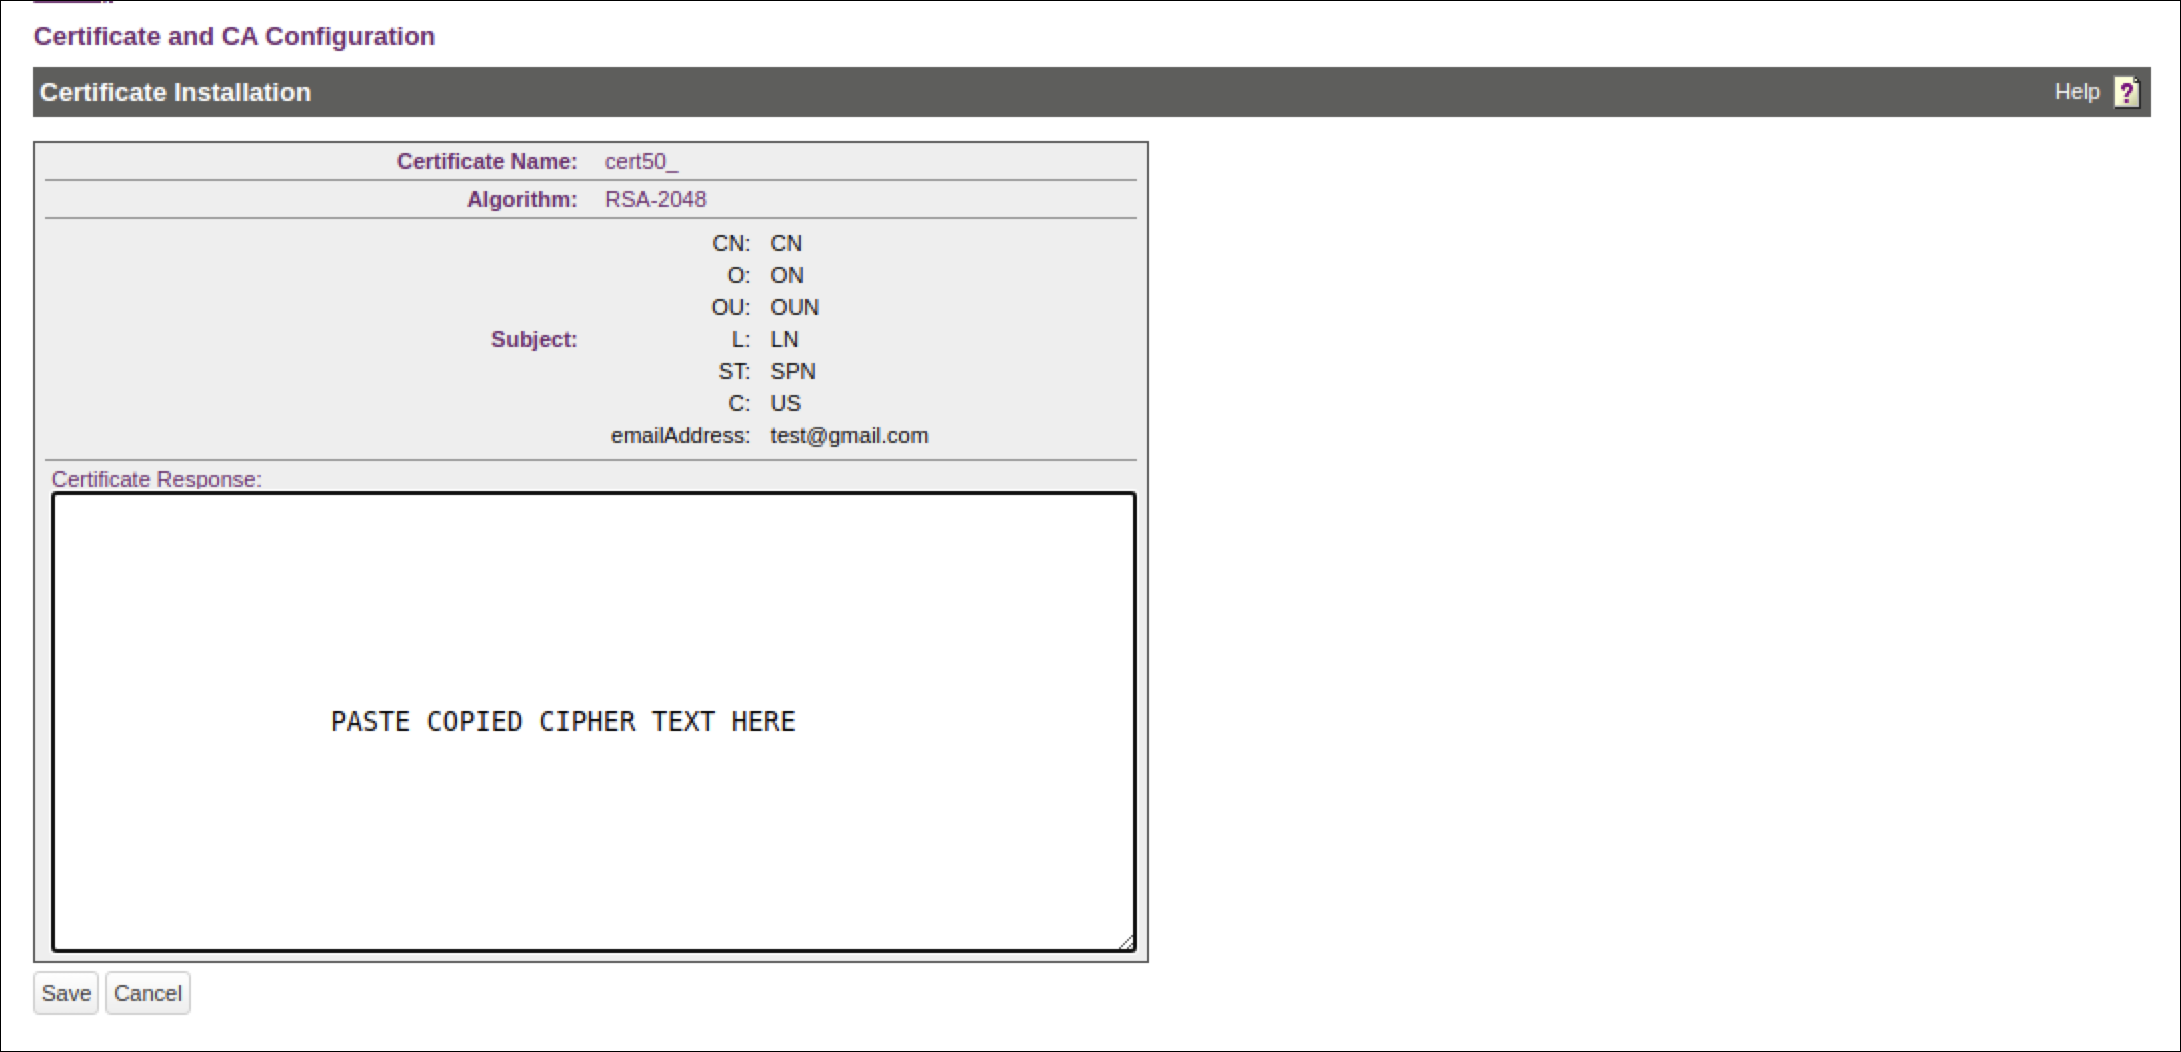
- Click Save.
The Management Console takes you to the Certificate List section. The section shows that the Certificate Purpose is Server and that the Certificate Status is Active.

Enable SSL on Keysecure (NAE-XML)
After SSL has been configured in Safenet KeySecure, perform the following steps.
- Log in to keysecure with admin privileges.
- Go to the
Device
tab and
click
NAE-XML
->
properties ->
edit.
- Select Use SSL.
- Select the Server Certificate from the given drop-down list (for example, cert50).
- Save changes.