Use case 1: Use Cloudera Manager to generate internal CA and corresponding certificates
Use Cloudera Manager to create and manage its own Certificate Authority.
- To choose this option, from Cloudera Manager go to . The Enable Auto-TLS page comes up.

- The Trusted CA Certificates Location field in the
Generate CA section is only for advanced use cases. This field
should be left empty unless directed to be filled by Cloudera support personnel or Cloudera professional services. The field should contain a
path to a PEM file on the Cloudera Manager host, which contains a list
of root CA certificates that should be imported into the truststores of all cluster
hosts.
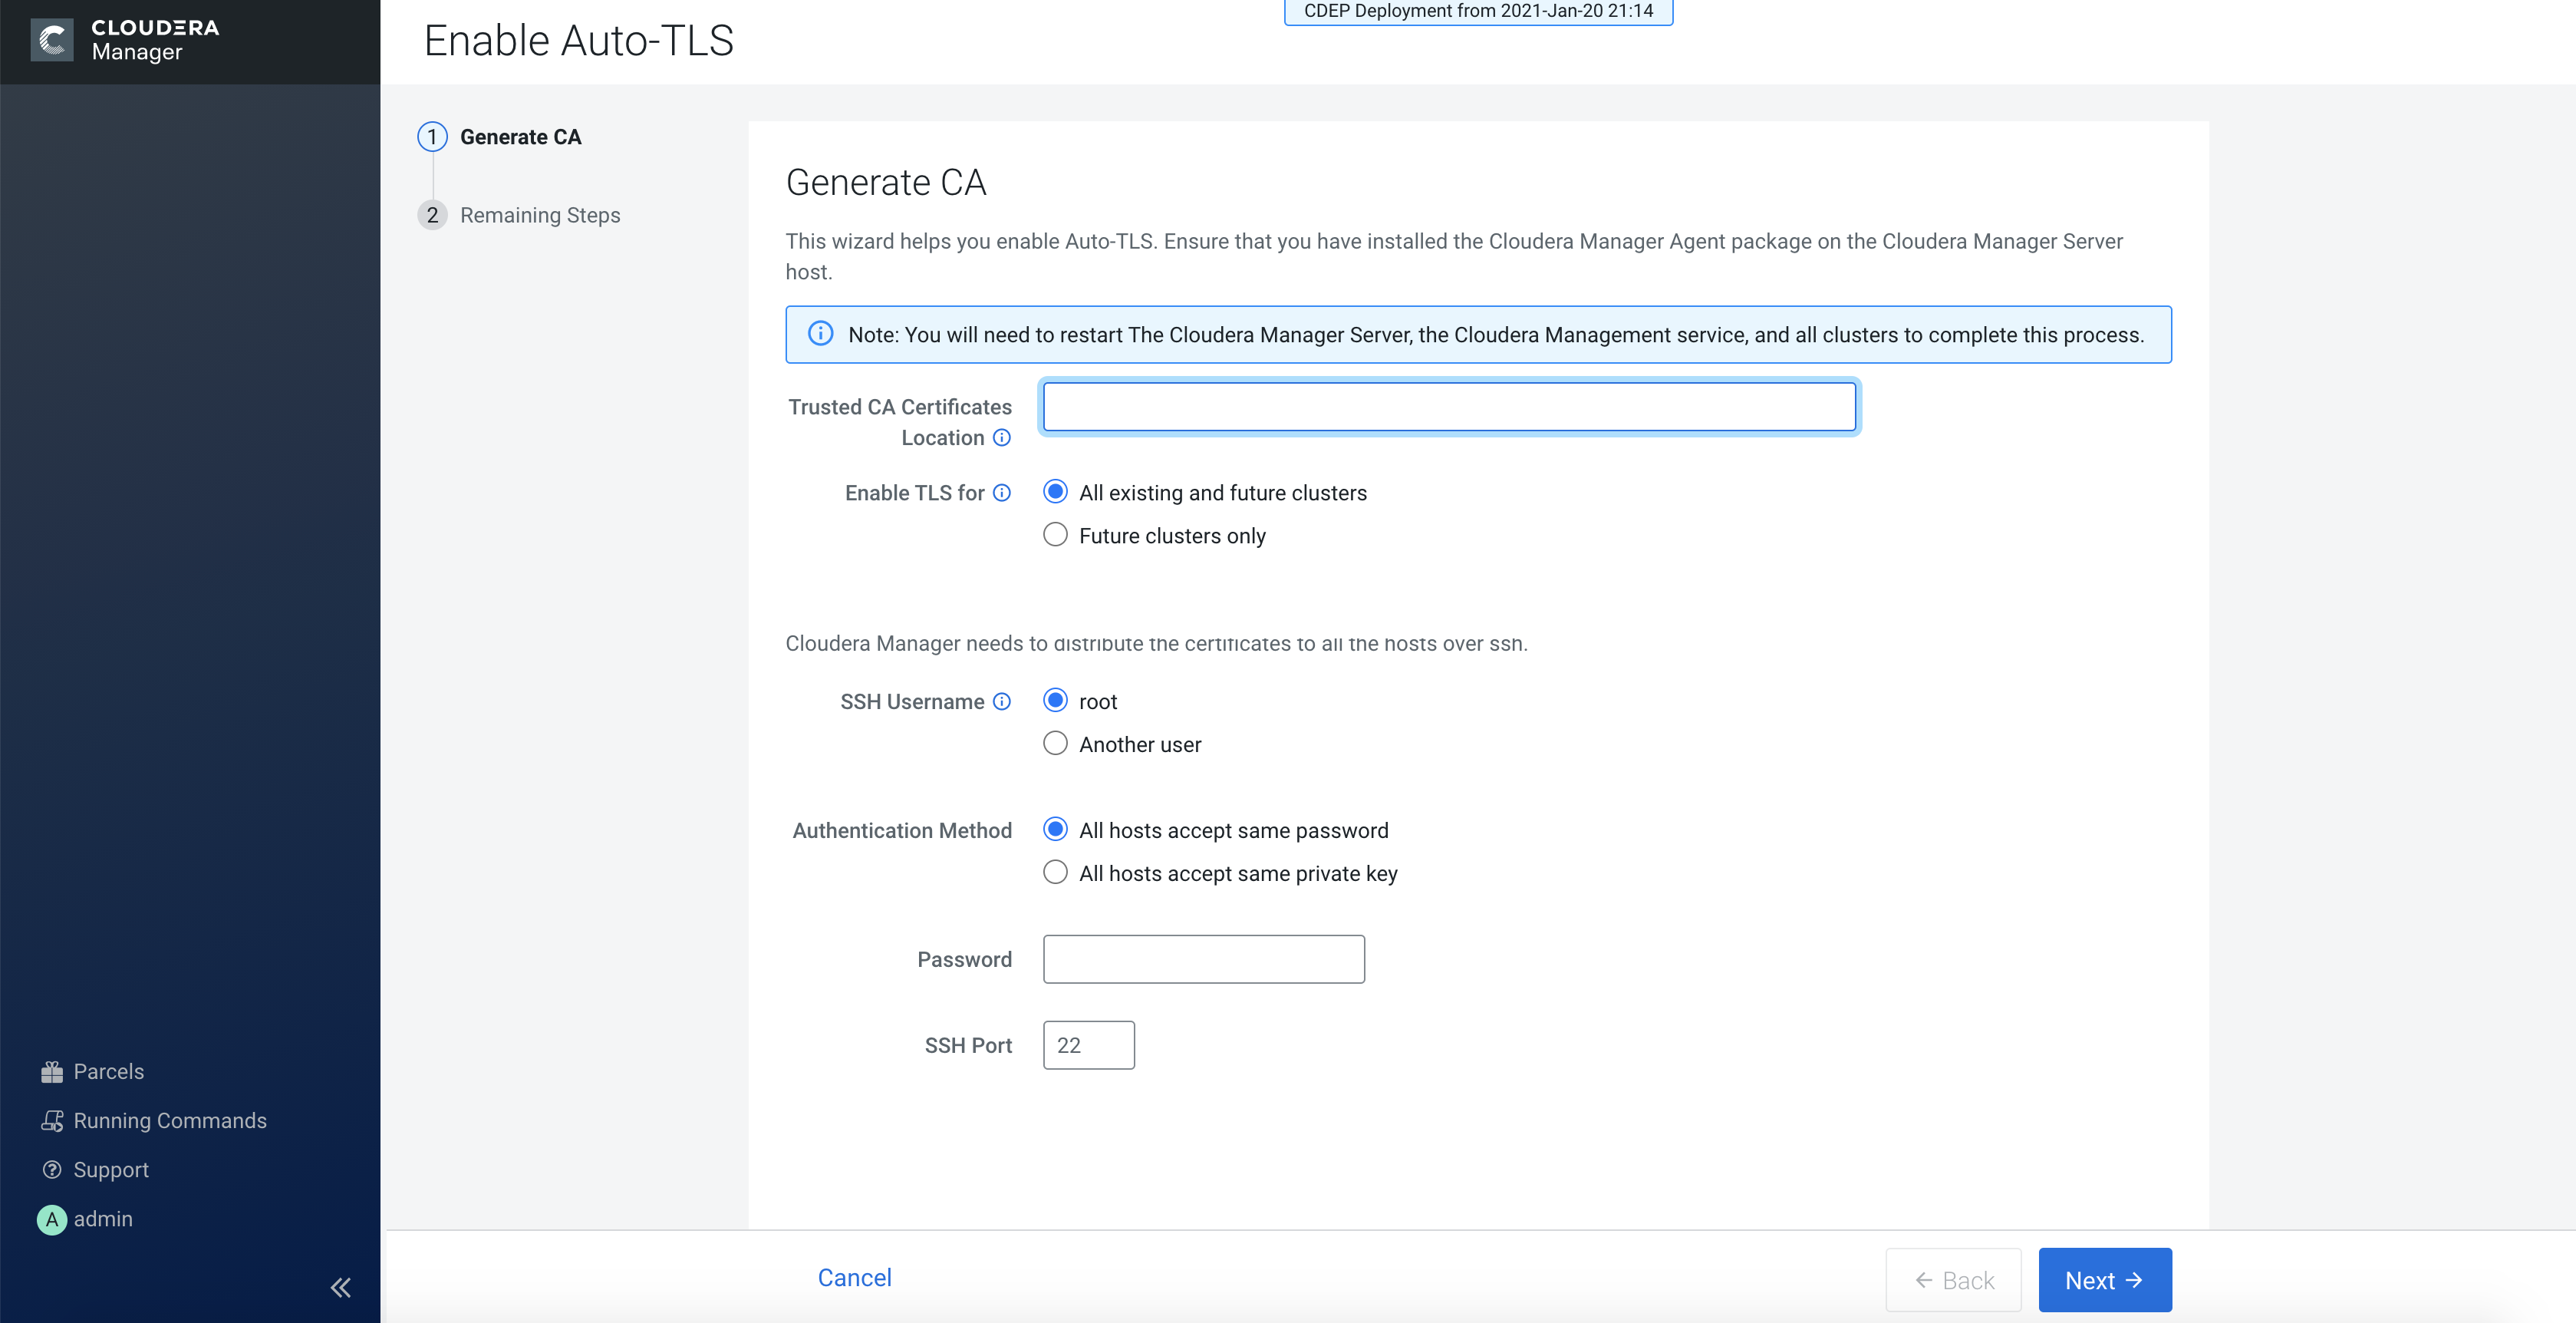
- From the Enable TLS for: options, select All existing and future clusters to enable Auto-TLS for all existing and future clusters, or select Future clusters only to enable Auto-TLS for future clusters only.
- Select the required SSH Username option. The available options are root and Another user.
- Select the required Authentication Method. You can either enable all hosts to accept the same password or you can enable all hosts to accept the same private key.
- Enter the password in the Password field and verify the SSH Port number.
- Click Next.
Rotate Auto-TLS Certificate Authority and Host Certificates
Your cluster security requirements may require that you rotate the Auto-TLS CA and
certificates.
- Navigate to Administration > Security.
- Click the Rotate Auto-TLS Certificates button to launch the wizard.
- Complete the wizard.
- Restart Cloudera Manager, Cloudera
Management Services, and all clusters.
This process also resets the truststore.
- If there are other root CA certificates in the truststore, please add them using the Trusted CA Certificates Location field in the Generate CA section.
- You must restart the Cloudera Management Service and finally restart any clusters that are stale.