Configure High Availability for Ranger KMS with DB
Use the following steps to configure high availability for Ranger KMS with an associated keystore database.
-
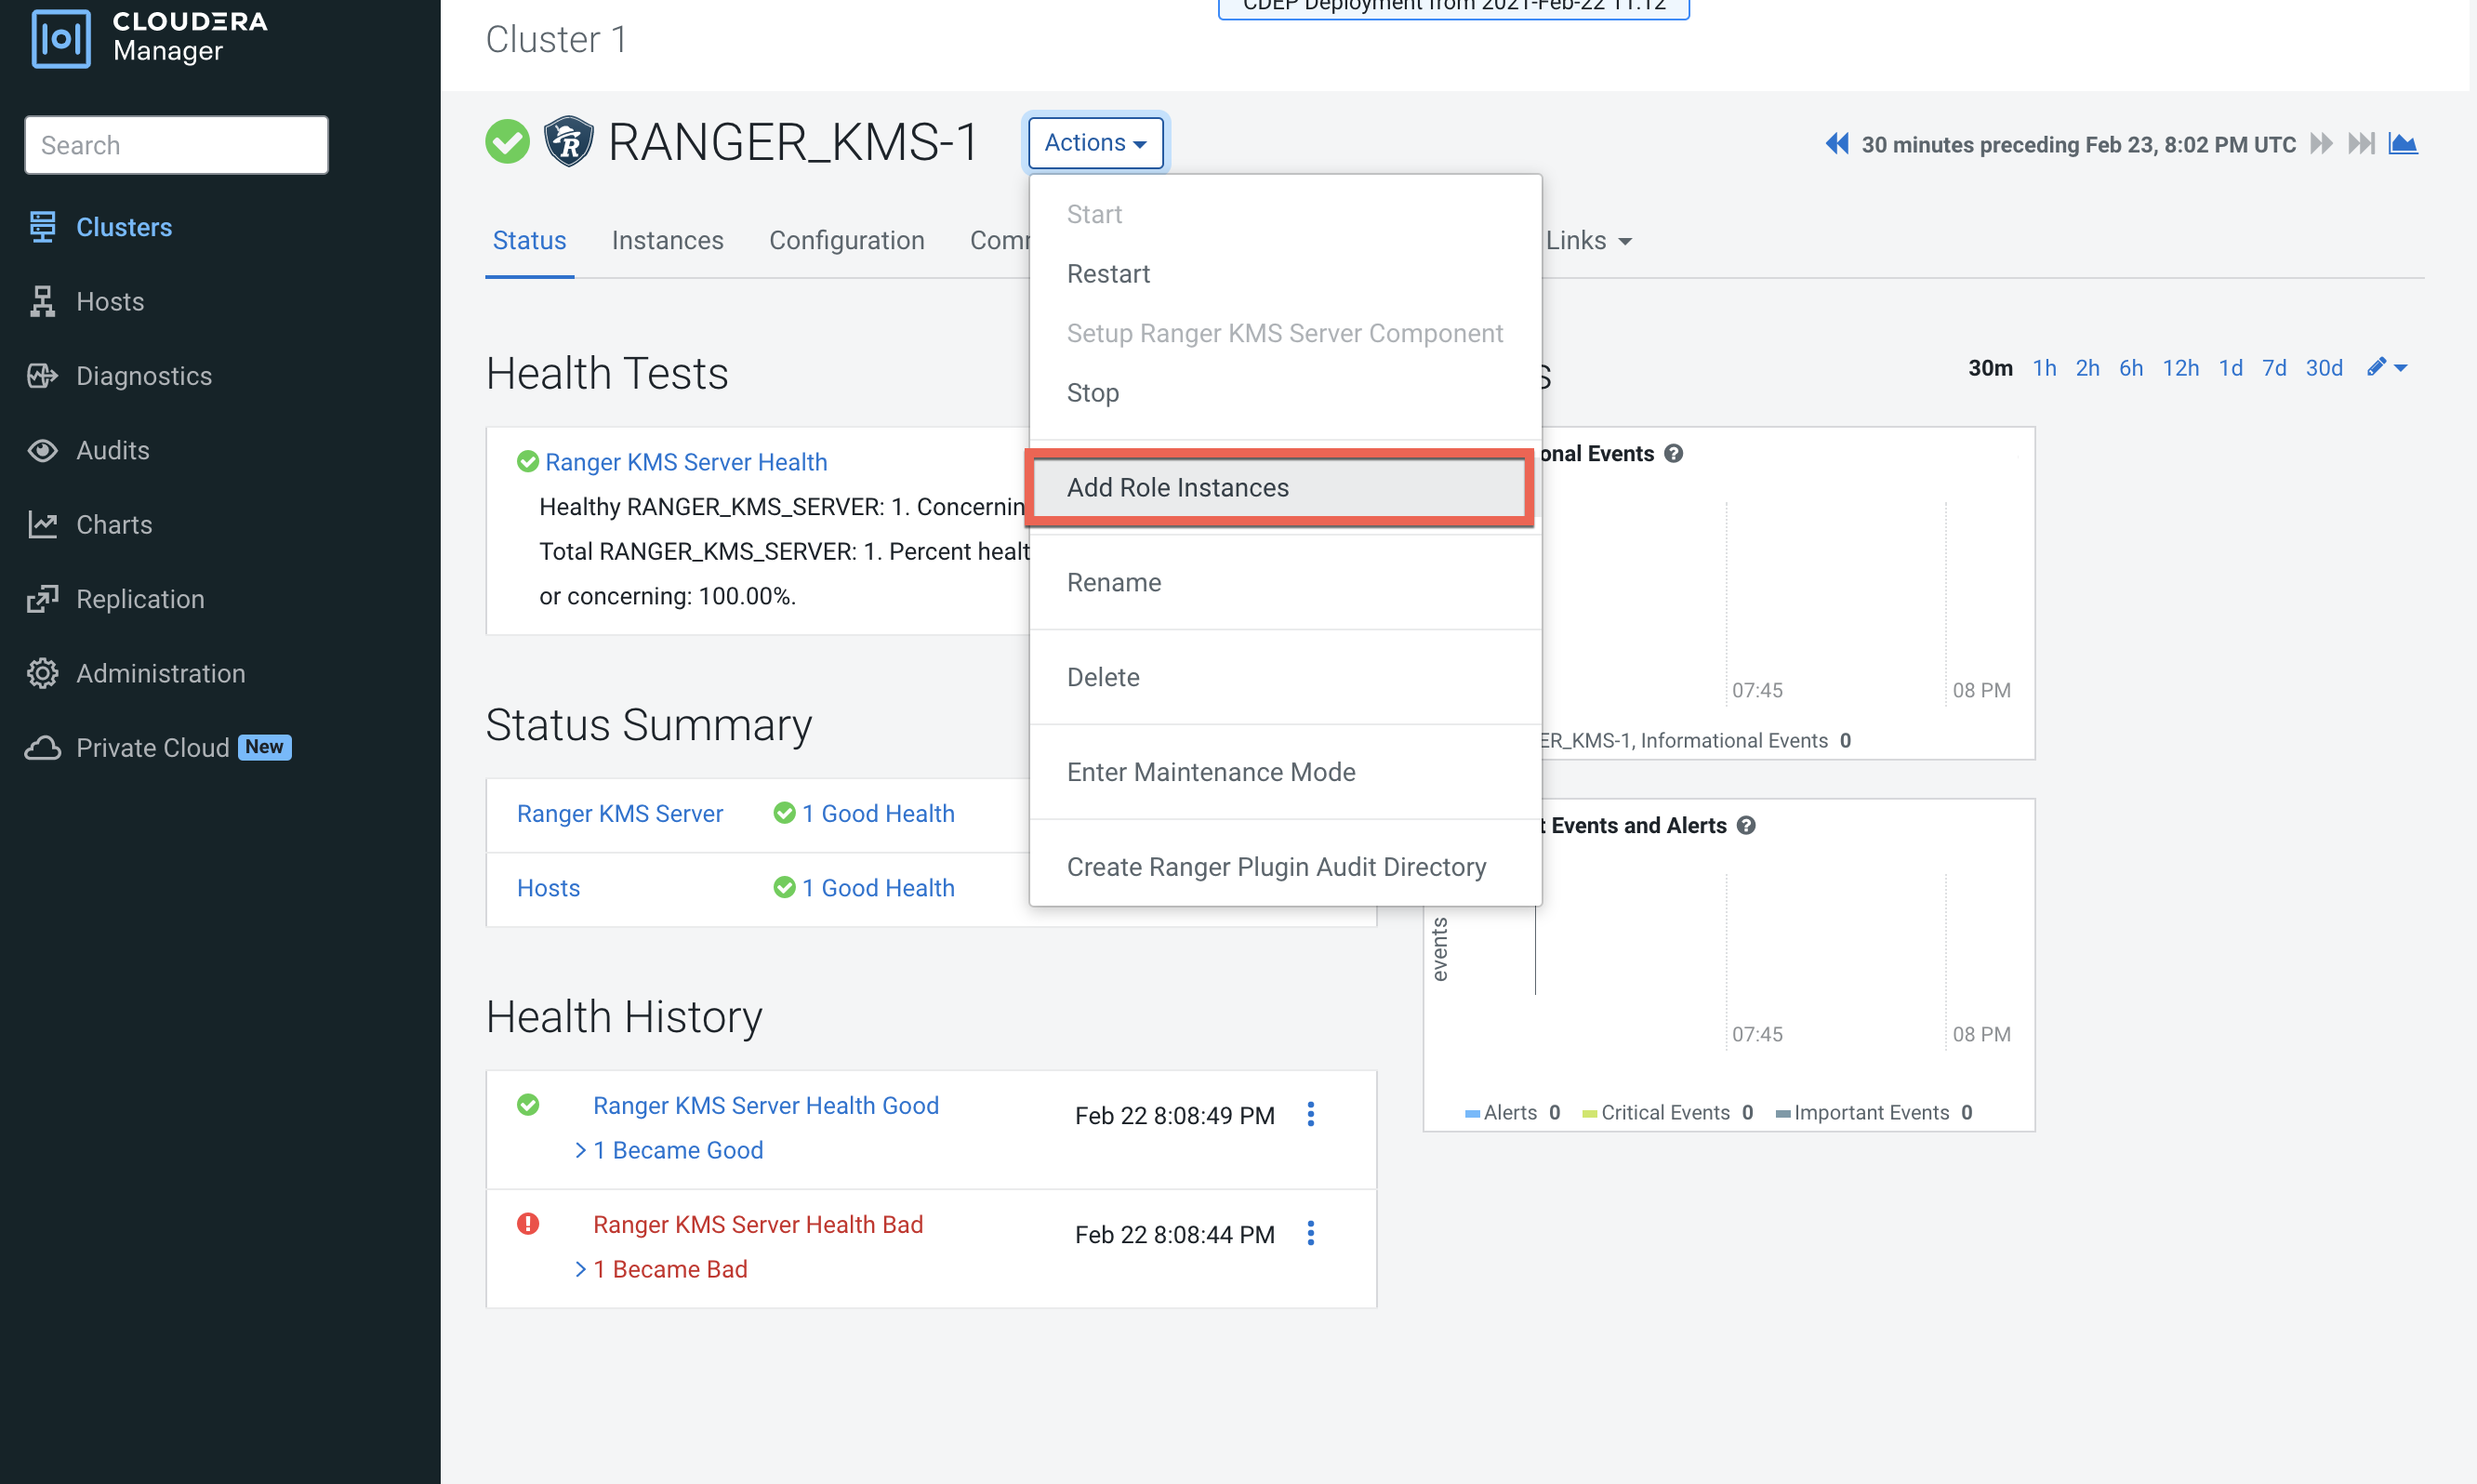
In Cloudera Manager, select Ranger KMS, then select Actions > Add Role Instances.
-
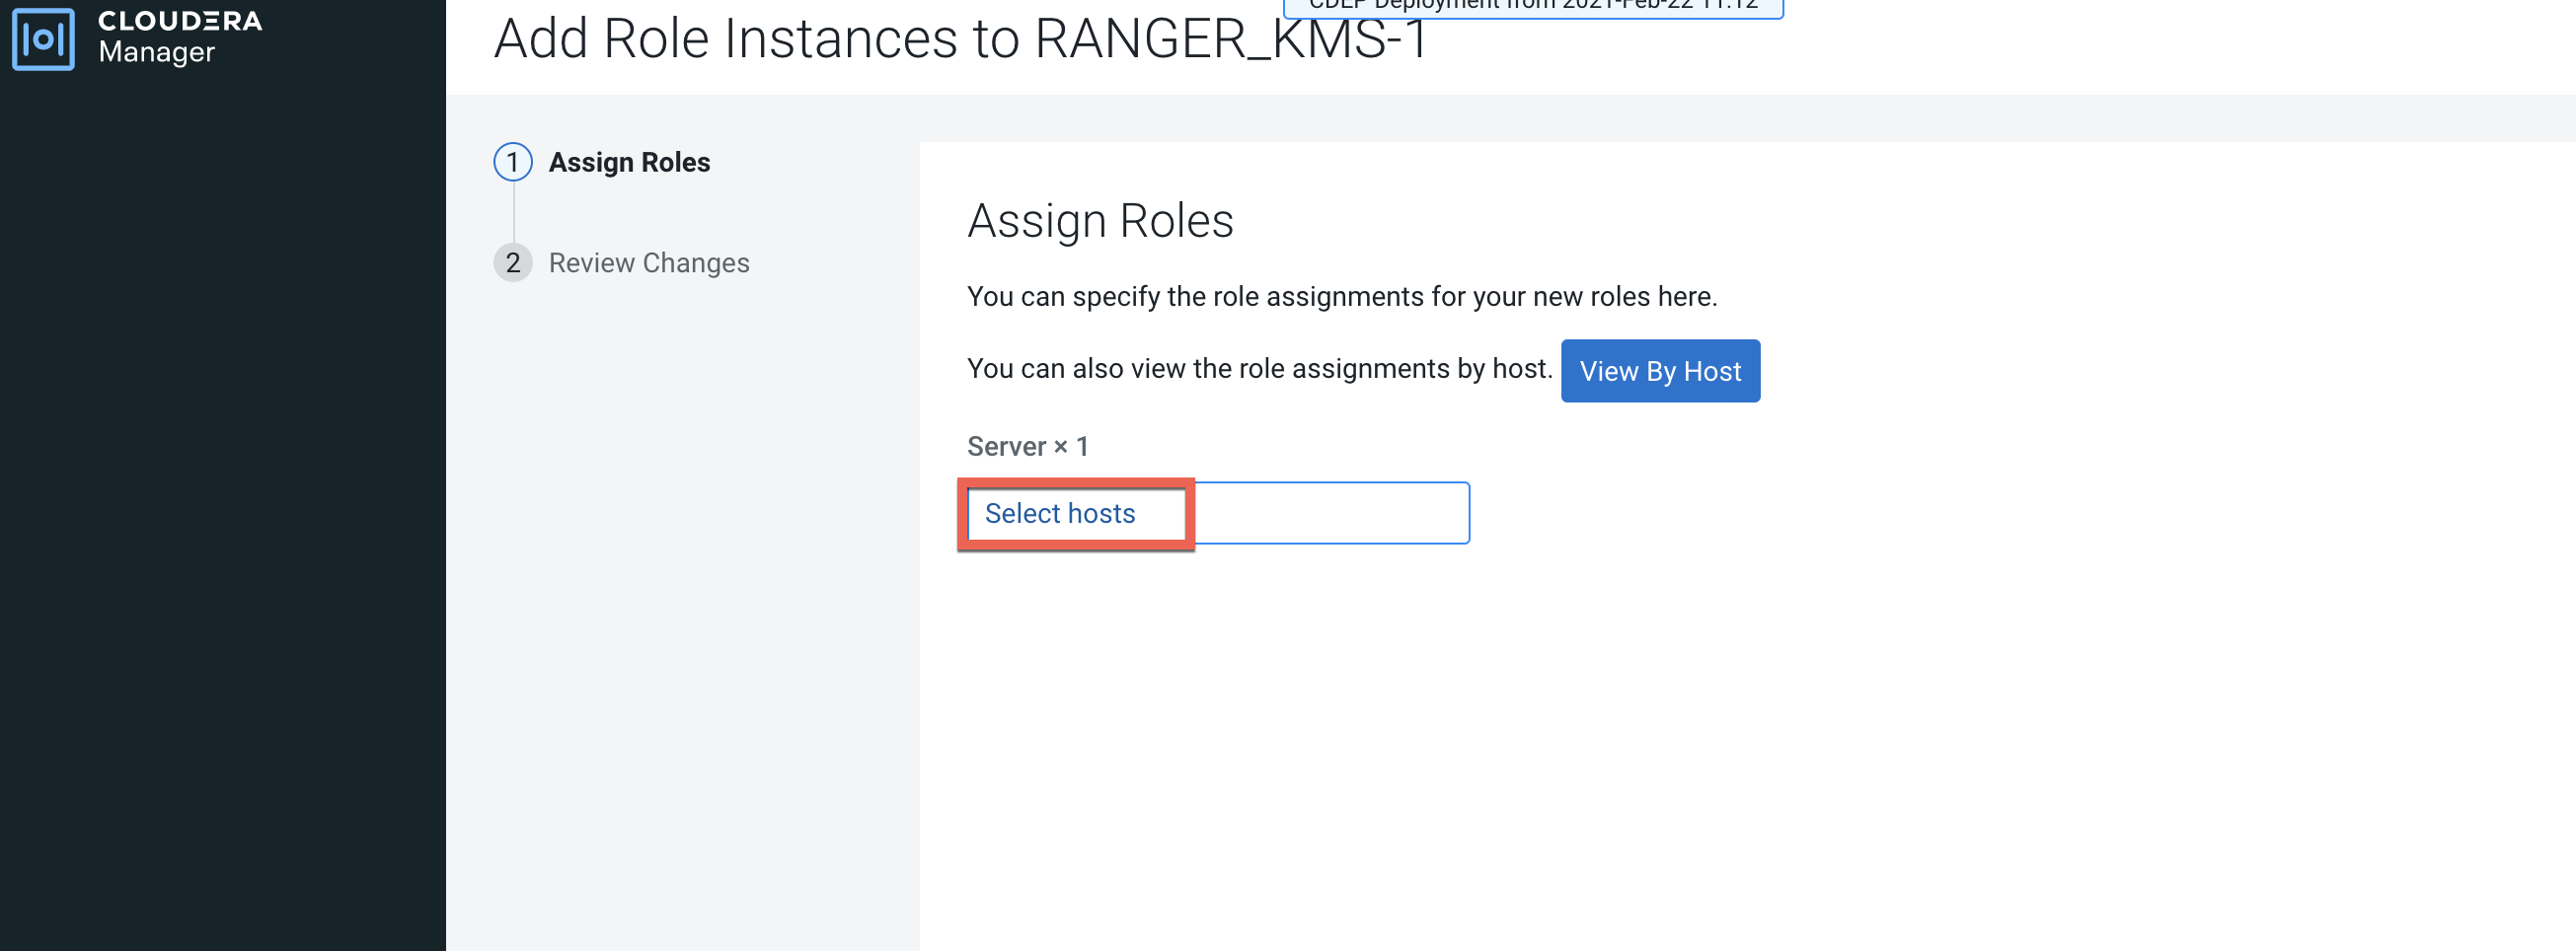
On the Assign Roles page, click Select hosts.
-
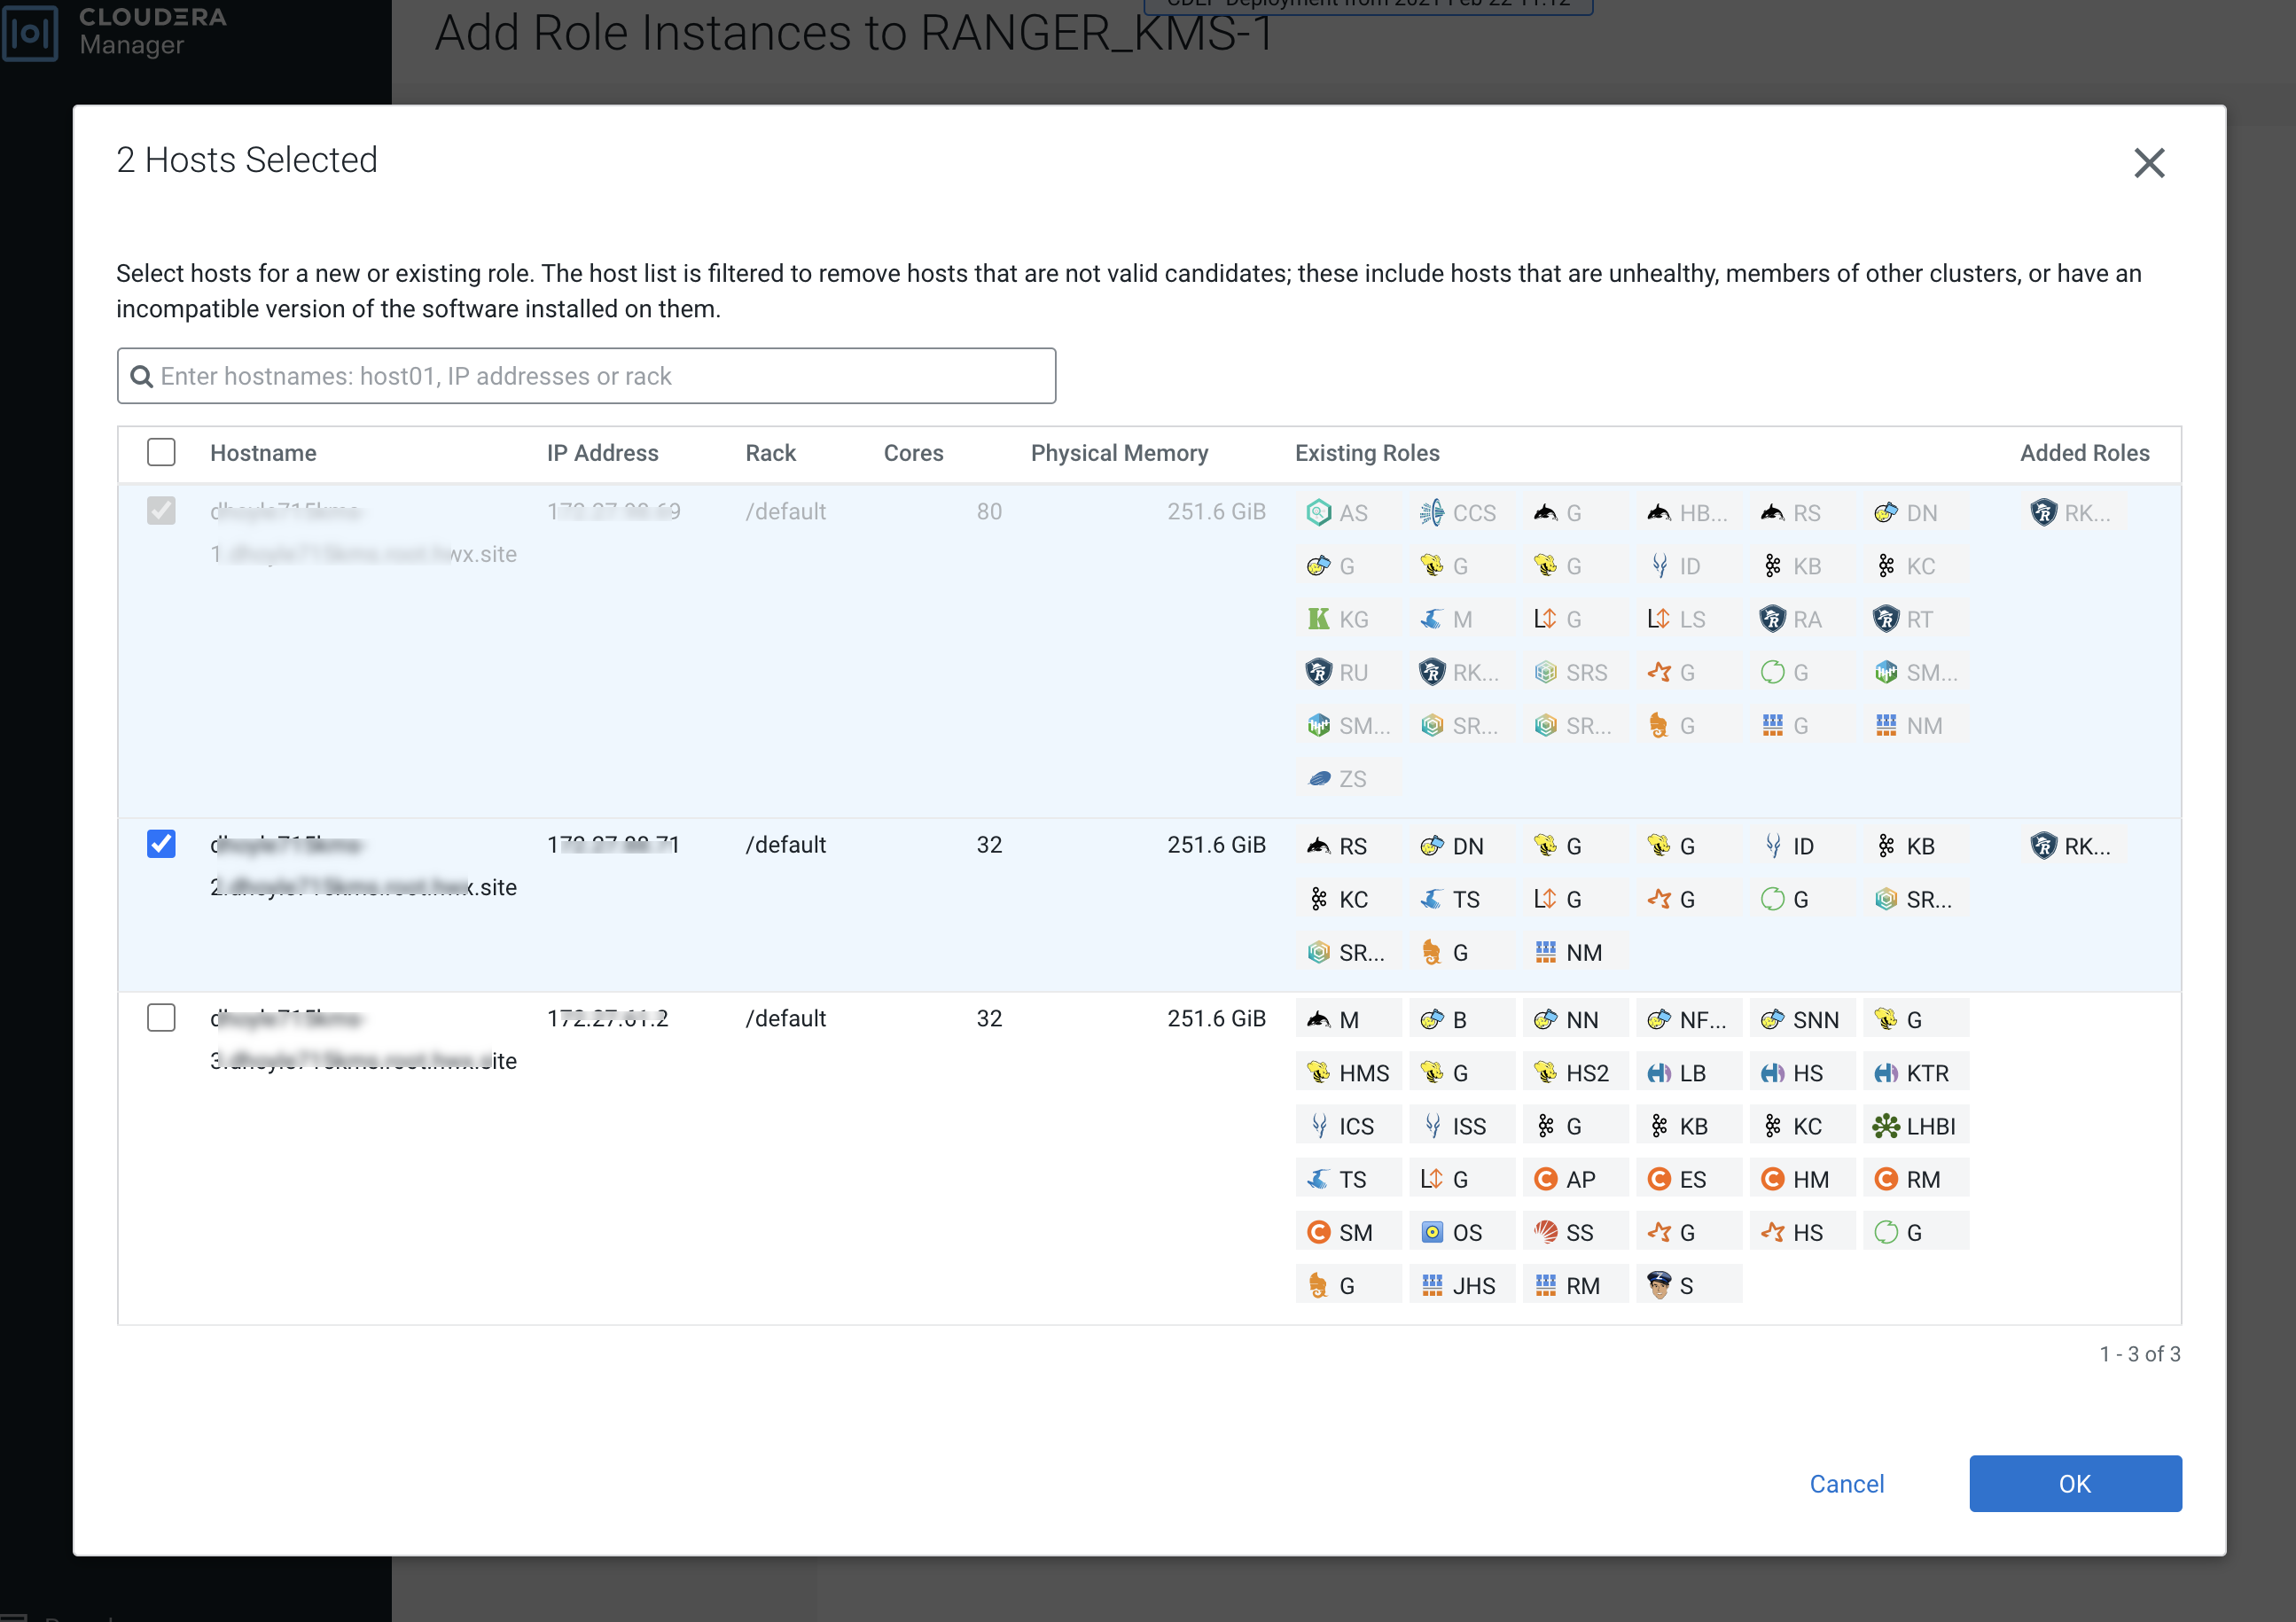
On the selected hosts page, select a backup Ranger KMS host. A Ranger KMS (RK)
icon appears in the Added Roles column for the selected host. Click OK to
continue.
-
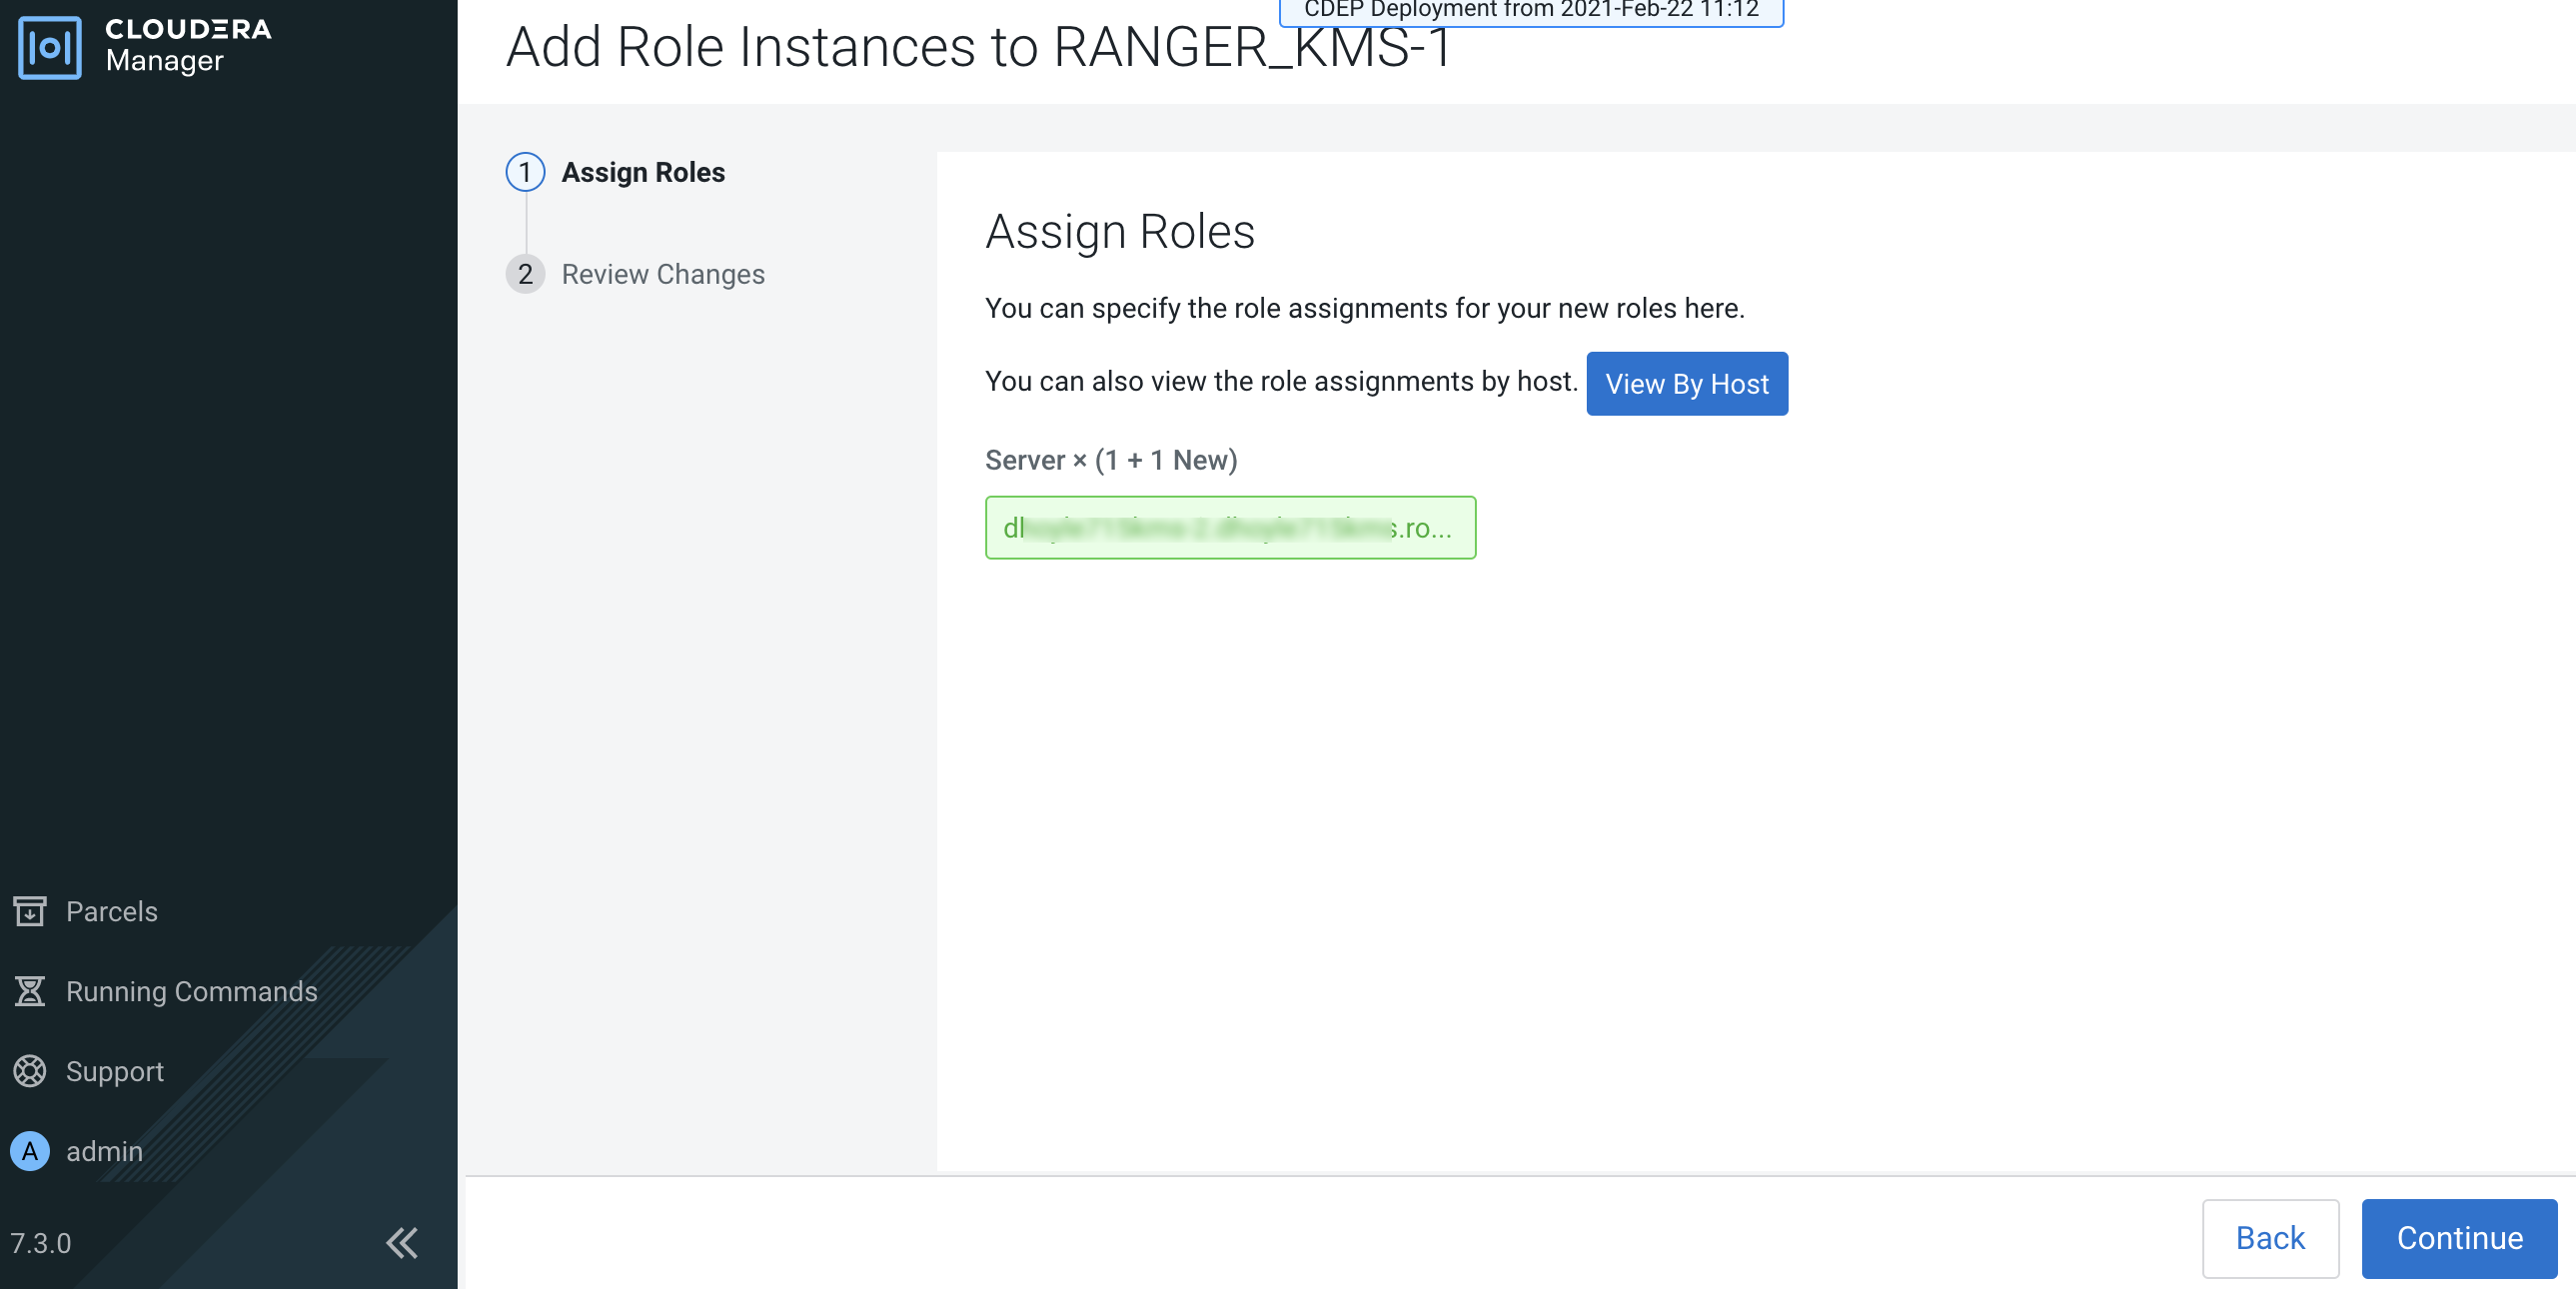
The Assign Roles page is redisplayed with the new backup host. Click
Continue.
-
Review the settings on the Review Changes page, then click Continue.

-
The new role instance appears on the Ranger KMS page. If the new Ranger KMS
instance was not started by the wizard, you can start the service by clicking
Actions > Start in the Ranger KMS service.

-
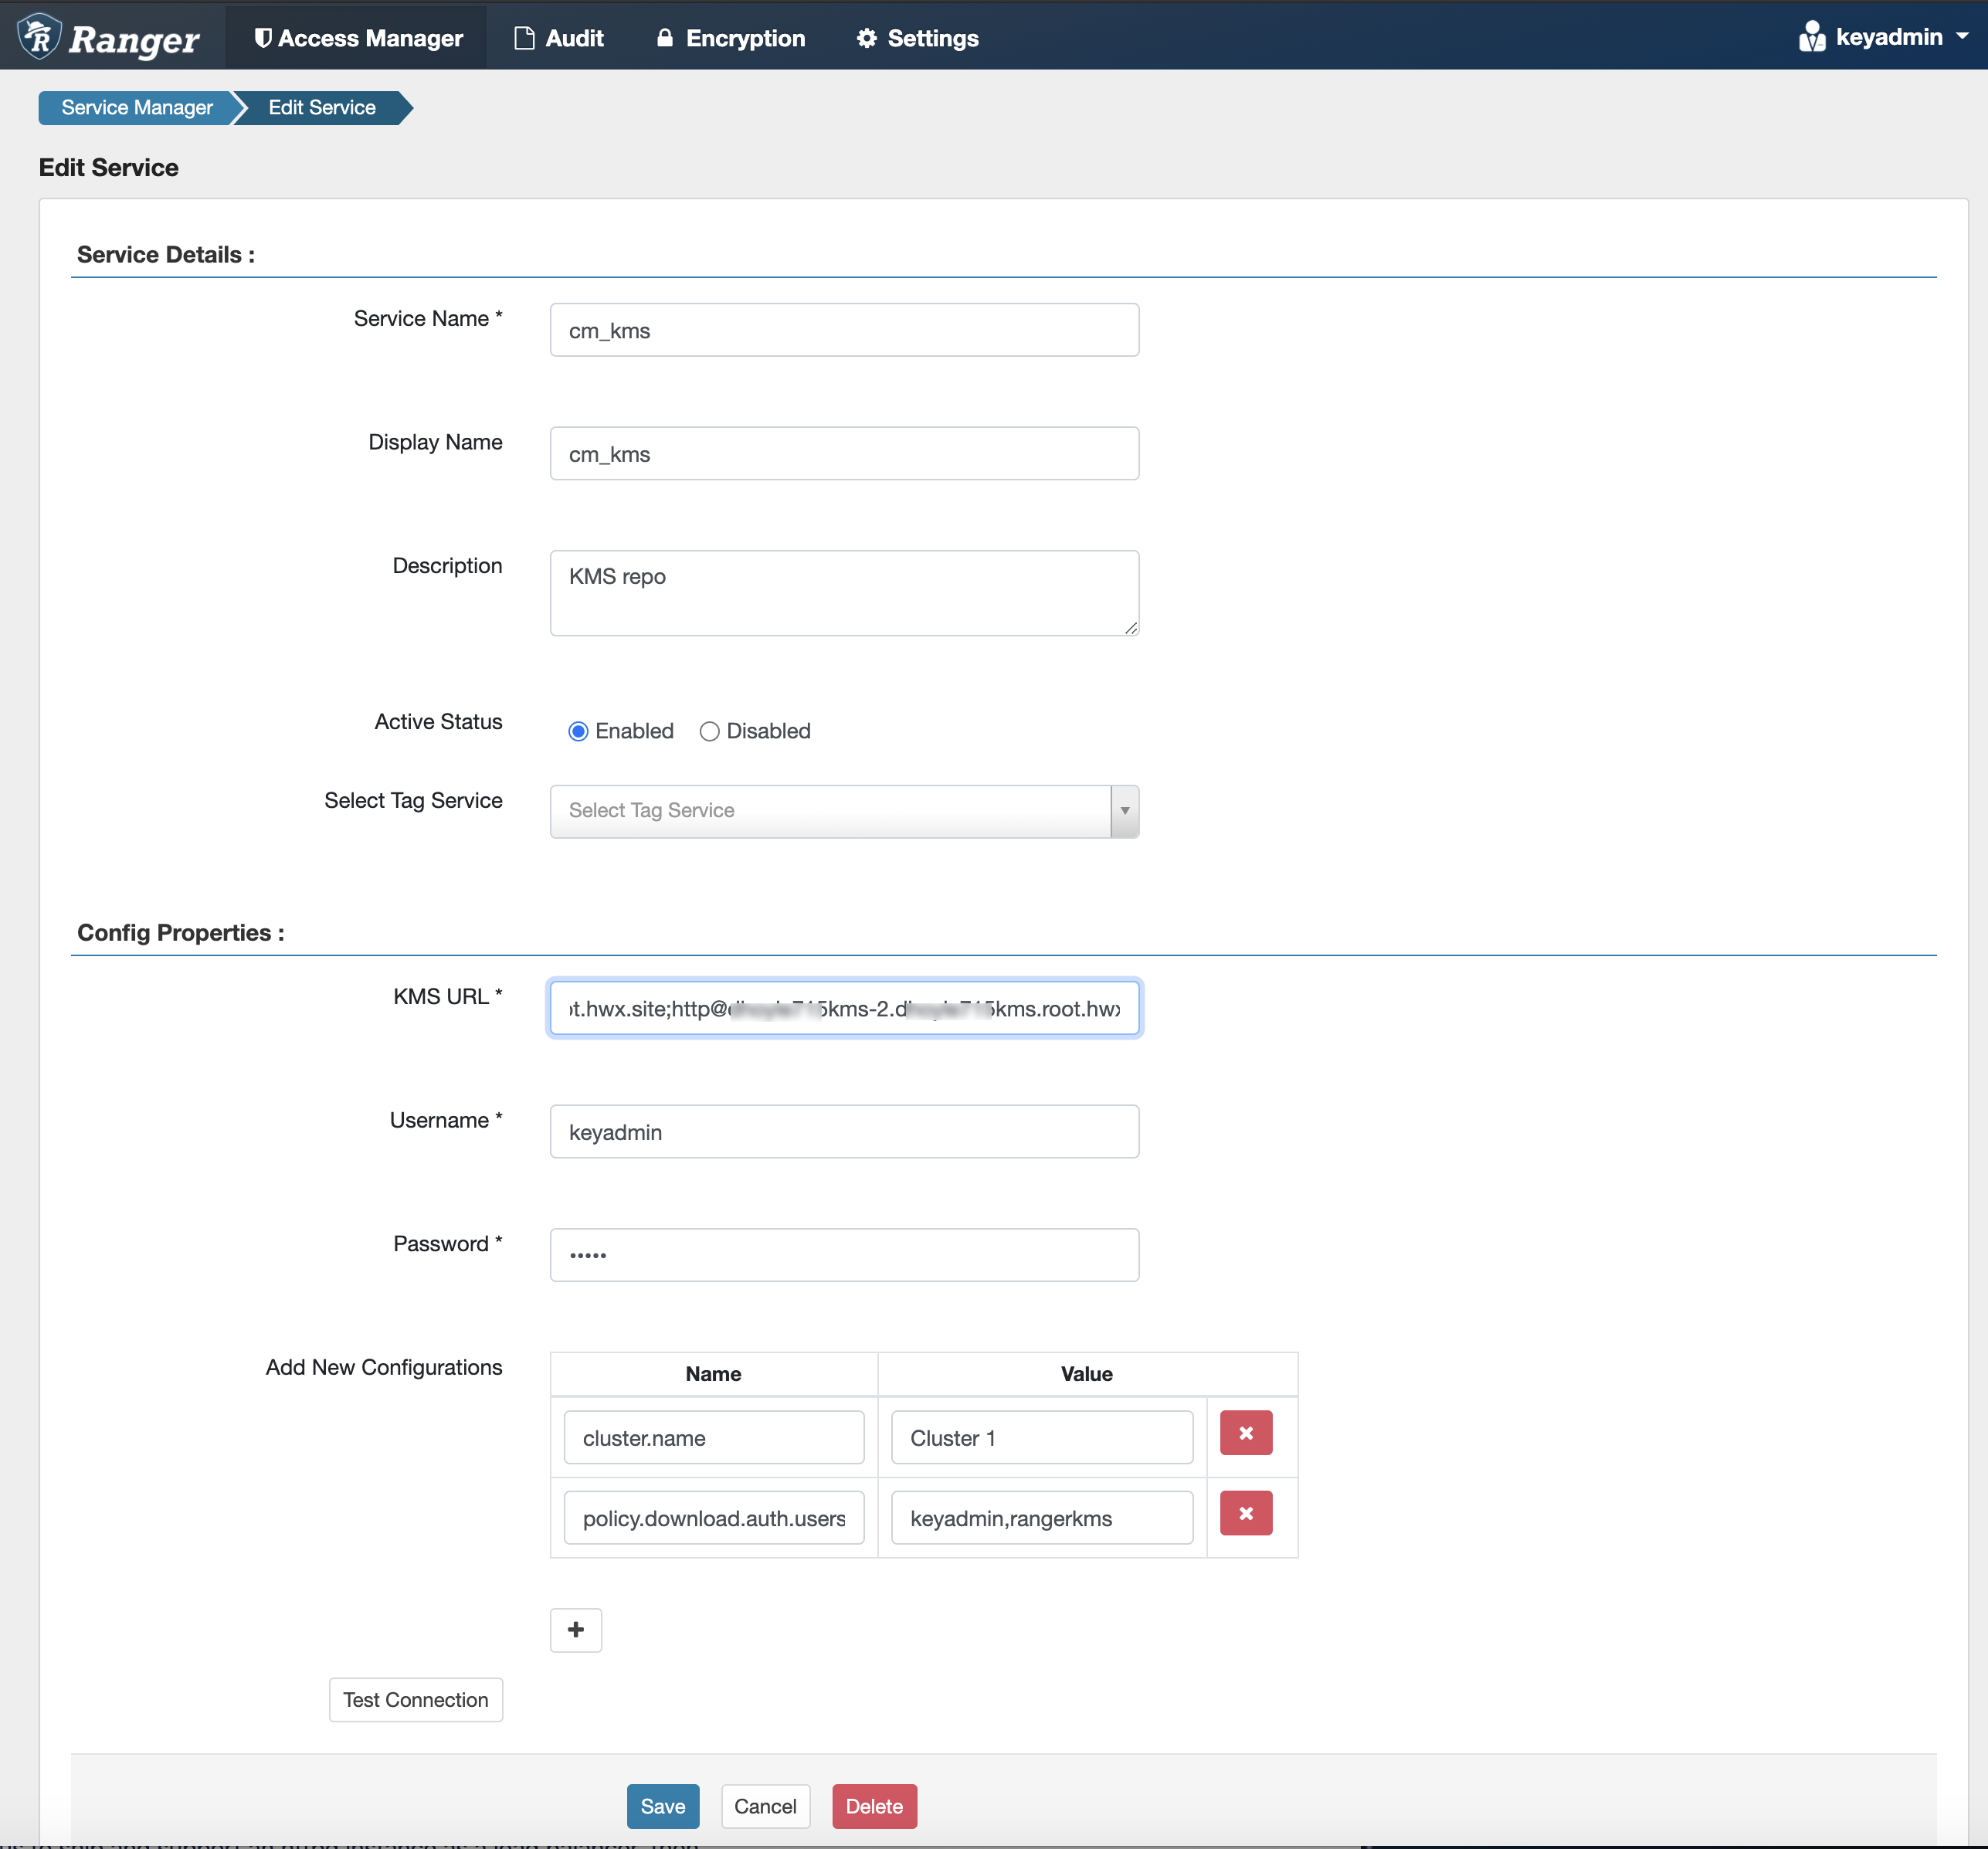
In Cloudera Manager, select the Ranger service, click
Ranger Admin Web UI, then log in as the Ranger KMS user (the default
credentials are keyadmin/admin123). Click the Edit icon for the cm_kms service,
then update the KMS URL property.
- Add the new KMS host using the following format:
kms://http@<kms_host1>;http@<kms_host2>:<kms_port>/kms - The default port is 9292. For example:
kms://http@kms_host1;http@kms_host2:9292/kms - If SSL is enabled, use
httpsand port 9494. For example:kms://http@kms_host1;http@kms_host2:9494/kms
Click Test Connection to confirm the settings, then click Save to save your changes.
- Add the new KMS host using the following format:
-
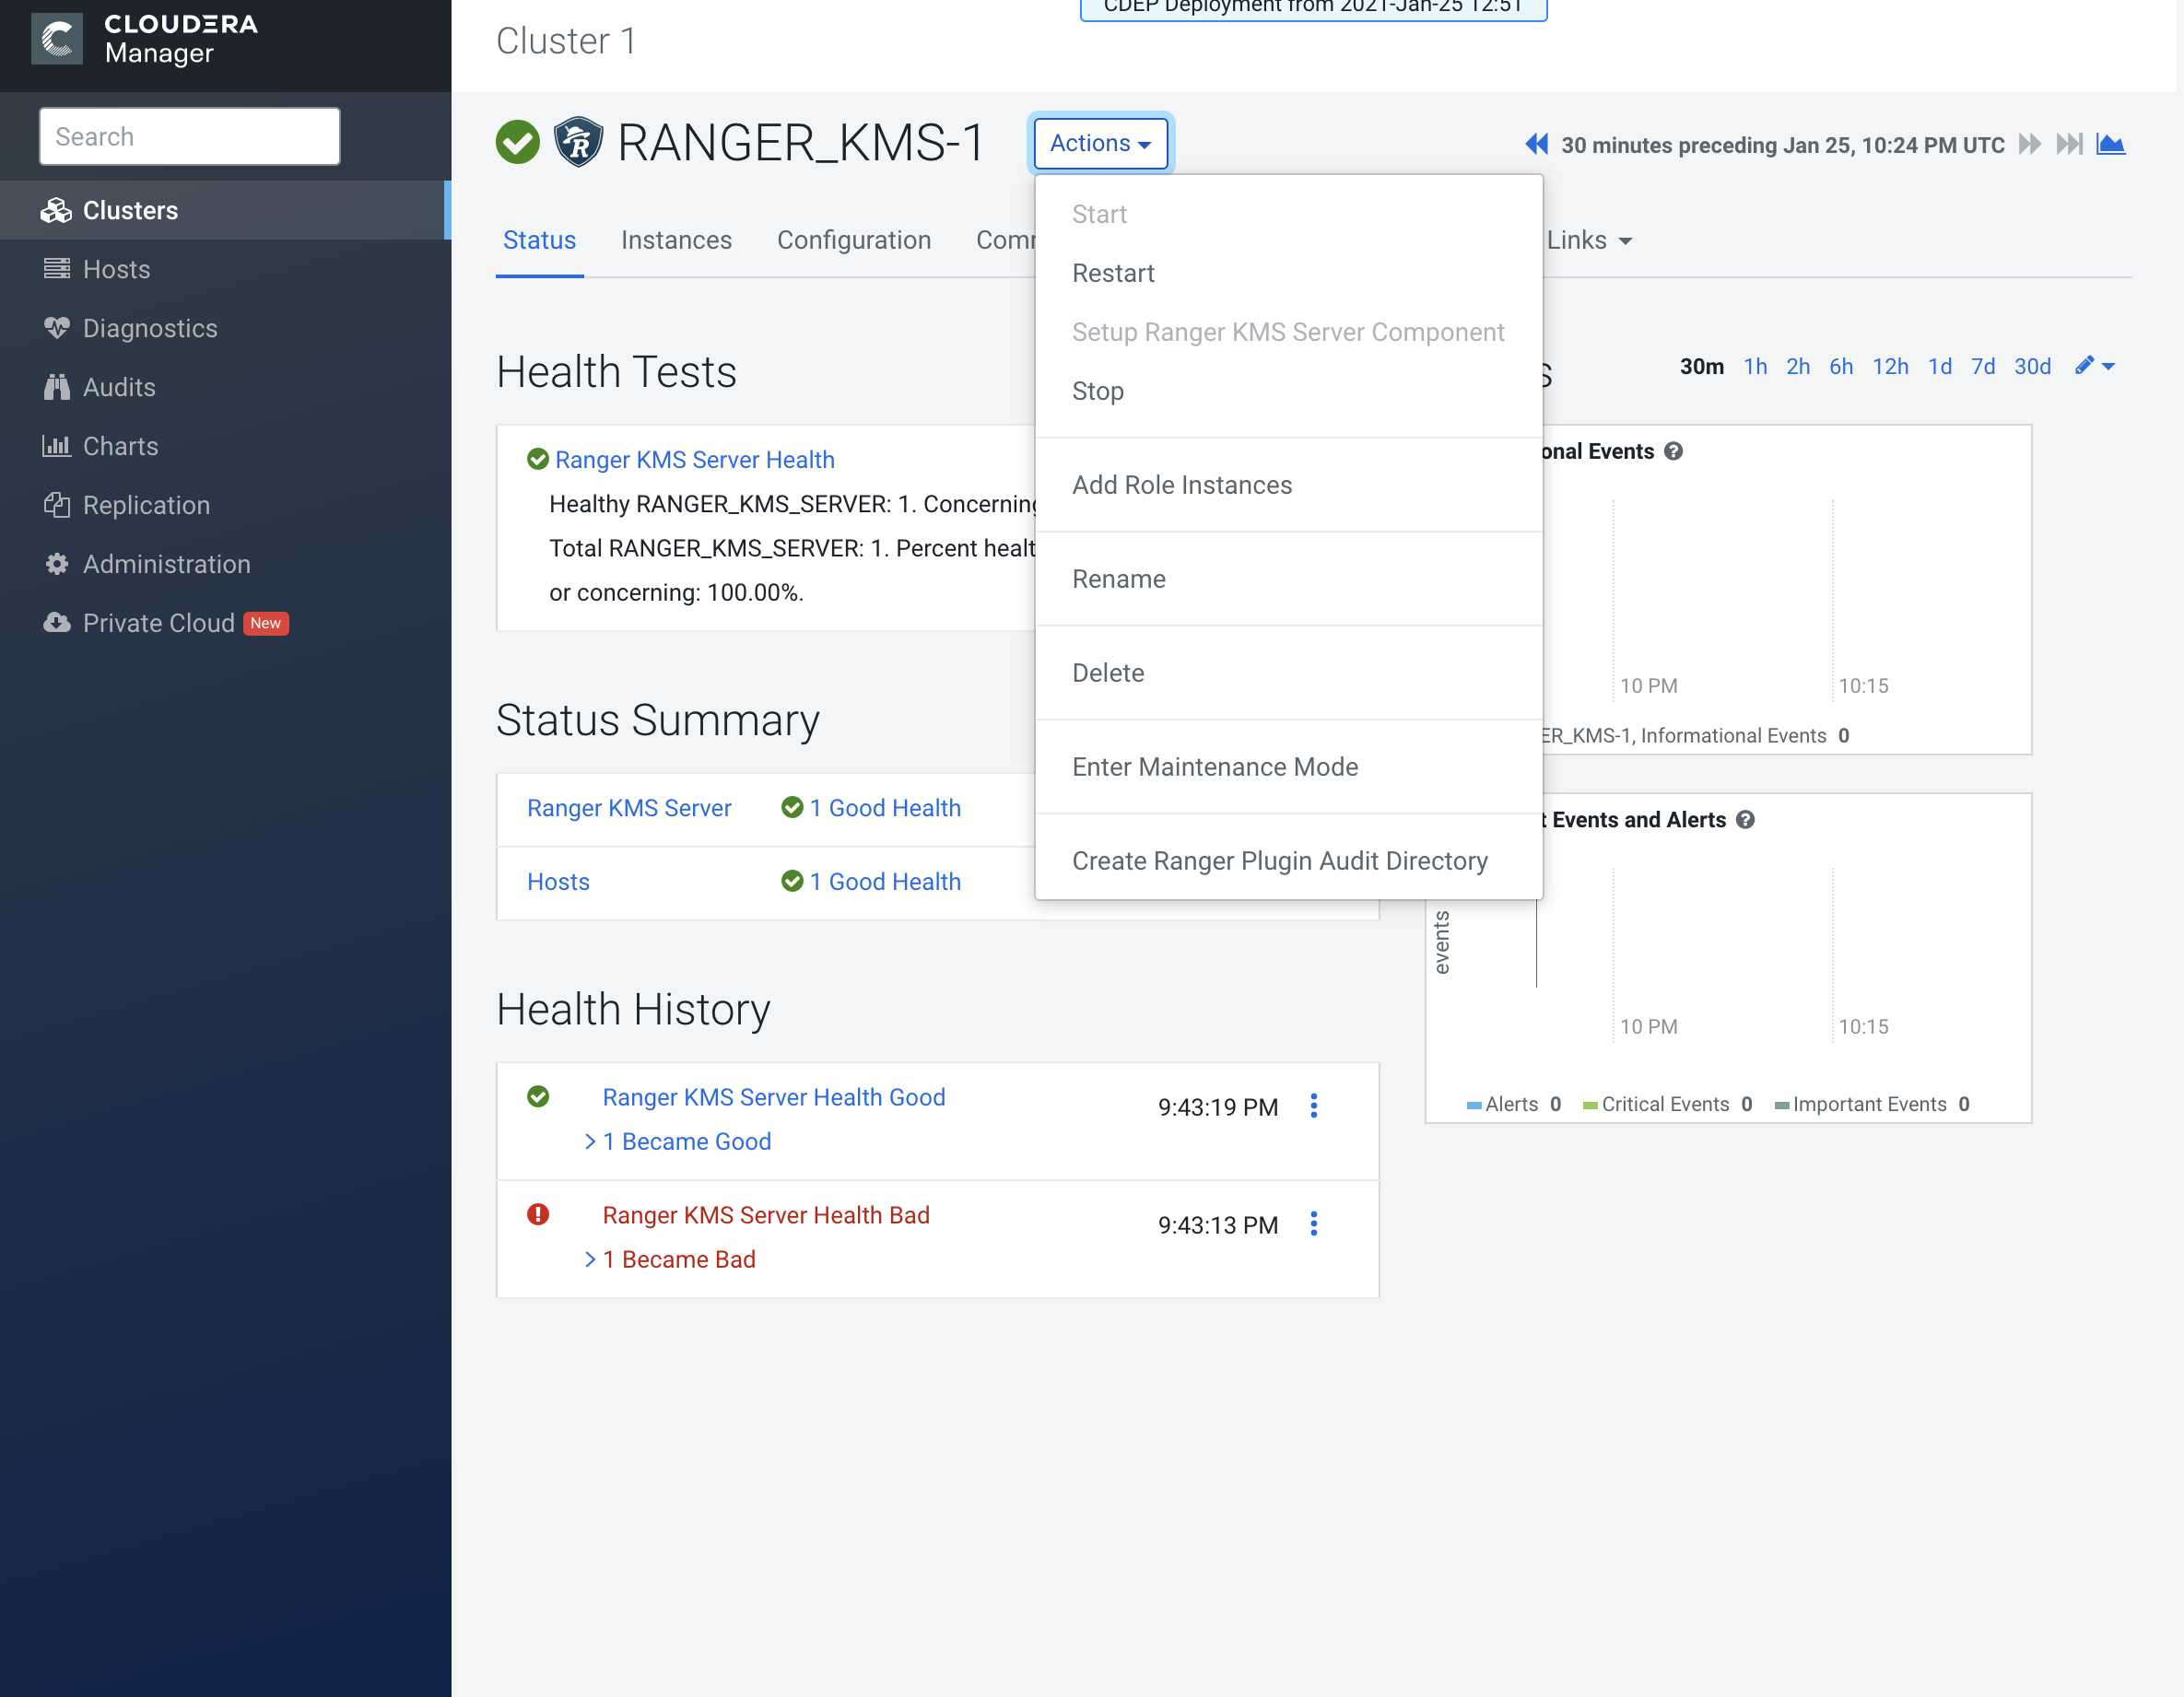
In Cloudera Manager, click the Ranger KMS service, then
select Actions > Create Ranger Plugin Audit Directory.
-
In Cloudera Manager, select Ranger KMS, then click
Configuration.
-
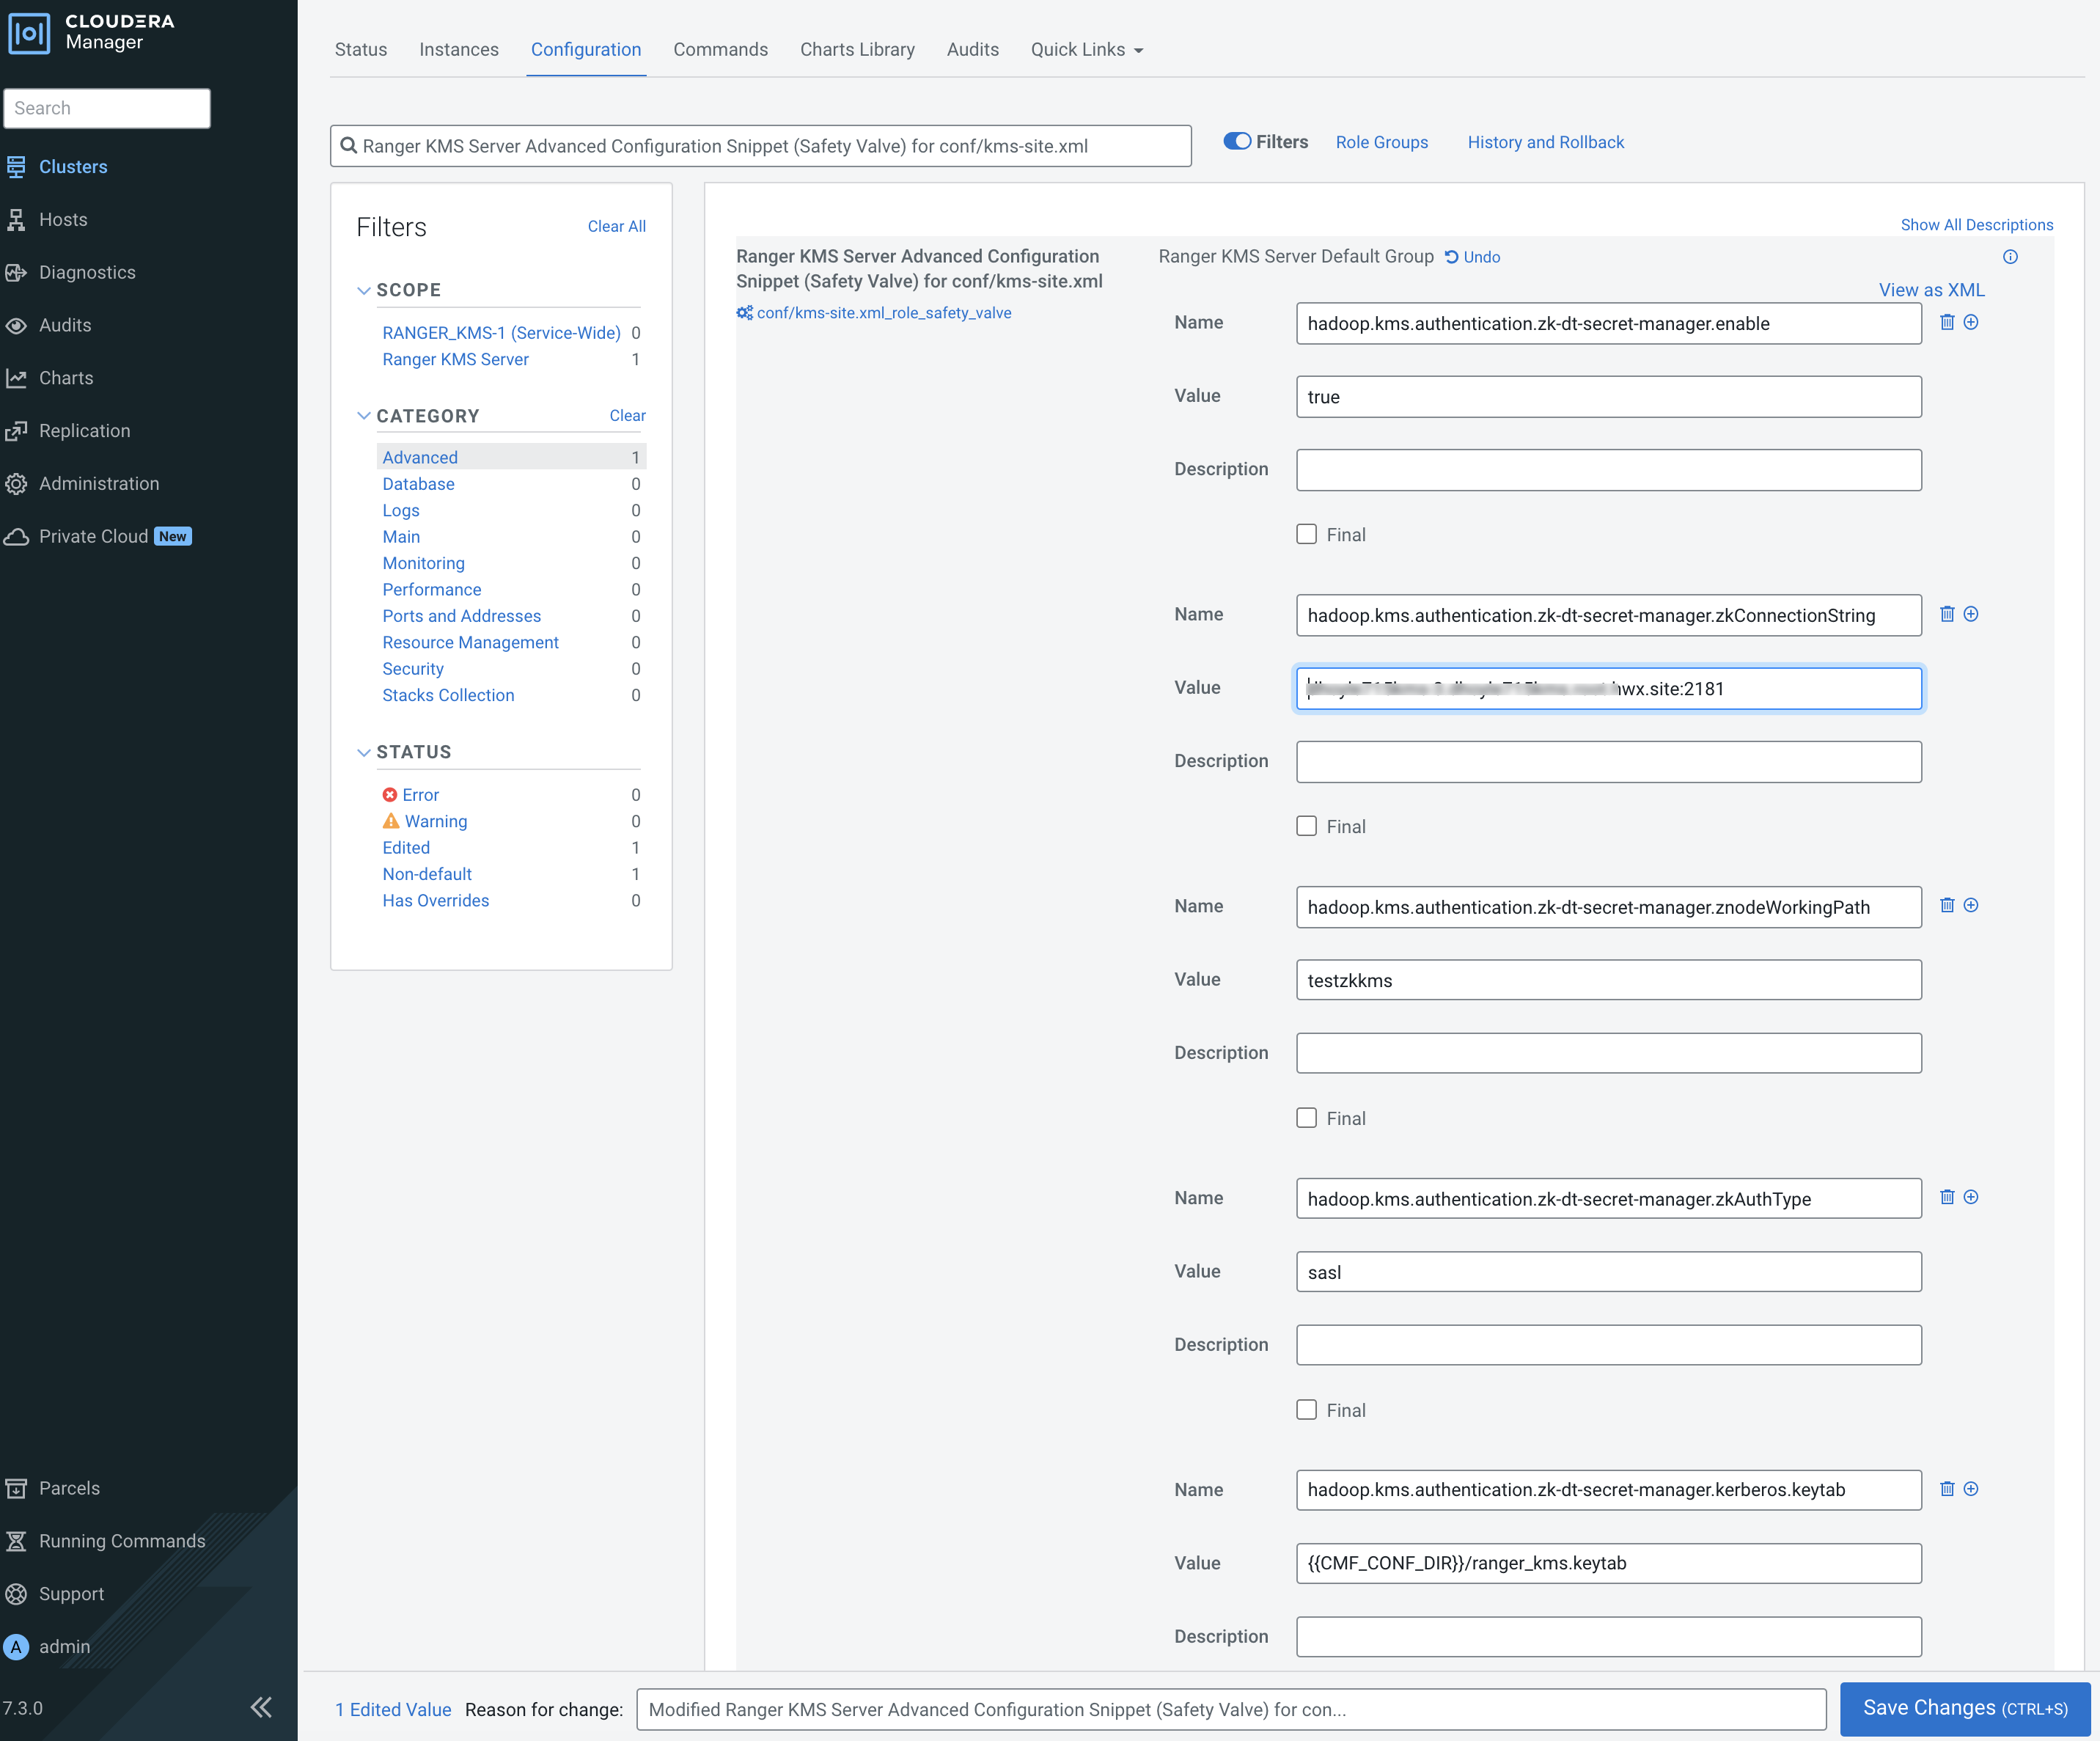
Use the Add (+) icons for the Ranger KMS Server Advanced Configuration
Snippet (Safety Valve) for conf/kms-site.xml property to add the
following properties, then click Save Changes.
- hadoop.kms.authentication.zk-dt-secret-manager.enable = true
- hadoop.kms.authentication.zk-dt-secret-manager.zkConnectionString = <Zookeeper hostname>:2181
- hadoop.kms.authentication.zk-dt-secret-manager.znodeWorkingPath
= <provide a znode working path other than /zkdtsm to
avoid collision>
For example:
hadoop.kms.authentication.zk-dt-secret-manager.znodeWorkingPath = testzkkms
- hadoop.kms.authentication.zk-dt-secret-manager.zkAuthType = sasl
- hadoop.kms.authentication.zk-dt-secret-manager.kerberos.keytab = {{CMF_CONF_DIR}}/ranger_kms.keytab
-
Use the Add (+) icons for the Ranger KMS Server Advanced Configuration
Snippet (Safety Valve) for conf/kms-site.xml property to add the
following properties, then click Save Changes.
-
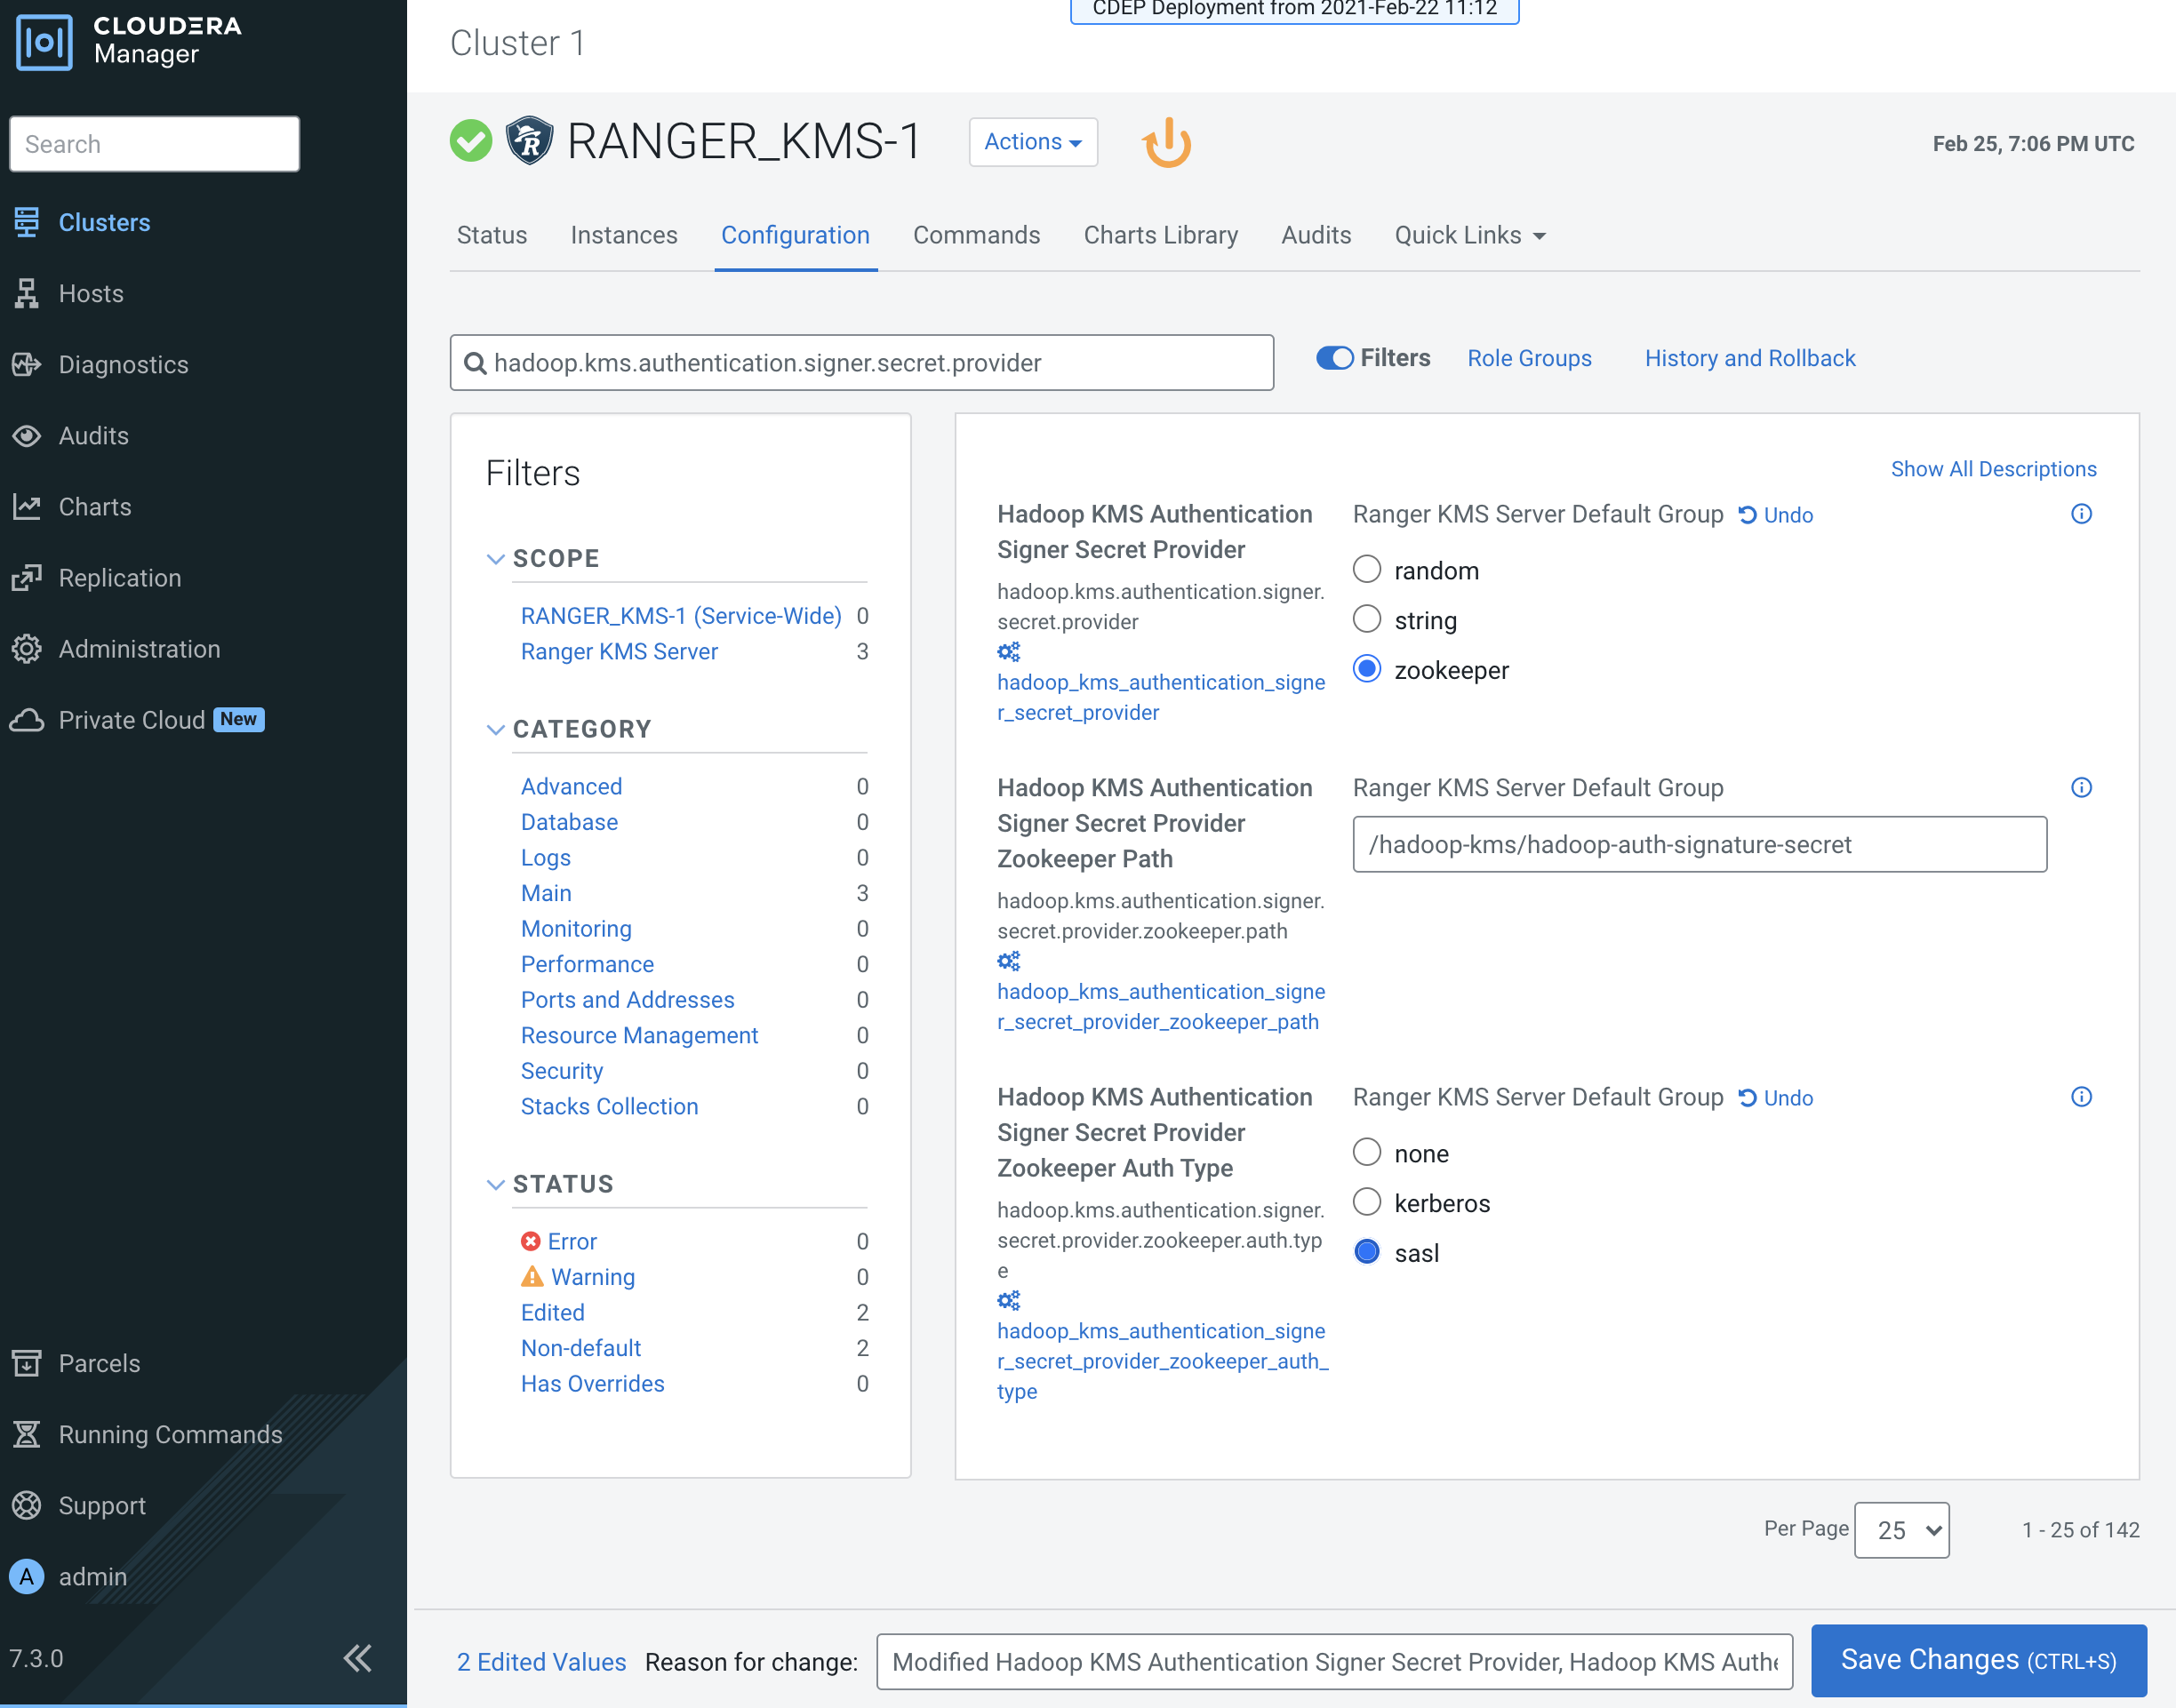
Update the following Ranger KMS configuration properties, then click Save
Changes.
- hadoop.kms.authentication.signer.secret.provider = zookeeper
- hadoop.kms.authentication.signer.secret.provider.zookeeper.auth.type = sasl
-
Verify that the
hadoop.kms.cache.enableproperty is set to the default value of true (the check box is selected).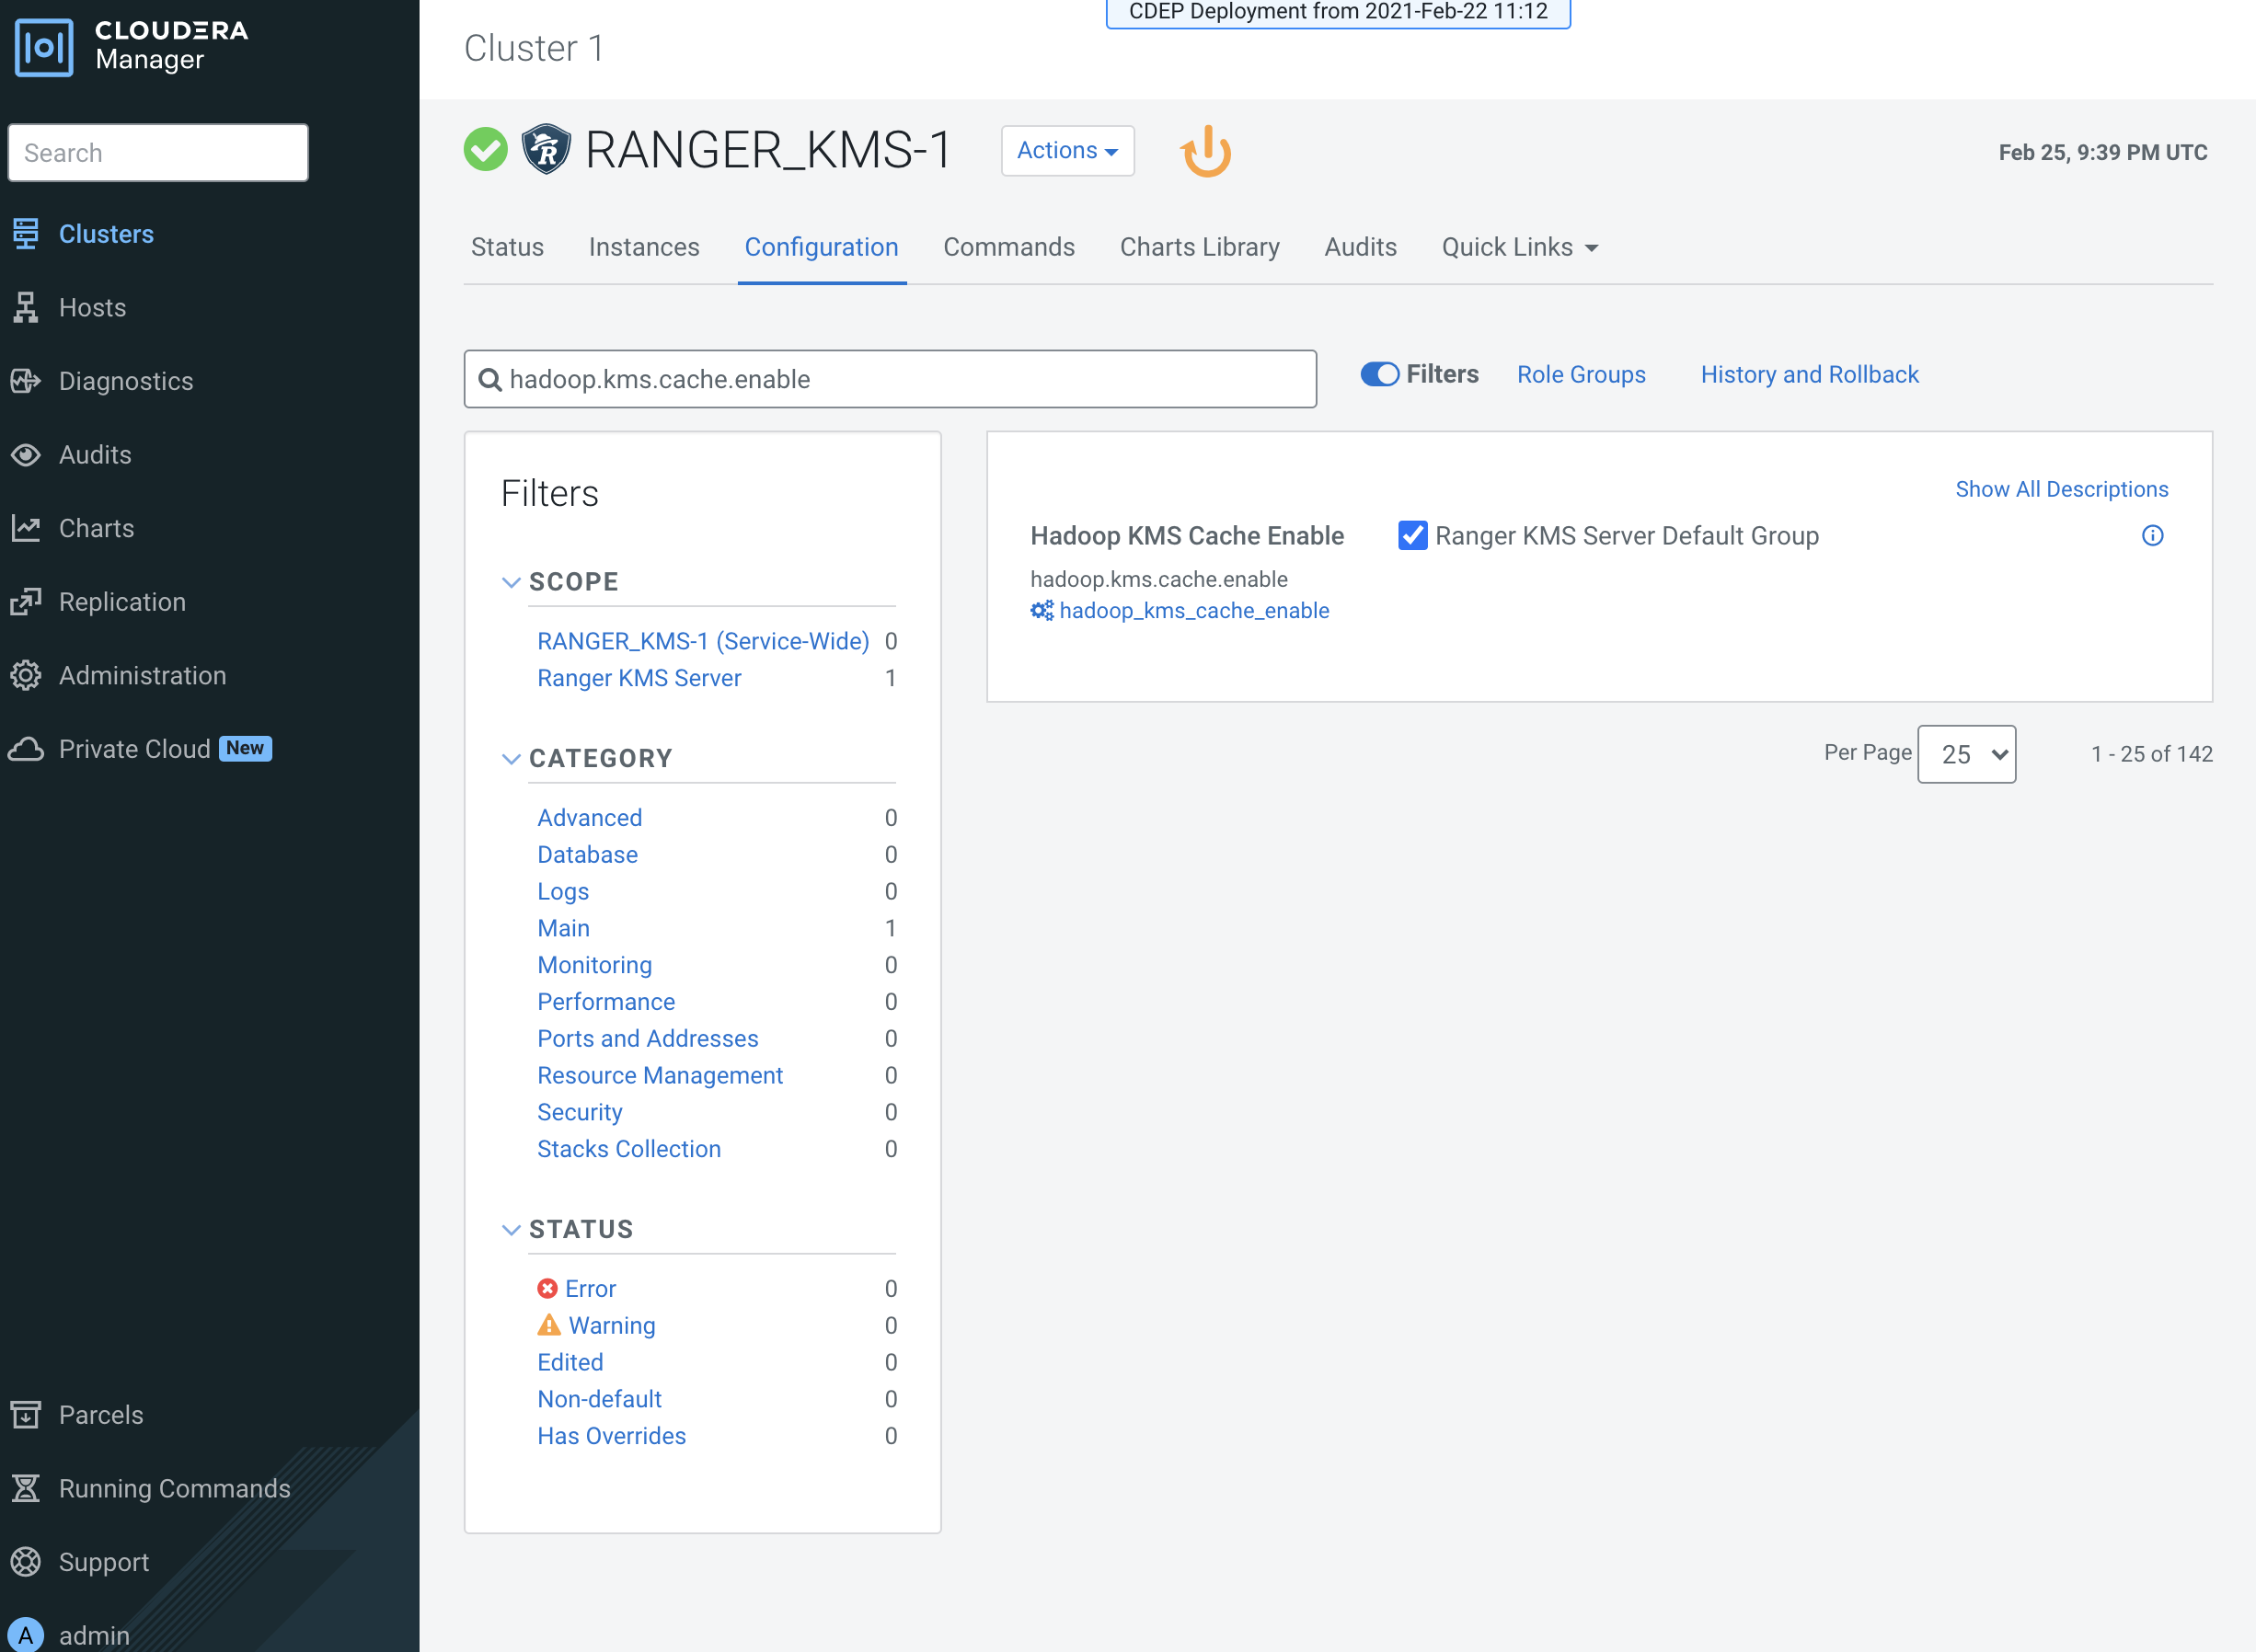
-
Click the Stale Configuration Restart icon.
