Adding Cloudera Storage Optimizer to an existing Ozone cluster after upgrade
Learn how to integrate Cloudera Storage Optimizer into an existing Ozone cluster after upgrading Cloudera Base on premises to 7.3.2.0 and Cloudera Manager to 7.13.2.0.
Before adding Cloudera Storage Optimizer to an existing Ozone cluster, do the following steps:
- Sign in to Cloudera Manager.
- In the left navigation, click Clusters and select the Ozone cluster.
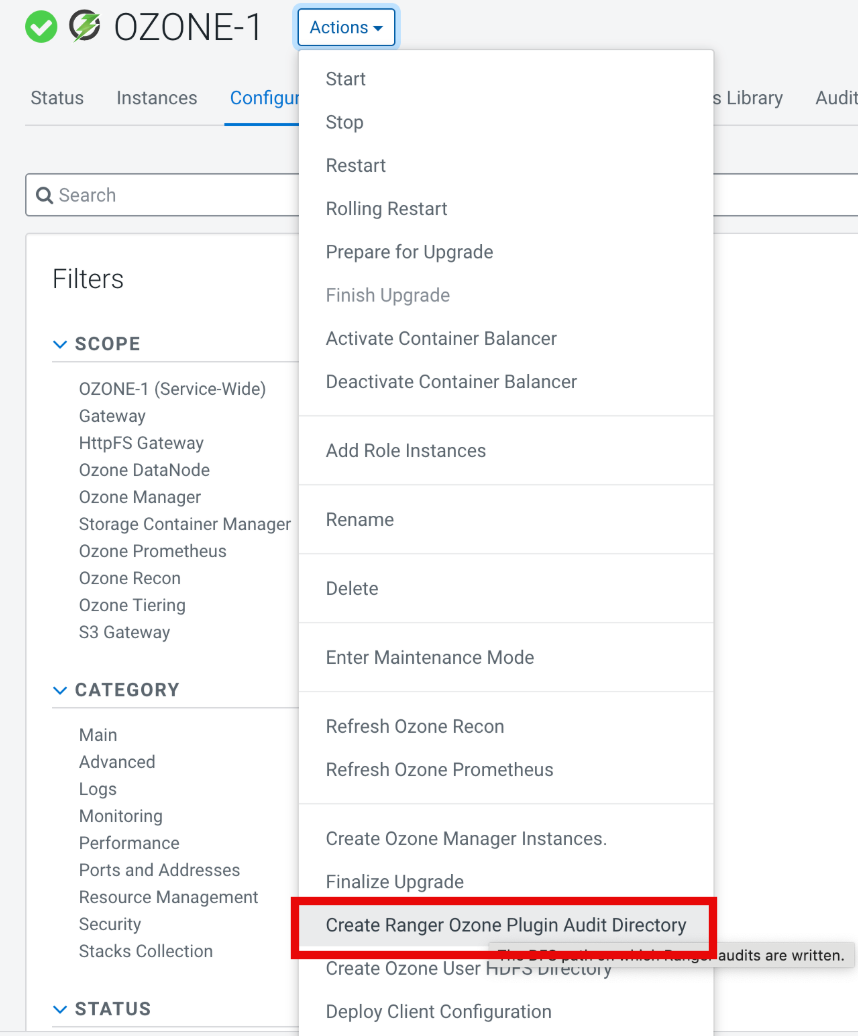
- Click Actions drop-down button and click
Create Ranger Ozone Plugin Audit Directory.
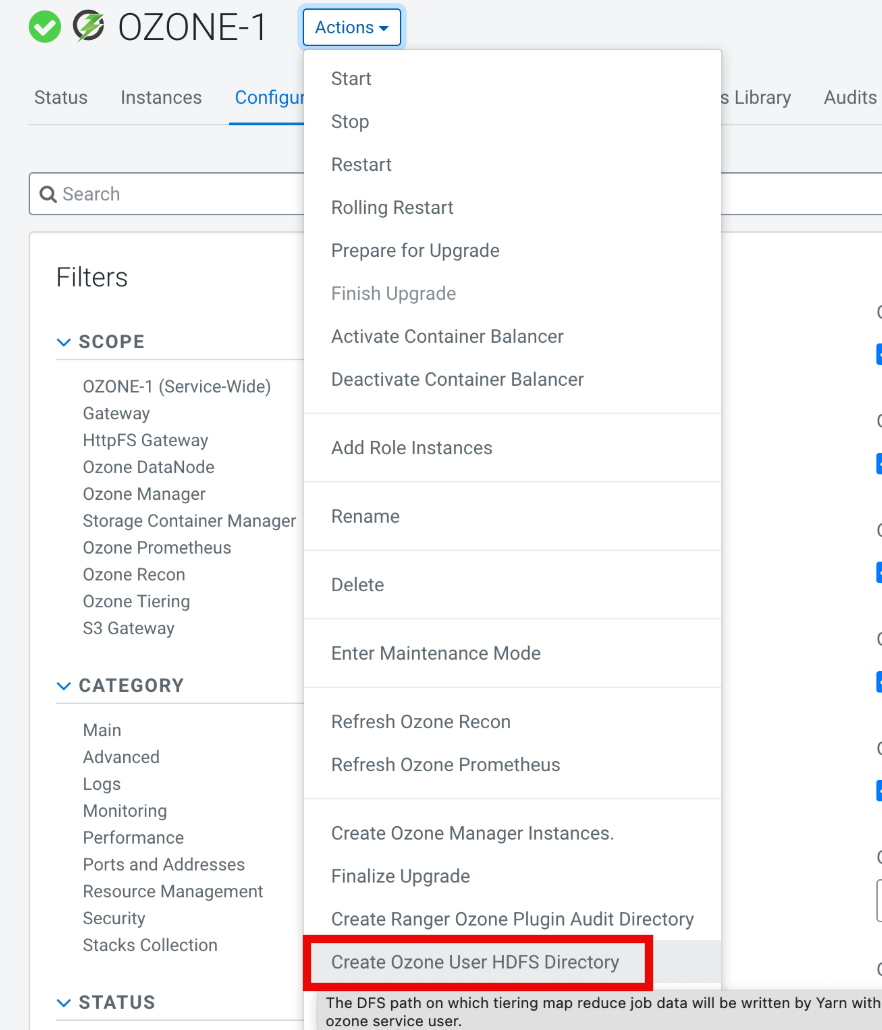
- Click Actions drop-down button and click
Create Ozone User HDFS Directory.
- Perform the steps mentioned in Configuring Ranger policies.
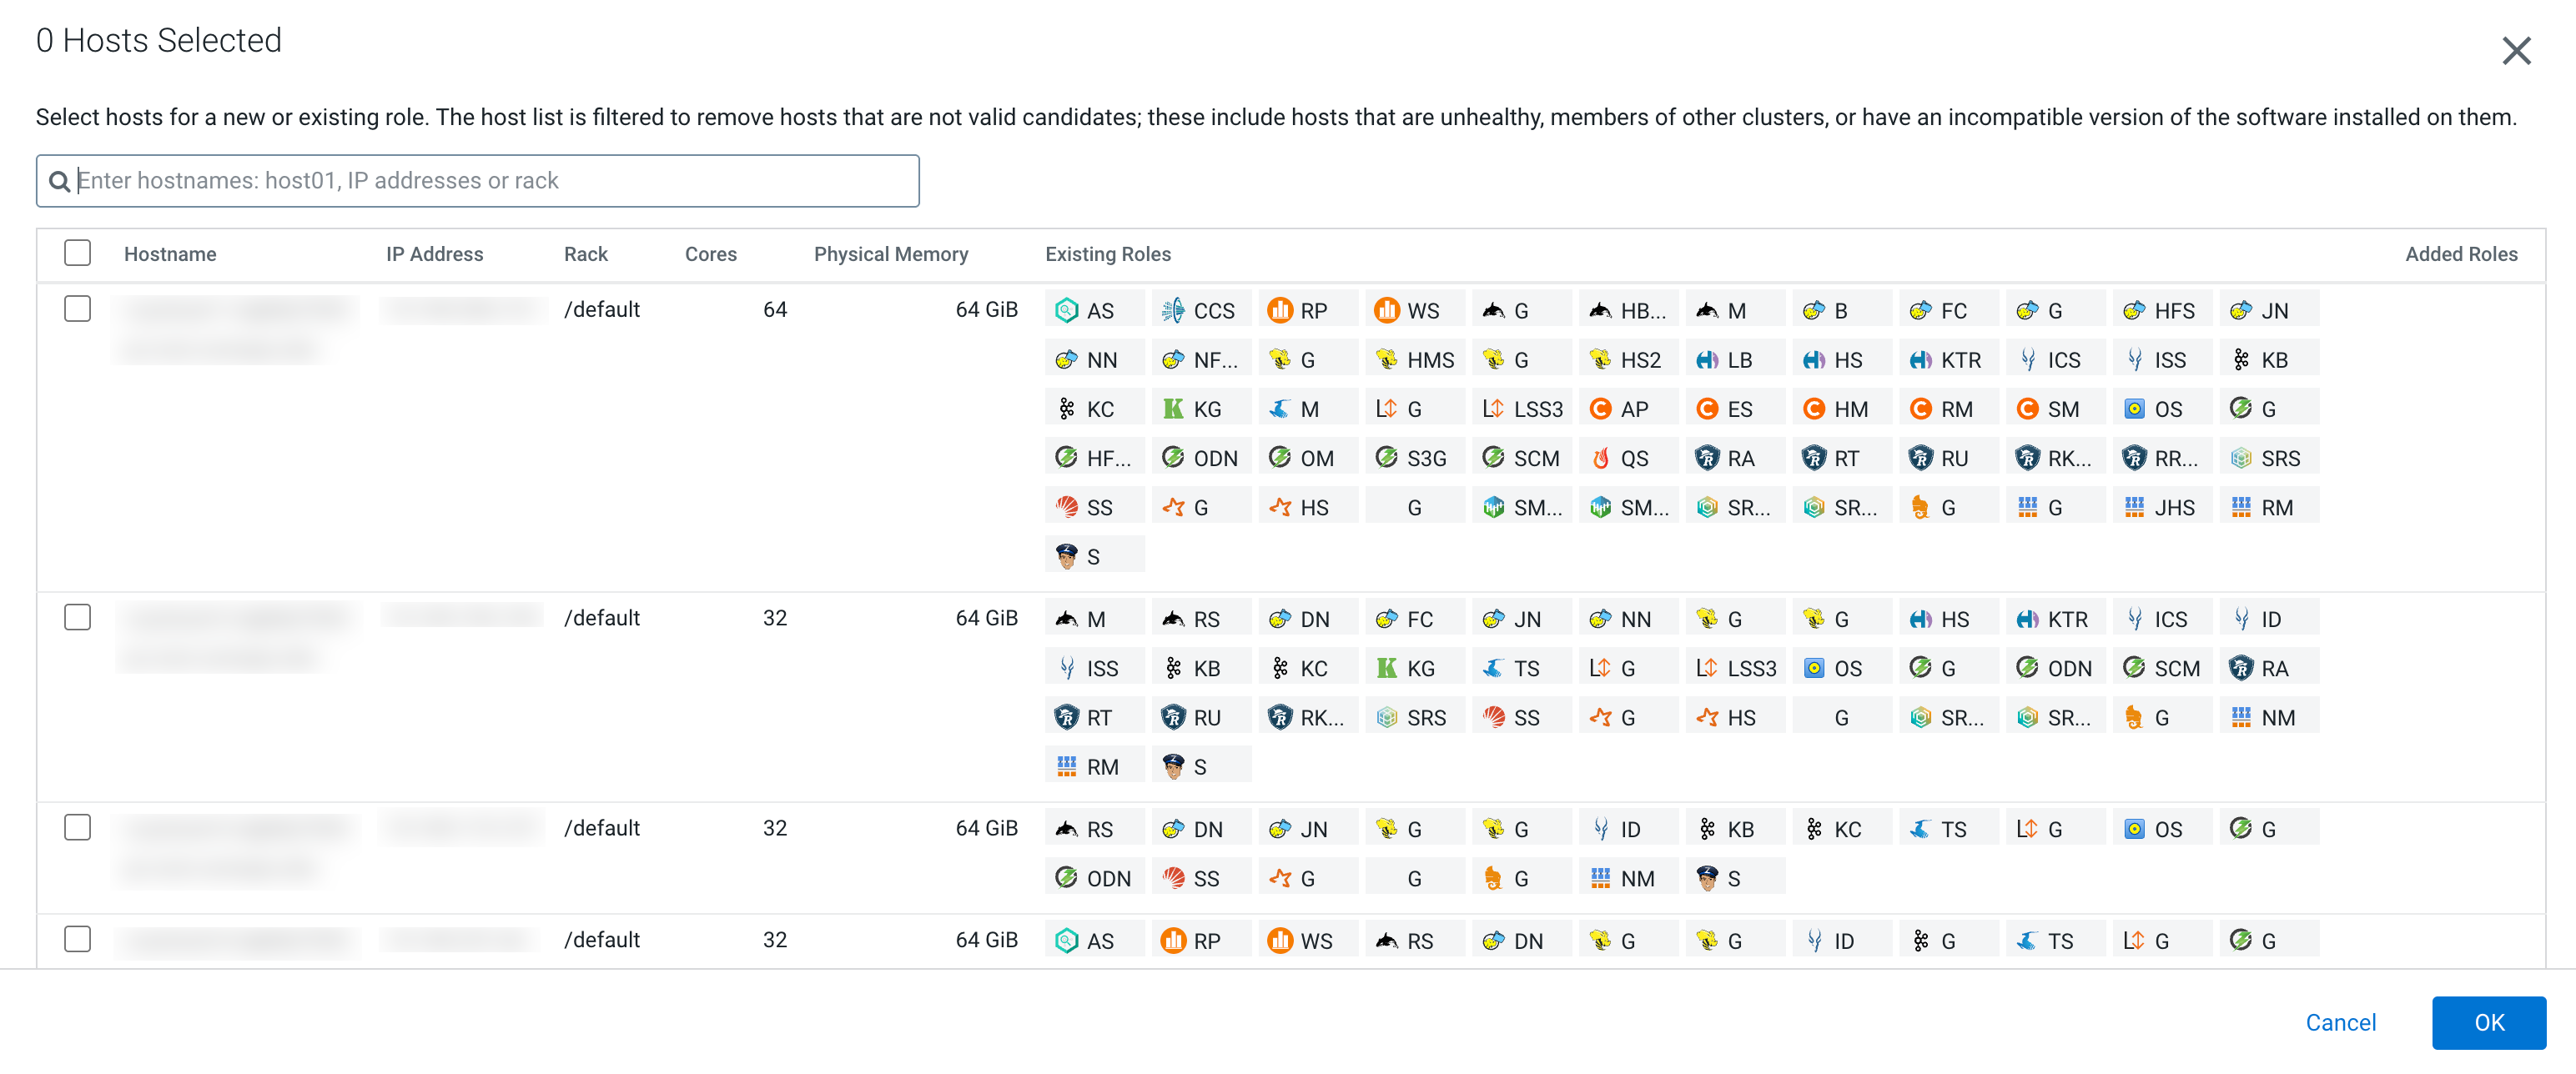
-
Click Add Role Instances button. Add Role
Instances to <***CLUSTER-NAME***> page
opens.

-
Click Ozone Tiering field. A popup window appears
displaying all the hosts.

-
Select the hostname onto which you want to install the sevice and click
OK.