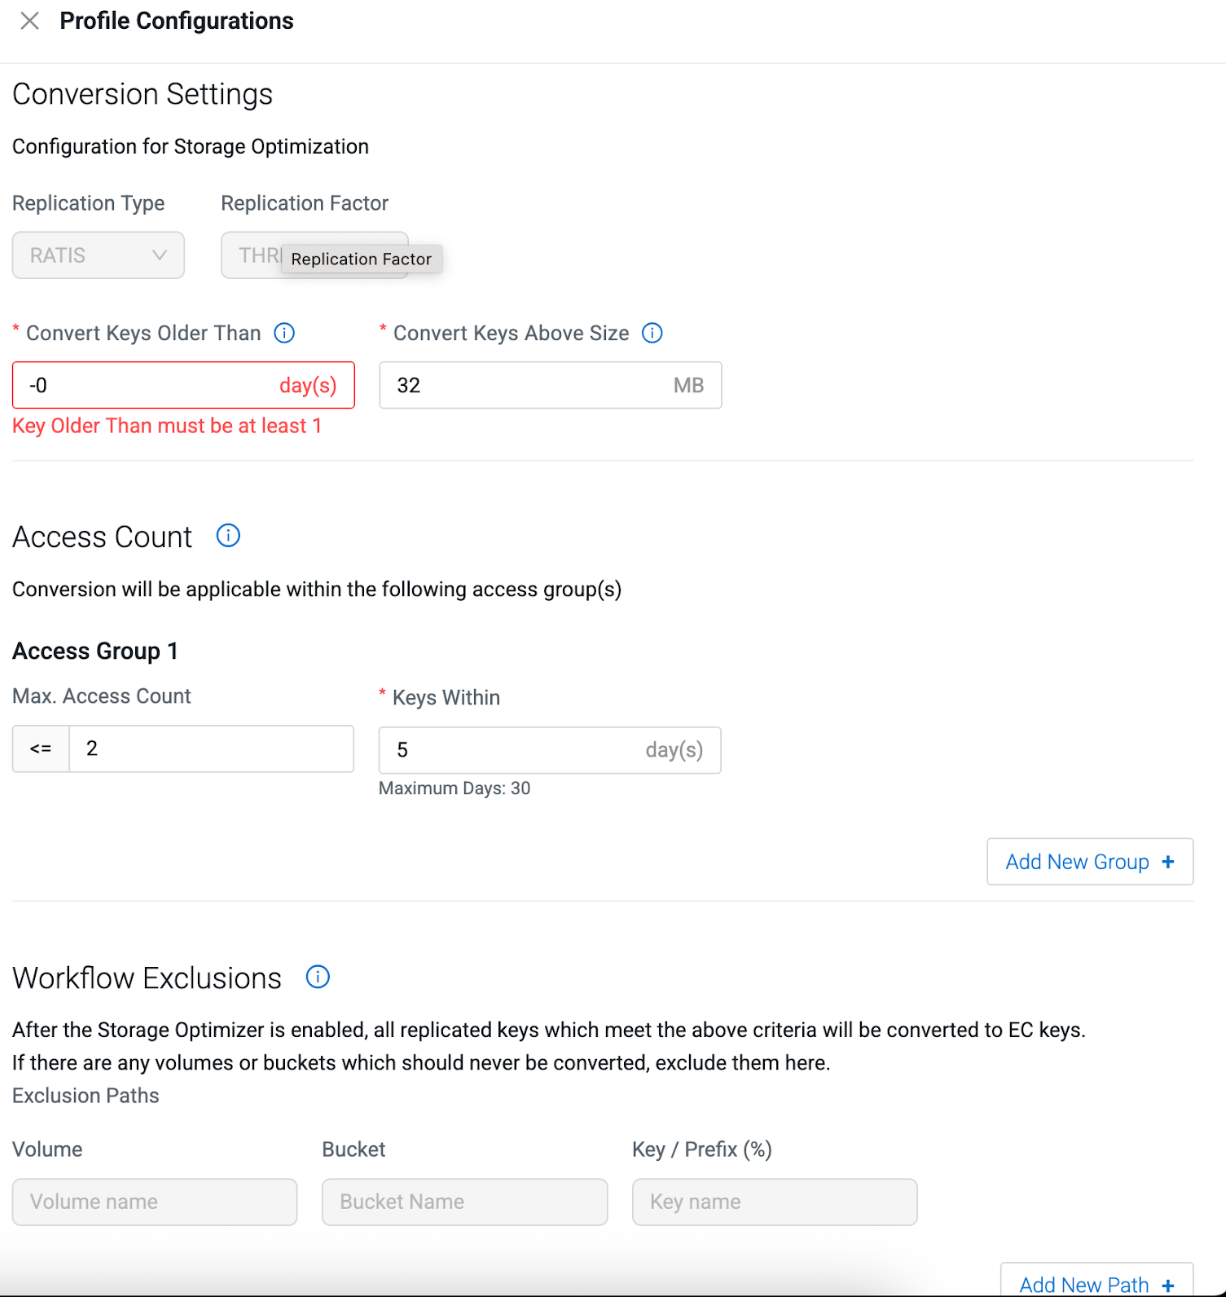
Configuring profiles through Cloudera Storage Optimizer UI

Cloudera Storage Optimizer offers a user-friendly web interface for configuring data conversion policies through the Cloudera Storage Optimizer UI. Learn how to configure profiles using the Cloudera Storage Optimizer UI.

Various types of profiles can be created and used, but only one will be default and activated at a time. Following are some examples which can be used as default profiles:
  • Standard profile (balanced):
    • Keys older than 30 days
    • Size above 32 MB
    • Not accessed in the time window

    It converts files larger than 32 MB that are not accessed in 30 days to EC format.

  • Aggressive profile (maximum savings):
    • Keys older than 7 days
    • Size above 1 MB
    • Ideal for logs and temporary data

    It aggressively converts log files to EC after just 7 days of inactivity.

  • Conservative profile (minimal risk):
    • Keys older than 90 days
    • Size above 100 MB
    • For critical archived data

    It is useful for conservative approach for important data, and for only converting large files that are rarely accessed over 3 months.

  1. Sign in to Cloudera Manager.
  2. In the left navigation, click Clusters and select the Ozone cluster.
  3. Click Instances tab and click on Ozone Tiering in the Role Type column. The Cloudera Storage Optimizer UI page opens.
  4. Click Configuration tab.
  5. Click Profile Configurations to create and manage storage optimization profiles.
  6. Update the following profile configurations:
    1. Conversion Settings: Configuration for Storage Optimization
      1. Replication Type: Select RATIS. By default, only RATIS replicated data can be converted to erasure coding (EC).
      2. Replication Factor: Enter THREE for standard 3x replication or your cluster's replication setting.
      3. Convert Keys Older Than: Enter the minimum number of days after which the files are eligible for conversion. Minimum value is 1 day. Default value is 30 day(s).

        Example, setting it to 30 days means that only files that are not accessed for 30 days or more will be converted to EC.

      4. Convert Keys Above Size: Enter the minimum size of files in MB that are eligible for conversion. Default value is 32 MB. However, Cloudera recommends to use 3 MB to 100 MB depending on your use case.
    2. Access Count Configuration: Defines access patterns to identify truly cold data. You can create multiple access groups for granular control. Under Access Group, update the following:
      1. Max. Access Count: Maximum number of times a file can be accessed (use "<=" for less than or equal).
      2. Keys Within: Time interval in days for counting accesses. Maximum value is 30 days.

      Example, if Max Access Countis set as <= 2 and Keys Within is set as 5 days, it means Cloudera Storage Optimizer convert files that are accessed 2 times or less in the past 5 days.

      Click Add New Group + to define multiple access criteria. Files must meet all the Access Group conditions to be converted.

    3. Workflow Exclusions: Protect critical data by defining paths that should never be converted, regardless of other criteria. Under Exclusion Paths, update the following:
      1. Volume: Enter the volume name that you want to exclude.

        Example, critical-volume

      2. Bucket: Specify the bucket name that you want to exclude.

        Example, real-time-bucket

      3. Key / Prefix (%): Define the key patterns using % as wildcard.

        Example, /important/% excludes all keys under /important/

        Click Add New Path + to add multiple exclusion rules.