Creating any policy from the policy creation form
Learn how to configure and create a new policy using the multi-step Create New Policy workflow.
-
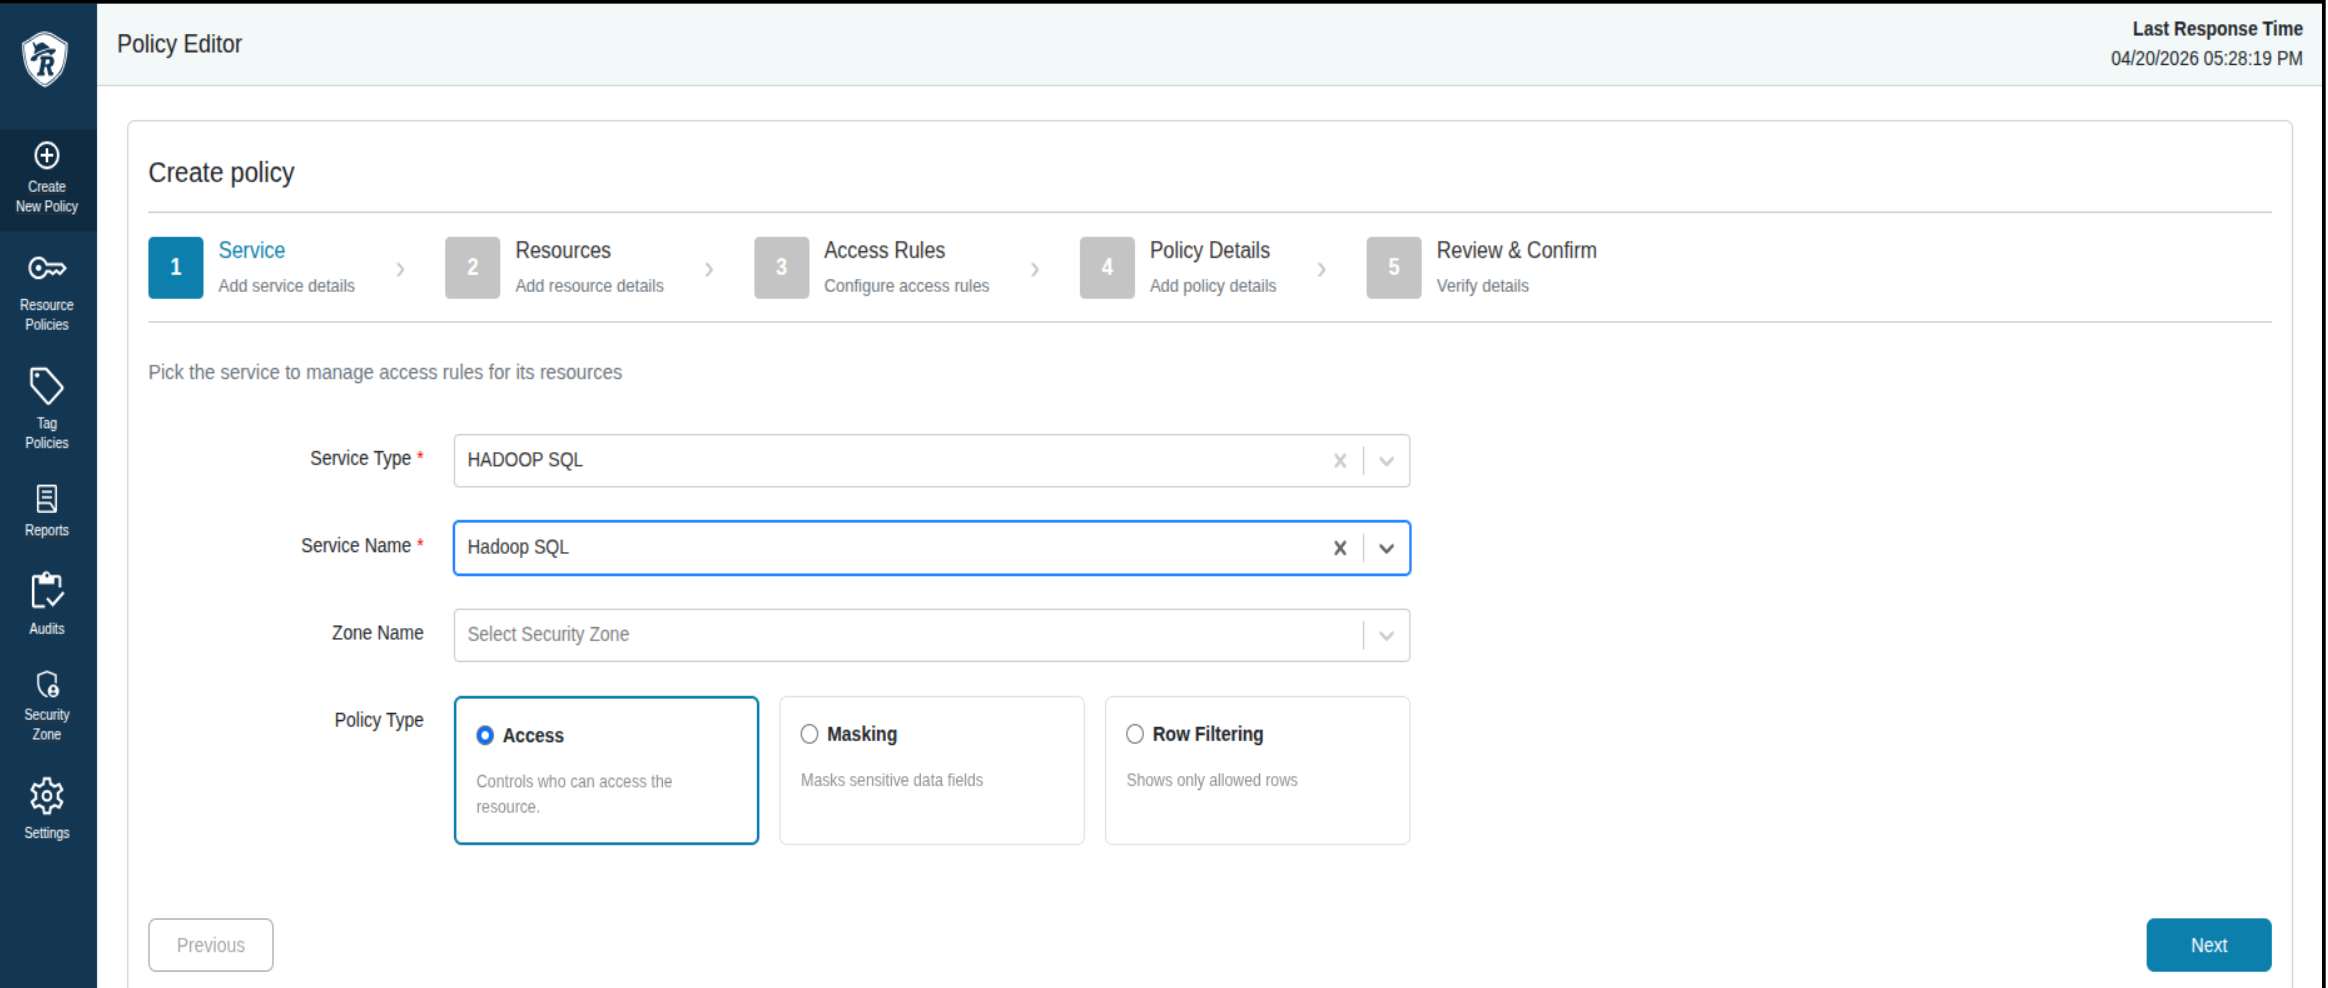
Service Details: Select the service definition, service name, optional security zone, and policy type (such as Access, Data Masking, or Row Filtering).
-
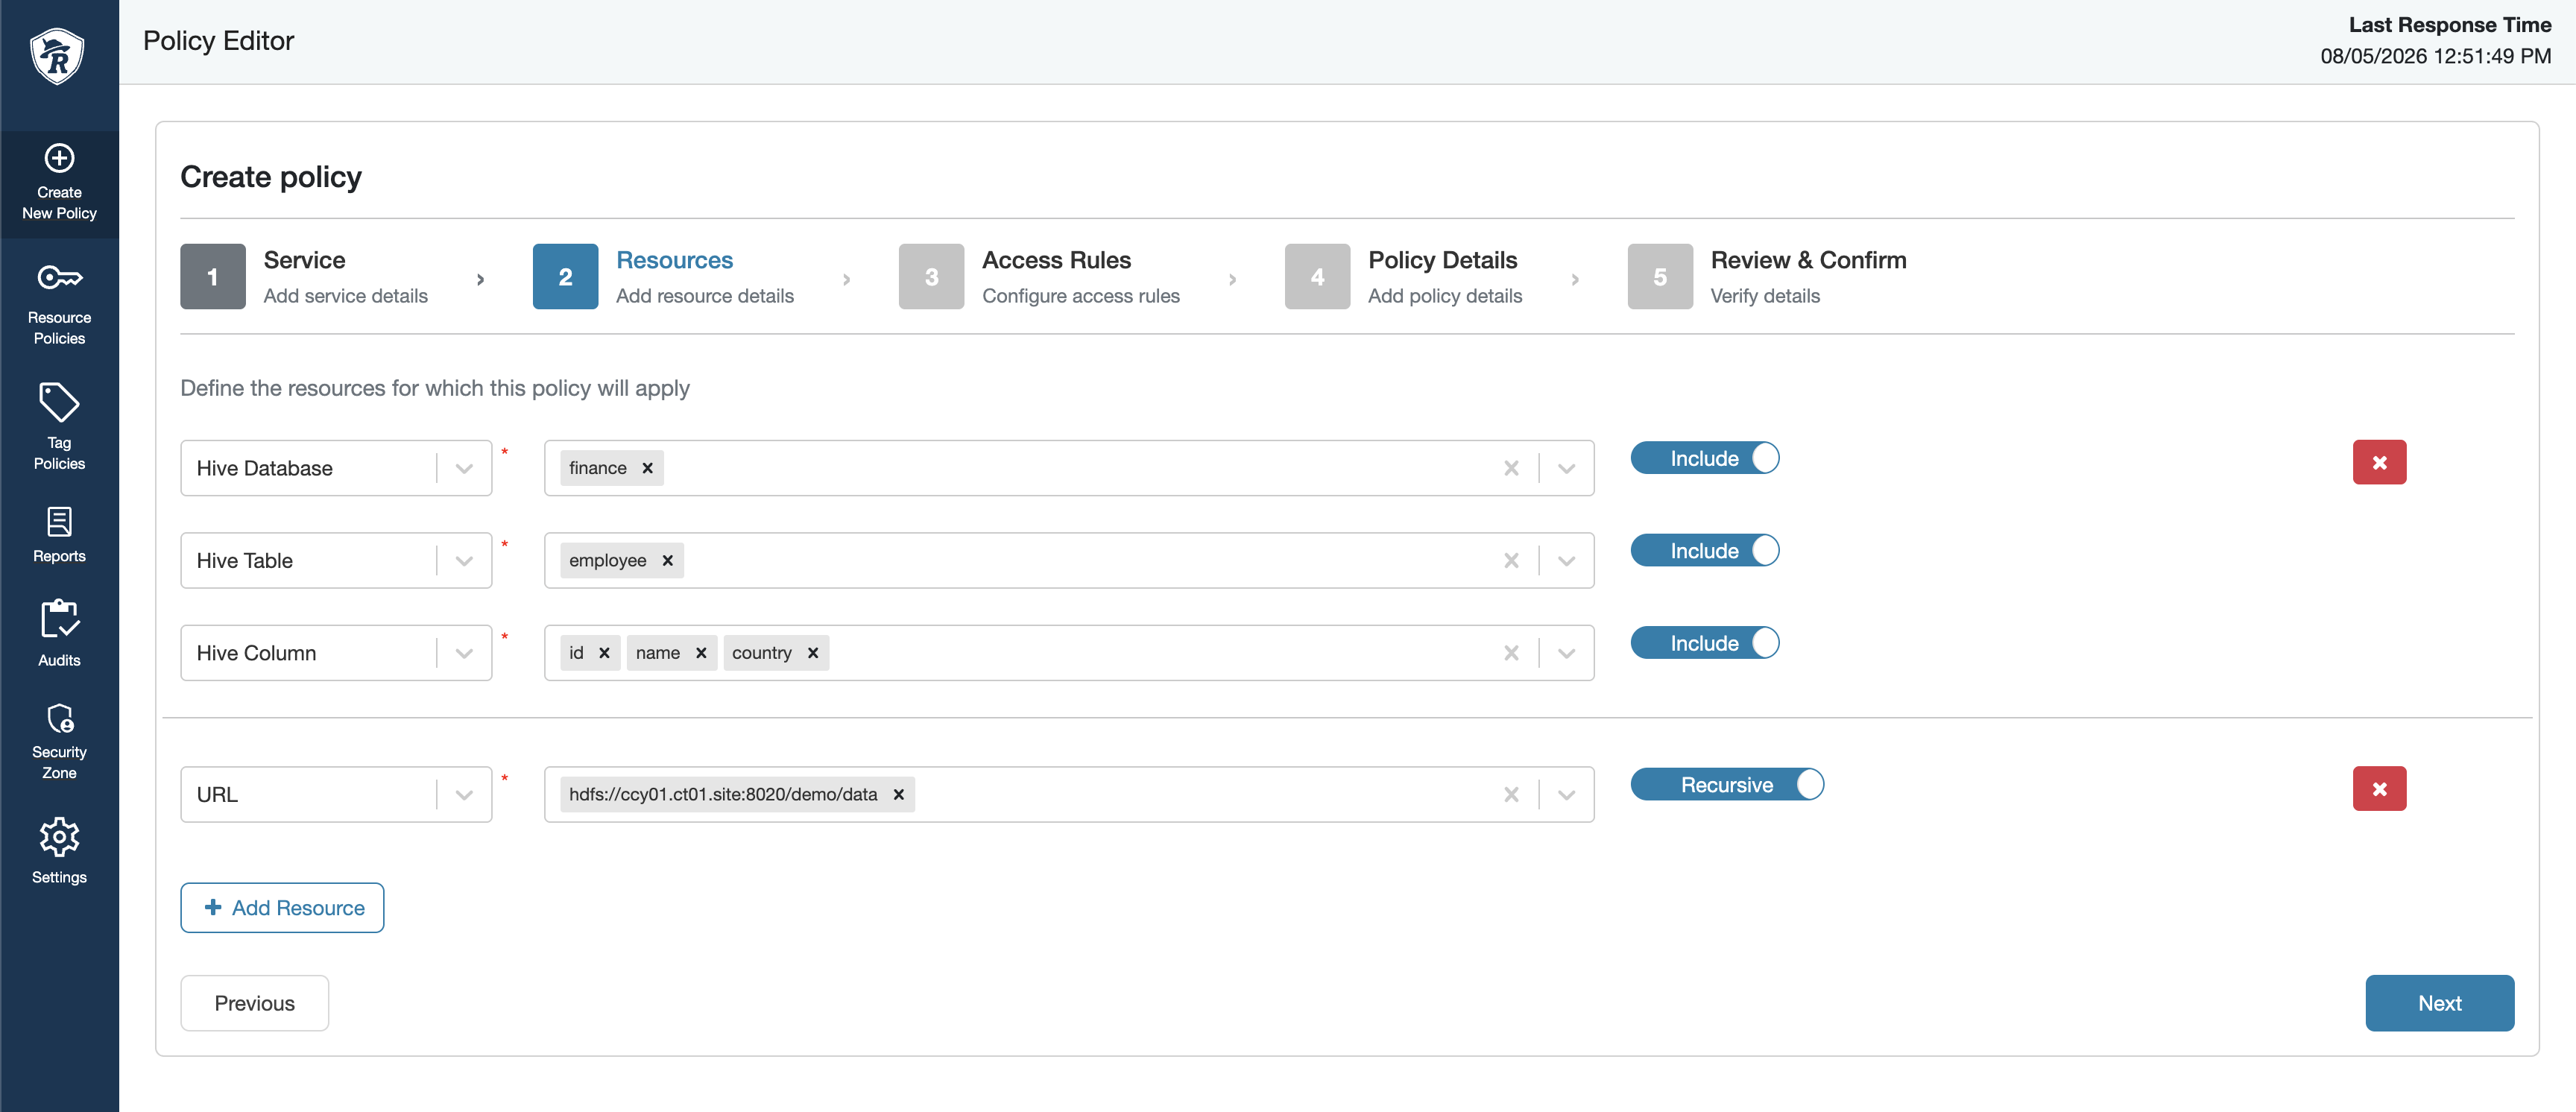
Resources Details: Define and add target resources for the policy.
-
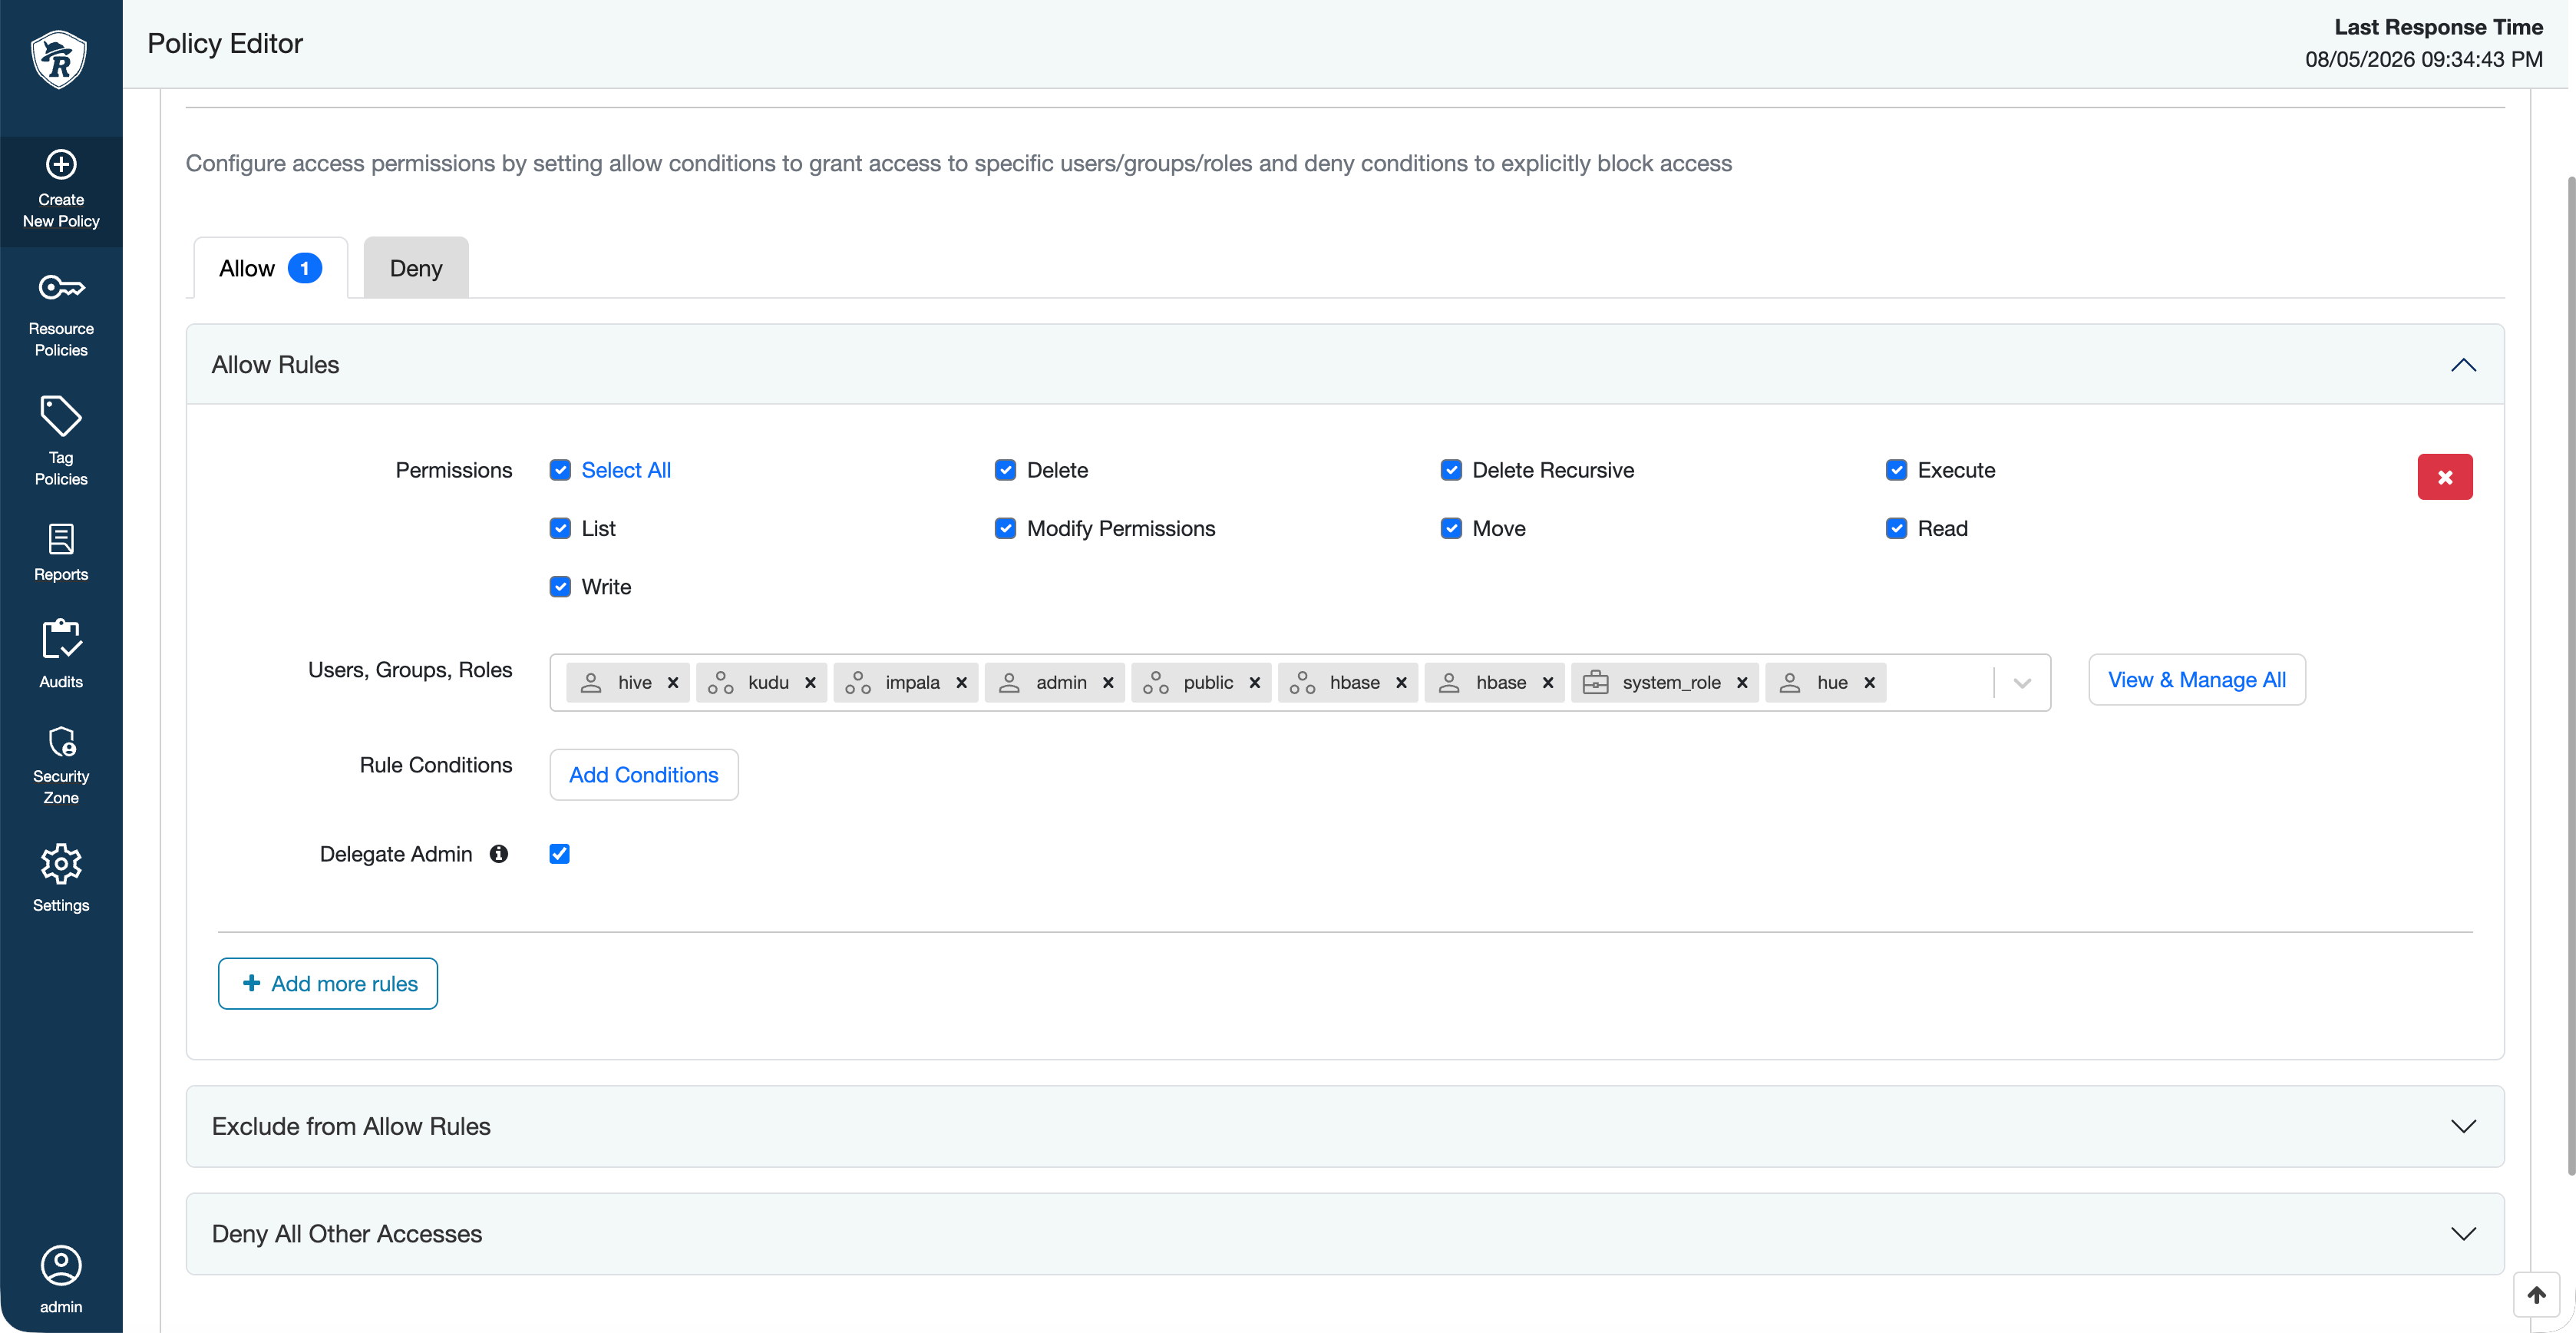
Access Rules Details: Assign specific permissions, choose users, groups, or roles, and add optional conditions or delegation settings.
-
Policy Details: Set basic policy attributes, such as name, labels, description, policy status, priority, and advanced parameters like validity period, policy conditions, and audit logging.
-
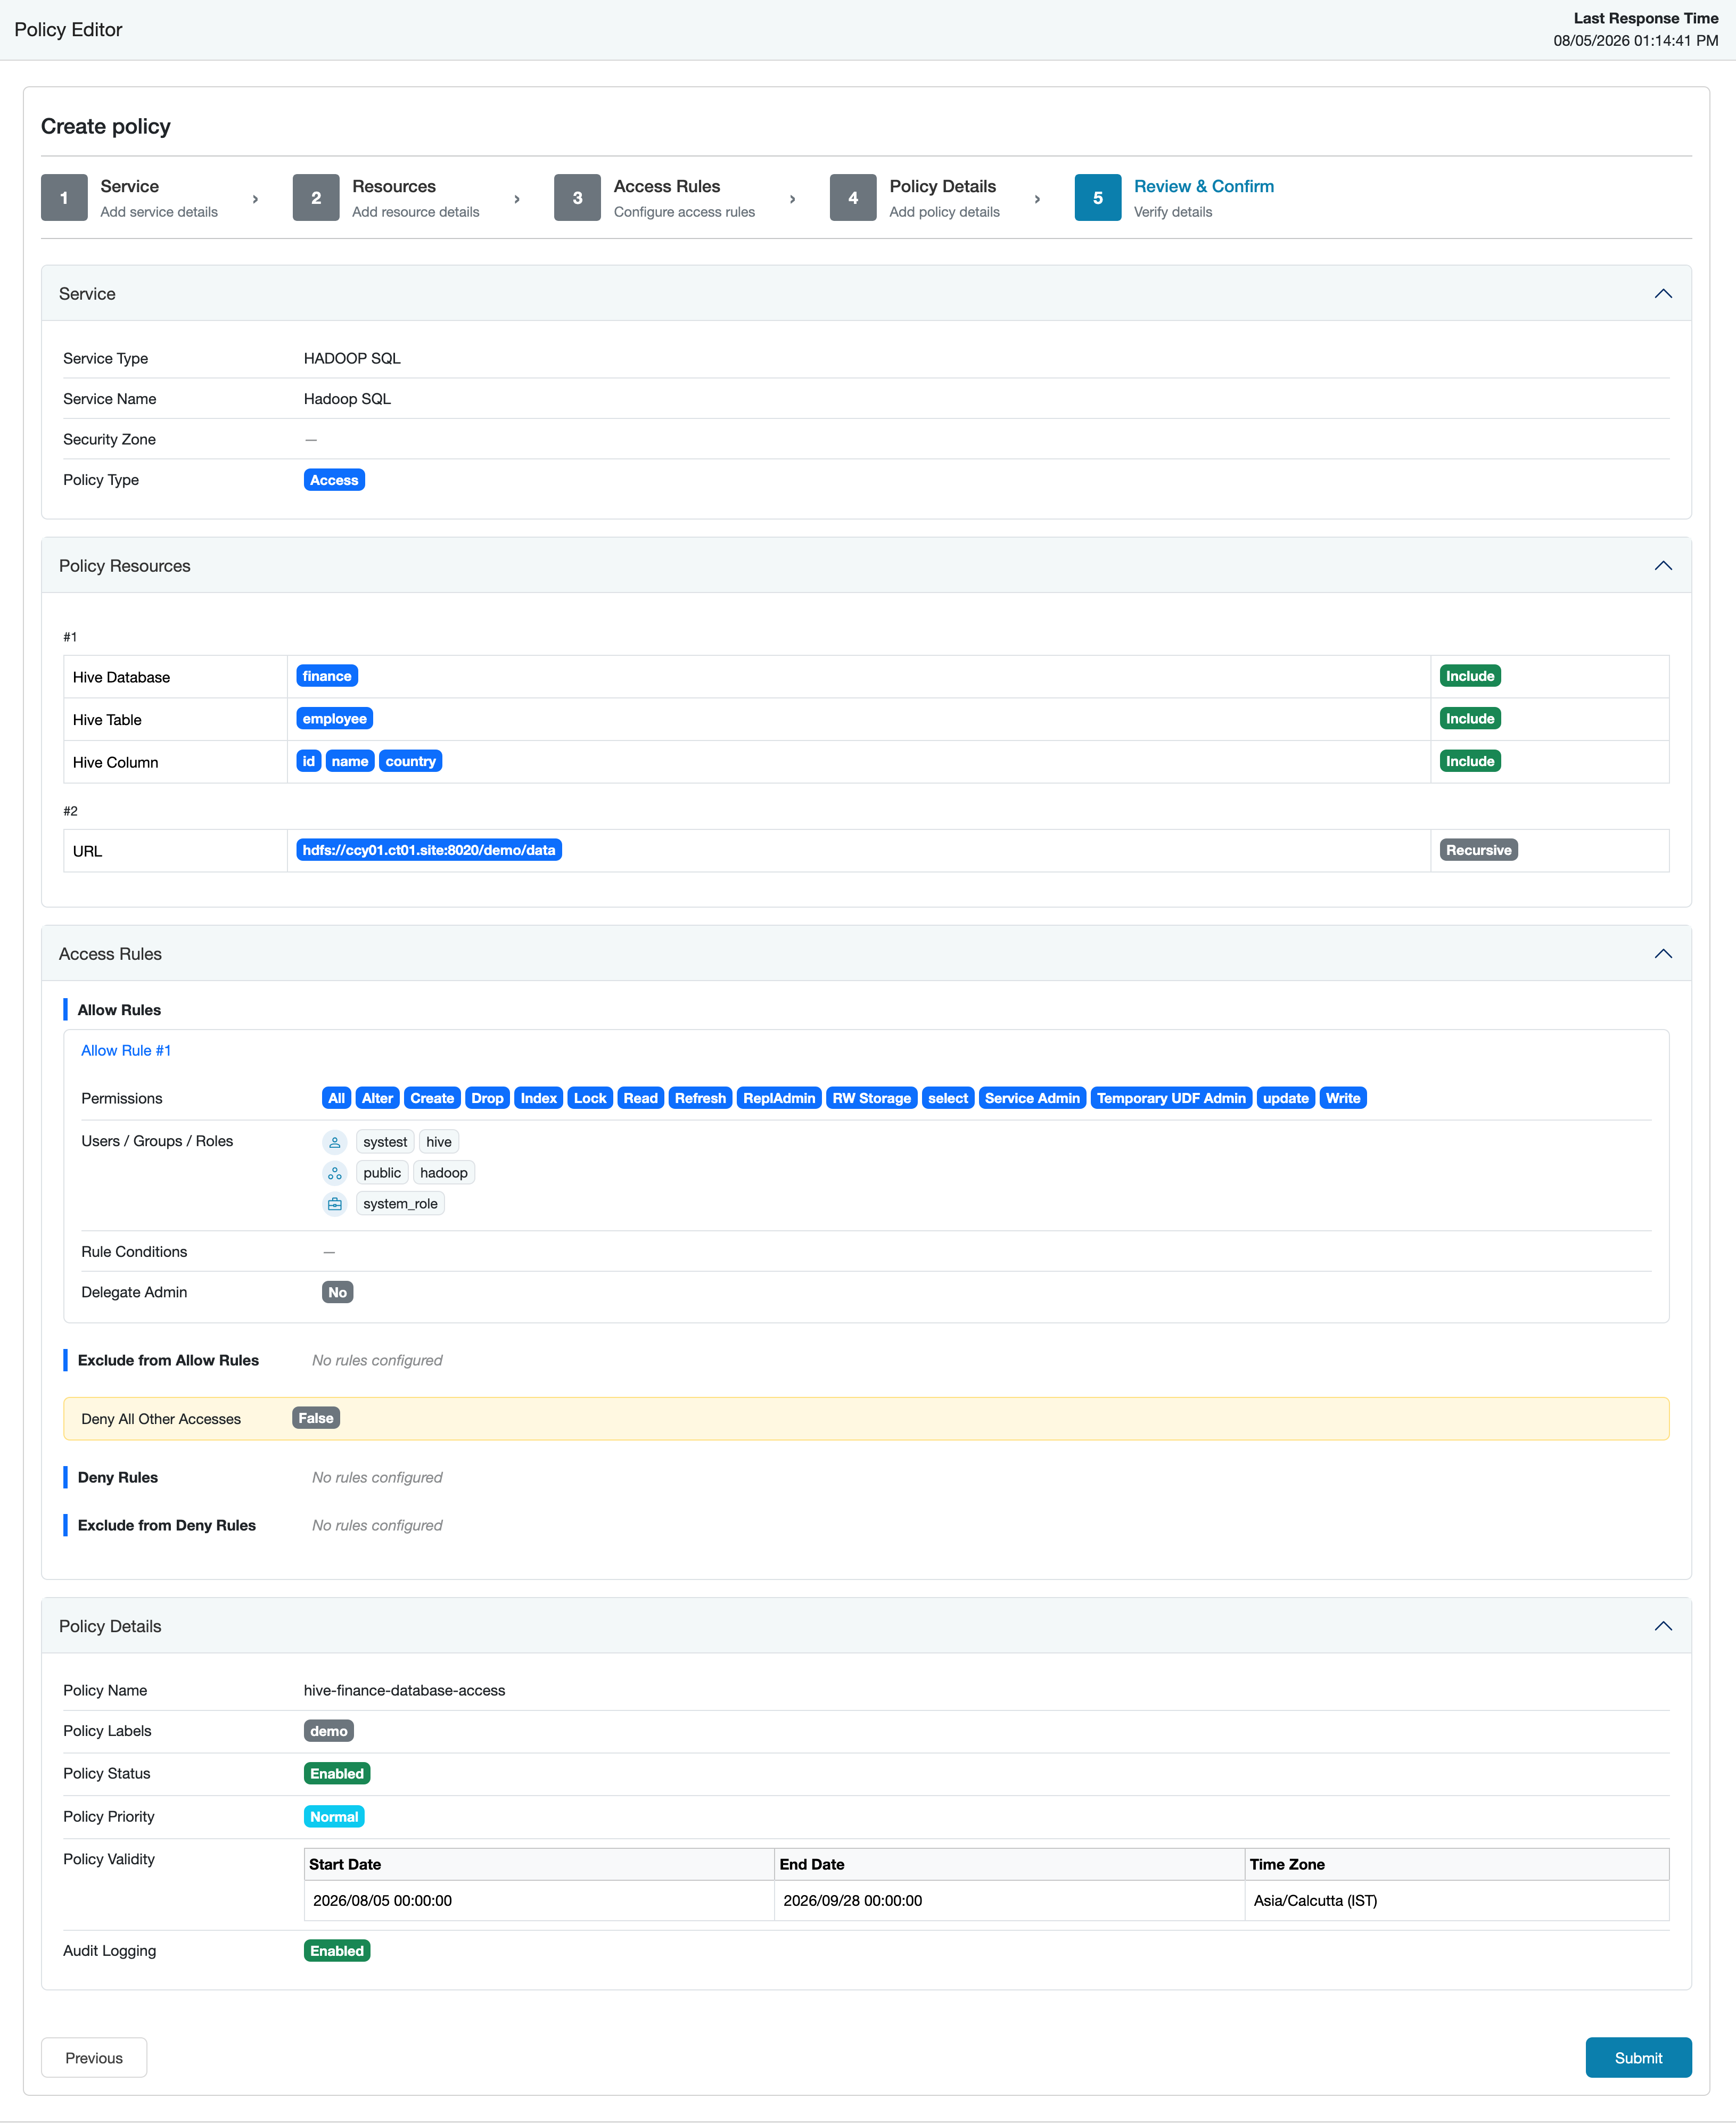
Review & Confirm: Review configured settings across all steps before submitting the new policy.
-
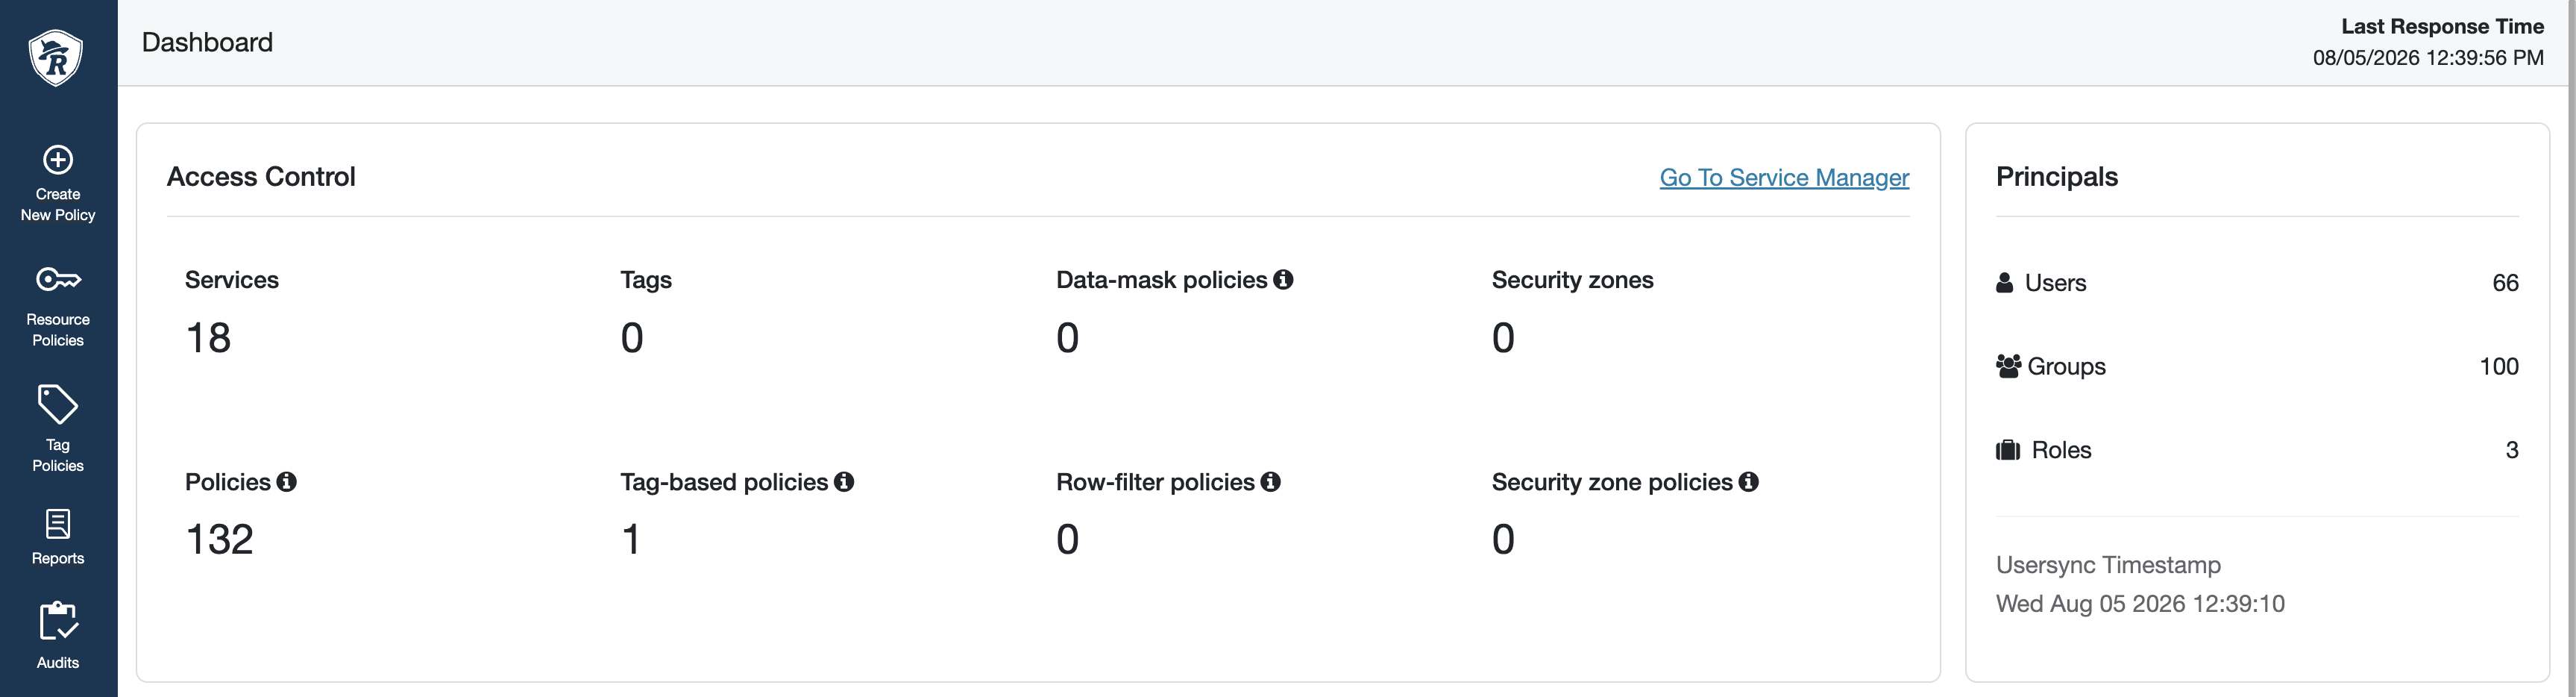
Click Create New Policy in the sidebar.
-
Add the following service details, and click Next.
Property Name Details Service Type Select the service definition for the policy.
Service Name Select the service name for which the policy is being created.Zone Name If a zone policy is desired, select a zone name.
Policy Type If the service supports data masking and row filtering policies, those options are available under the policy type.
-
Select the resource for the policy, and click
Next.
You can add multiple resources.
-
Configure the following access rules, and click
Next:
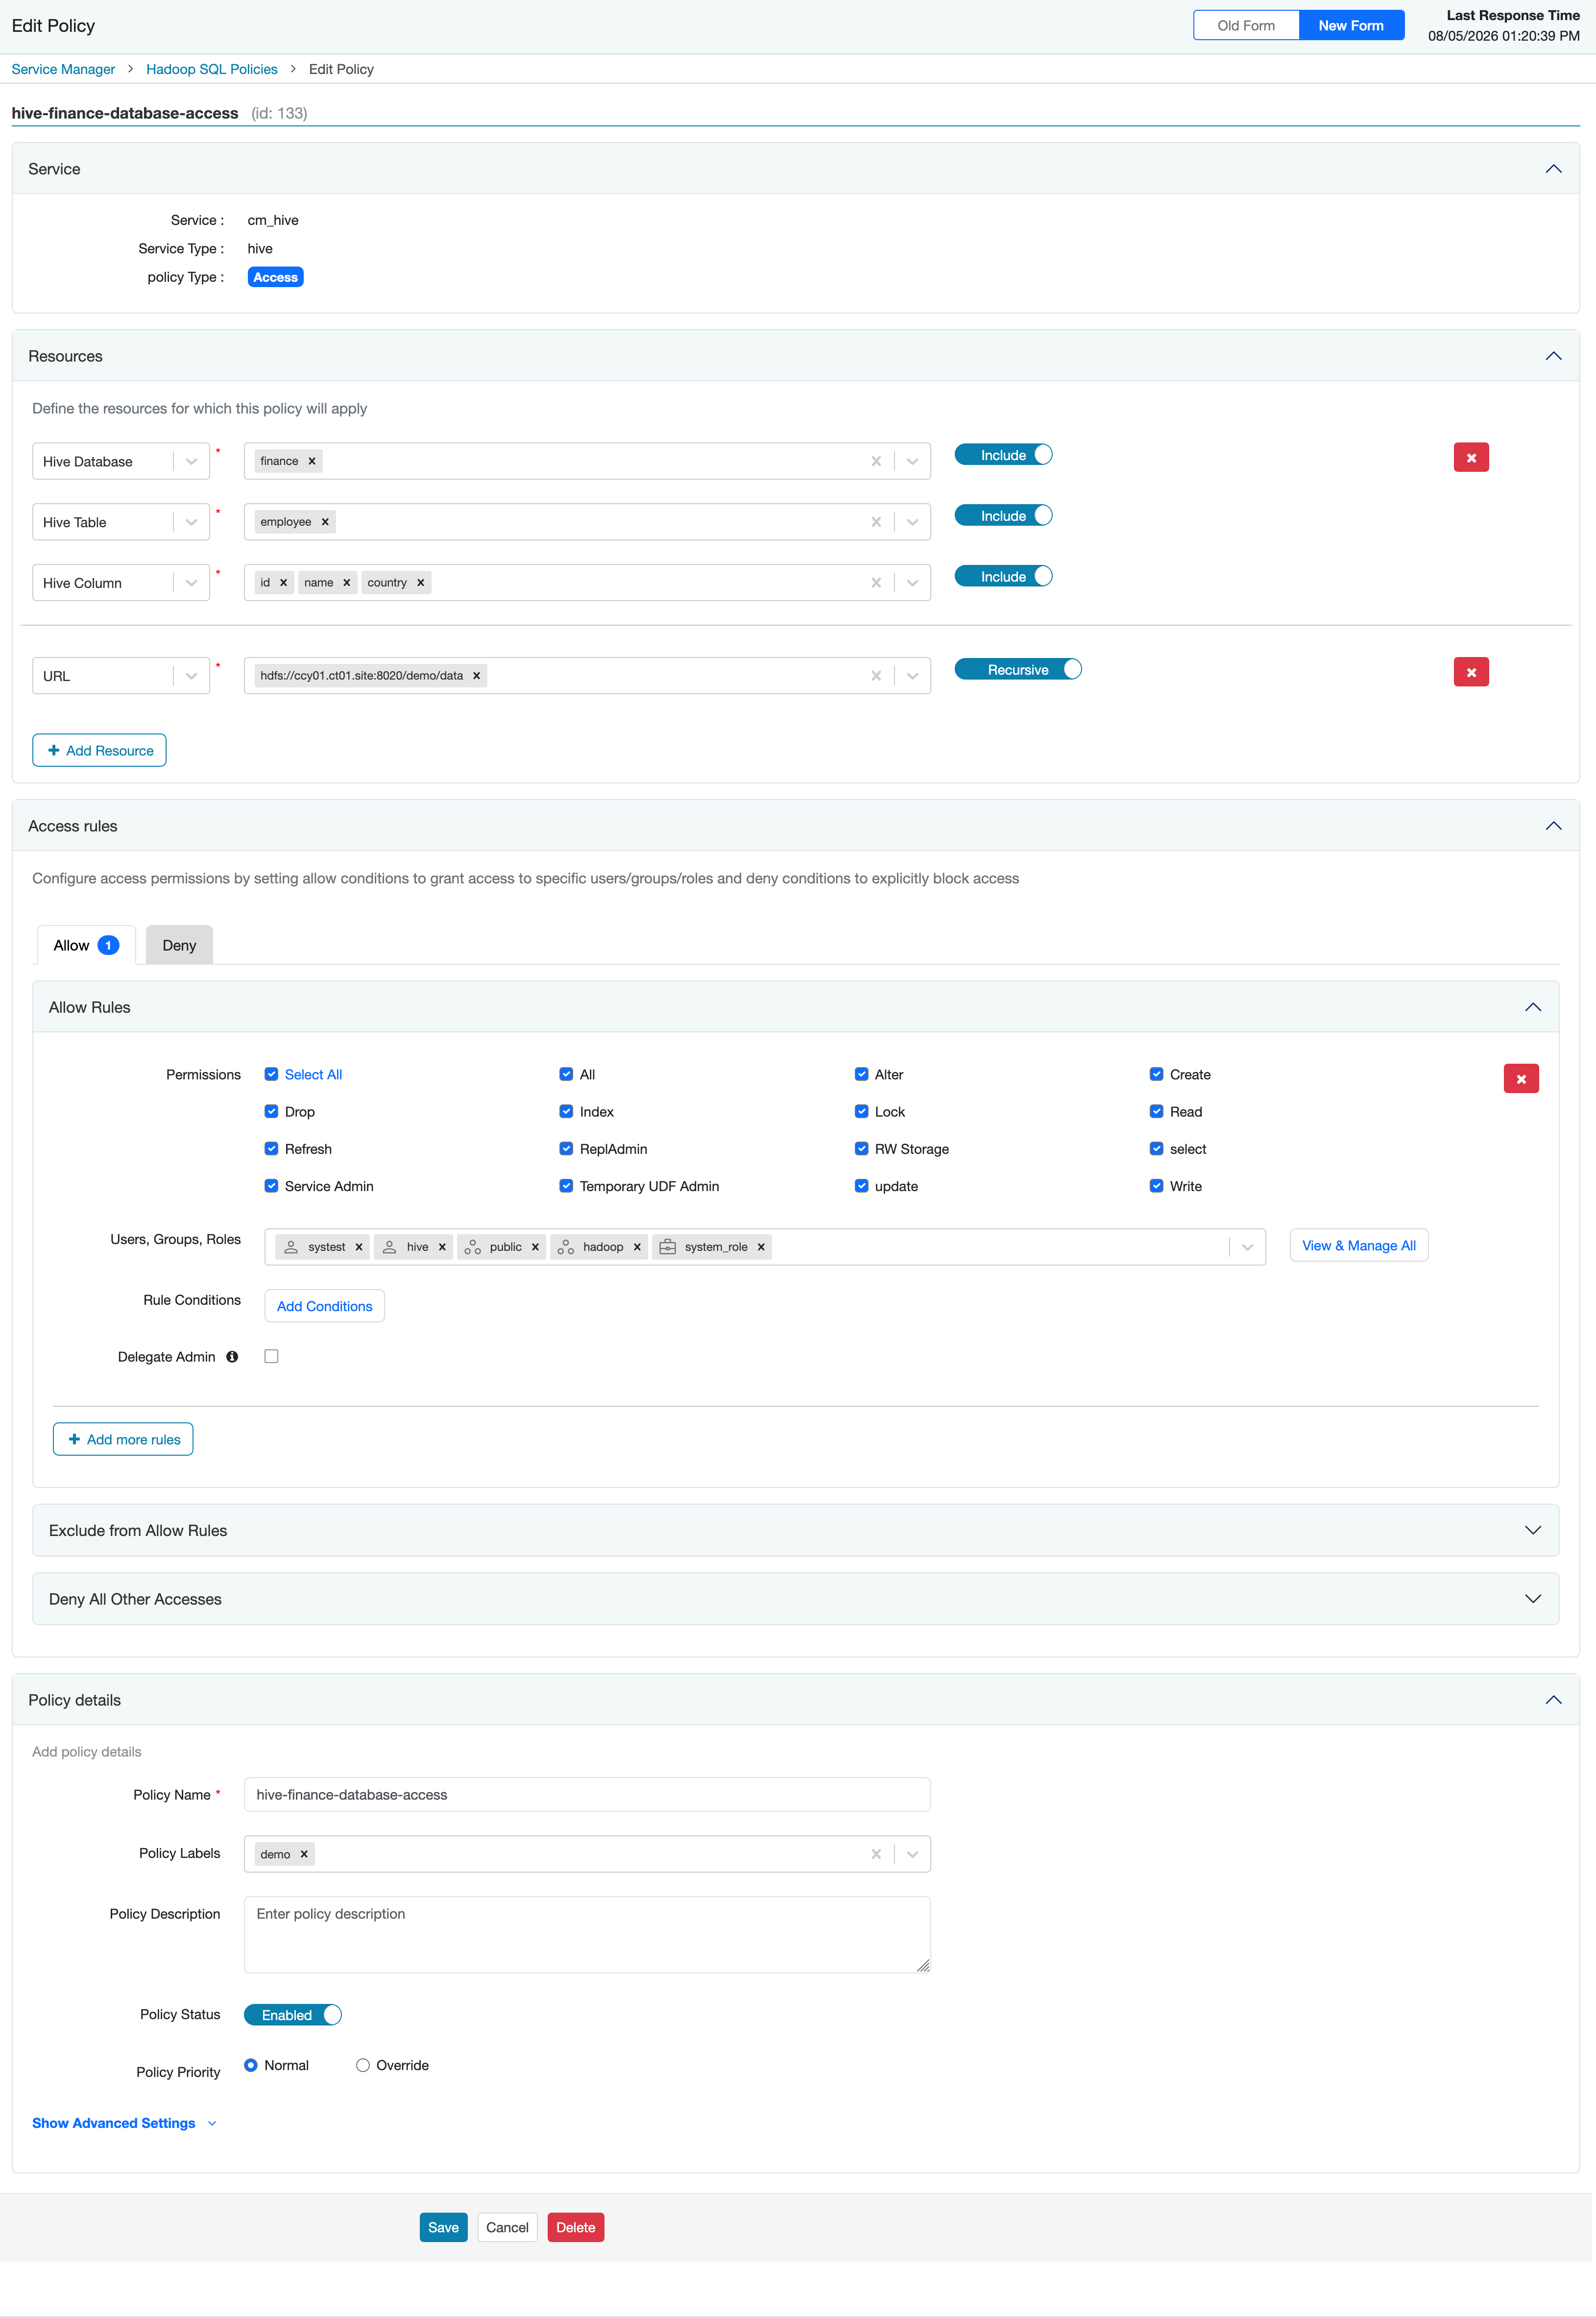
- Permissions: Select the specific type of permission needed.
-
Users, Groups, Roles: This is a single-selection box where you must type first to filter and select from the listed users, groups, or roles. These entities are classified using different icons.
-
Rule Conditions: Enter condition and value.
- Delegate Admin: Select to grant users or groups or roles the authority to create and manage policies, but strictly within the specific resource boundaries defined by the original policy.
If the list of users/groups/roles grows large, you can manage them by clicking the Manage button. The Manage Users, Groups & Roles page shows how you can remove them.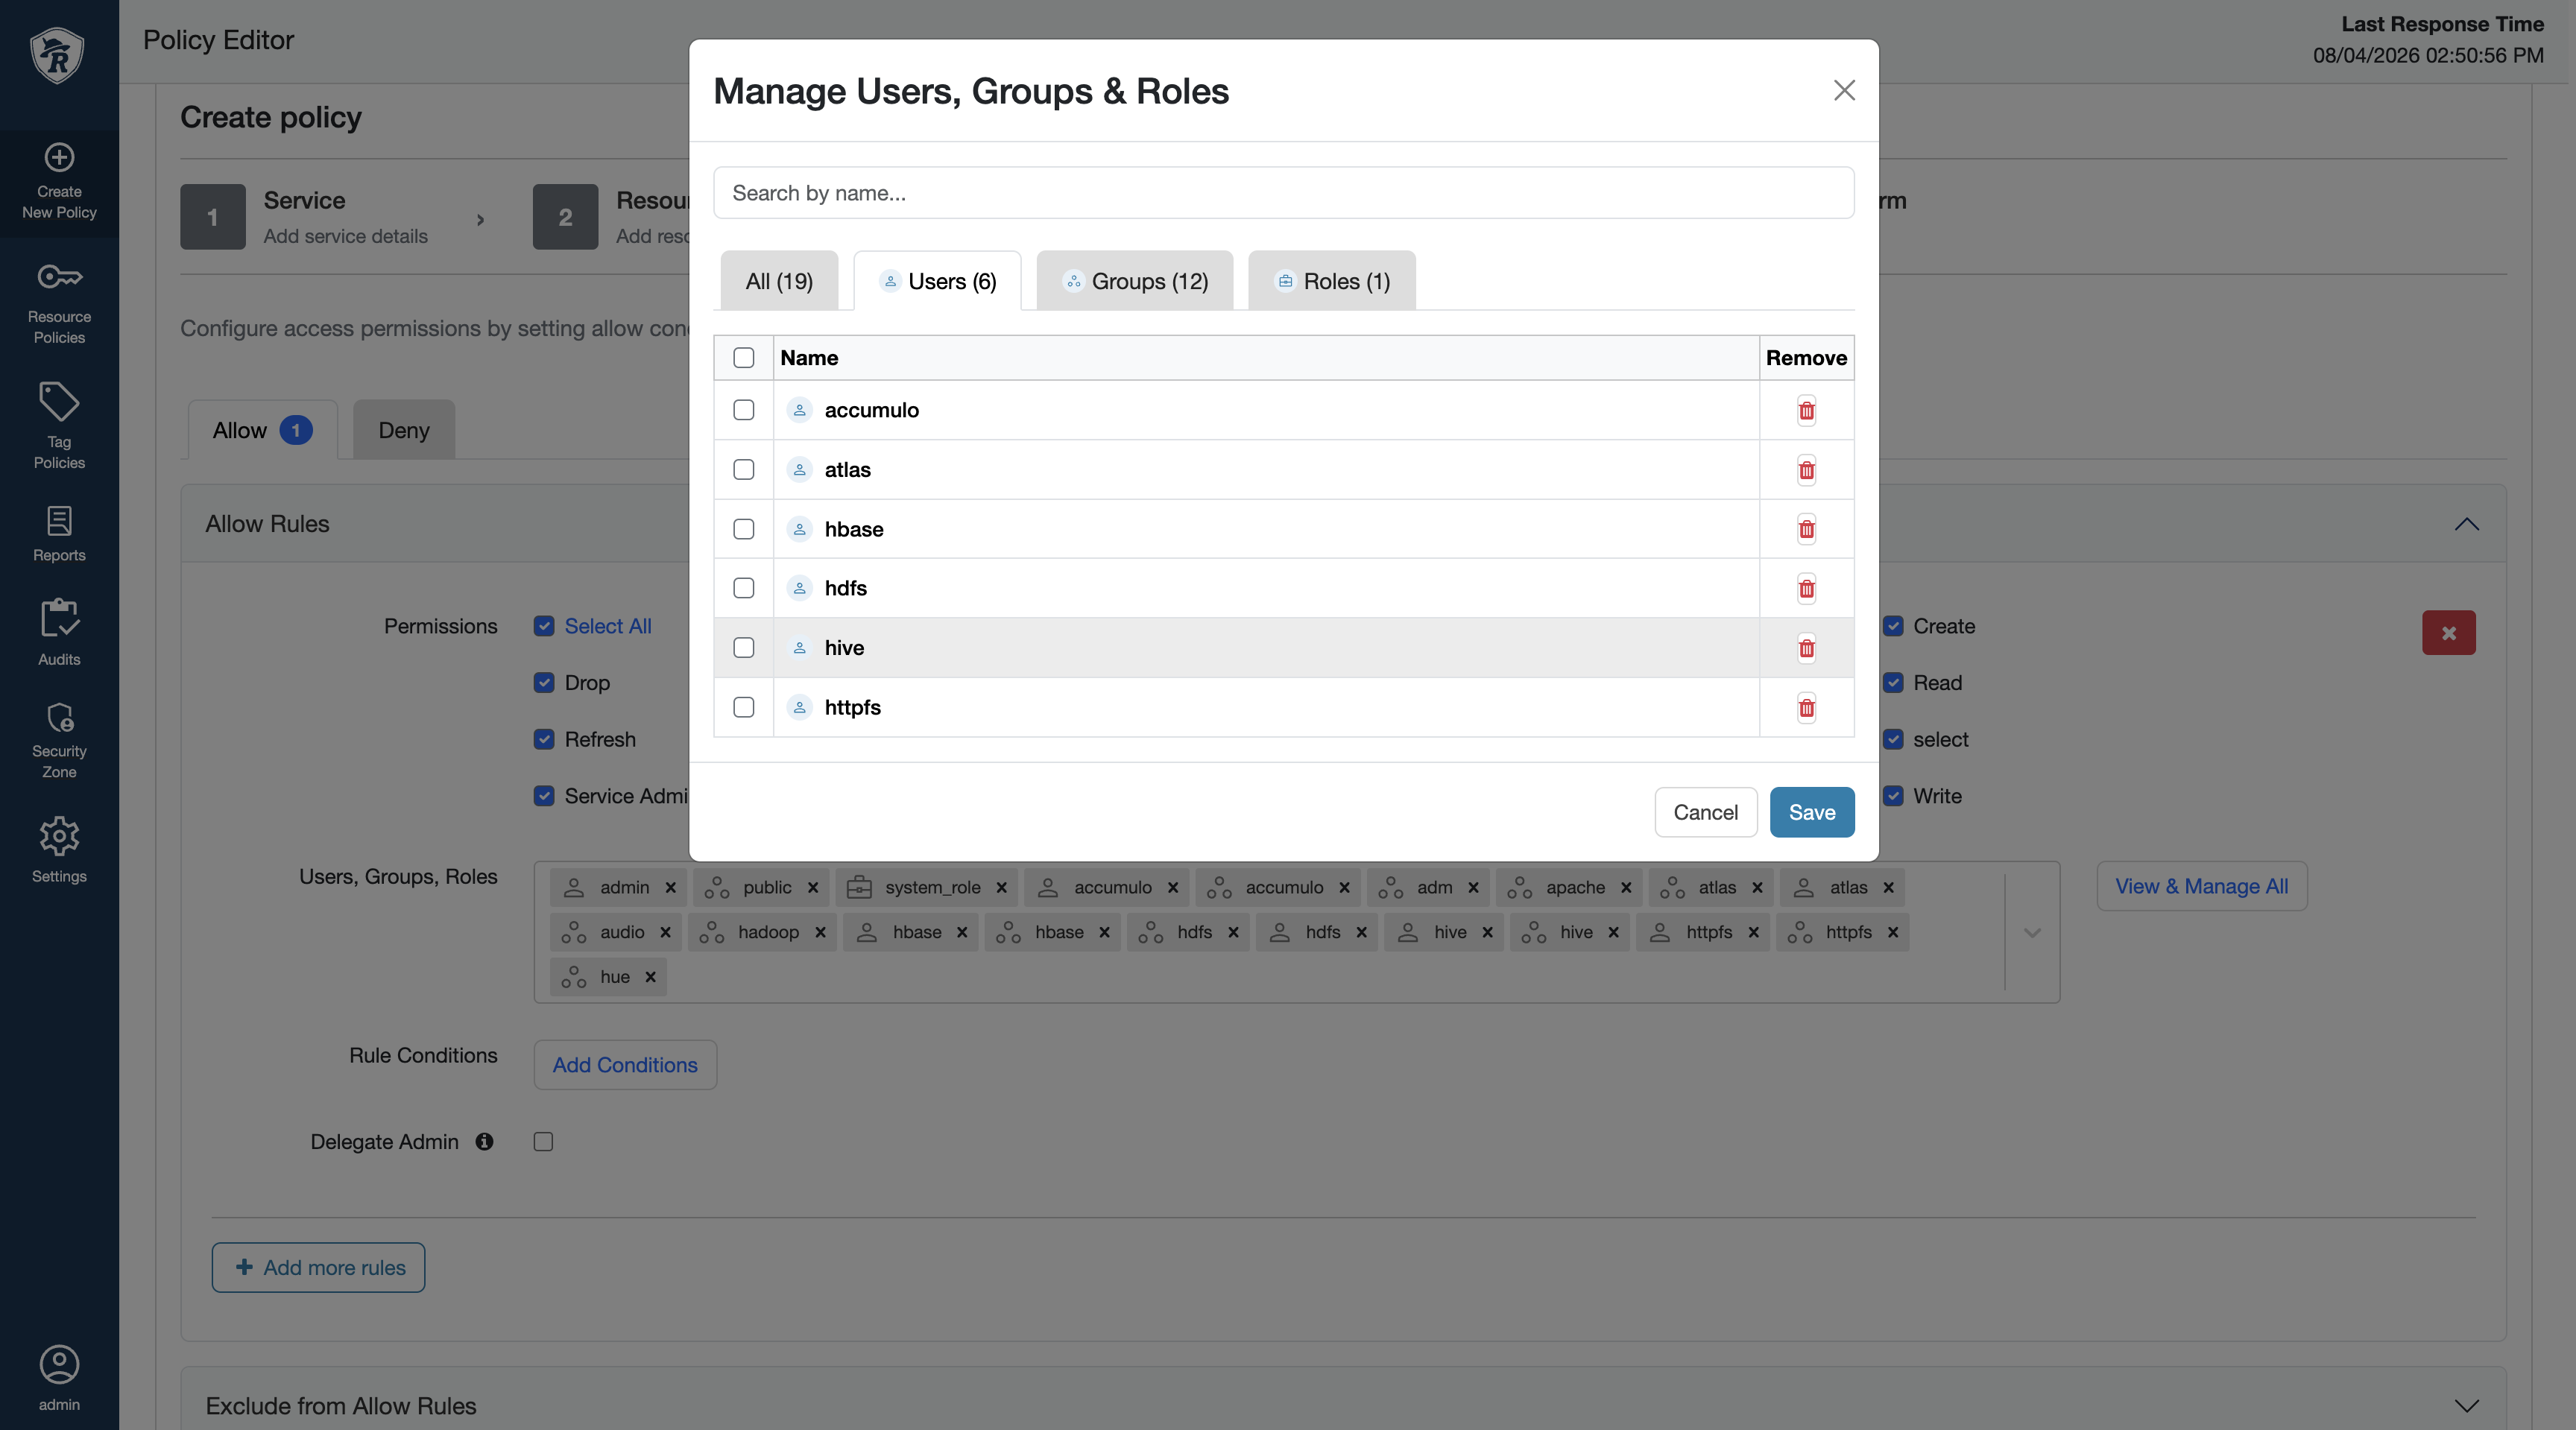
-
Add the following policy details, and click Next.
Property Name Details Policy Name Enter a unique name for this policy. The name cannot be duplicated anywhere in the system. Policy Labels Specify a label for this policy. You can search reports and filter policies based on these labels. Policy Description Enter a description for the policy. Policy Status Enable or disable the policy. Policy Priority Select whether the policy is a normal or an override one. Show Advanced Settings Select the validity period, policy condition, and audit logging for the policy. 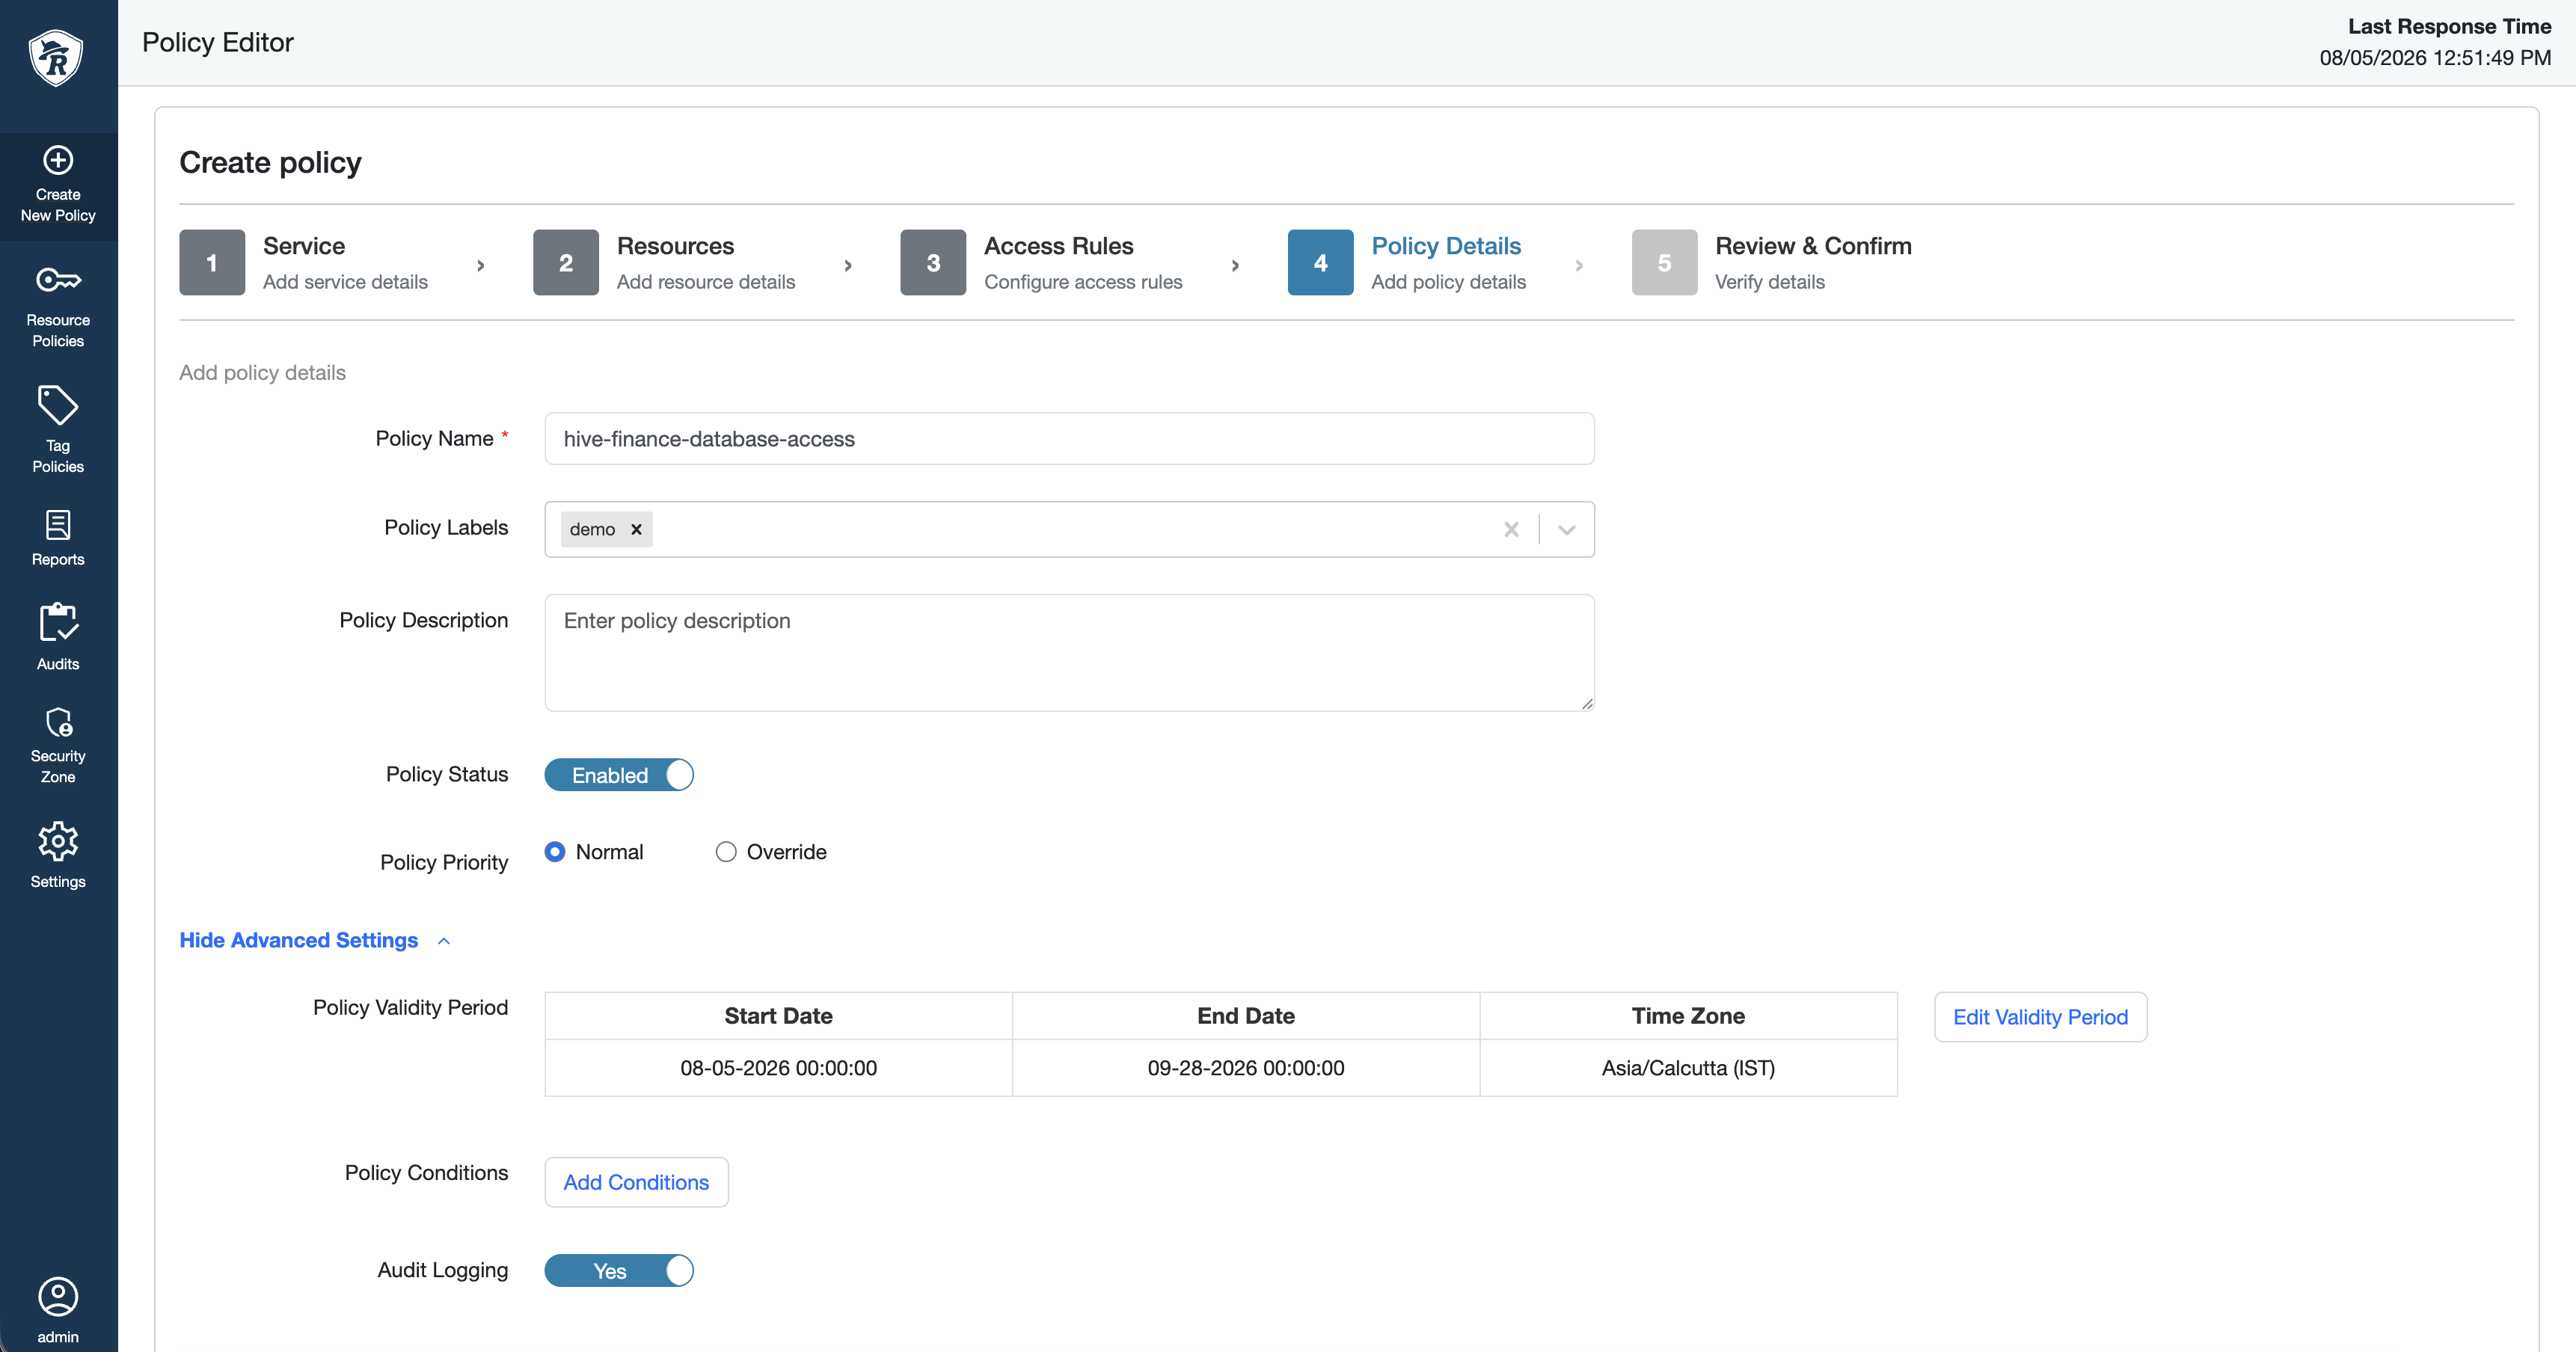
-
Verify the details, and click Submit.
You can review the filled data and go back to any step by clicking the step ID to make changes.