You can update your existing CDP Private Cloud Data Services 1.3.3 to 1.4.0 or 1.4.0-H1
without requiring an uninstall.
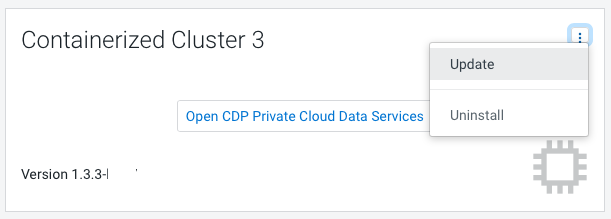
In Cloudera Manager, navigate to CDP Private Cloud Experiences 1.3.3 and click . Click Update.
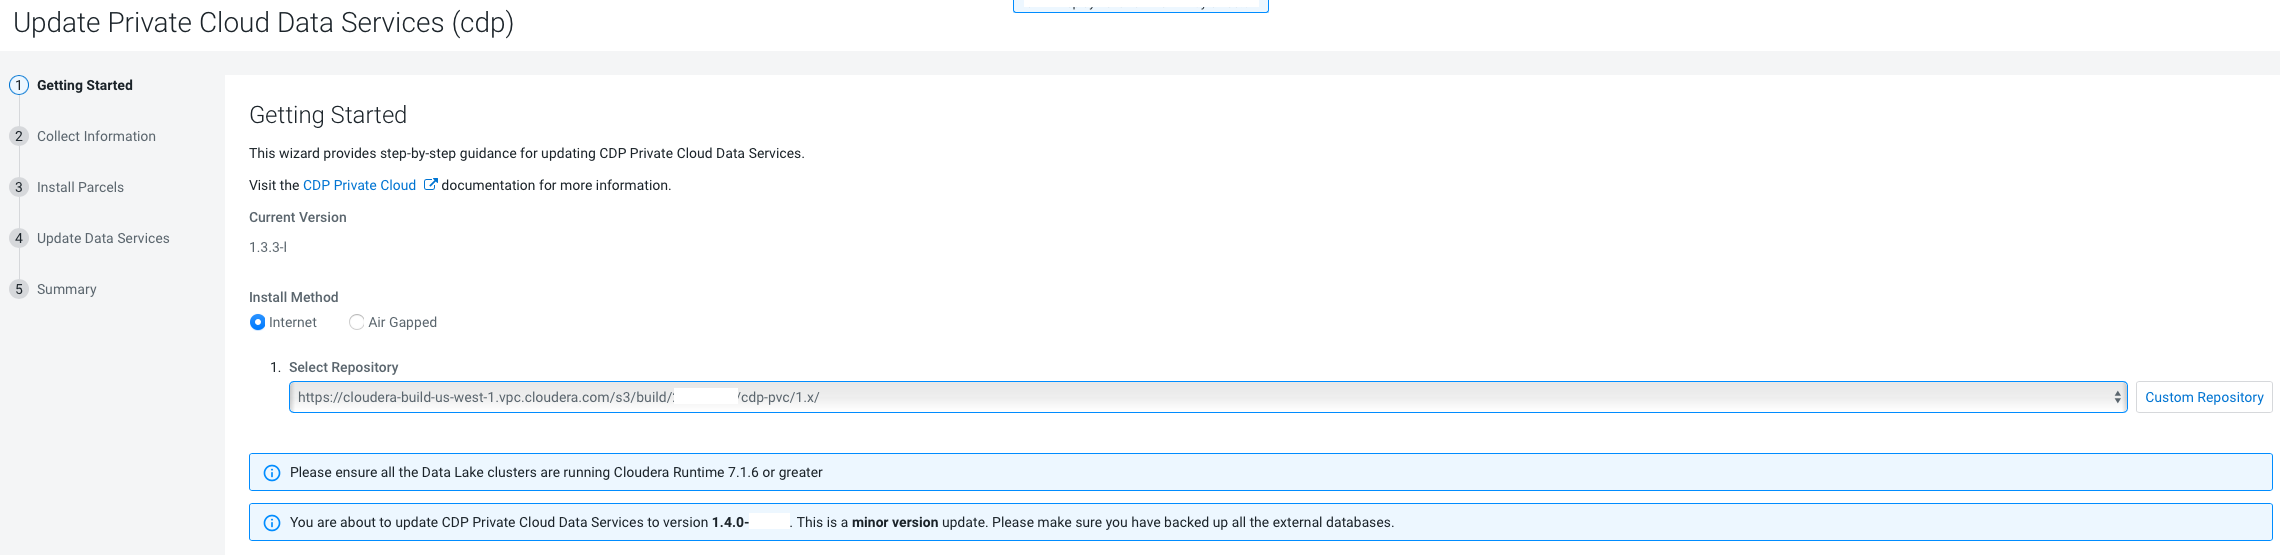
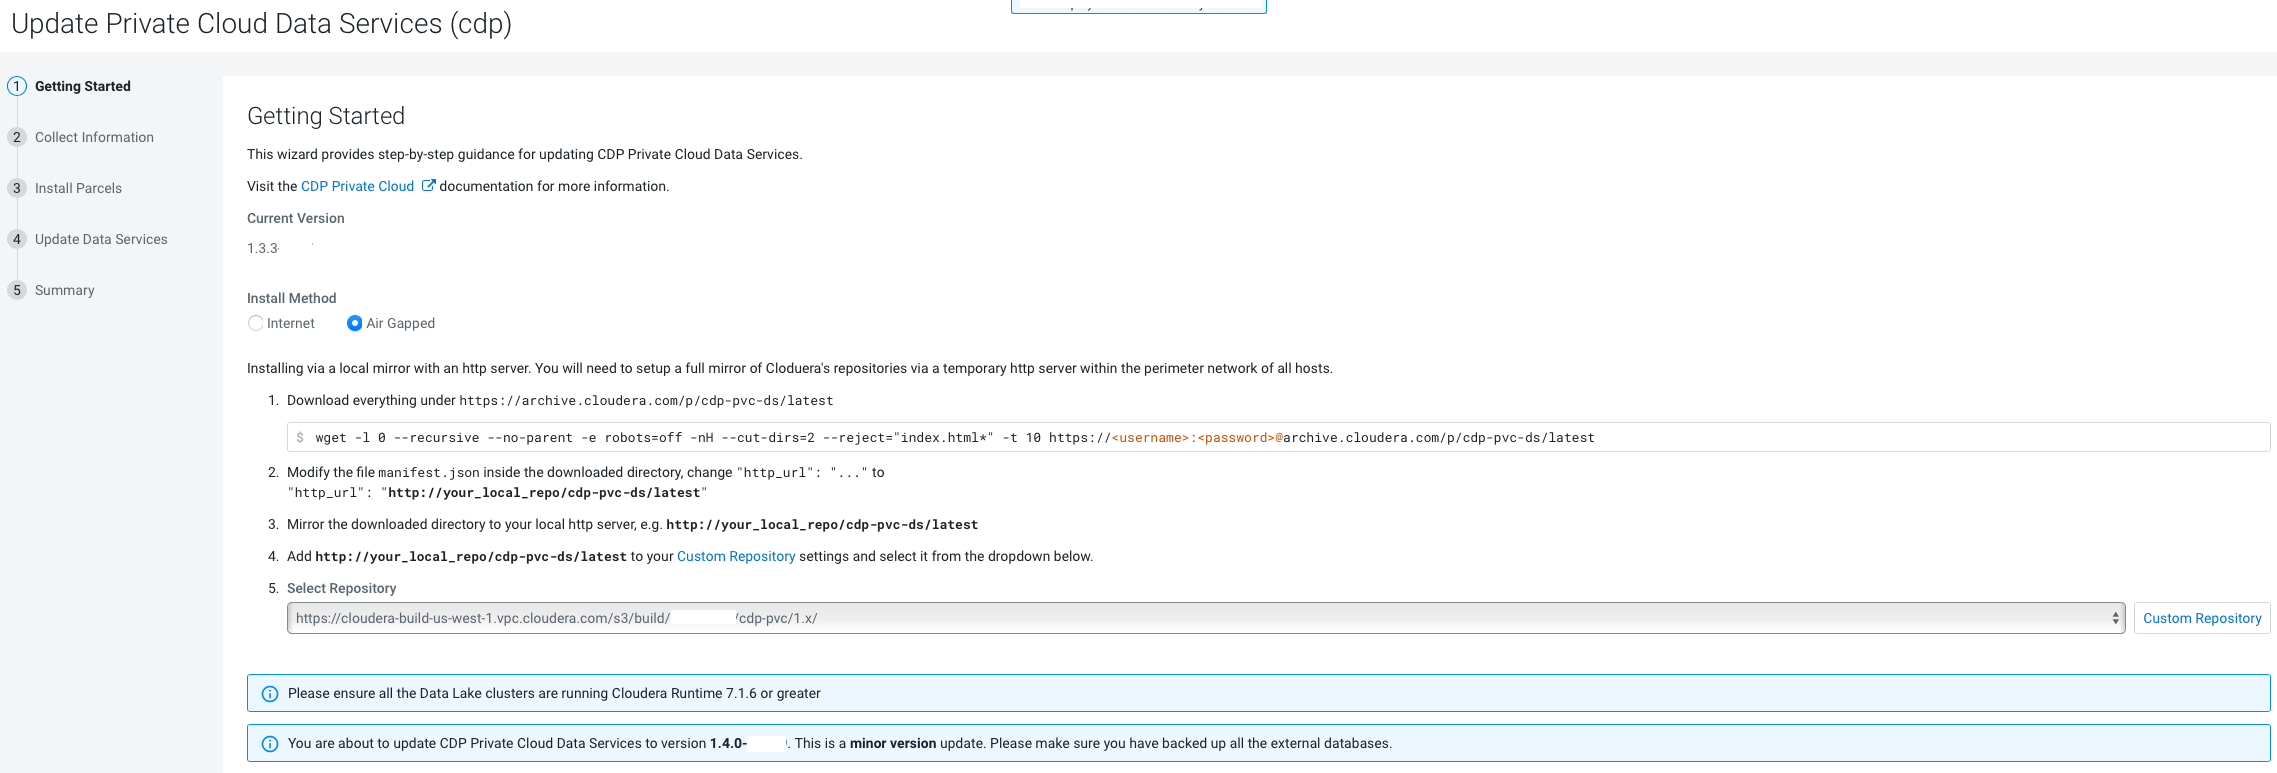
On the Getting Started page, you can select the Install
method - Air Gapped or Internet
and proceed.
Internet install method
Air Gapped install method
Click Continue.
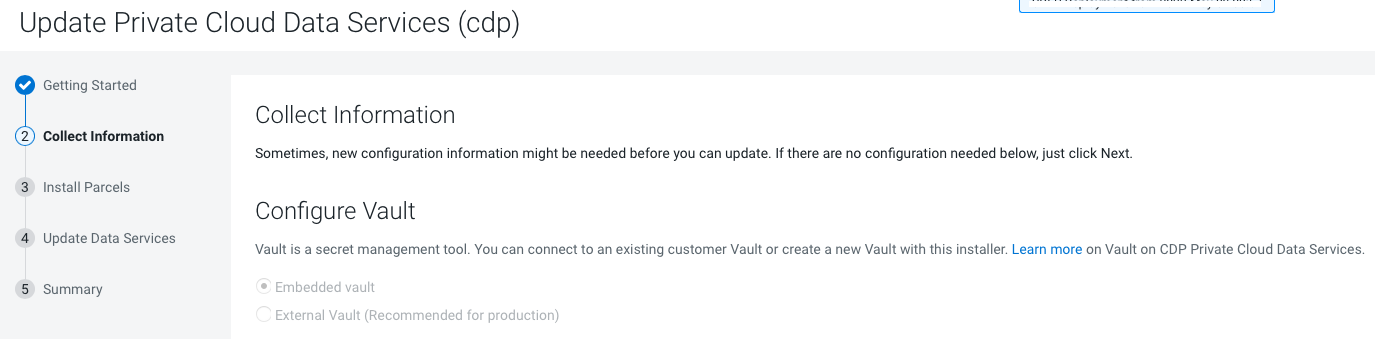
On the Collect Information page, click
Continue.
On the Install Parcels page, click
Continue.
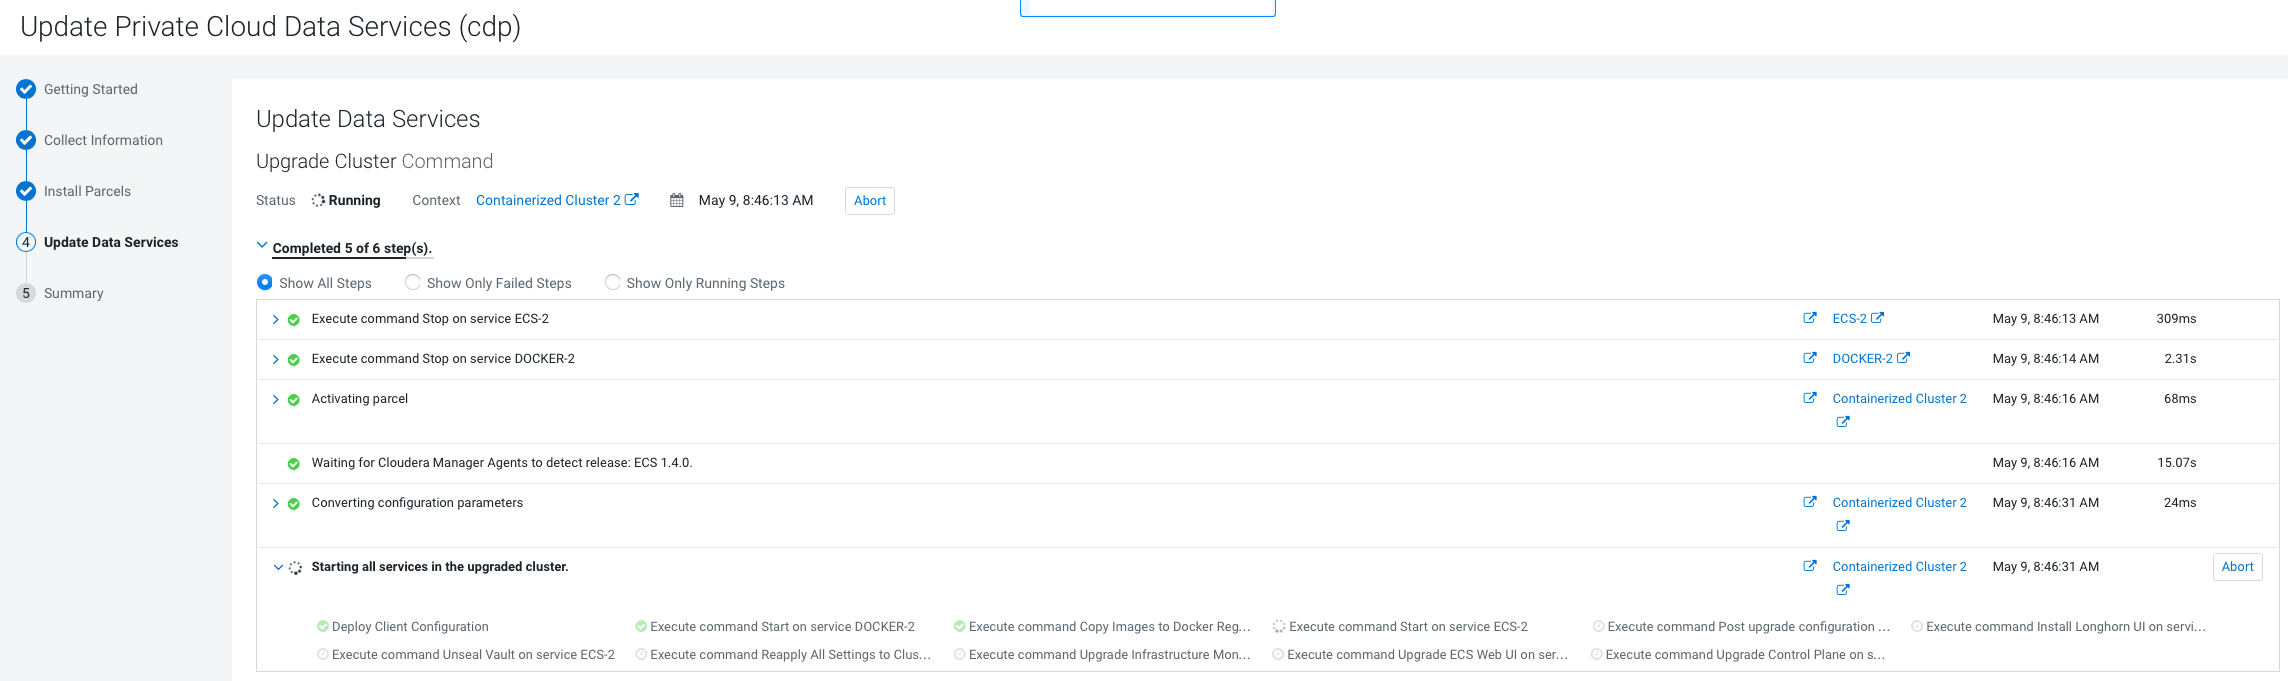
On the Update Progress page, you can see the
progress of your update. Click Continueafter
the update is complete .
If you encounter an error message in the Upgrade Cluster Command
output, during the Execute command Install Tolerations
Webhook on service ECS-3 step that mentions a failure
waiting for kube-proxy to come up, do the following:
Log in using ssh to one of the ECS Server nodes and run
the following command:
/var/lib/rancher/rke2/bin/kubectl get nodes
The
output will look similar to the following:
NAME                           STATUS     ROLES                       AGE     VERSION
ecs-abc-1.vpc.myco.com   Ready      control-plane,etcd,master   4h50m   v1.21.8+rke2r2
ecs-abc-2.vpc.myco.com   NotReady   <none>                      4h48m   v1.20.8+rke2r1
ecs-abc-3.vpc.myco.com   Ready      <none>                      4h48m   v1.21.8+rke2r2
ecs-abc-4.vpc.myco.com   NotReady   <none>                      4h48m   v1.20.8+rke2r1
ecs-abc-5.vpc.myco.com   NotReady   <none>                      4h48m   v1.20.8+rke2r1
If
any of the version numbers in the last column are lower than the
expected version, reboot those nodes. (For example,
v1.20.8 in the output above.)
In the Command Output window, in the step that failed,
click Resume.
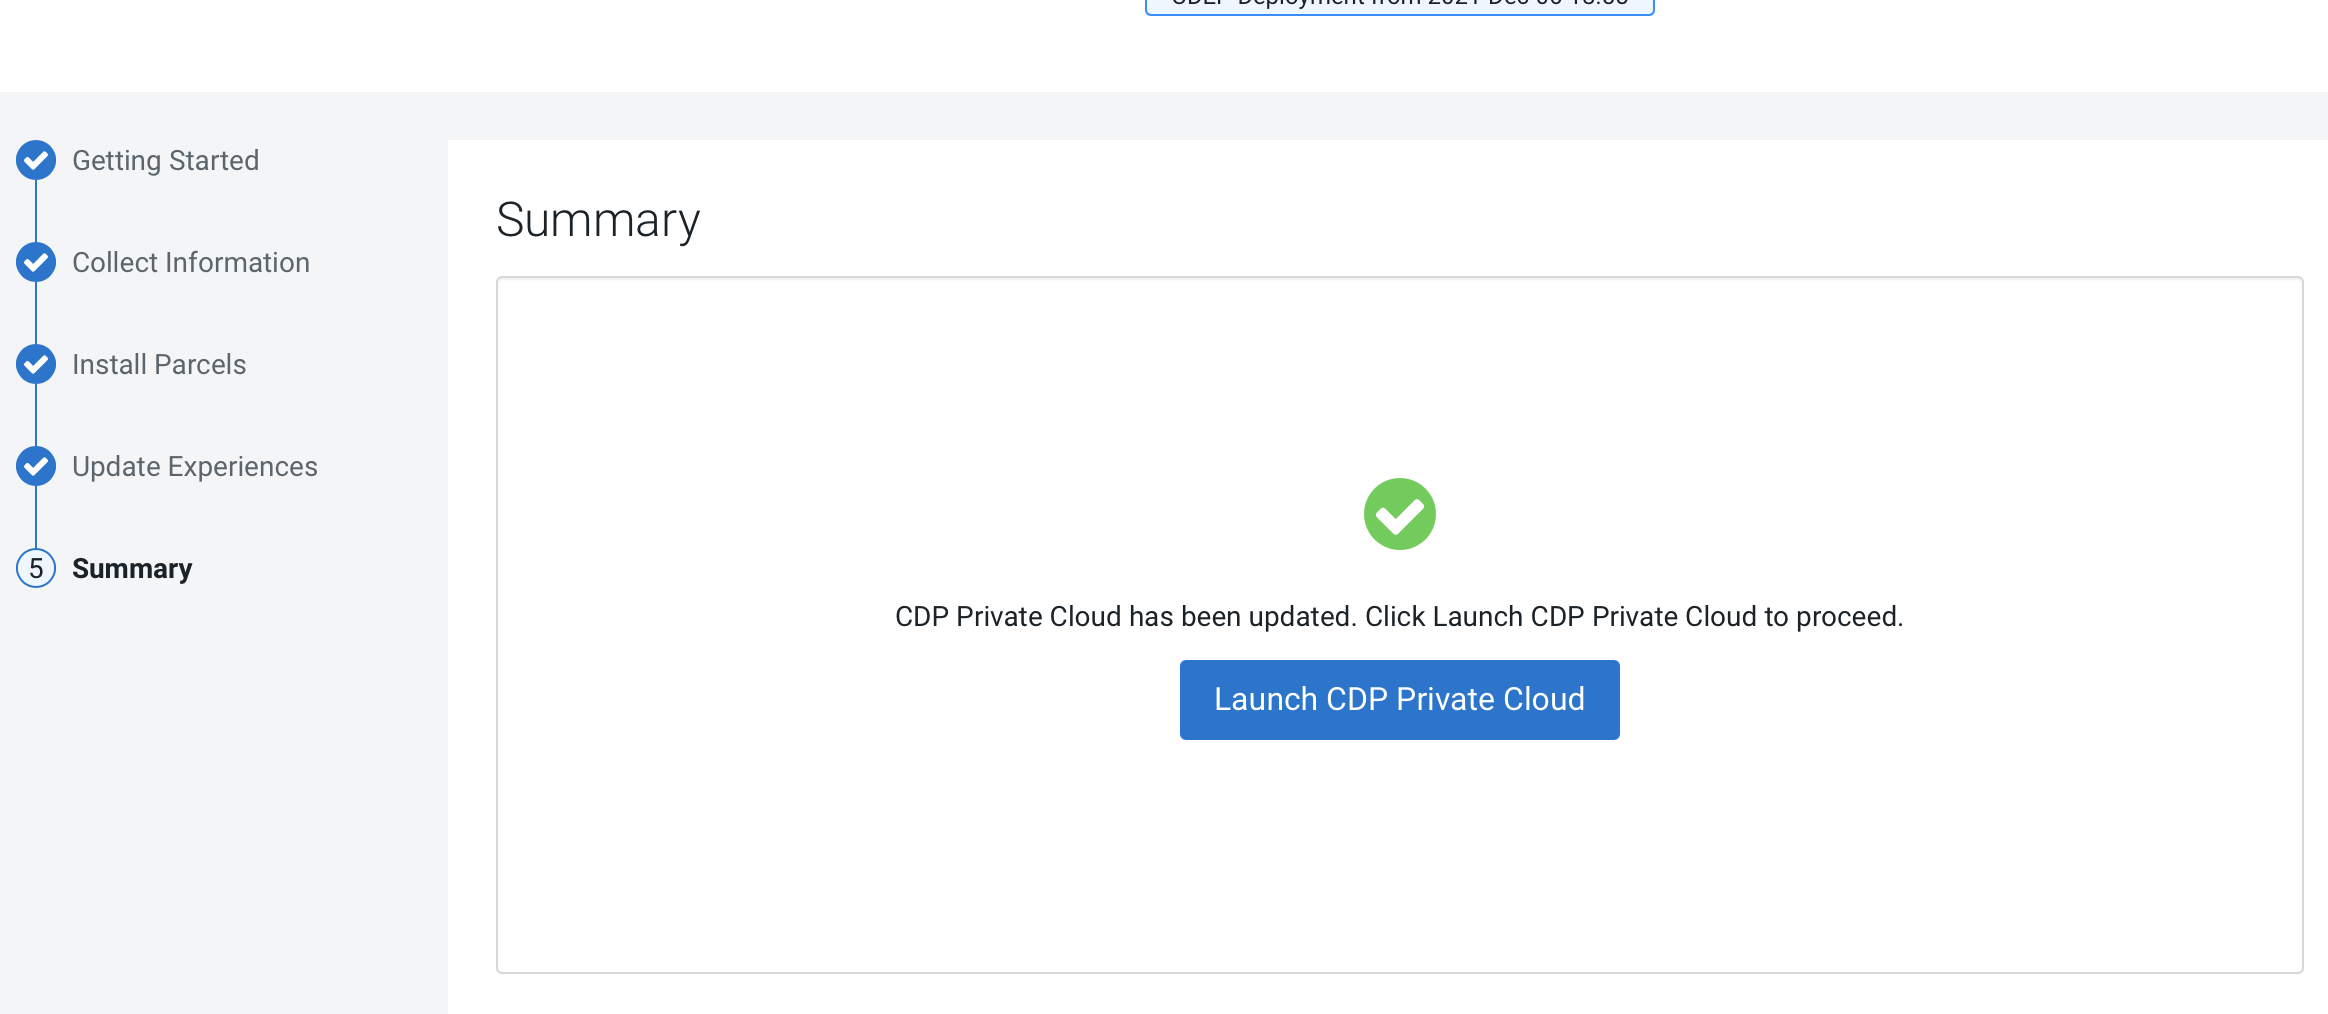
After the update is complete, the Summary
page appears. You can now Launch CDP Private
Cloud from here.
Or you can navigate to the CDP Private Cloud Data
Services page and click Open CDP Private
Cloud Data Services.
CDP Private Cloud Data Services opens
up in a new window.
If you see a Longhorn Health Test message about a degraded Longhorn
volume, wait for the cluster repair to complete.
After the upgrade, the version of YuniKorn may not match the version
that should be used with Private Cloud version 1.3.4. The YuniKorn
version should be: 0.10.4-b25. If this version is not deployed, do the
following to correct this:
Log in to any node with access to the ECS cluster using ssh. The
user must have the correct administration privileges to execute
these commands.
Run the following command to find the YuniKorn scheduler
pod:
kubectl get pods -n yunikorn | grep yunikorn-scheduler
The
first value on the line is the scheduler pod ID. Copy that text
and us it in the following command to describe the
pod:
kubectl describe pod **yunikorn-scheduler-ID** -n yunikorn : grep "Image:"
A
completed upgrade for 1.3.4 shows the image
version:
Check the status of all pods by running the following command on
the ECS server node:
kubectl get pods --all-namespaces
If there are any pods stuck in “Terminating” state, then force
terminate the pod using the following
command:
kubectl delete pods <NAME OF THE POD> -n <NAMESPACE> --grace-period=0 —force
If
the upgrade still does not resume, continue with the remaining
steps.
In the Cloudera Manager Admin Console, go to the ECS service and
click Web UI > Storage
UI.
The Longhorn dashboard opens.
Check the "in Progress" section of the dashboard to see whether
there are any volumes stuck in the attaching/detaching state in.
If a volume is that state, reboot its host.
If the
upgrade fails, or constantly retries the upgrade, do the following:
Open the ECS Web UI (Kubernetes Dashboard):
In the Cloudera Manager Admin Console, go to the ECS
service.
Click Web UI
> ECS Web
UI.
If you see an error message similar to the following after the
upgrade for the alertmanager pod, perform the steps below. If it
is another pod, skip to Step 3 below.
Warning FailedAttachVolume 2s (x5 over 20s) attachdetach-controller AttachVolume.Attach failed for volume "pvc-6b2bc988-cbdf-4b4a-a005-dee7a1b26cf5" : rpc error: code = DeadlineExceeded desc = volume pvc-6b2bc988-cbdf-4b4a-a005-dee7a1b26cf5 failed to attach to node ecs-bcrgq6-3.vpc.myco.com
Restart the pod with the error
message:
kubectl delete pod <pod name and number as shown in the error message>
The
pod will restart.
If the pod still reports the error, log in to one of the ECS
hosts and run the following command to delete the
pvc:
kubectl delete pod <pod name and number as shown in the error message>
The
pod will restart.
There will be two instances of alertmanager,
cdp-release-prometheus-alertmanager-0 and
cdp-release-prometheus-alertmanager-1, Run
the following command, using the instance of the pod with the
error message to restart the
pod:
kubectl delete pod cdp-release-prometheus-alertmanager-<number> -n <namespace>
If the same error happens with a pod that is not the
alertmanager, but one that is not running in a statefulset, but in
a deployment (like prometheus or grafana), save the pvc before
deleting it and re-add it after it has terminated:
Log in to one of the ECS hosts and run the following command
to save the
pvc:
kubectl get pvc storage-volume-monitoring-prometheus-alertmanager-<number> -n <namespace> -o yaml > mybackup.yaml
 . Click Update.