Migrating from source cluster to destination cluster
After registering the source and destination cluster, and labeling the scanned datasets, workloads and applications on the source cluster, you can start the migration process.
-
Configure the Migration by providing the required information.
The Cloudera workload user and password will be used to access Cloudera Manager of the Cloudera Data Hub cluster in Cloudera on cloud. You also must set the S3 Bucket Base Path for HDFS or Cloud Storage Path when migrating HDFS data. Some migration require SSH login credentials with sudo-less password.
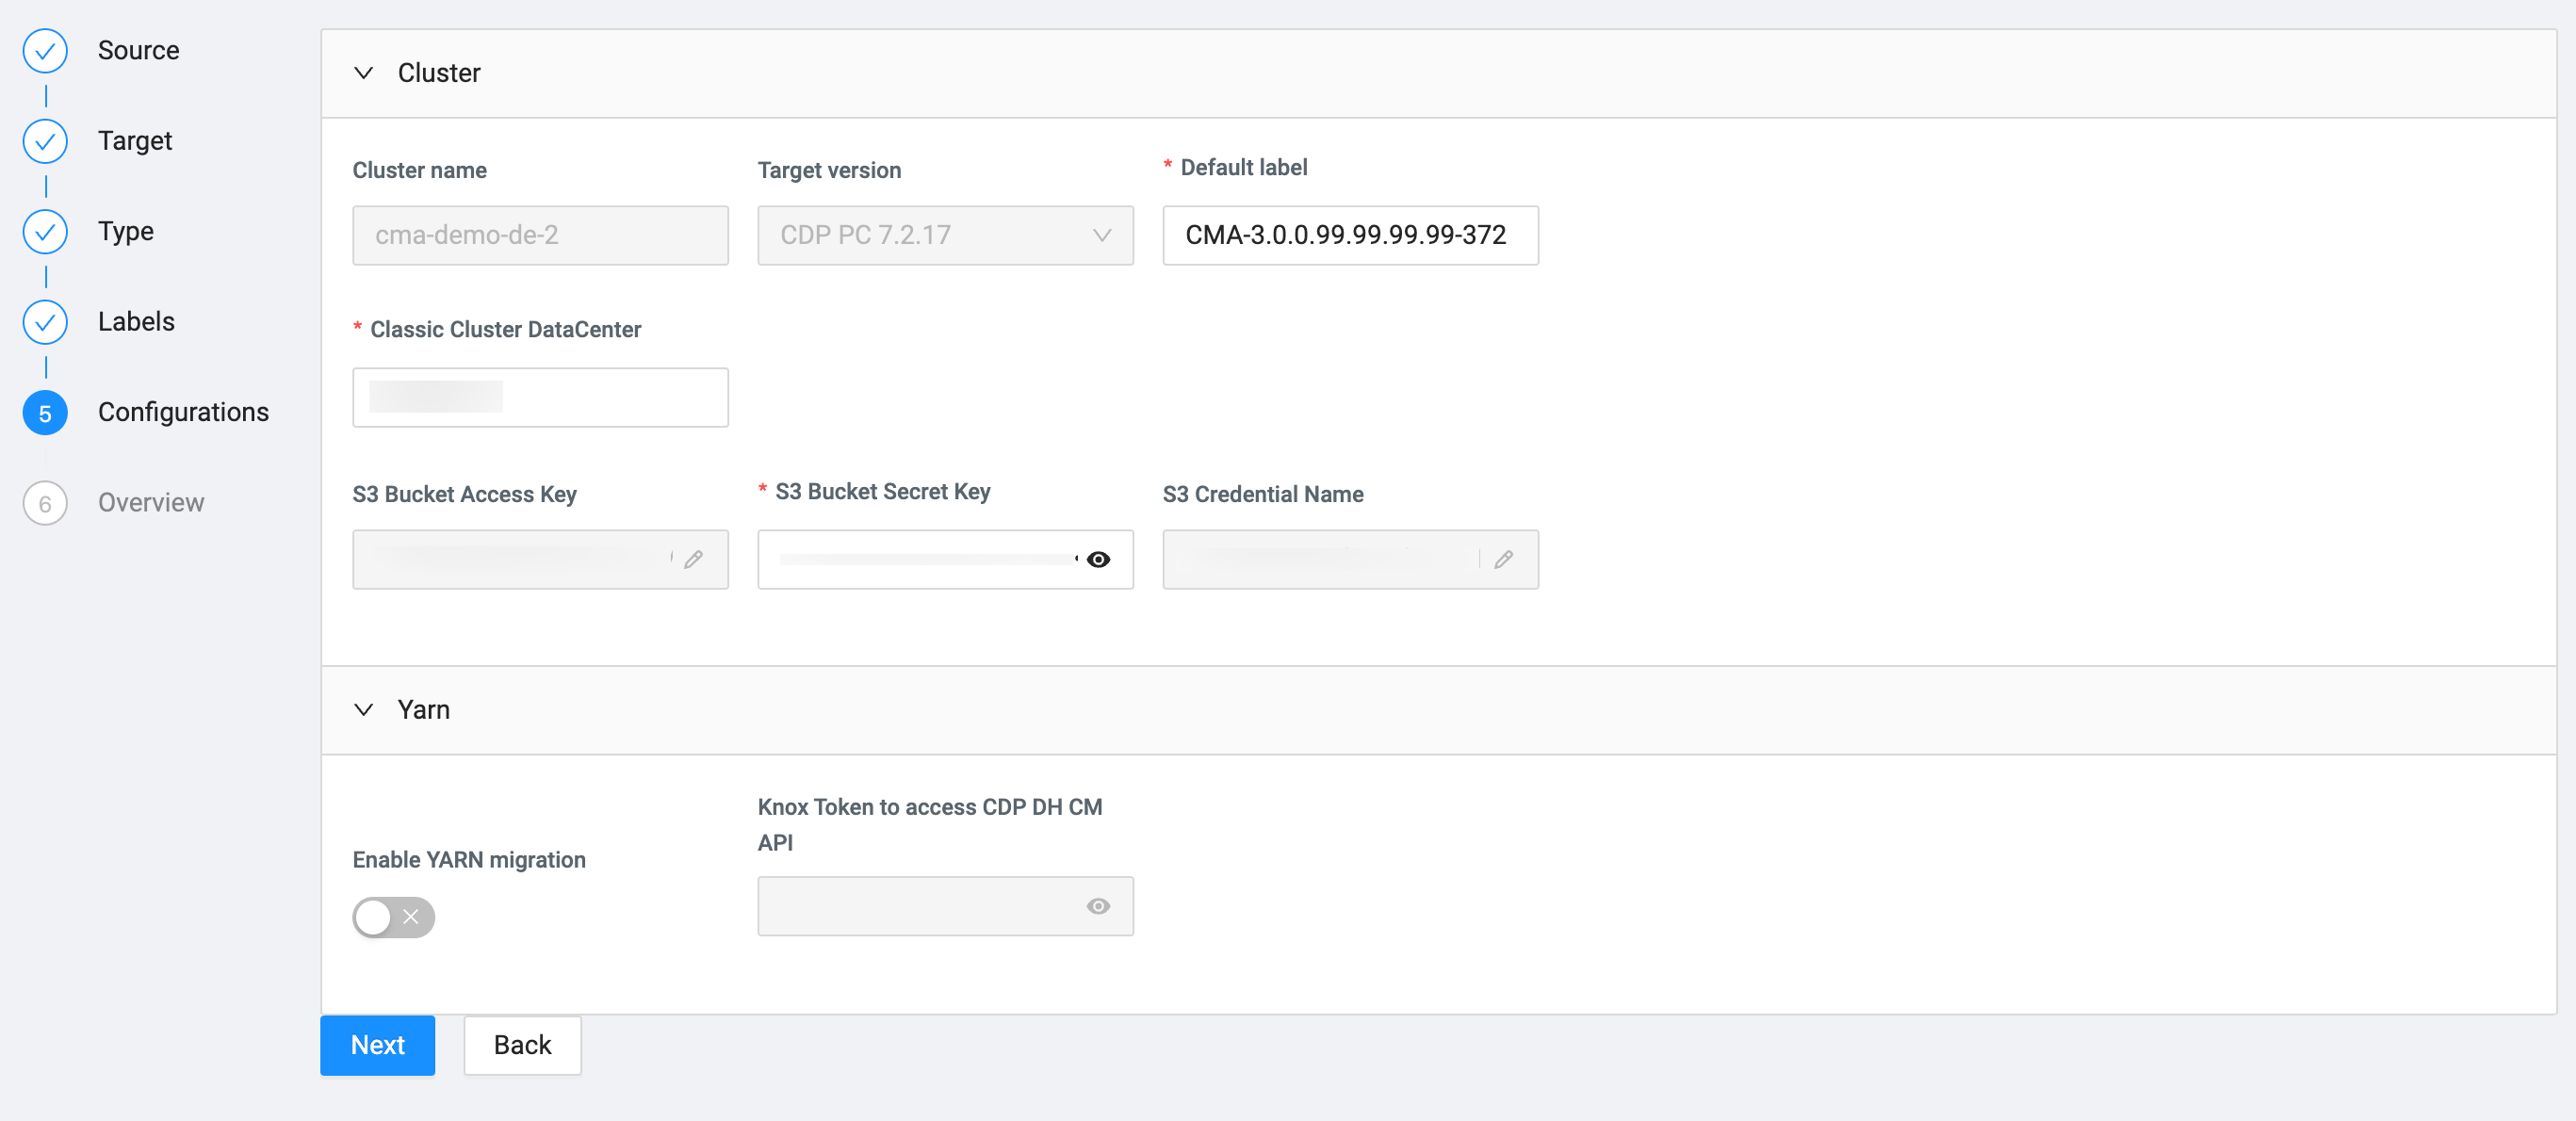 The remaining service specific settings on the Configurations page are automatically filled out, but can be changed based on your requirements.
 -
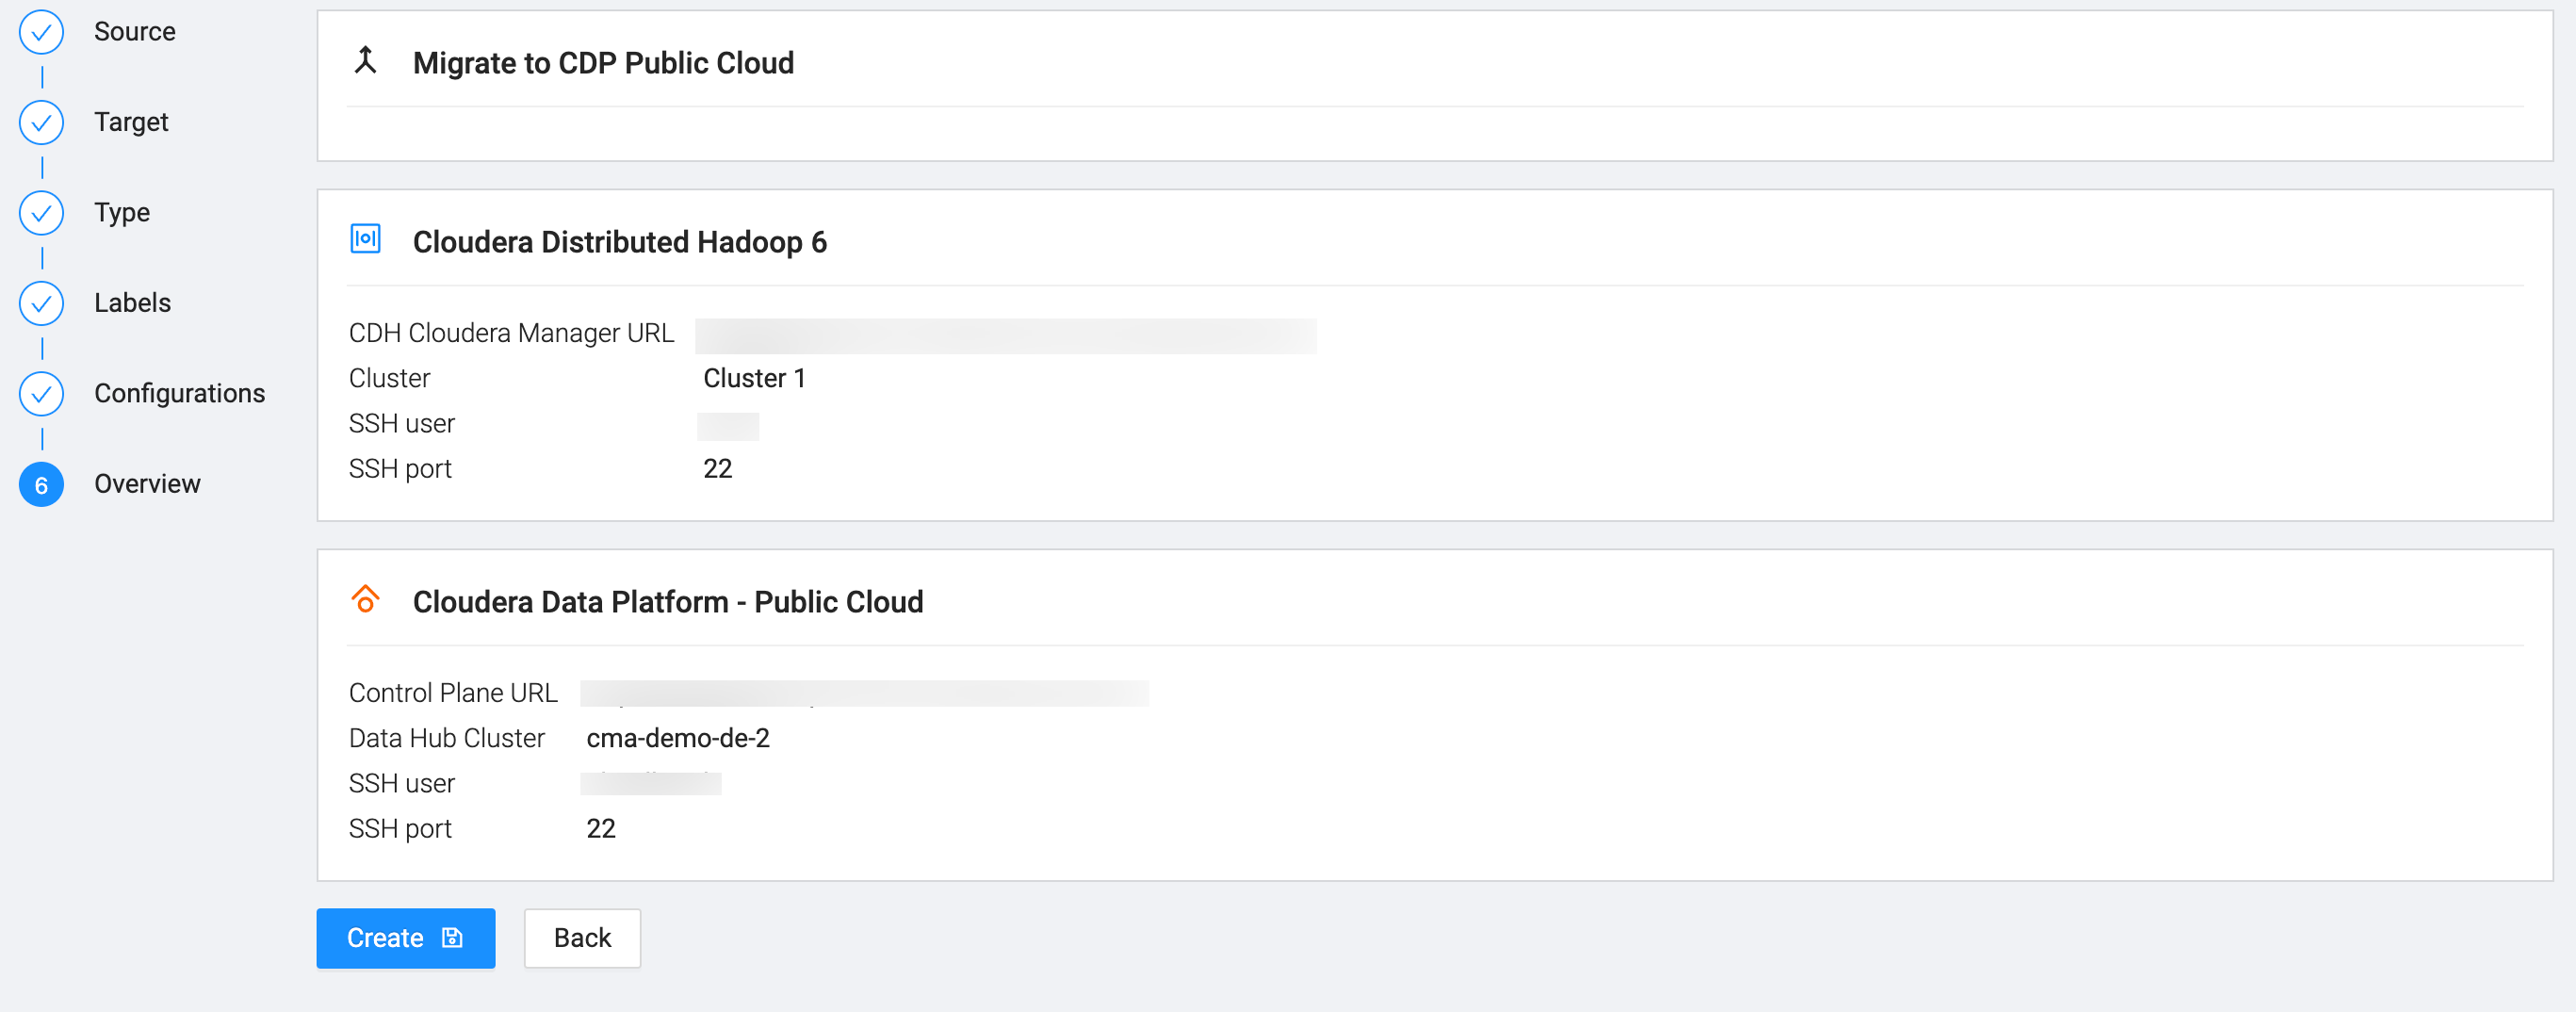
Review the information on the Overview page and ensure
that the information is correct.
At this point, you can go back and change any configuration if the information is not correct.
-
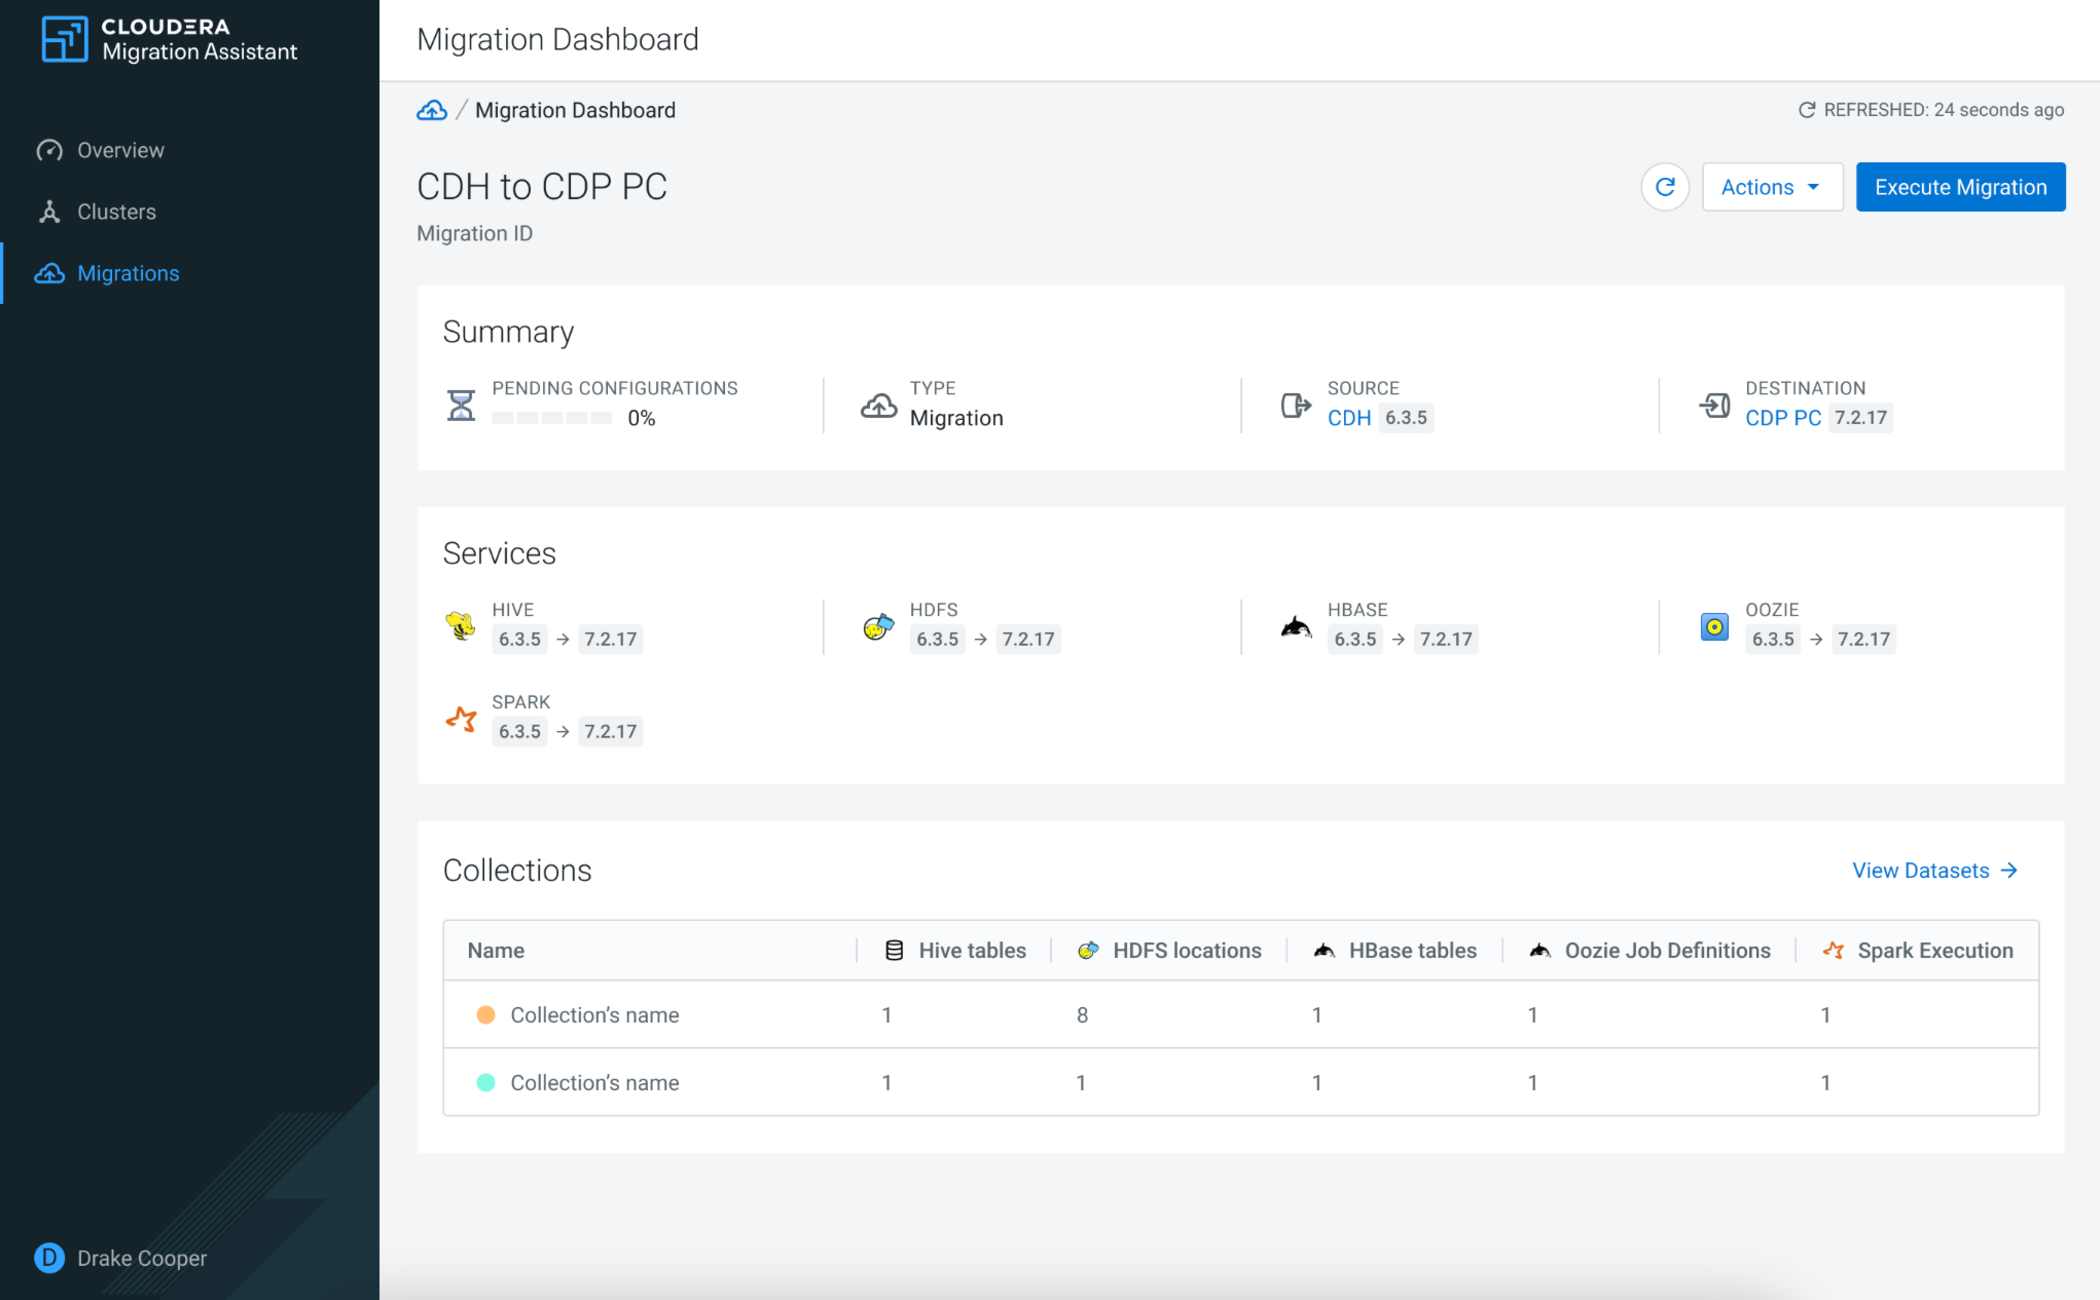
Click Execute Migration to start the migration on the
Migration Dashboard.
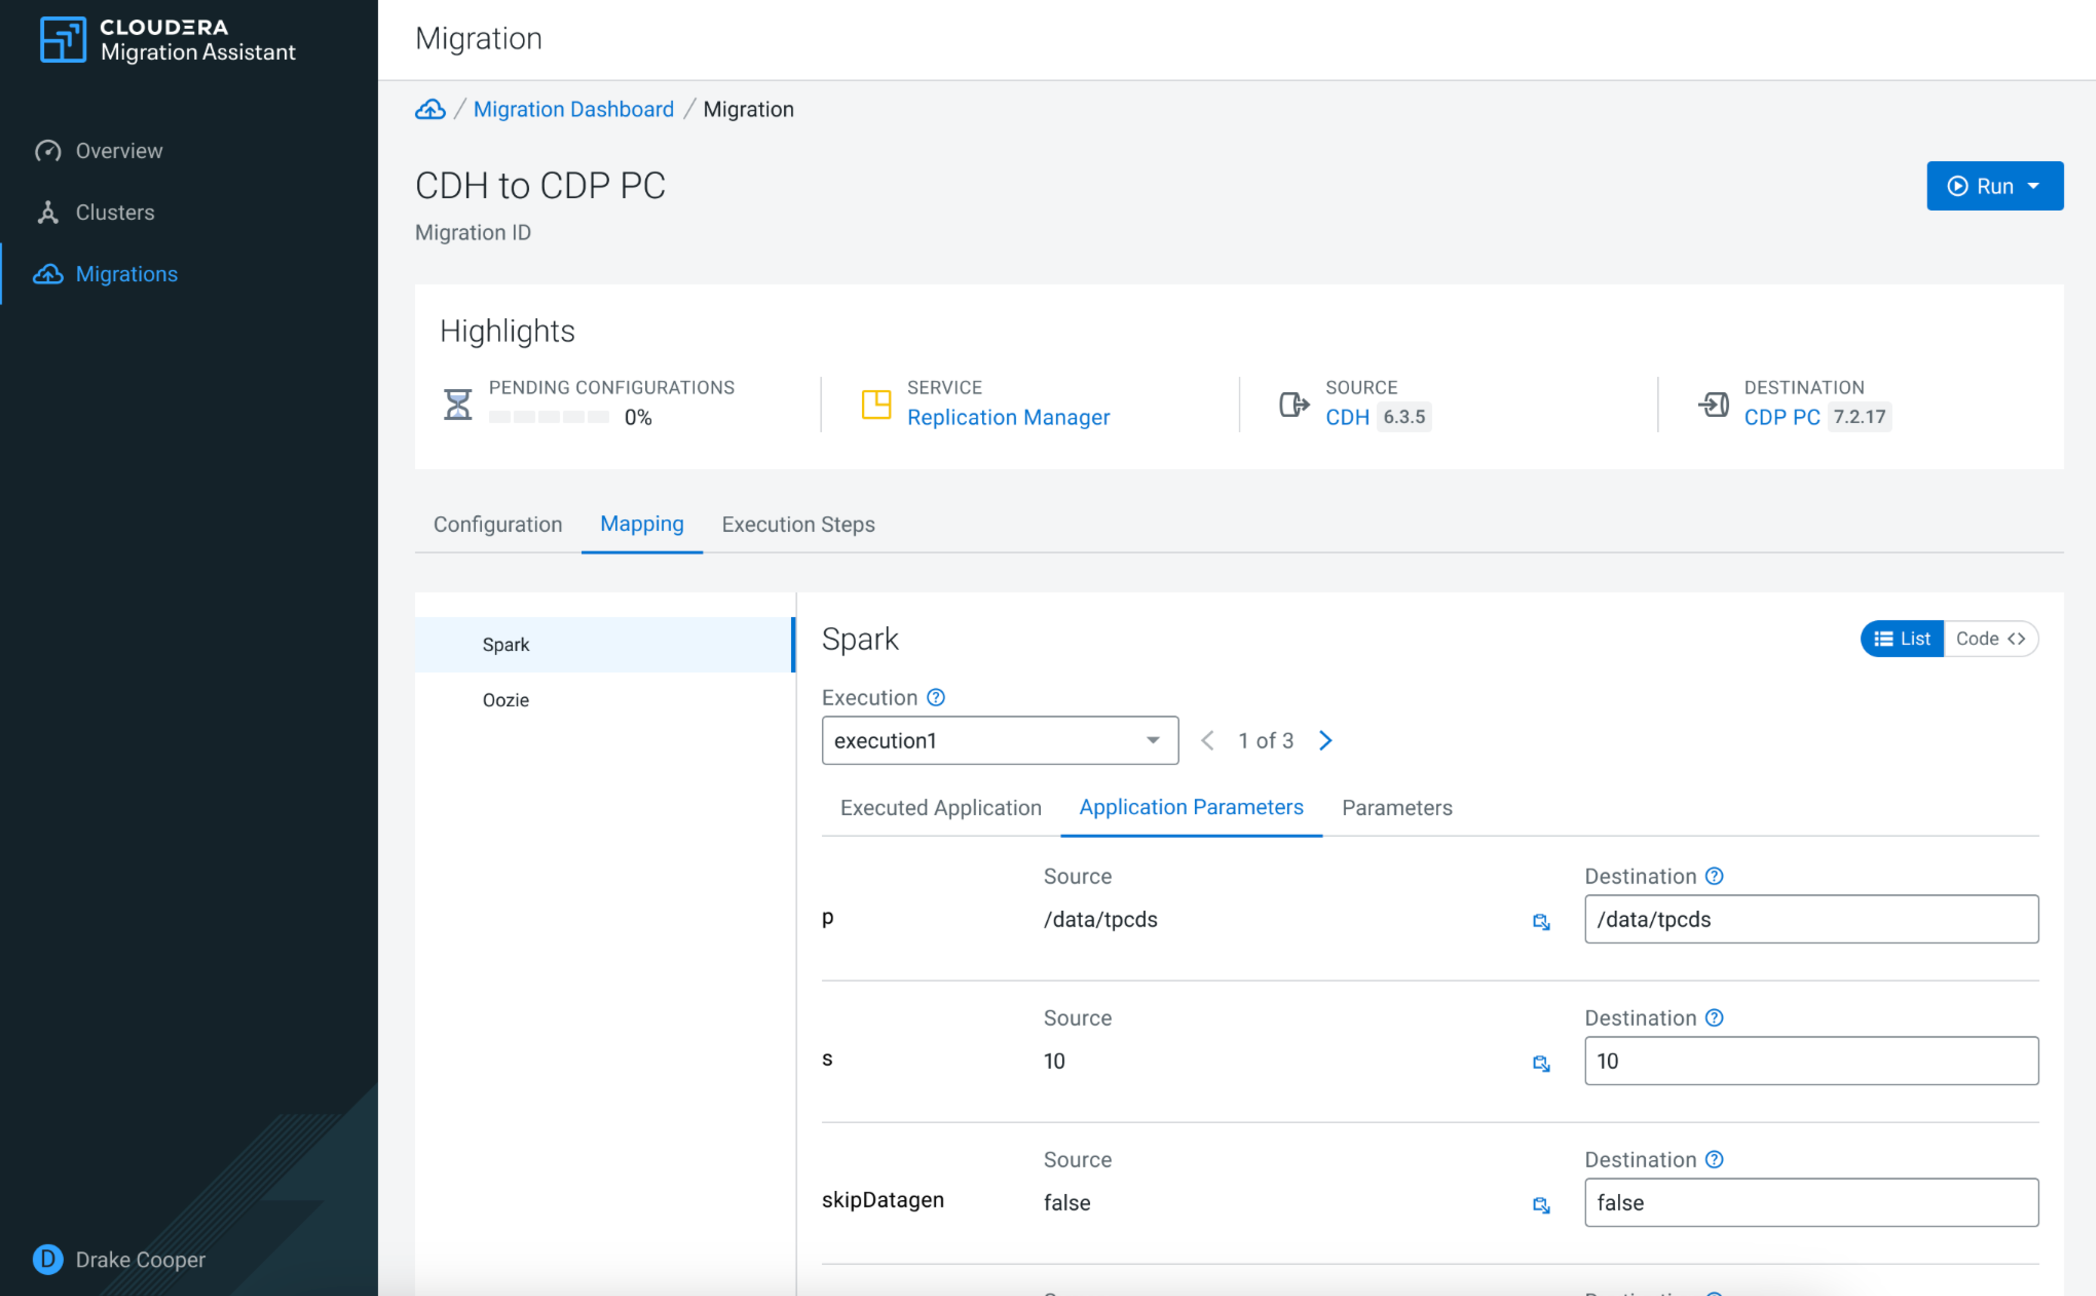
Before you can start the migration, you can update the Cluster, S3, HDFS and YARN specific settings on the Configuration tab.
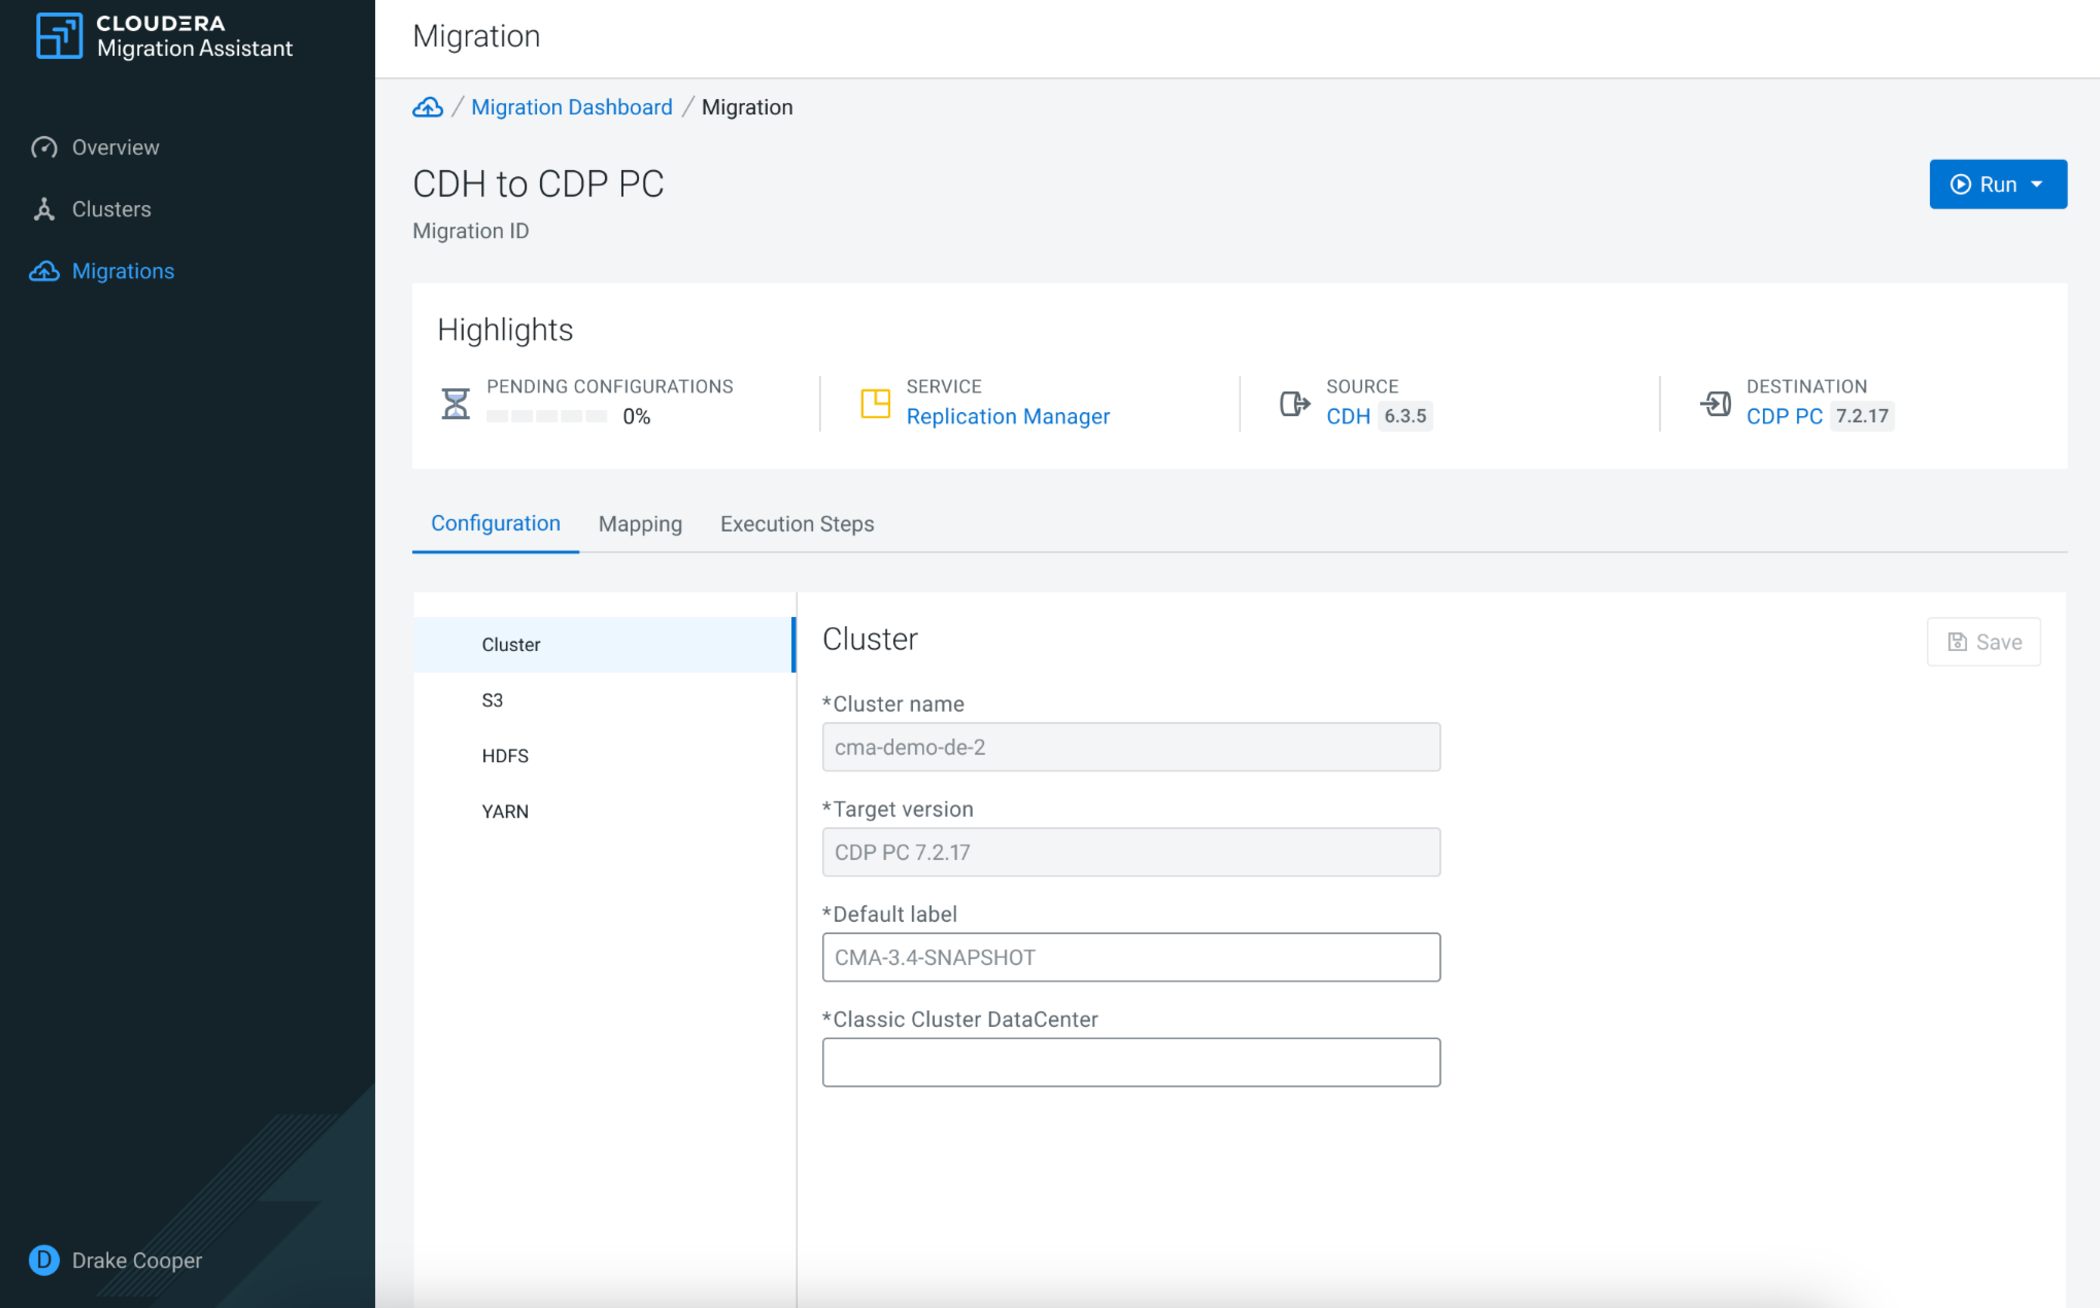
Under Mapping, you can ensure that the datasets and applications from the source cluster are in a compatible format on the target cluster.
After finishing the configuration and mapping, click Run to start either the whole migration or specific phases of the migration. You can track the process of each migration step using the Execution Steps tab.
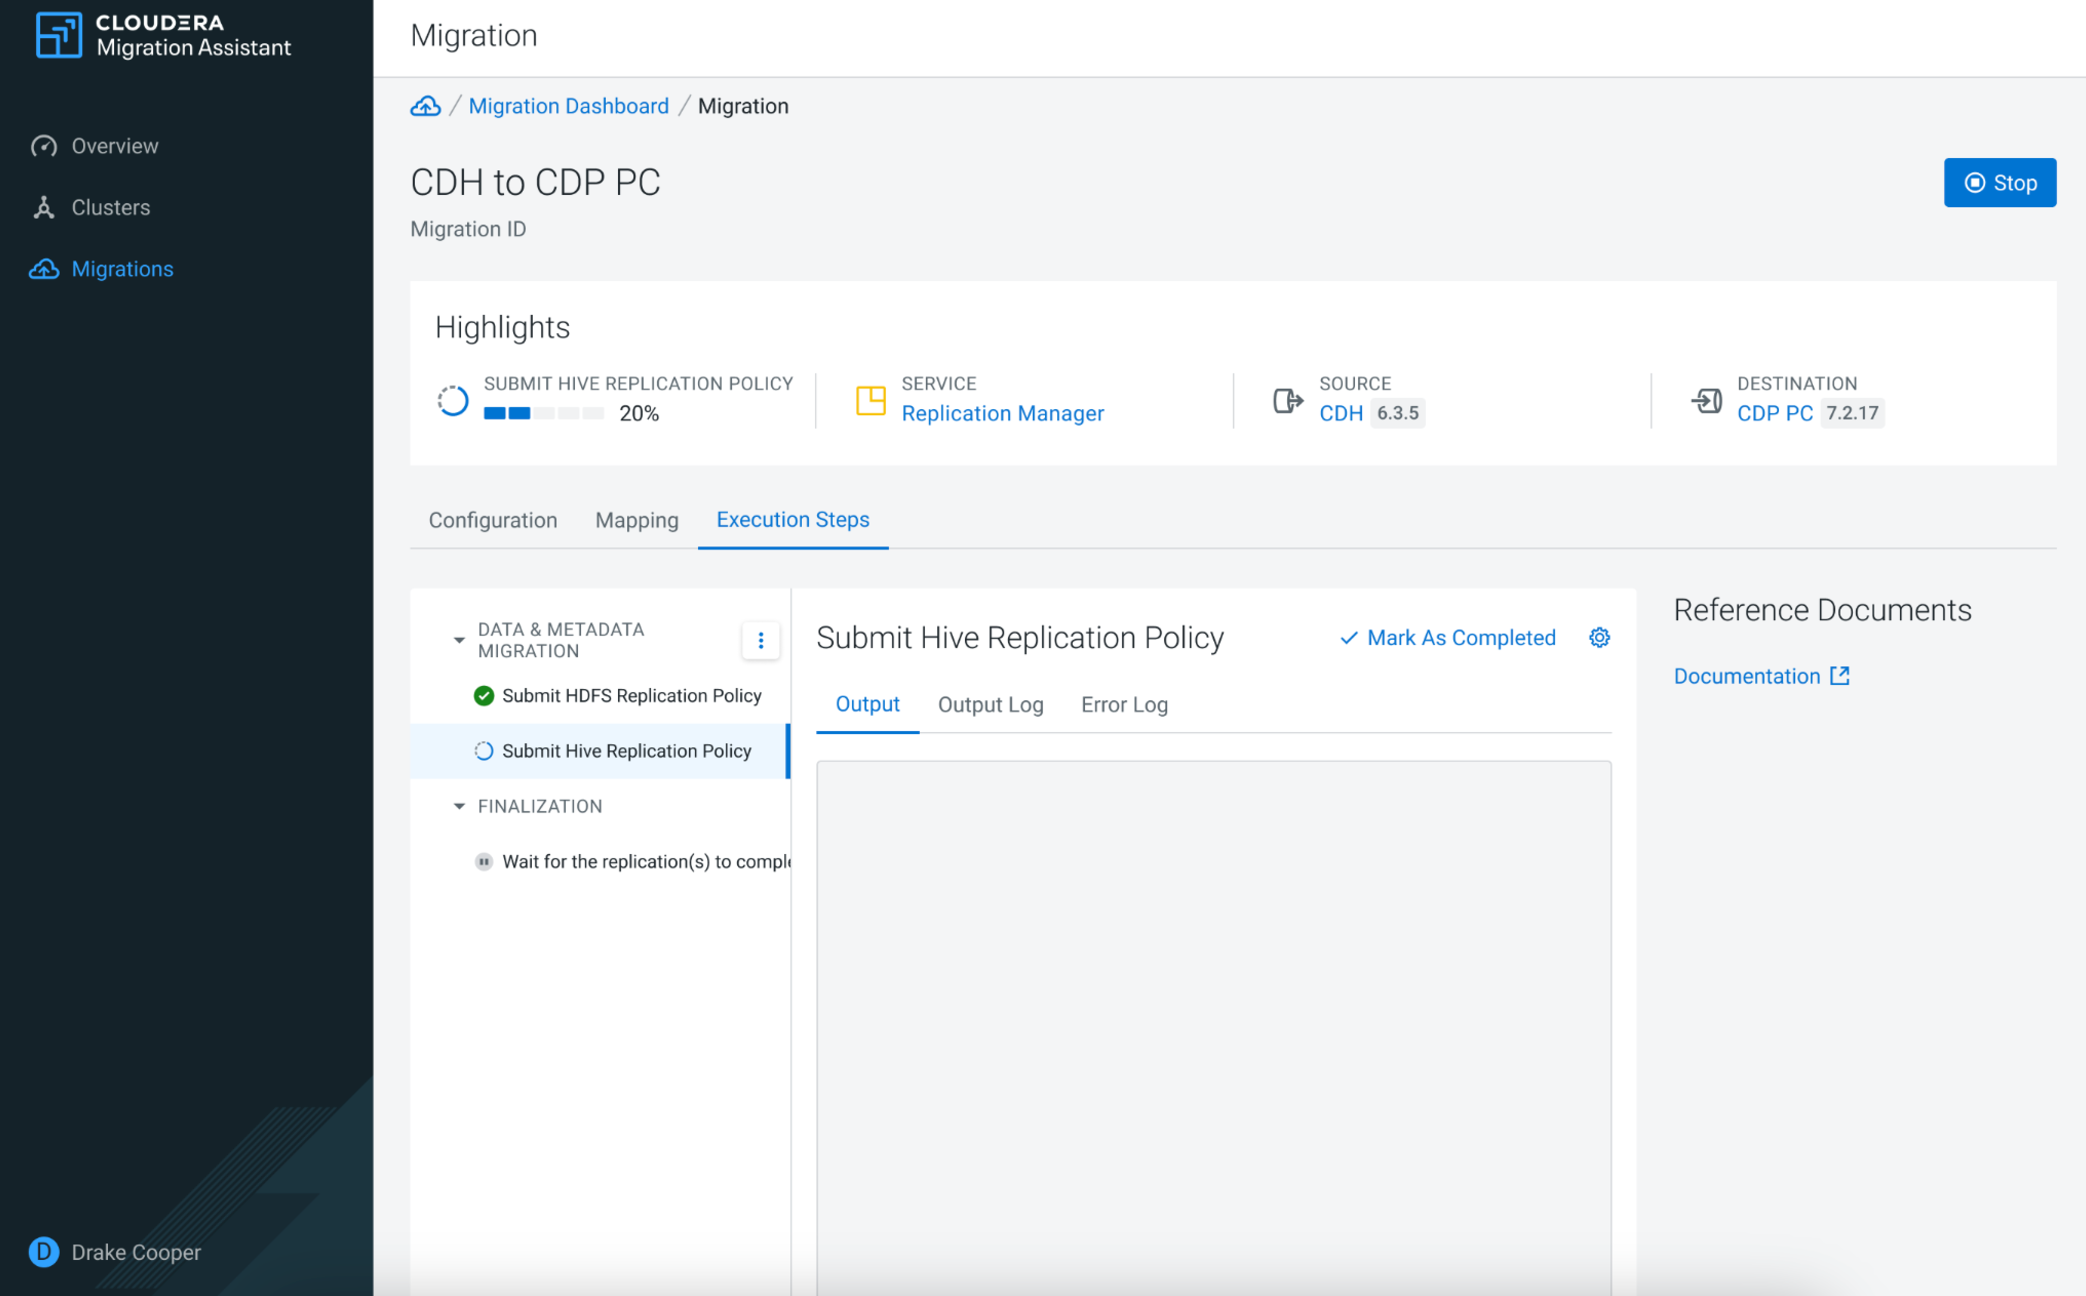
The Data & Metadata Migration executes the data migration of the labeled datasets with Replication Manager.
You can also view the migration process of the data and workloads based on the selected services. For example, the Hive SQL Migration replicates the Hive SQL queries that were fixed to be Hive complied during the Hive Workload migraton steps.
The Finalization waits until all the Cloudera Replication Manager policies complete their jobs. If the label is created as a frequently scheduled migration, the Cloudera Replication Manager waits only for the first jobs.
When migrating from Cloudera Base on premises to Cloudera on cloud, you need to manually export and import the Ranger policies from the source cluster to the destination cluster using the followingcurlcommands:- Exporting policies
- To export all
policies:
curl -X GET --header "text/json" -H "Content-Type: text/json" -o file.json -u [***USERNAME***]:[***PASSWORD***] "http://[***HOSTNAME***]:[***RANGER PORT***]/service/plugins/policies/exportJson" - To export for specific HDFS
resource:
curl -X GET --header "text/json" -H "Content-Type: text/json" -o file.json -u [***USERNAME***]:[***PASSWORD***] "http://[***HOSTNAME***]:[***RANGER PORT***]/service/plugins/policies/exportJson?resource%3Apath=[***PATH NAME***]" - To export for policies for specific resource such as Hive
database and Hive
column:
curl -X GET --header "text/json" -H "Content-Type: text/json" -o file.json -u [***USERNAME***]:[***PASSWORD***] "http://[***HOSTNAME***]:[***RANGER PORT***]/service/plugins/policies/exportJson??resource%3Adatabase=[***DATABASE NAME***]&resource%3Acolumn=[***COLUMN NAME***]"
- To export all
policies:
- Importing policies
- To Import policies from JSON file without
servicesMap:
curl -i -X POST -H "Content-Type: multipart/form-data" -F 'file=@/path/file.json' -u [***USERNAME***]:[***PASSWORD***] http://[***HOSTNAME***]:[***RANGER PORT***]/service/plugins/policies/importPoliciesFromFile?isOverride=true - To Import policies from JSON file with
servicesMap:
curl -i -X POST -H "Content-Type: multipart/form-data" -F 'file=@/path/file.json' -F ‘servicesMapJson=@/path/servicesMapping.json’ -u [***USERNAME***]:[***PASSWORD***] http://[***HOSTNAME***]:[***RANGER PORT***]/service/plugins/policies/importPoliciesFromFile?isOverride=true
- To Import policies from JSON file without
servicesMap:
- Exporting policies