Learn how to set up the ConsumeWindowsEventLog processor to capture windows events
through MiNiFi, and to send data from MiNiFi to NiFi.
Download MiNiFi MSI and set the classname.
In this example, the classname is test6. You can set this
property at install time (MSI) or by going directly to the
minifi.properties file. Also ensure that the
nifi.c2.enable property is set to true. This informs MiNiFi
that run time flow instructions will be received from EFM.
Start MiNiFi.
MiNiFi can be configured to send data to multiple endpoints (for example,
Kafka, NiFi, EventHub). In this example, data will be sent to NiFi over
S2S.
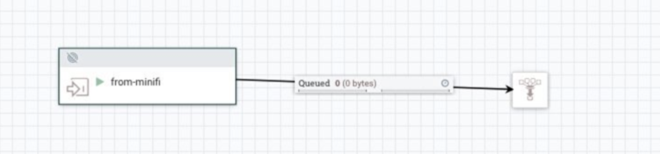
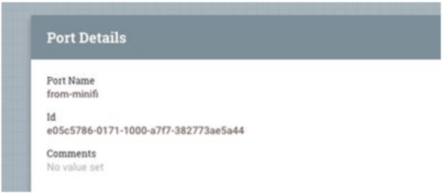
Create an input port on NiFi.
Capture the port ID.
The port ID will be used in EFM later on.
On EFM, open the test6 class.
This is where we design the flow for all agents with their class set to
test6.
To capture windows events through MiNiFi, add ConsumeWindowsEventLog processor
to the canvas.
Configure the processor to pull events.
In this example, MiNiFi collects the windows security events.
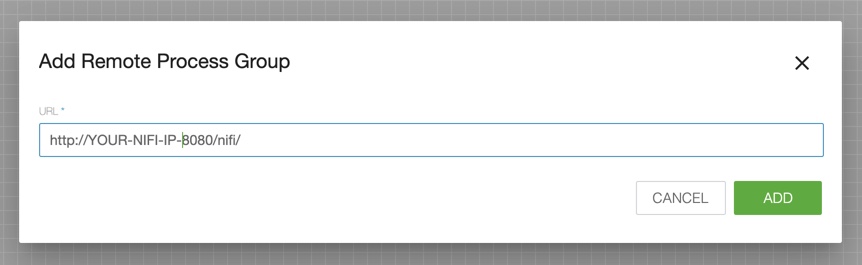
To send data from MiNiFi to NiFi, add a Remote Process Group to the canvas and
provide a NiFi endpoint.
Connect the ConsumeWindowsEventLog processor to the Remote Process Group and
provide the NiFi Input Port ID captured earlier.
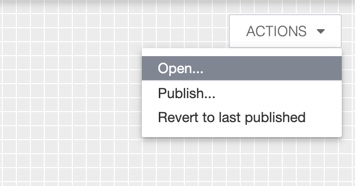
Click Publish.
MiNiFi contacts EFM at a set interval
(nifi.c2.agent.heartbeat.period). Once that occurs,
MiNiFi receives new run time flow instructions. At that time data starts
flowing into NiFi.