Using the Agent Deployer
Learn how you can deploy a MiNiFi application using the Agent Deployer in the Edge Flow Manager, including generating and running deployment commands.
-
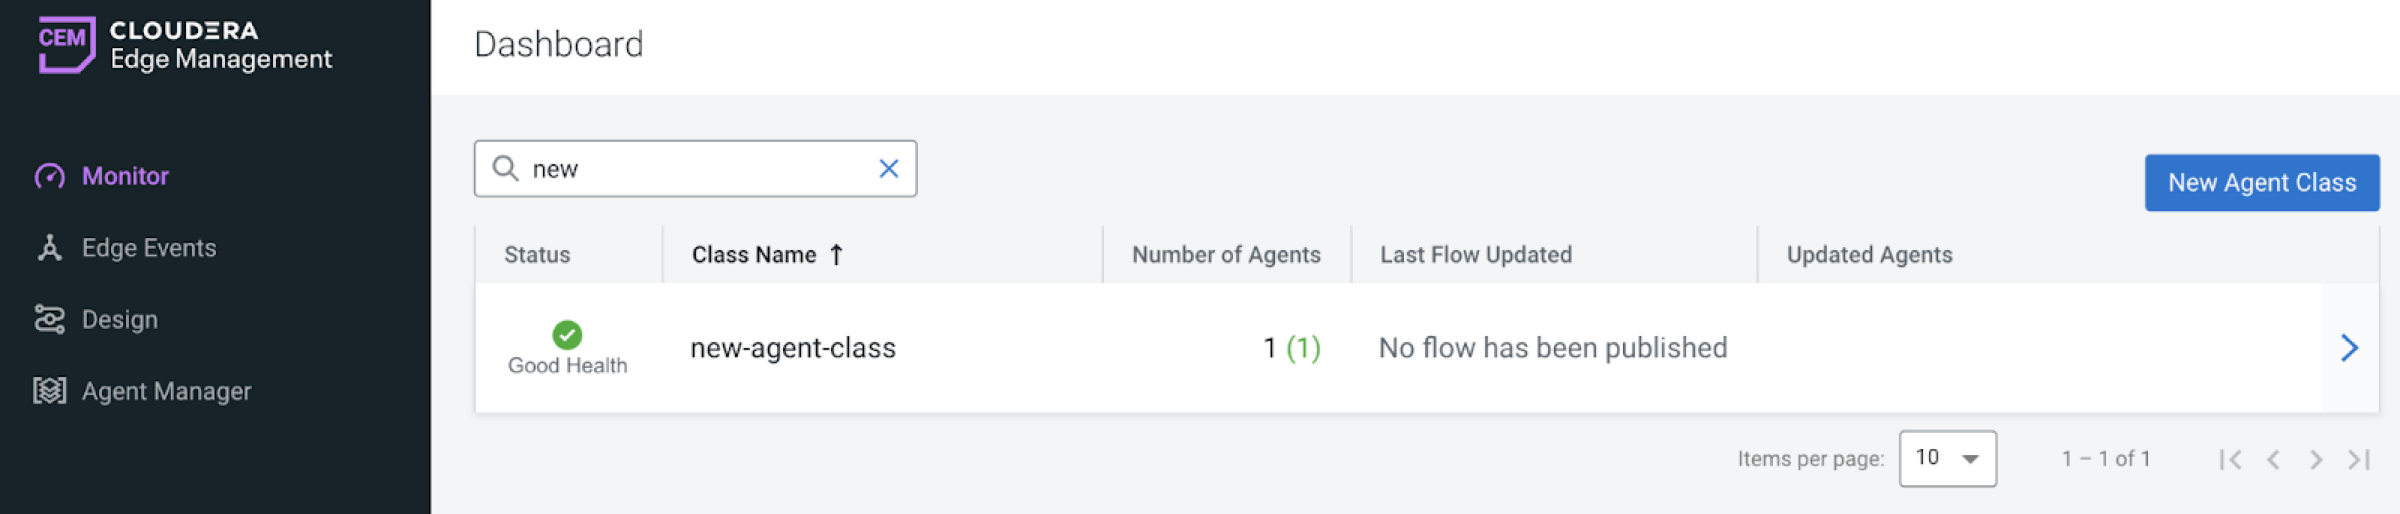
Create a new agent class.
-
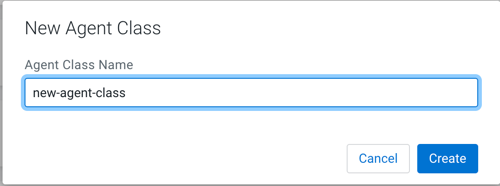
Click New Agent Class.

-
Enter a name and click Create.
The new aget class is added to the list. -
Click New Agent Class.
-
Generate a deploy command.
-
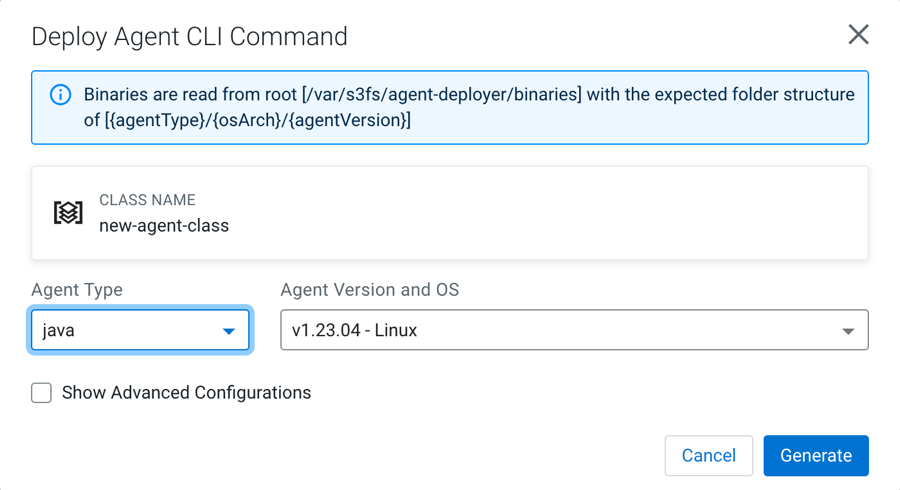
Click .

If binaries are available, the Agent Type, Agent Version, and OS fields are pre-populated.
-
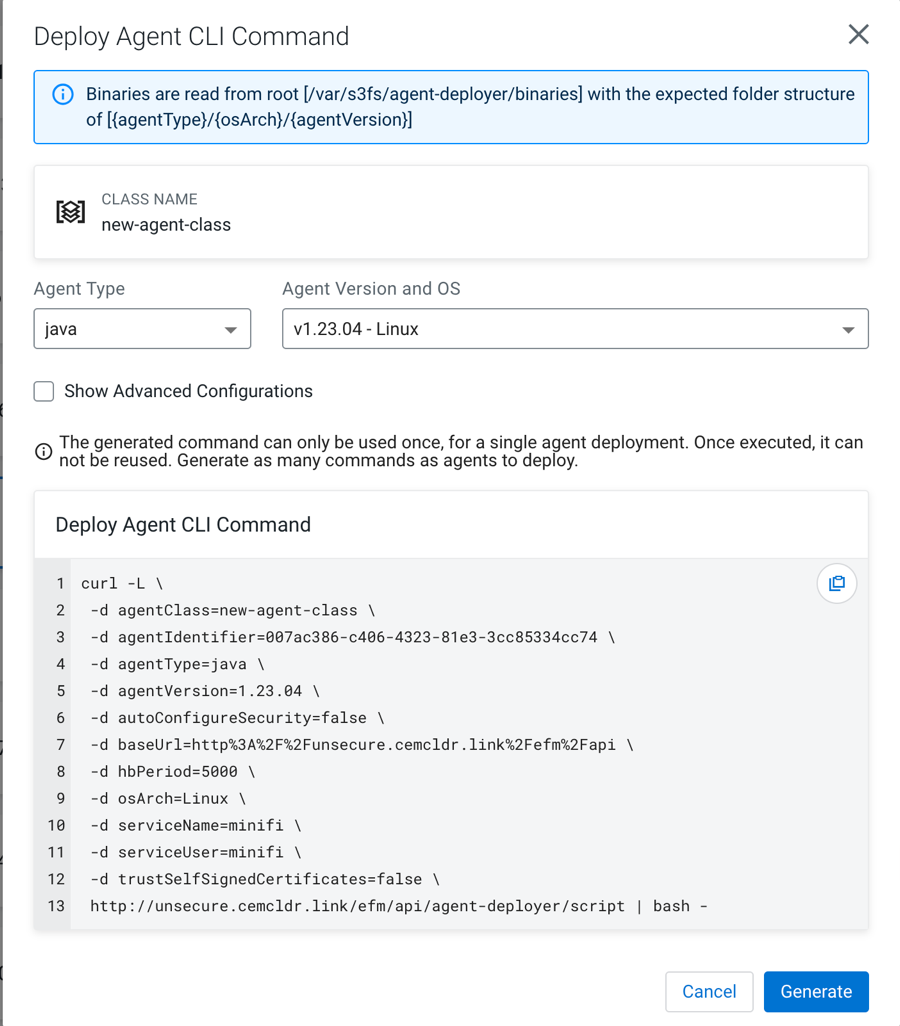
Click Generate.
The generated deployment command is displayed.
-
Click .
- Optional:
Configure the advanced options for the Deploy Agent CLI
command.
In specific scenarios, the default configuration may not meet your specific requirements. In this case, use the advanced configurations to customize parameters. To make the advanced options visible, select Show Advanced Configurations.
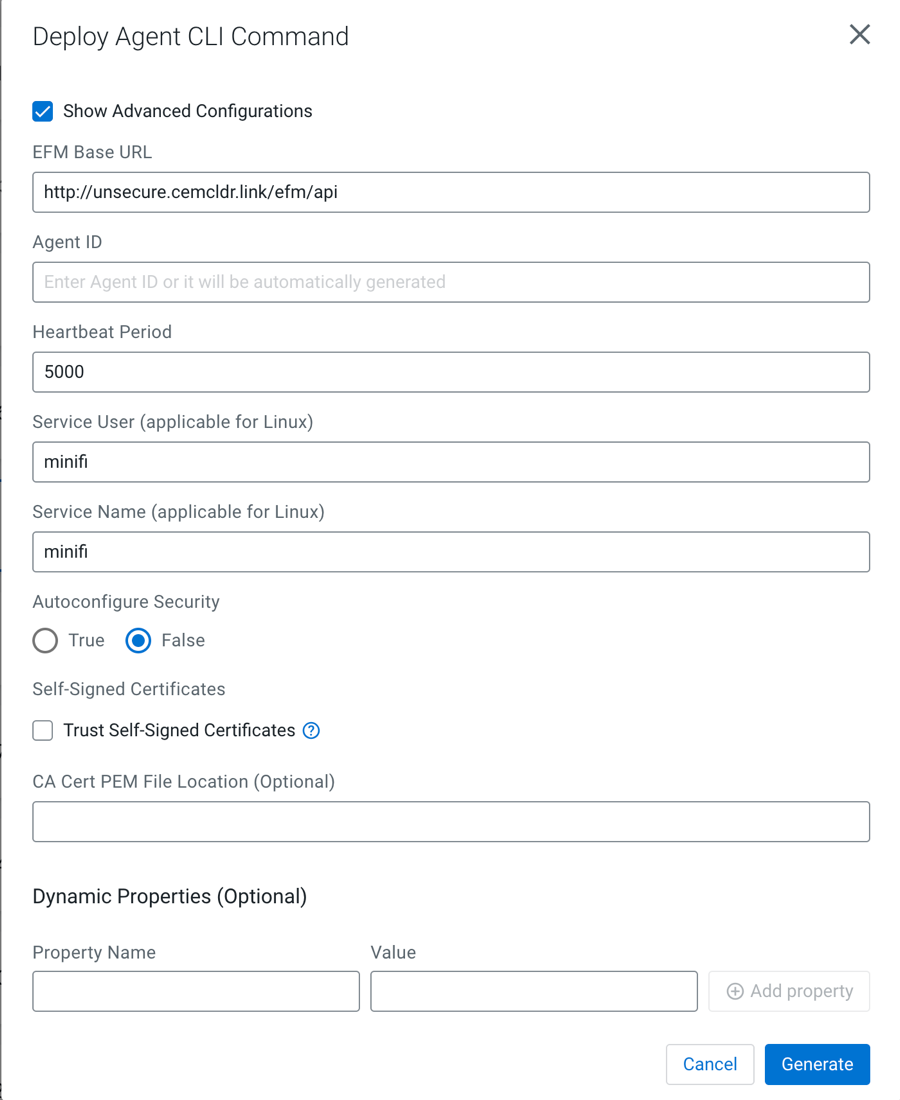
- Edge Flow Manager Base URL
-
The full URL of the EFM REST API base. The generated command uses this URL to access Edge Flow Manager from the remote host. If EFM is behind a load balancer or a proxy, you can override this URL.
- Agent ID
-
The agent ID is automatically generated, but you can also set a custom value. If a custom value is set, make sure that each command generation has a unique identifier.
- Heartbeat Period
-
Defines how often the agent sends heartbeat messages.
- Service User
-
- On Linux: A user is created with this name and the agent process runs under this user.
- On Windows: This is not applicable at the moment because the Java agent is not started as a service and the C++ agent is parameterized with the Service User.
- Autoconfigure Security
-
If security is enabled in Edge Flow Manager (for example any authentication method is turned on), the agent needs to connect to Edge Flow Manager in a secured manner. If Autoconfigure Security is enabled, Edge Flow Manager generates the necessary certificates for the agent, and the command downloads the certificates through a secured channel, and configures the agent automatically.
You can provide your own Certificate Authority (CA) for signing certificates. If a custom CA is not provided, Edge Flow Manager generates one during startup, which will be used for the certificates.
For more information on Autoconfigure Security features, see Configuring Agent Deployer for securing agents.
- Self-Signed Certificates and CA Cert PEM File Location
-
If Edge Flow Manager is set up using a self-signed certificate (where Edge Flow Manager generated the CA and it was not provided externally), the request issued by the Agent Download command may be rejected since the issuing host will not trust Edge Flow Manager.
You have two options:- Select the Trust Self-Signed Certificates checkbox to trust the self-signed certificate and proceed with the Agent Download command.
- Use the CA Cert PEM File Location to reference a CA Cert on the agent file system. This allows the agent to trust Edge Flow Manager by using the specified CA certificate.
- Dynamic properties:
-
You have the flexibility to override any arbitrary MiNiFi properties.
- For MiNiFi Java agents: The properties are located in the bootstrap.conf file.
- For MiNiFi C++ agents: The properties are located in the minifi.properties file.
-
Run the command.
Copy and paste the generated CLI command on the target host’s shell or command line.
The command downloads the agent binary into the directory where the script was run. After that, the command extracts, configures, and runs the agent in the background.
For Java agents on Linux, you should see a log message similar to the following.
user@user-host /opt/cloudera/minifi curl -L \
 -d agentClass=new-agent-class \
 -d agentIdentifier=061c6cf6-1922-41b7-8239-ad25a0f5be9a \
 -d agentType=java \
 -d agentVersion=1.23.04 \
 -d autoConfigureSecurity=false \
 -d baseUrl=http%3A%2F%2Funsecure.cemcldr.link%2Fefm%2Fapi \
 -d hbPeriod=5000 \
 -d osArch=MacOs \
 -d serviceName=minifi \
 -d serviceUser=minifi \
 -d trustSelfSignedCertificates=false \
 http://unsecure.cemcldr.link/efm/api/agent-deployer/script | bash -
  % Total    % Received % Xferd  Average Speed   Time    Time     Time  Current
                                 Dload  Upload   Total   Spent    Left  Speed
100 17505  100 17208  100   297  18755    323 --:--:-- --:--:-- --:--:-- 19152
 _______ __ _______ __ _______ __      __             __         __ __
|   |   |__|    |  |__|    ___|__|    |__.-----.-----|  |_.---.-|  |  .-----.----.
|       |  |       |  |    ___|  |    |  |     |__ --|   _|  _  |  |  |  -__|   _|
|__|_|__|__|__|____|__|___|   |__|    |__|__|__|_____|____|___._|__|__|_____|__|

-- Verifying if the following commands exist: tar gzip cat grep sed seq mkdir sleep
-- Verifying if java is installed on the system...
-- Found java at: /Users/fkis/.sdkman/candidates/java/current/bin/java
openjdk version "1.8.0_362"
OpenJDK Runtime Environment (Zulu 8.68.0.19-CA-macos-aarch64) (build 1.8.0_362-b08)
OpenJDK 64-Bit Server VM (Zulu 8.68.0.19-CA-macos-aarch64) (build 25.362-b08, mixed mode)
-- Verifying if the system is capable of handling tar.gz archives...
-- Looking for a download utility on the system...
-- > curl
-- curl version: 7.88.1
-- Downloading MiNiFi...
  % Total    % Received % Xferd  Average Speed   Time    Time     Time  Current
                                 Dload  Upload   Total   Spent    Left  Speed
100  234M  100  234M    0     0  1701k      0  0:02:21  0:02:21 --:--:-- 1123k
-- MiNiFi has been downloaded to directory: minifi-1.23.04-b15
-- Configuring MiNiFi...
-- Starting MiNiFi as a simple background process...
-- Waiting until MiNiFi is up...
-- OK
#Mon Jul 24 15:40:29 CEST 2023
port=64281
pid=87120
secret.key=451f4e40-15a5-4a58-8d18-63983fec927c

  MiNiFi is now started as a background process.

  You can stop it by issuing the following commands:

    %> cd "minifi-1.23.04-b15"
    %> bin/minifi.sh stop

  To start again:

    %> cd "minifi-1.23.04-b15"
    %> bin/minifi.sh start

-- Installation has successfully completed.

  In addition of the existing (default) configuration values, the followings have been applied:

  ---
c2.agent.identifier=061c6cf6-1922-41b7-8239-ad25a0f5be9a
c2.rest.path.heartbeat=/c2-protocol/heartbeat
c2.rest.path.acknowledge=/c2-protocol/acknowledge
c2.rest.url=http://unsecure.cemcldr.link/efm/api/c2-protocol/heartbeat
c2.rest.url.ack=http://unsecure.cemcldr.link/efm/api/c2-protocol/acknowledge
c2.agent.class=new-agent-class
c2.agent.heartbeat.period=5000
c2.enable=true
c2.rest.path.base=http://unsecure.cemcldr.link/efm/api
  ---

  If you would like to modify this configuration, you need to perform these steps:

    1) Stop MiNiFi
    2) Edit the files located in "minifi-1.23.04-b15/conf"
    3) Start MiNiFi
After successful installation, the agent sends heartbeats, appearing as an active agent in Edge Flow Manager.