Deploying the CMA server with parcels
Install Cloudera Migration Assistant CSDs and parcels through Cloudera Manager, add CMA_MASTER and CMA_AGENT services on the right hosts, and configure OAuth and Gateway discovery for production clusters.
CMA is deployed as a parcel-based add-on service in Cloudera Manager and requires 1.5 GB of extra memory on the host. For architecture and network requirements, see Cloudera Migration Assistant deployment.
Dependencies
Ensure these components are installed on the CMA host:
-
Python 3.11
-
JDK 17+ with
JAVA_HOMEset
CMA automatically downloads required Python packages (Ansible, cryptography, database drivers, and others) at startup. In airgapped environments, pre-bundle packages in the CMA extras tarball.
Custom PyPI repository
By default, CMA downloads Python packages from the public
PyPI index. In corporate environments with internal PyPI mirrors, set PyPI Index
URL (cma_pip_index_url) in the CMA Master or CMA Agent
service configuration — for example
https://nexus.corp.com/repository/pypi/simple/. When a custom index URL is
configured, CMA passes --trusted-host to
pip automatically.
If JDK 17+ is not installed, download and install it on the host before deploying the service. When Java is on a default path (/usr/java/jdk-17, /usr/lib/jvm/java-17, or similar), you can omit Cloudera Migration Assistant Java Home.
For general instructions on adding an add-on service, see Extending Cloudera Manager — Add-on Services.
Download URLs
Cloudera Migration Assistant CSDs and parcels are published at
https://archive.cloudera.com/cma/version/, where
version is the Cloudera Migration Assistant release version (for
example, 4.0.0.0).
To find the exact file names for your version, browse the archive:
-
CSDs:
https://archive.cloudera.com/cma/version/csd/ -
Parcels:
https://archive.cloudera.com/cma/version/parcels/
| File | Description |
|---|---|
CMA_MASTER-version-build.jar |
CSD for the CMA Master service |
CMA_AGENT-version-build.jar |
CSD for the CMA Agent service |
-
After download completes, click Distribute to distribute the
parcel to all clusters.
Figure 1. Distribute the CMA parcel 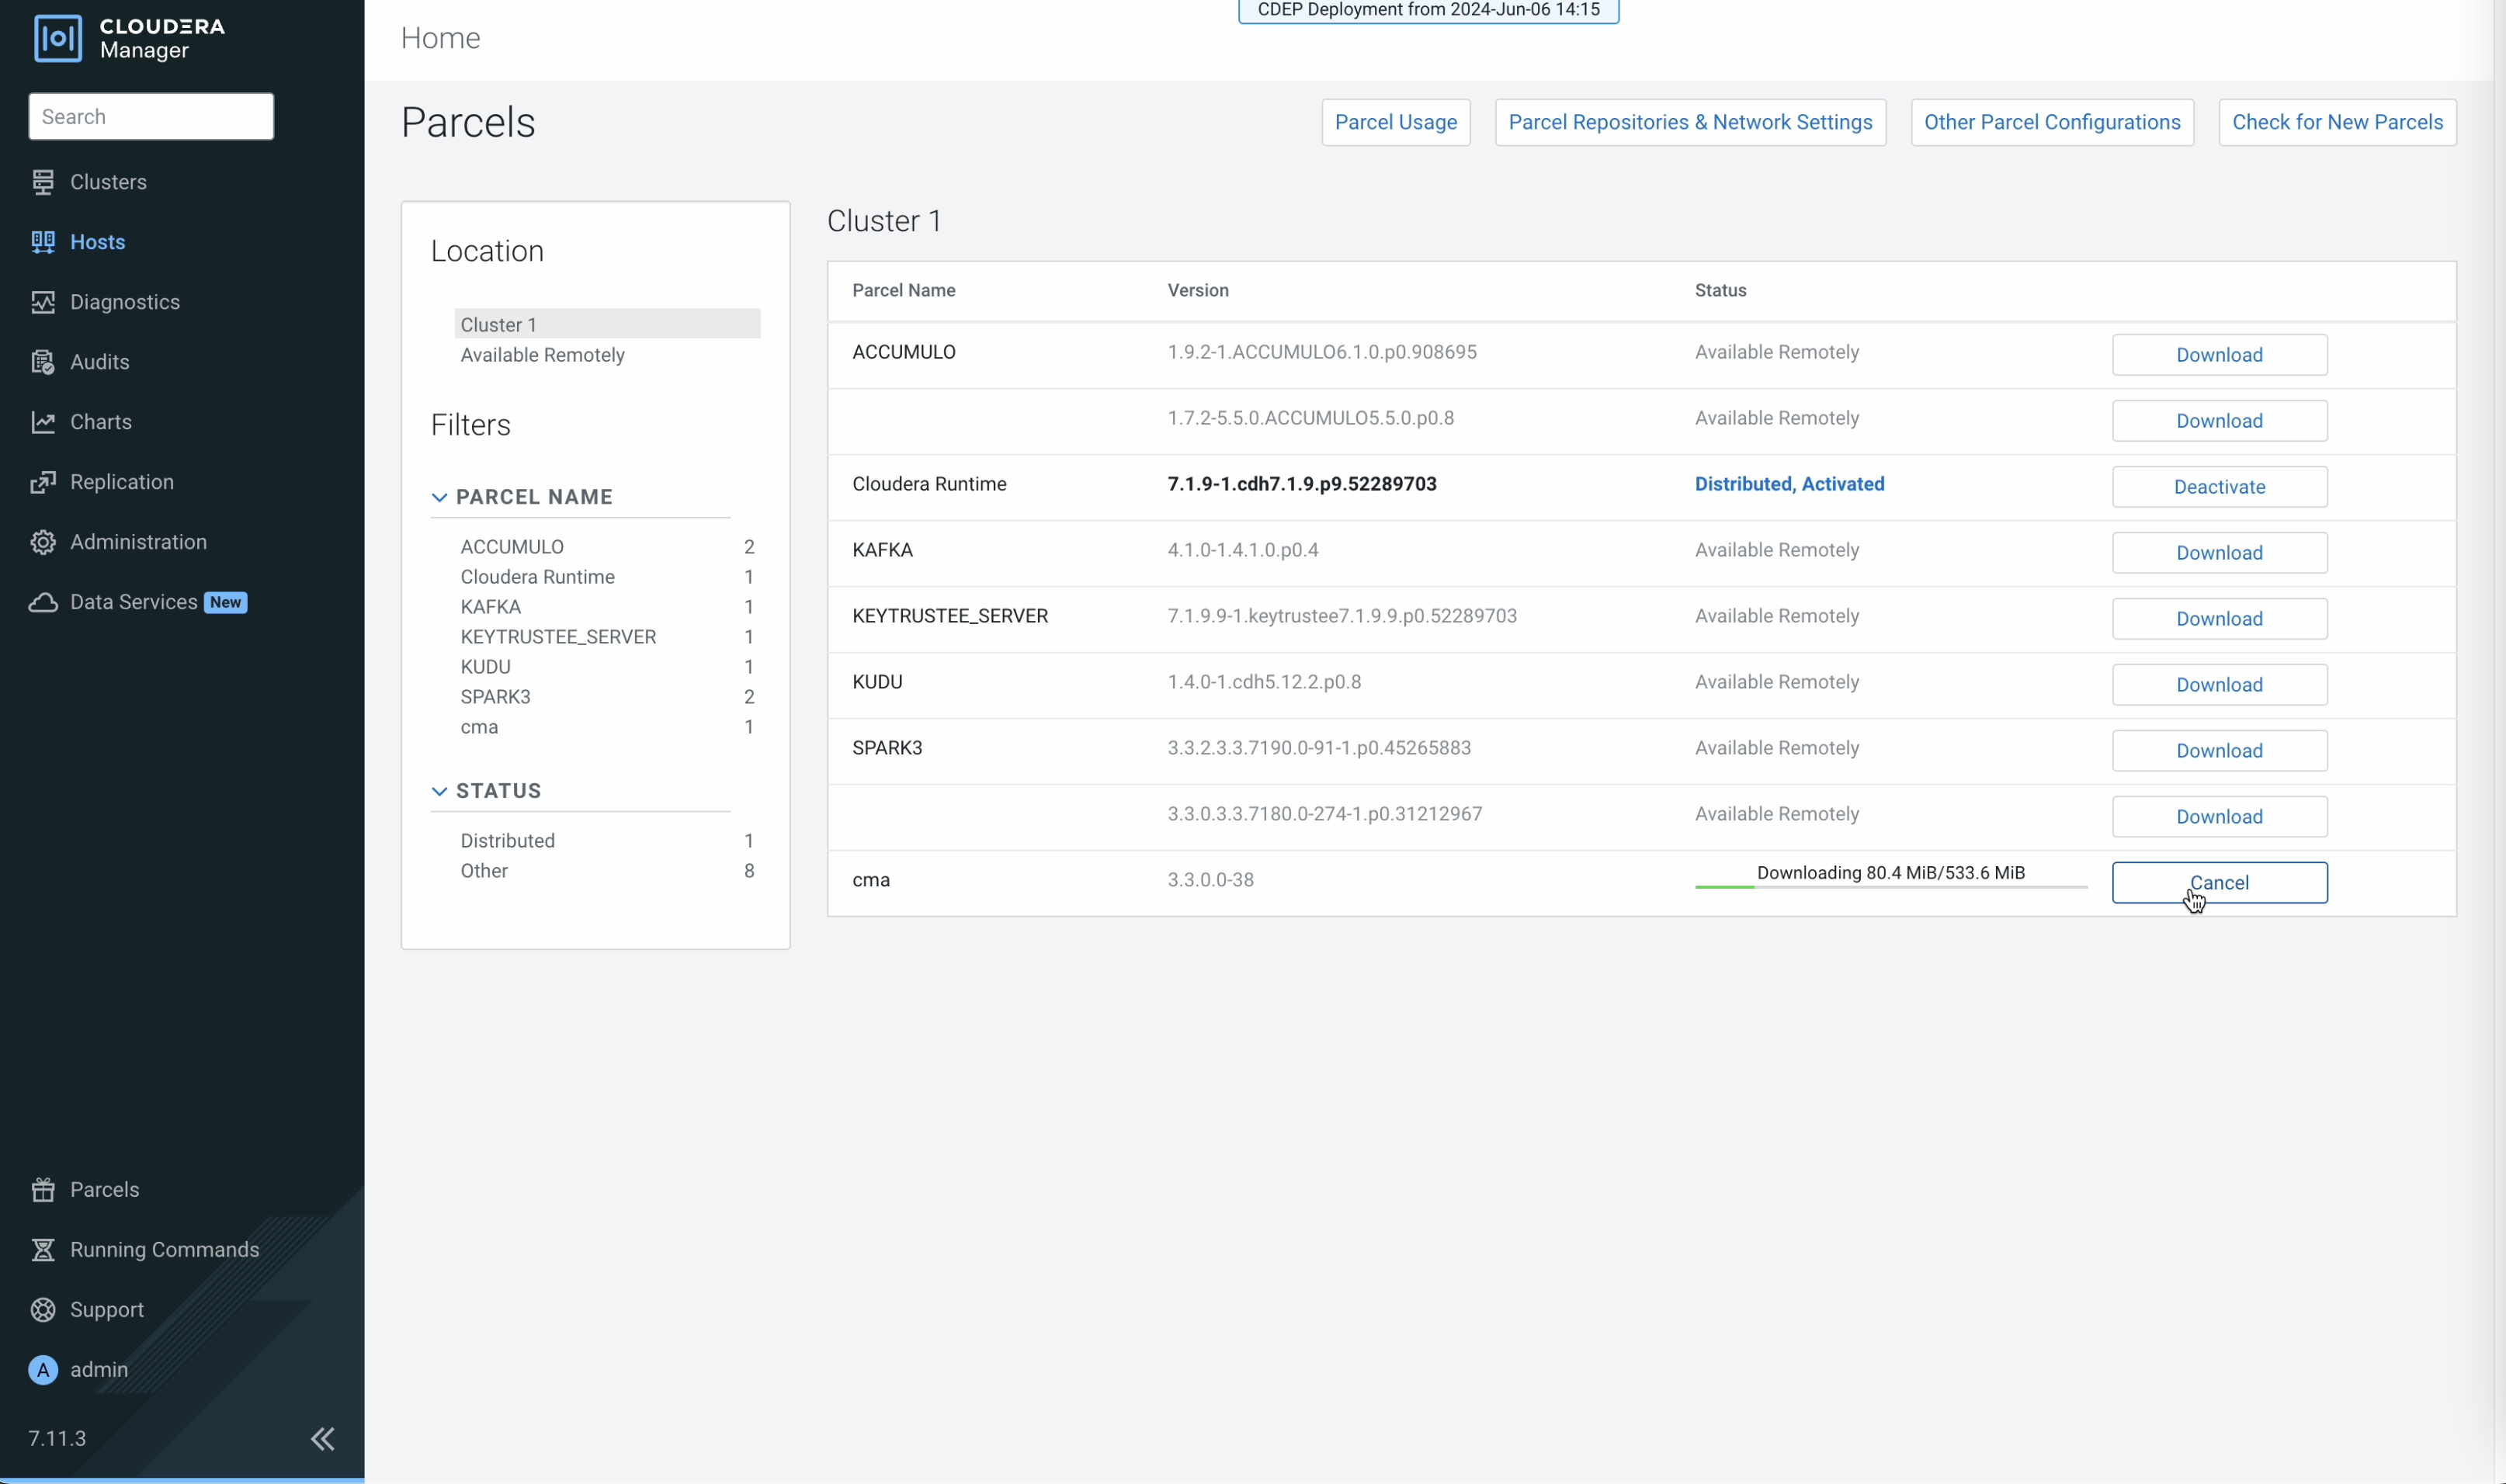
-
Review service configurations and click Continue. Set
cma_agent_client_secretto match the value configured on the CMA Master (for example the Agent OAuth2 Client Secret from the Marketplace engine). Set Gateway URL (cma_gateway_url) to the gateway URL of the remote master.The first run of the service starts. When the command finishes, the service is added to the cluster.
Figure 2. CMA agent service started 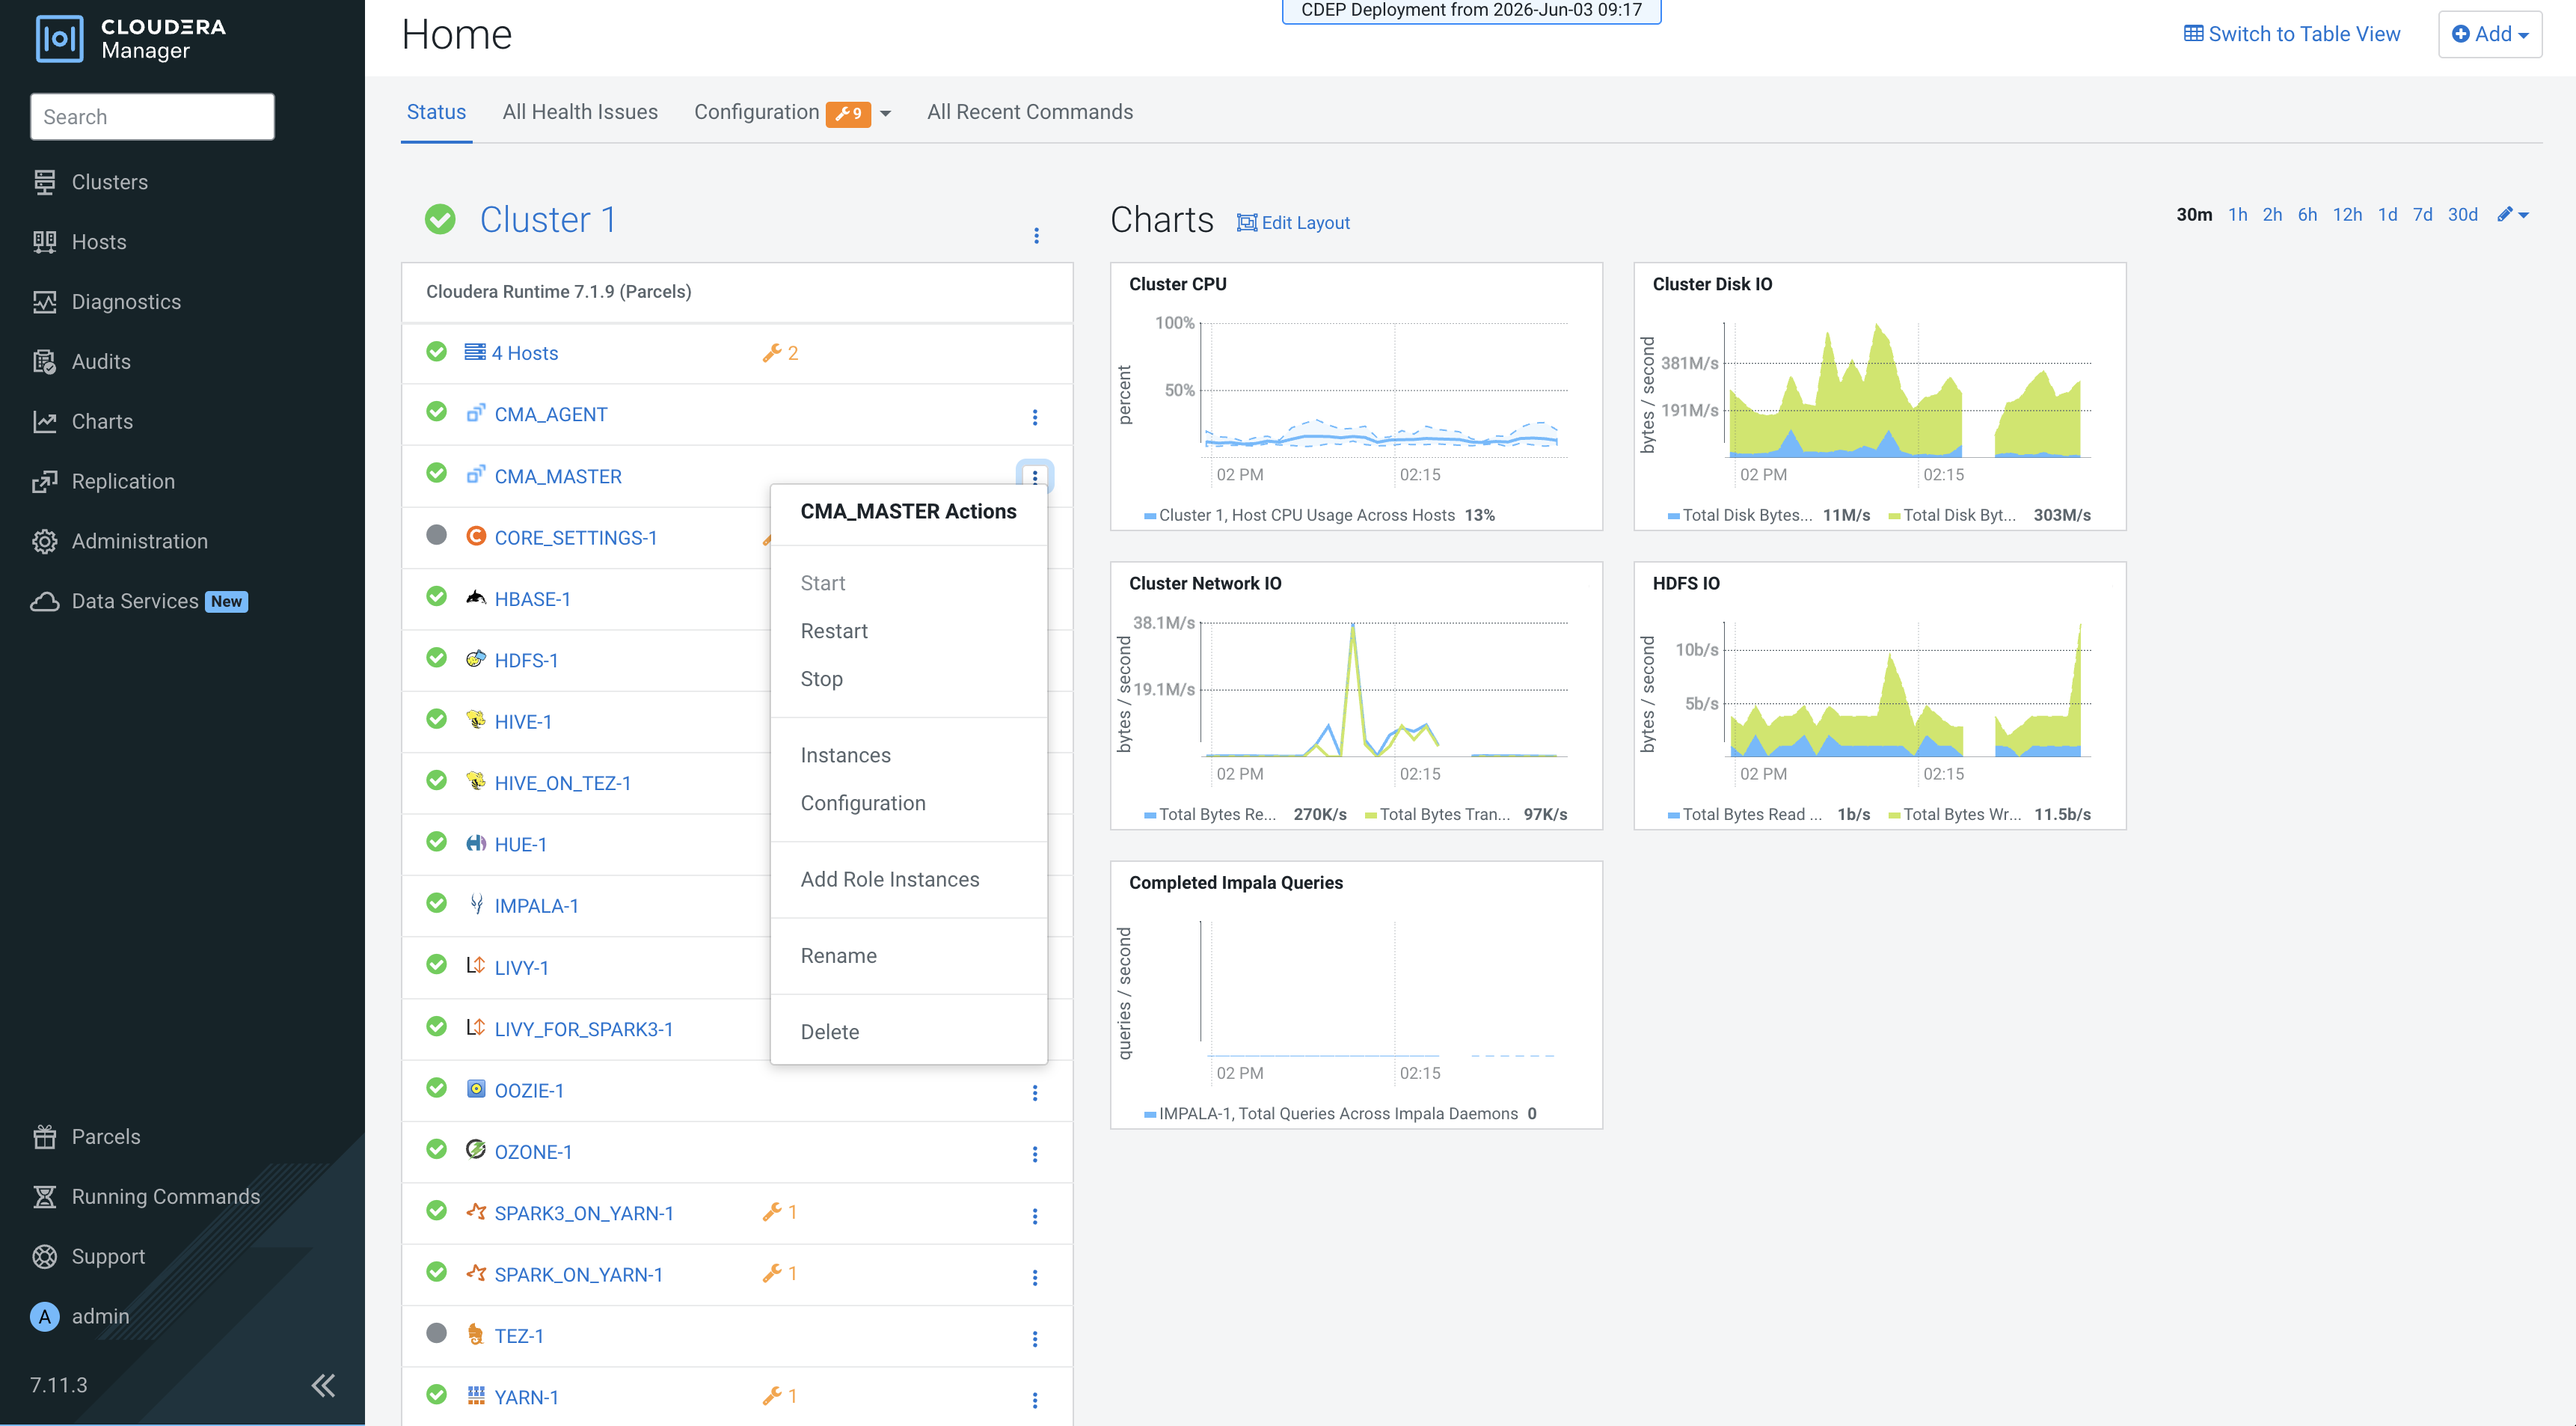
-
After download completes, click Distribute to distribute the
parcel to all clusters.
Figure 3. Distribute the CMA parcel
-
From the list, select the CMA service type to add,
then click Continue. The single CMA
parcel provides two service types:
CMA_MASTER(central control node) andCMA_AGENT(cluster-side executor).The Add Service wizard opens.
Figure 4. Add CMA service 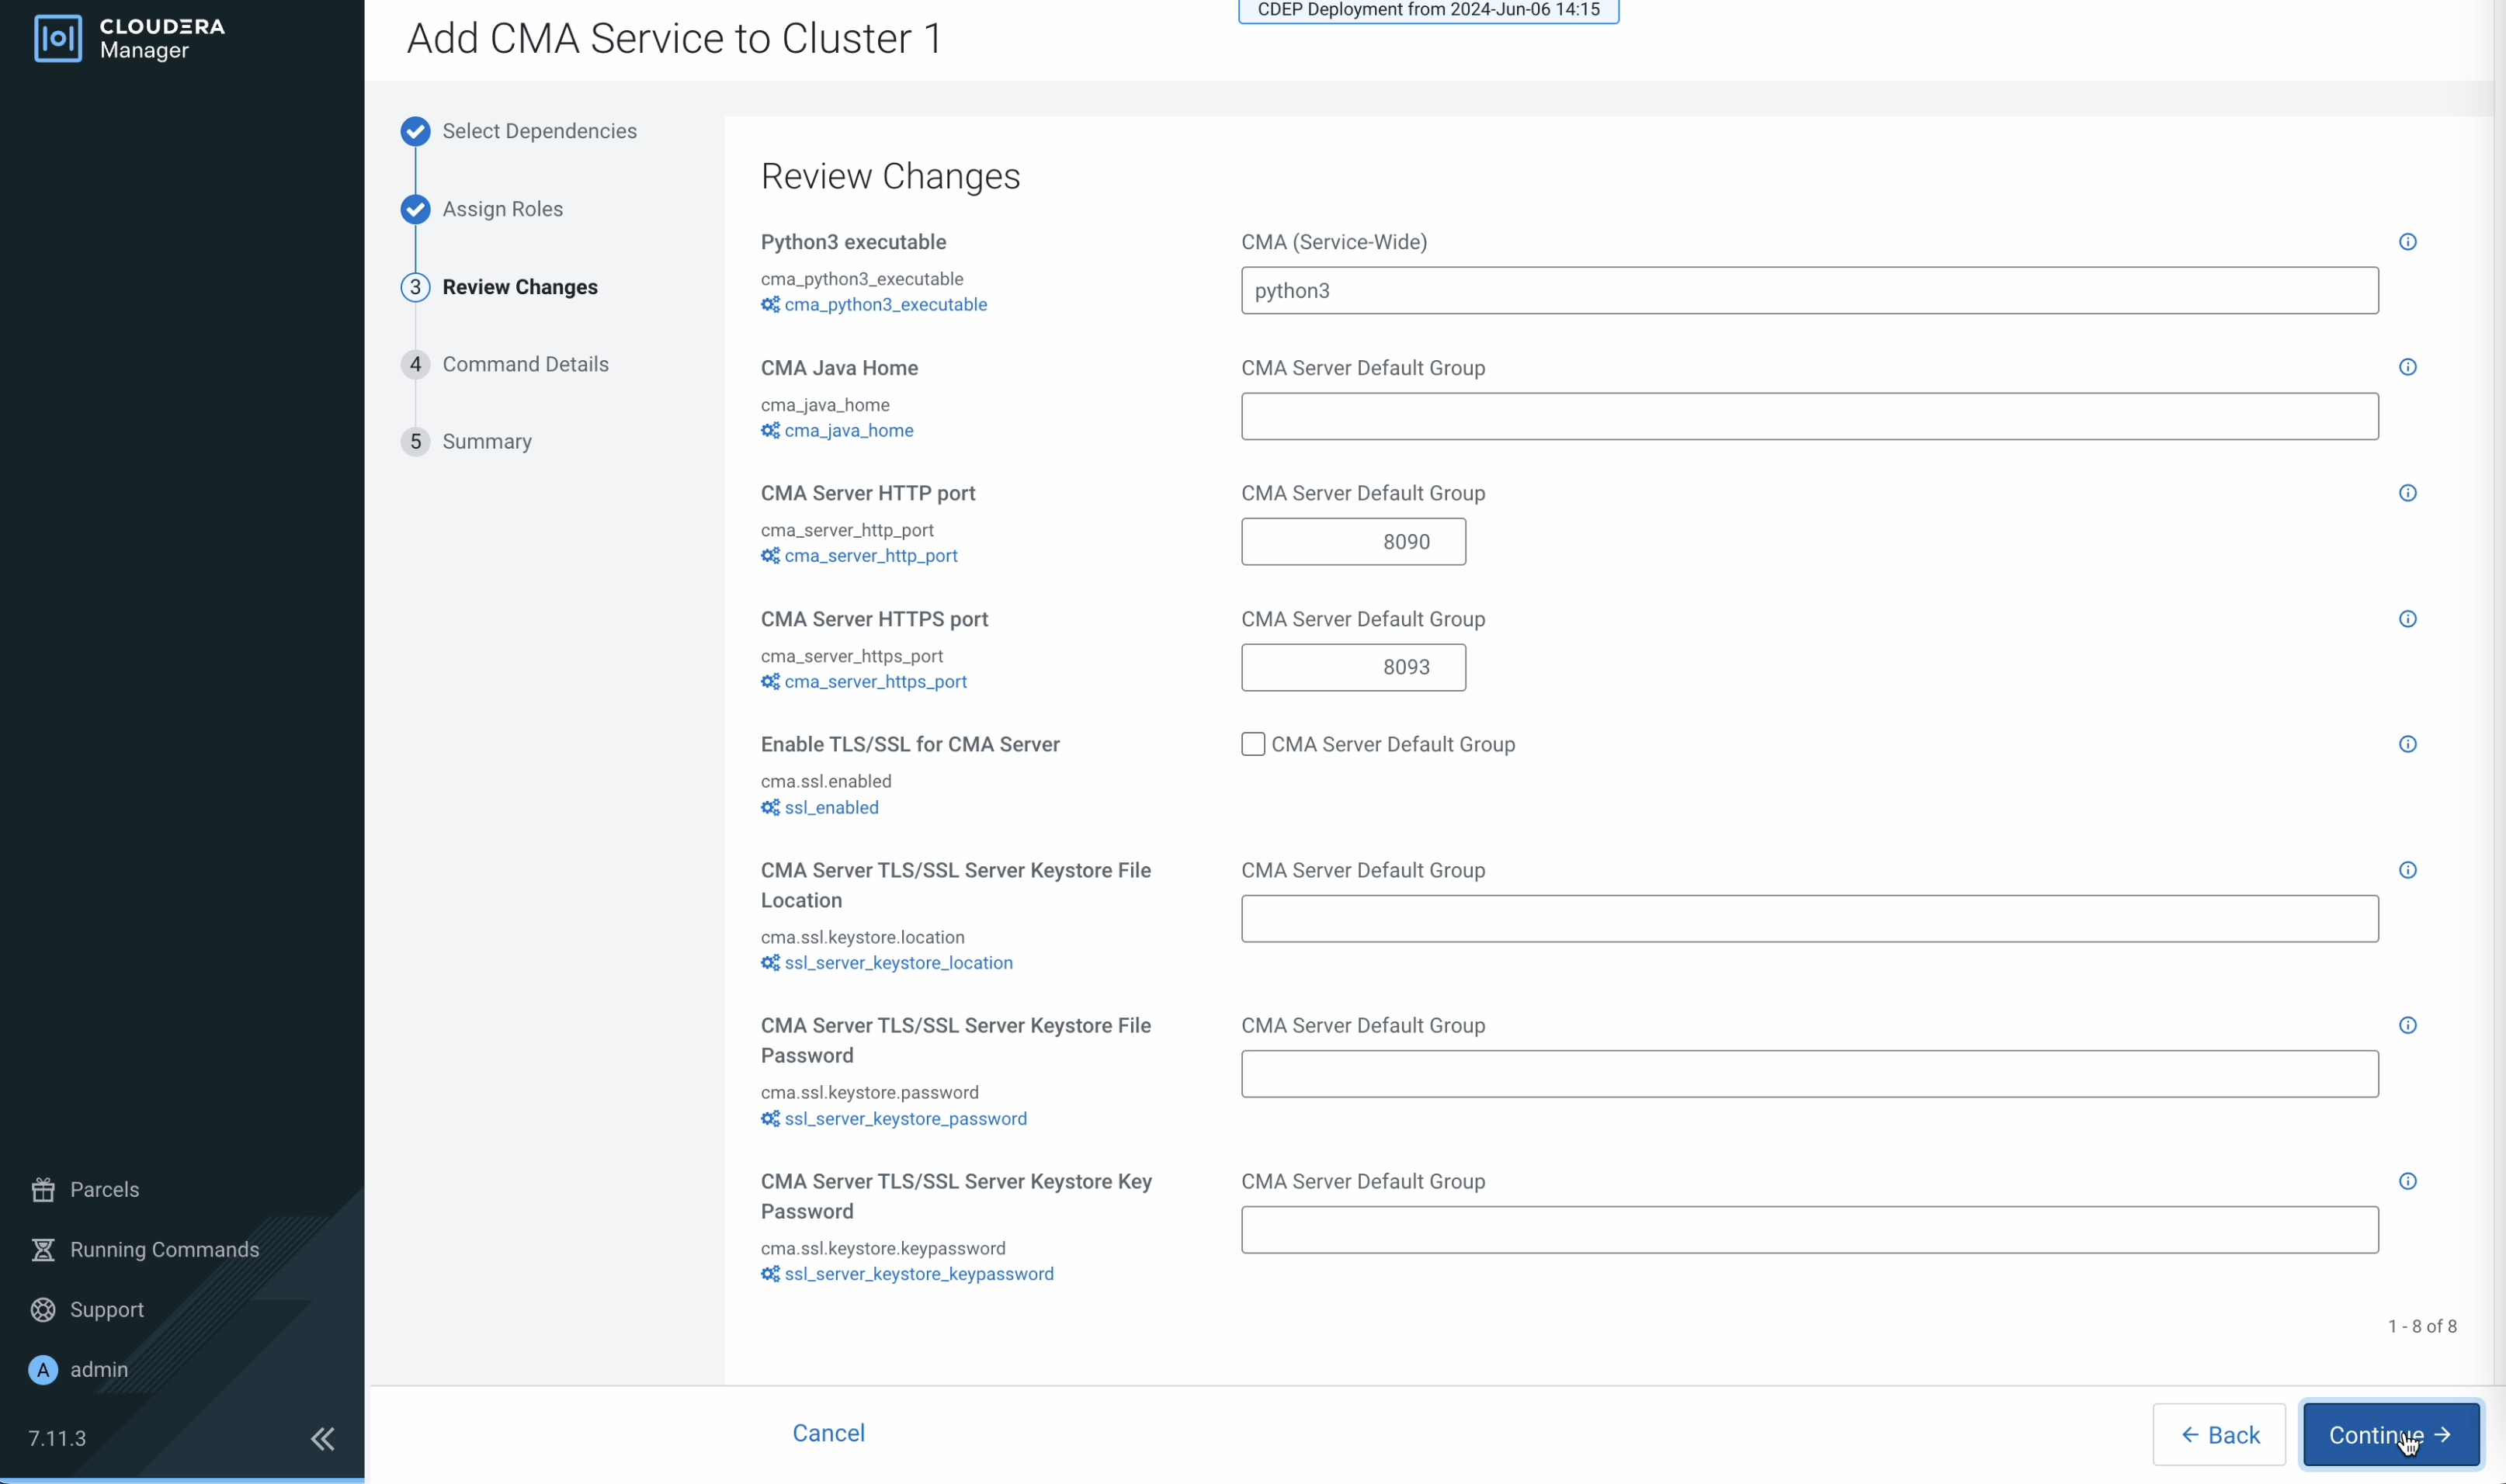
-
Review service configurations and click Continue. At minimum, set
OAuth2 client credentials (
cma_client_secret,cma_agent_client_secret). If the CMA Agent is on a different cluster from the CMA Master, also set Gateway URL (cma_gateway_url).The first run of the service starts. When the command finishes, the service is added to the cluster.
Figure 5. CMA service started
-
Go back to the cluster homepage, open the CMA Master
service page, and click the Server UI tab to open the CMA UI.
Figure 6. CMA landing page 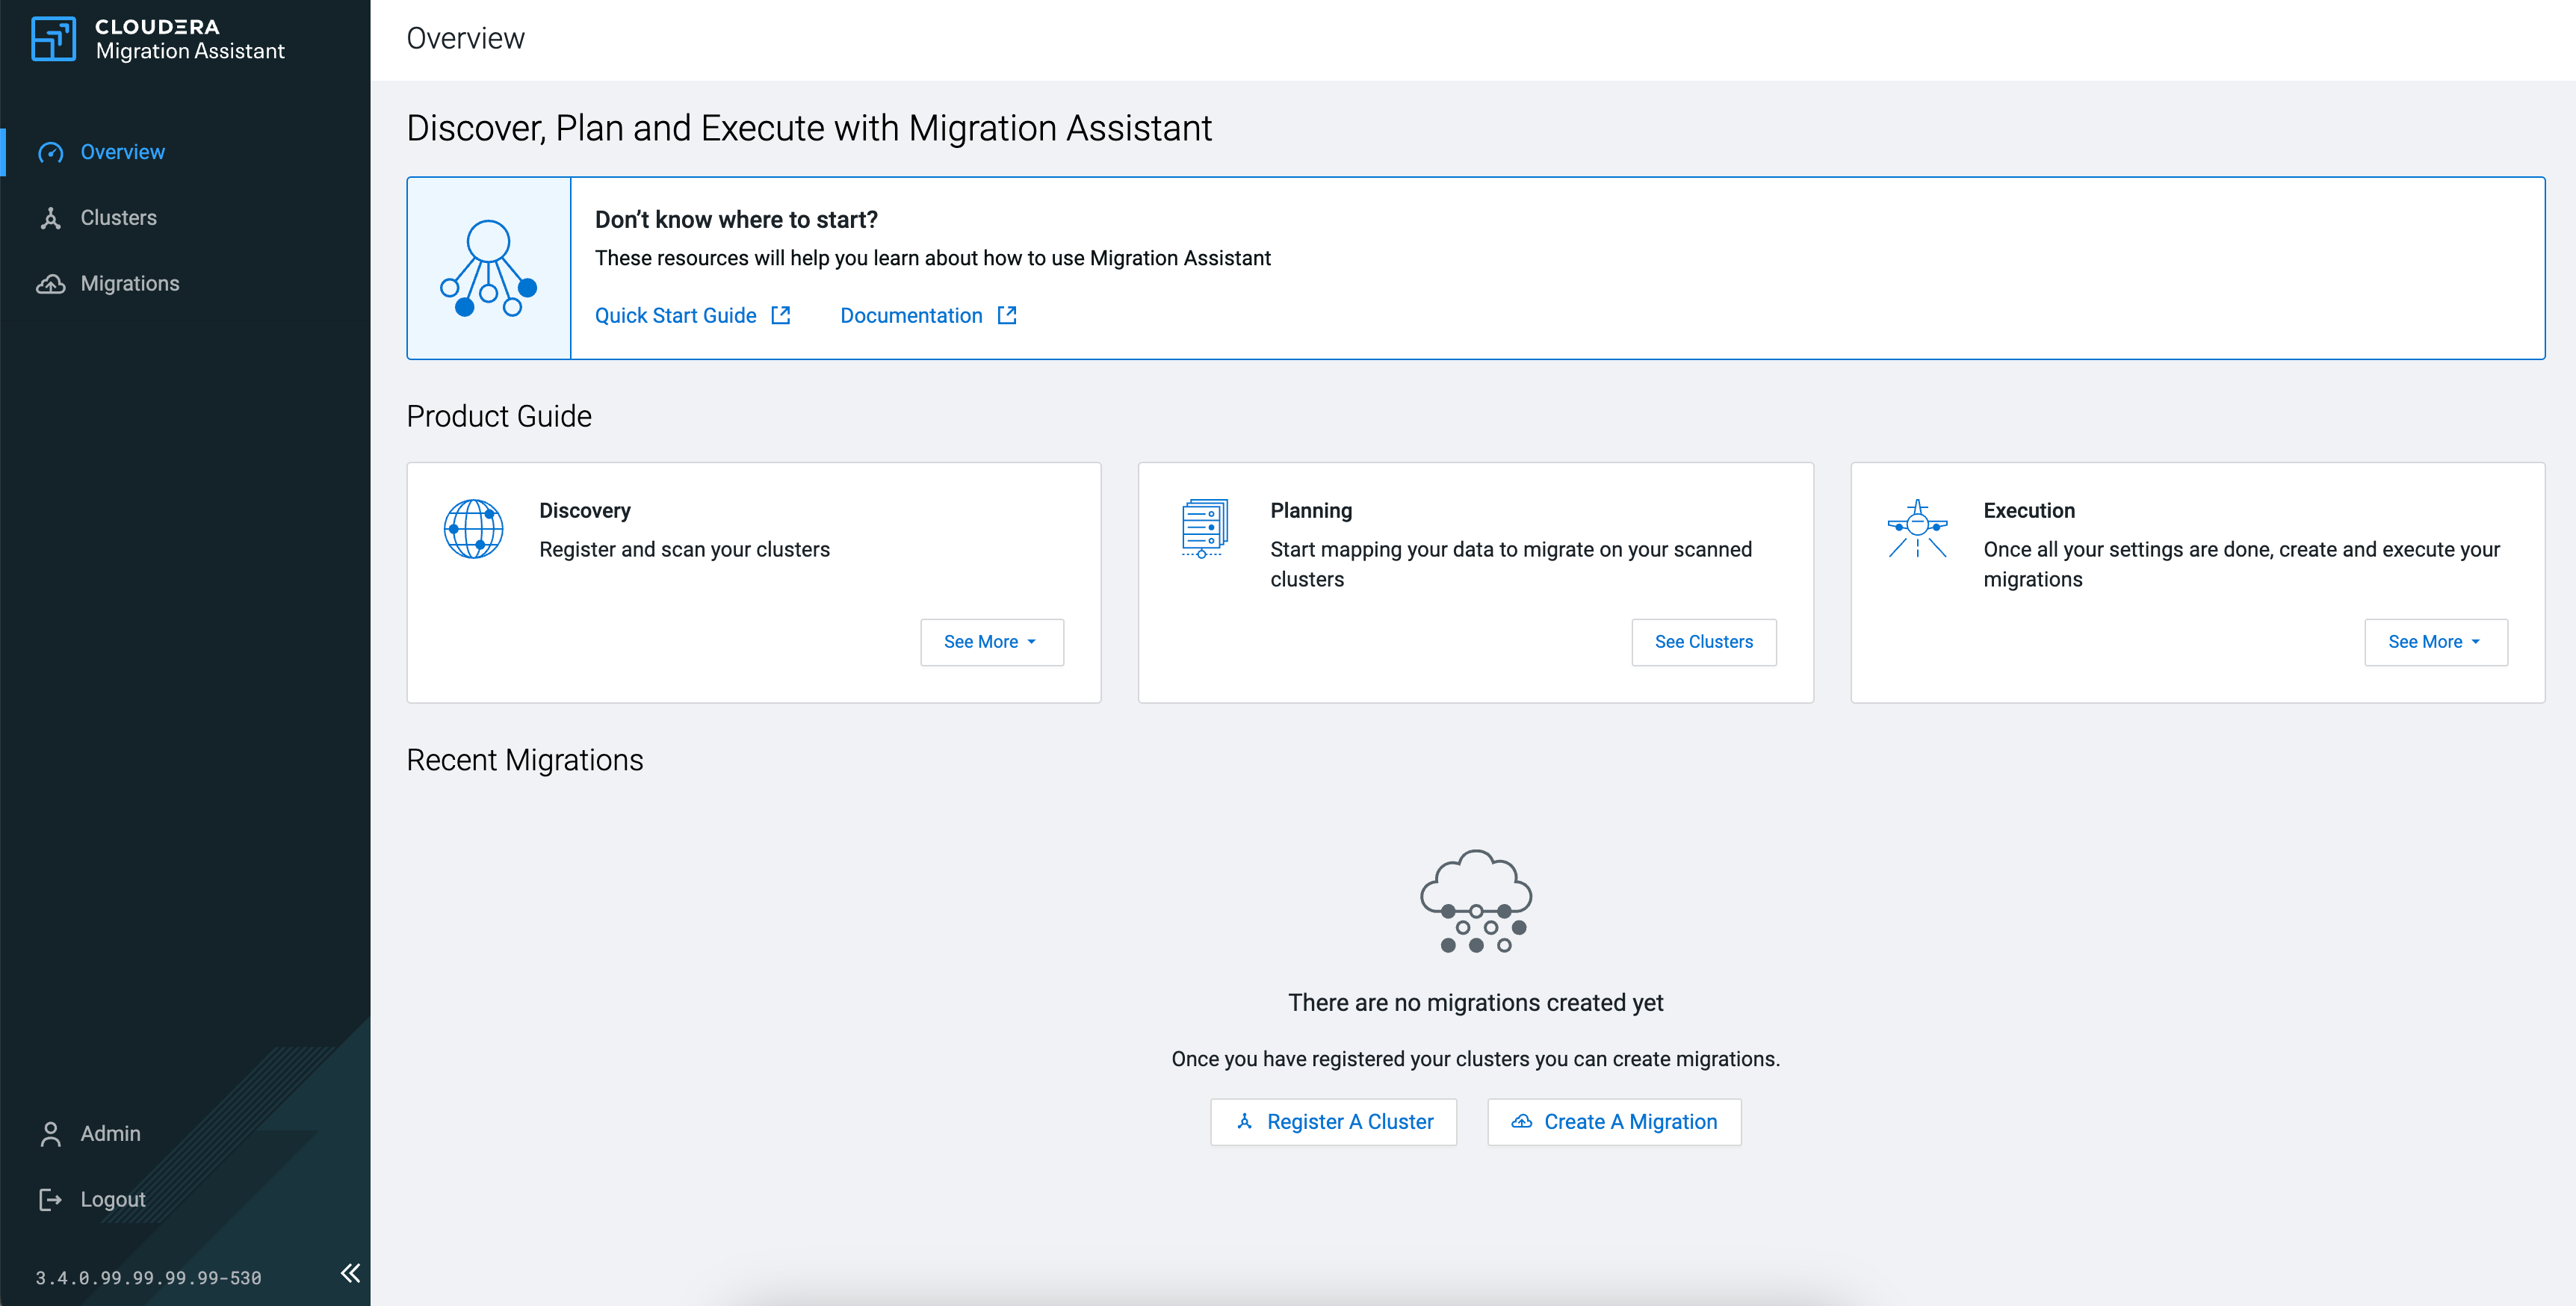
| Service | Description |
|---|---|
| CMA_MASTER | The central control node, including the Gateway Server, Auth Server, Master Server roles. Deploy once, typically on a dedicated host or on the target cluster. |
| CMA_AGENT | The cluster-side executor, including the Agent Server role. Deploy on each source and target cluster that participates in the migration. |
You can deploy both services on the same cluster if needed (for example, the target cluster runs both CMA Master and CMA Agent).
Clusters are registered automatically when CMA Agents are deployed and started. For more information, see Registering Clusters.
Agent configuration: When the CMA Agent is deployed on a different cluster from the CMA Master, you must perform the following tasks
The agent uses the Gateway URL to automatically discover the Master host, gRPC port, and
Auth Server URI
using
the discovery endpoint (GET /api/agent/config).
To find the Gateway URL: In Cloudera Manager on the
Master's cluster, open the CMA Master service and click the CMA UI link. The URL in
your browser (up to the port) is the Gateway URL — typically
https://<master-host>:8093 (HTTPS) or
http://<master-host>:8090 (HTTP). You can verify it from the agent
host with:
You can set up Vault to store secrets. For instructions, see Storing secrets in Vault.
By default, CMA uses an embedded H2 database. A database
password is mandatory for all database types, including H2. Cloudera Manager generates
credential files (db.properties and auth-db.properties) from
the CSD service descriptor at deployment.
For production deployments, CMA supports PostgreSQL as an external database. For setup instructions, see Configuring CMA with PostgreSQL.
CMA uses the following sets of OAuth2 client credentials for trusted communication between its components:
-
Master credentials (
cma_client_id/cma_client_secret) — Used by the Gateway Server to authenticate with the Auth Server. Configured on the CMA Master service. -
Agent credentials (
cma_agent_client_id/cma_agent_client_secret) — Used by CMA Agents to authenticate to the Master's gRPC server. These values must match on both the CMA Master and every CMA Agent.
| Parameter | Default | Description |
|---|---|---|
cma_client_id |
cma |
OAuth2 client ID for Gateway ↔ Auth Server |
cma_client_secret |
— | OAuth2 client secret for Gateway ↔ Auth Server (required) |
cma_agent_client_id |
cma-agent |
OAuth2 client ID for Agent ↔ Master gRPC |
cma_agent_client_secret |
— | OAuth2 client secret for Agent ↔ Master gRPC |
Set OAuth credentials in Cloudera Manager under the CMA Master and CMA Agent
service configurations. The CSD generates credential files (master-auth.properties,
agent-auth.properties) automatically.
