You can use the registered Kafka provider to create Kafka tables that can be used as
source and sink in your SQL Stream jobs.
Make sure that you have created a Kafka topic.
Make sure there is generated data in the Kafka topic.
Make sure that you have the right permissions set in Ranger.
Go to your cluster in Cloudera Manager.
Click SQL Stream Builder from the list of
services.
Click SQLStreamBuilder Console.
The Streaming SQL Console opens in a new window.
Select Console from the left- side menu.
Go to the Tables tab.
Select Add table > Apache Kafka.
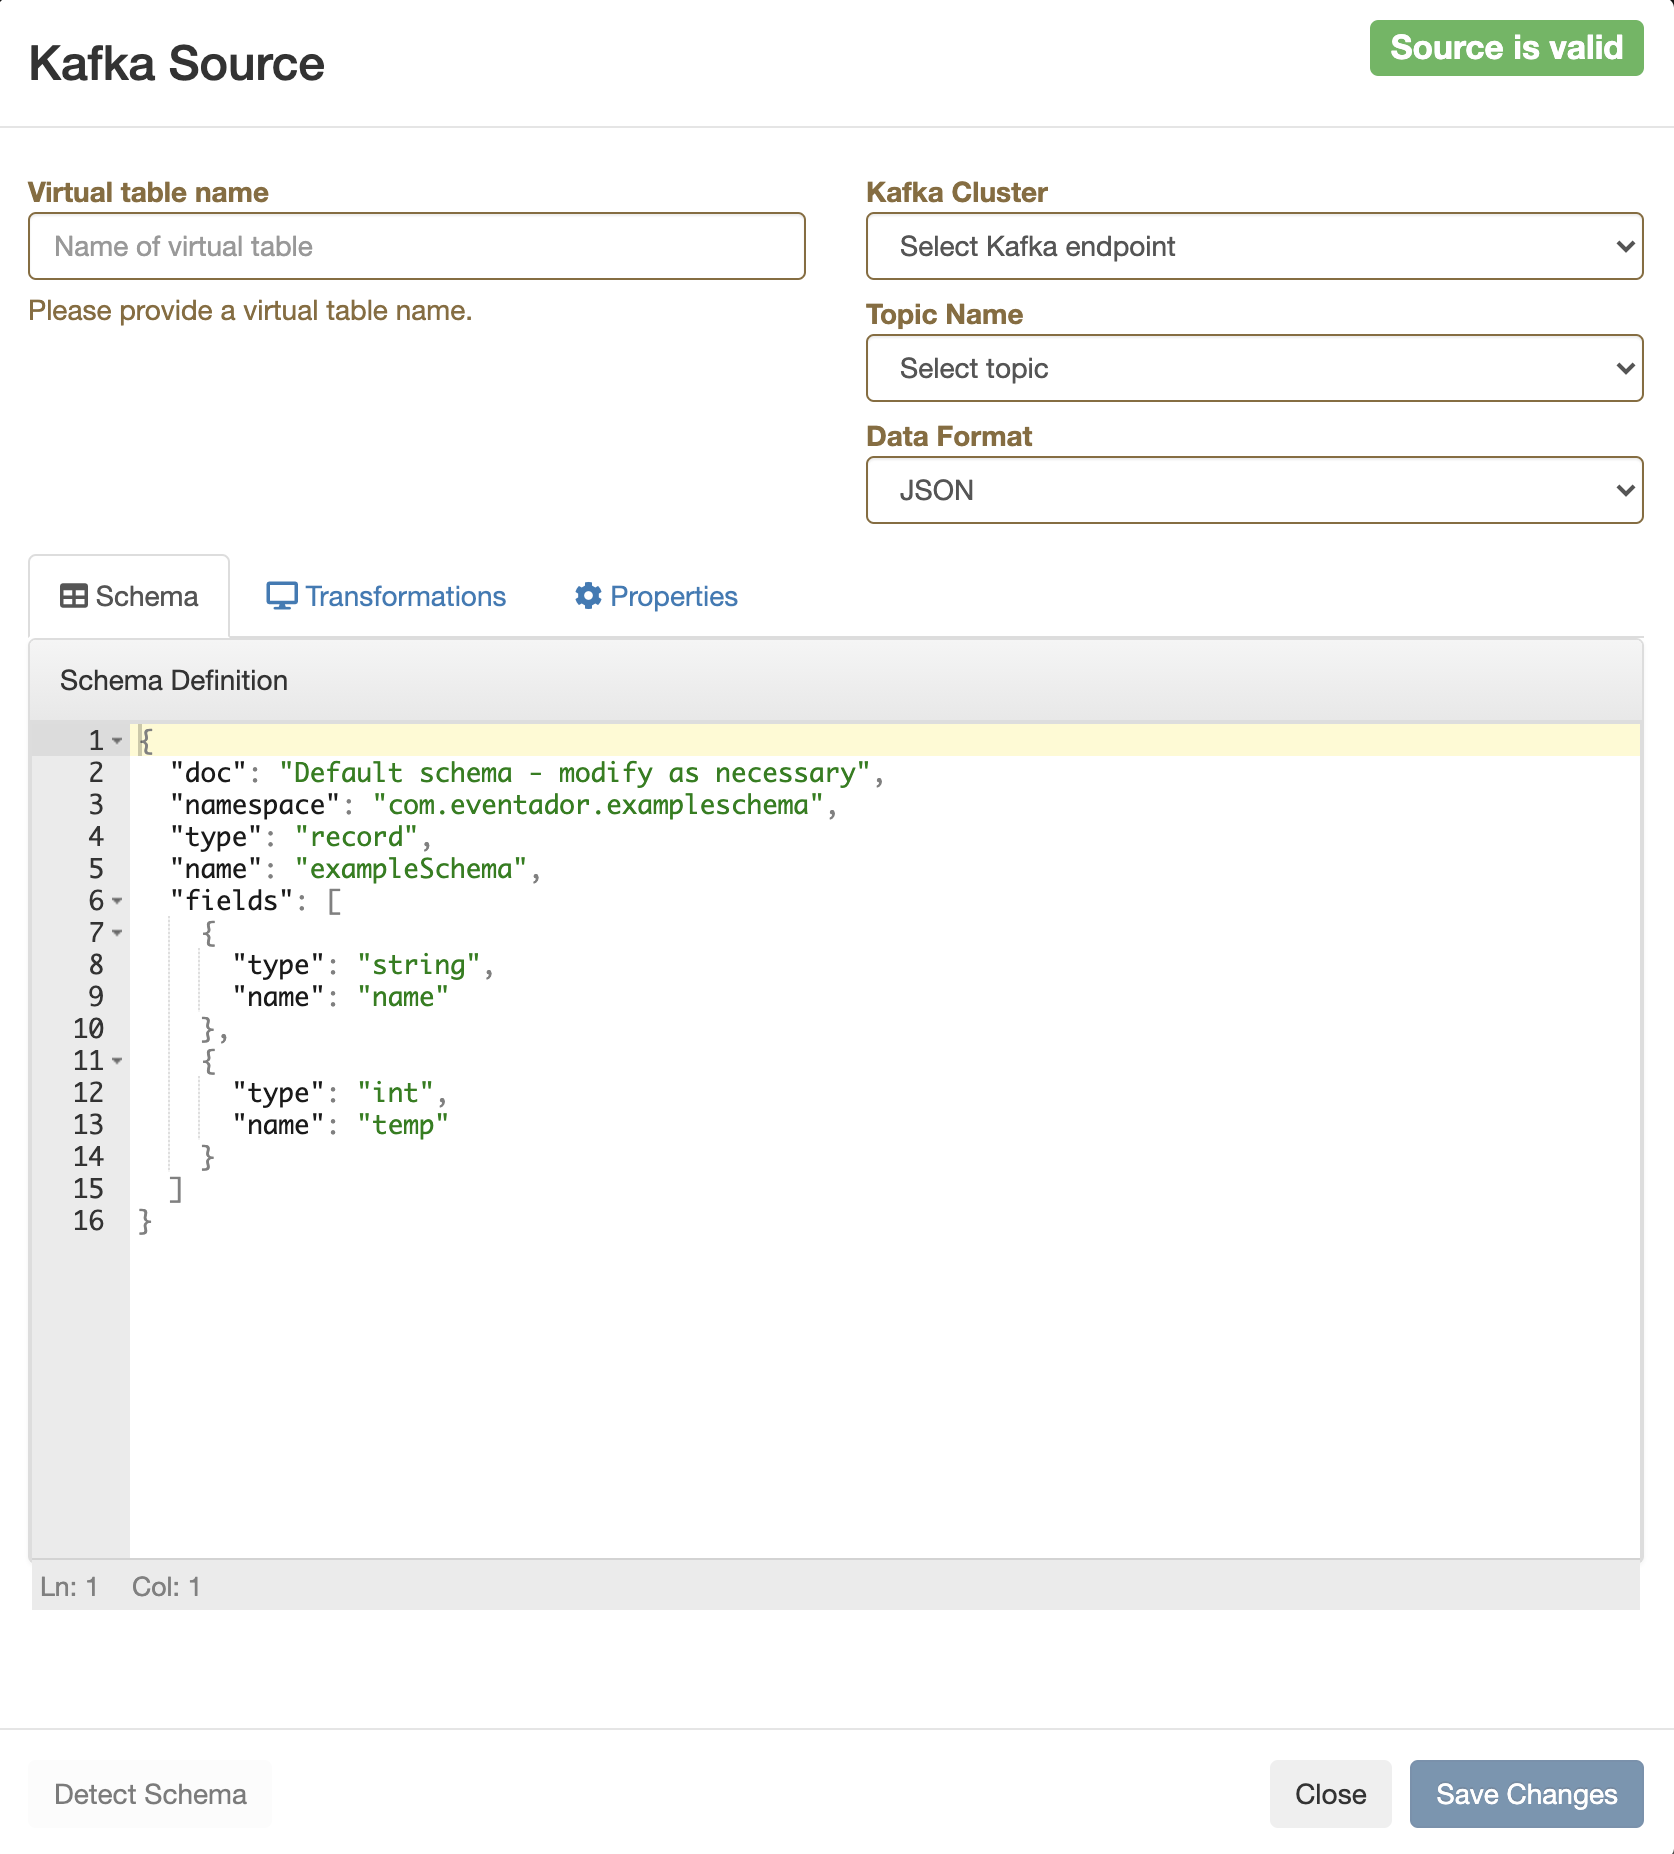
The Kafka Table window appears.
Provide a Name for the Table.
Select a registered Kafka provider as Kafka
cluster.
Select a Kafka topic from the list.
Select the Data format.
You can select JSON as data format.
You can select AVRO as data format.
Determine the Schema for the Kafka table.
Add a customized schema to the Schema Definition
field.
Click Detect Schema to read a sample of the JSON
messages and automatically infer the schema.
Customize your Kafka Table with the following options:
Configure the Event Time if you do not want to
use the Kafka Timestamps.
Unselect the checkbox of Use Kafka
Timestamps.
Provide the name of the Input Timestamp
Column.
Add a name for the Event Time
Column.
Add a value to the Watermark
Seconds.
Configure an Input Transform, add the code using the
Transformations tab.
Configure any Kafka properties required using the Properties tab.
For more information about how to configure the Kafka table, see the
Configuring Kafka tables section.
Select Save Changes.
The Kafka Table is ready to be selected as a source or a
sink for the SQL Stream job. To use Kafka as a source add it to the SQL query with the
FROM statement. To use it as a sink, select the Kafka table when
creating the SQL job from the Sink Table drop-down menu.