Connecting Cloudera Data Engineering to Apache Kafka

Apache Kafka powers Cloudera Data Engineering by providing a resilient messaging backbone for real-time data ingestion, routing, and decoupled event-driven architectures. Connect to Kafka using Cloudera Data Engineering and produce and consume data to and from Kafka topics on the base cluster.

  1. You must download the following JAR files for compiling Scala application:
    • kafka-clients-[***KAFKA-CLOUDERA-RUNTIME-VERSION***].jar
    • spark-sql-kafka-0-10_2.12-[***SPARK3-CLOUDERA-RUNTIME-VERSION***].jar
    • spark-core_2.12-[***SPARK3-CLOUDERA-RUNTIME-VERSION***].jar
    • spark-sql_2.12-[***SPARK3-CLOUDERA-RUNTIME-VERSION***].jar
  2. You must create a configuration file named kafka_client_jaas.conf with the following content:
    KafkaClient {
        com.sun.security.auth.module.Krb5LoginModule required
        useTicketCache=true
        serviceName="kafka";
    };
  3. You must get the Kafka bootstrap servers from the base cluster.
    1. Sign in to Cloudera Manager.
    2. In the left navigation menu, click Clusters.
    3. Select the Kafka cluster.
    4. Go to the Configuration tab.
    5. Search for Bootstrap Servers and record the displayed value.
      Figure 1. Bootstrap Servers value
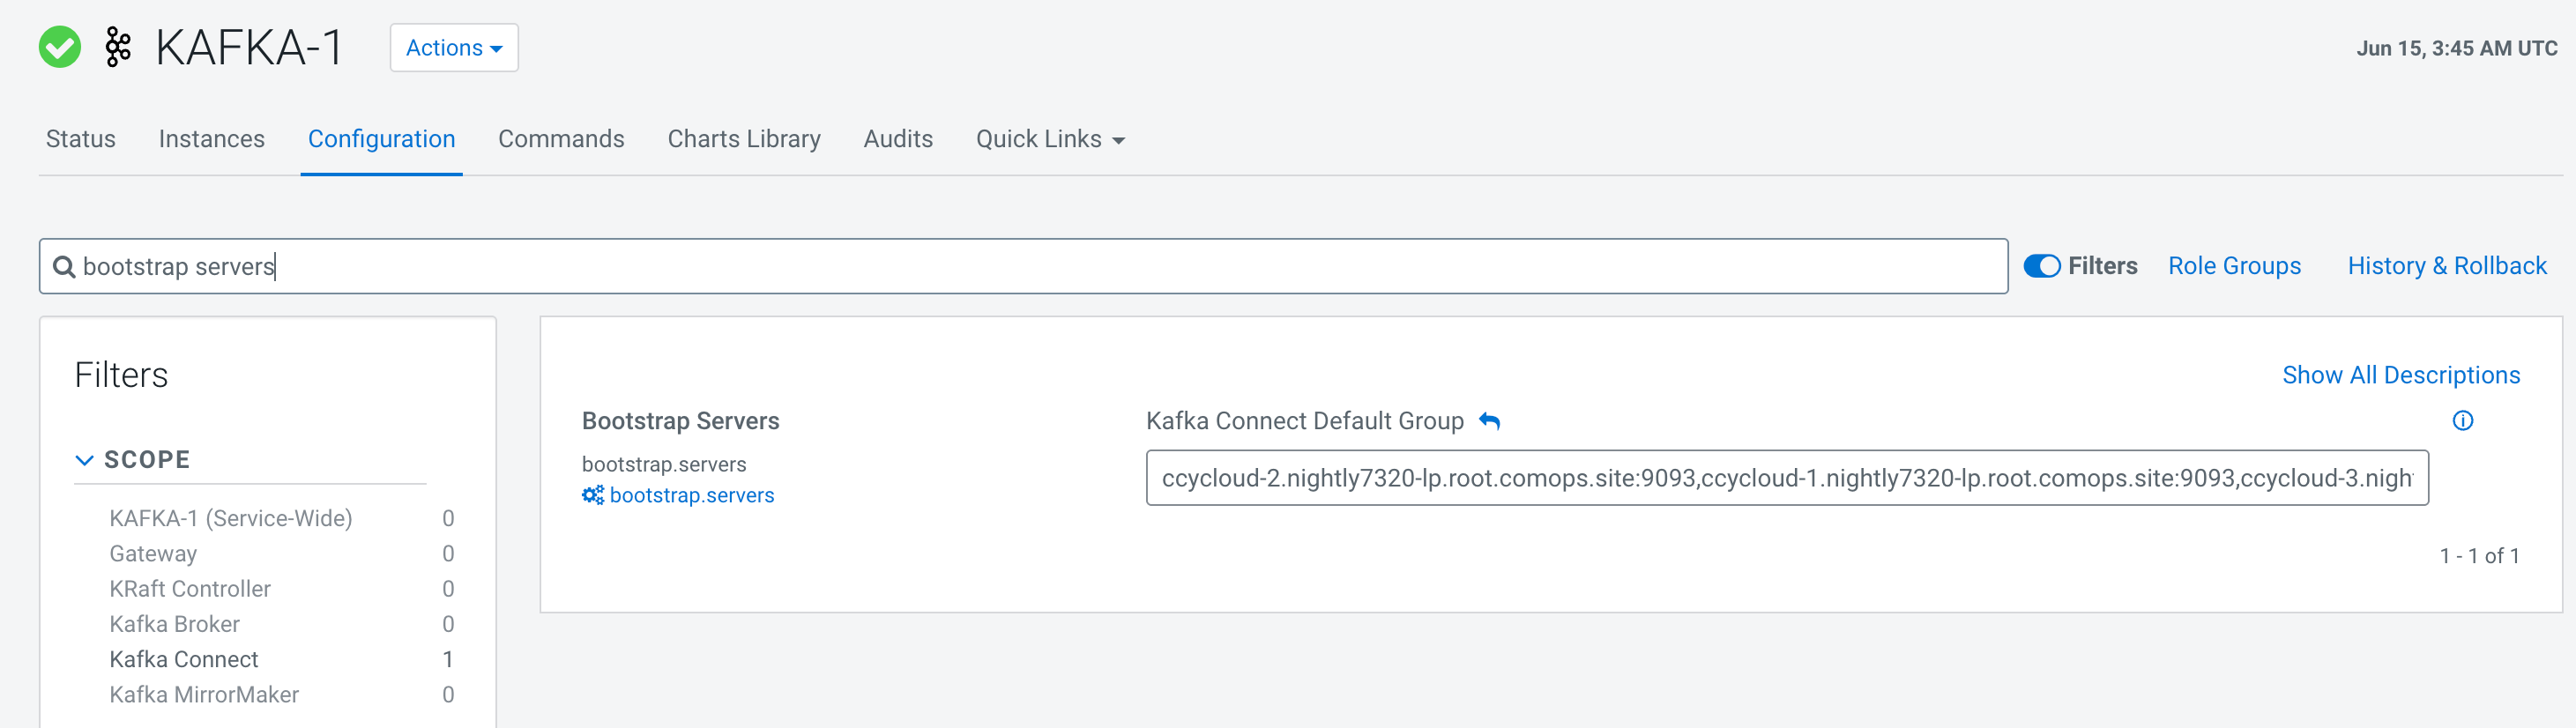
  4. You must set up a Kafka topic in the Kafka base cluster.
    1. Sign in to Cloudera Manager.
    2. In the left navigation menu, click Clusters.
    3. Select the Kafka cluster.
    4. Go to the Instances tab.
    5. Search for the Kafka broker and copy the Kafka Broker node host name.
      Figure 2. Kafka Broker ID and hostname
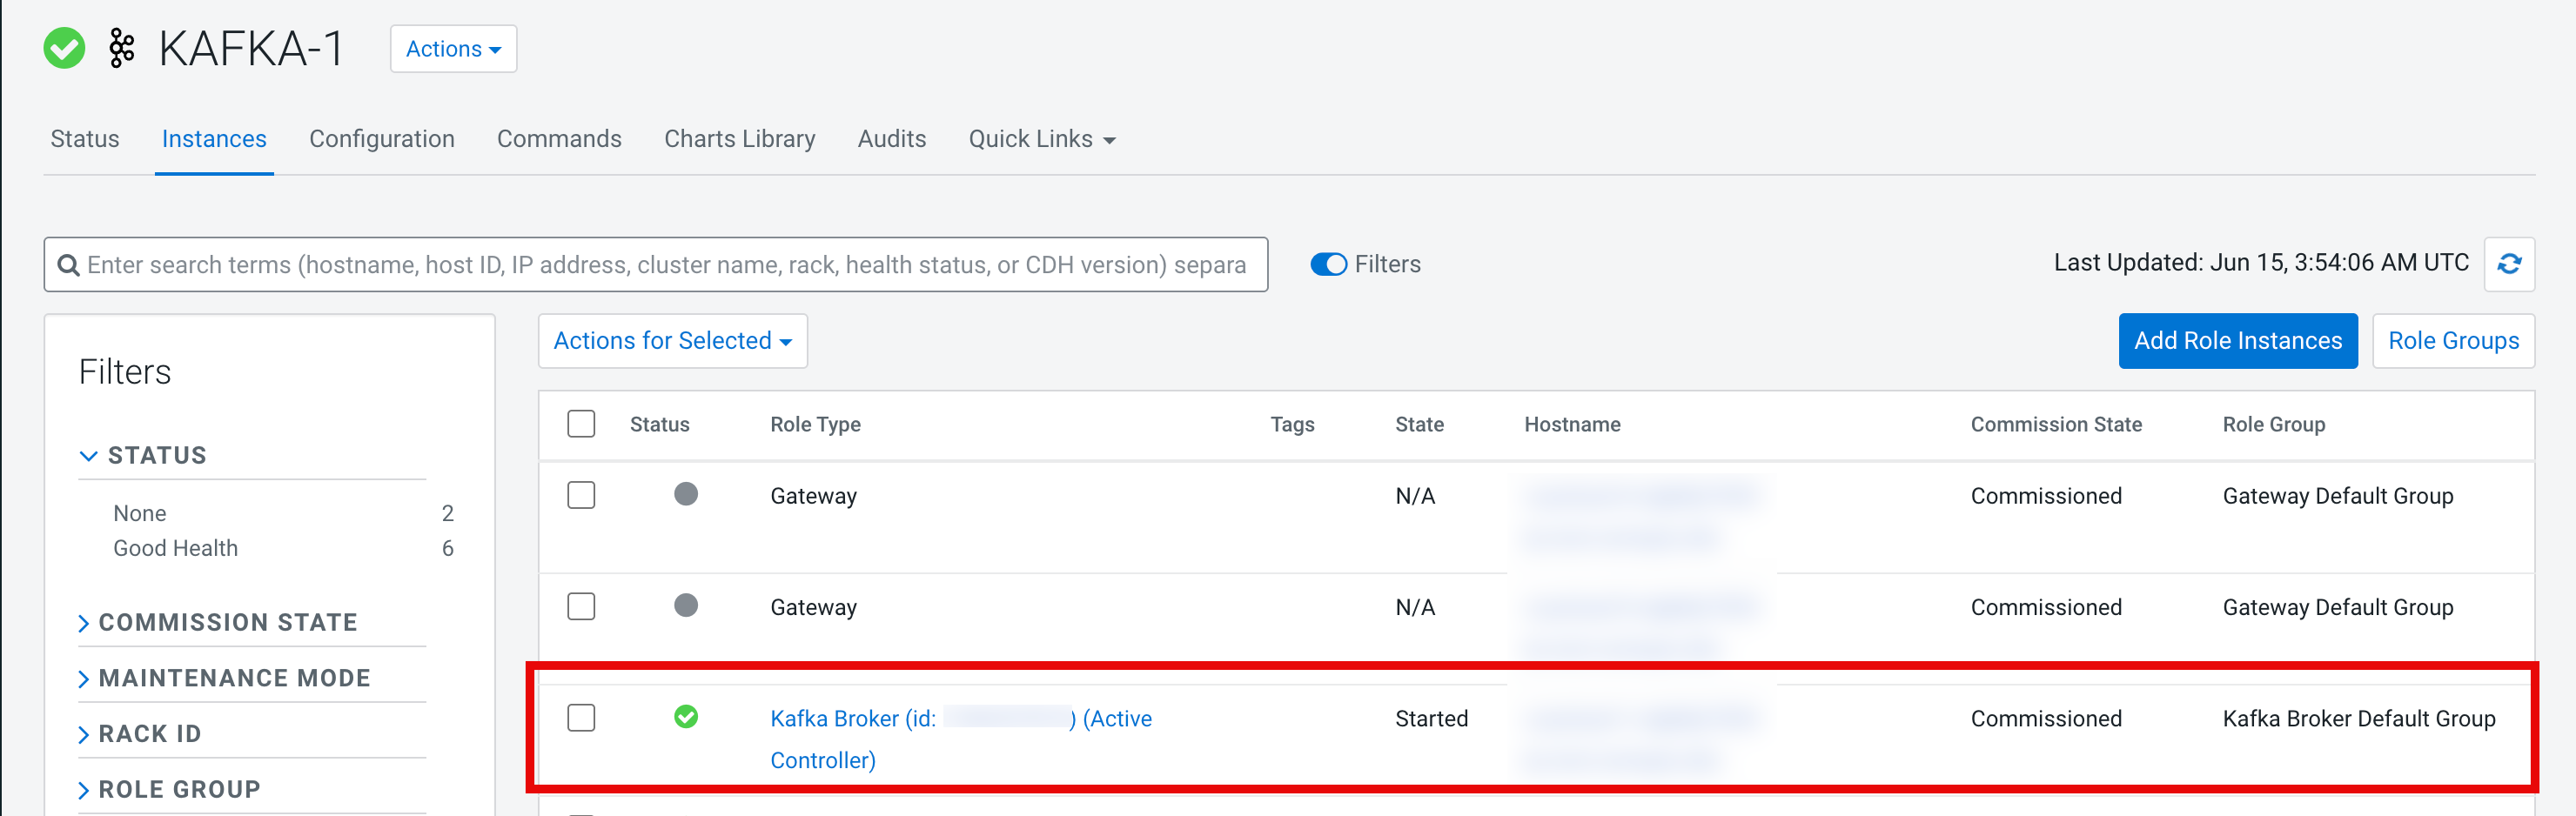
    6. Open your terminal and SSH into the Kafka Broker node.
    7. Create a new file named kafka-temp.properties in the Kafka Broker node with the following content:
      security.protocol=SASL_SSL
      sasl.mechanism=GSSAPI
      sasl.jaas.config=com.sun.security.auth.module.Krb5LoginModule required useKeyTab=false useTicketCache=true client=true debug=true;
      sasl.kerberos.service.name=kafka
      ssl.truststore.location=/var/lib/cloudera-scm-agent/agent-cert/cm-auto-global_truststore.jks
    8. Authenticate using kinit with a Kafka administrator account or any workload user that has Create access to all topics (*) or a specific topic.
    9. Create the Kafka topic by running the following command:
      $ kafka-topics --create --bootstrap-server [***KAFKA-BOOTSTRAP-SERVERS***] --replication-factor 1 --partitions 1 --topic spark-kafka --command-config kafka-temp.properties
  5. You must provide consumer, producer, and cluster roles to the user using the Ranger UI. For more information, see Configure a resource-based policy: Kafka.
  1. Create a new project with the files for the Cloudera Data Engineering jobs for publishing and consuming from Kafka.
  2. Add the downloaded JAR files to the lib directory and build the project.
    Example:
    $ ls lib/ 
    kafka-clients-3.4.1.7.1.9.1069-3.jar         spark-sql-kafka-0-10_2.12-3.3.2.3.3.7191000.13-1.jar
    spark-core_2.12-3.3.2.3.3.7191000.13-1.jar   spark-sql_2.12-3.3.2.3.3.7191000.13-1.jar
    
    $ sbt compile && sbt package
    The Cloudera Data Engineering job JAR files are present in the target/scala-[***SCALA-VERSION***] directory.
  3. In the Cloudera console, click the Data Engineering tile. The Cloudera Data Engineering Home page is displayed.
  4. Click Resources in the left navigation menu. The Resources page is displayed.
  5. Click the Create Resource button.
  6. In the Name filed, enter kafka-resources and click Save.
  7. Go to the Details tab.
  8. Click the Upload Files button and upload the following files:
    • The jaas.conf file
    • The Cloudera Data Engineering job JAR files
  9. Create a new job named kafka-publishing. For instructions about creating jobs, see Creating jobs in Cloudera Data Engineering.
    1. Create a Cloudera Data Engineering job with the following details and attach the kafka_client_jaas.conf file in the resources:
      • Name: kafka-publishing
      • Application File: Upload the spark-streaming_[***SCALA-VERSION***].jar file.
      • Main Class: SparkStreaming
      • Spark Configurations:

        Example

        spark.driver.extraJavaOptions=-Djava.security.auth.login.config=/app/mount/kafka_client_jaas.conf
        spark.kafka.clusters.kafka.auth.bootstrap.servers=[***KAFKA-BOOTSTRAP-SERVERS***]
      • Files and Resources: Upload the kafka_client_jaas.conf file.
    2. From the Create and Run drop-down list select Create.
  10. Create a new job named kafka-consuming.
    1. Create a Cloudera Data Engineering job with the following details and attach the kafka_client_jaas.conf file in the resources.
      • Name: kafka-consuming
      • Application File: Upload the spark-streaming_[***SCALA-VERSION***].jar file
      • Main Class: SparkConsuming
      • Spark Configurations:

        Example

        spark.driver.extraJavaOptions=-Djava.security.auth.login.config=/app/mount/kafka_client_jaas.conf
        spark.kafka.clusters.kafka.auth.bootstrap.servers=[***KAFKA-BOOTSTRAP-SERVERS***]
      • Files and Resources: Upload the kafka_client_jaas.conf file
    2. From the Create and Run drop-down list select Create.
  11. Click Jobs in the left navigation menu. The Jobs page is displayed.
  12. Run the kafka-publishing job. For instructions about running a Cloudera Data Engineering job, see Running Jobs in Cloudera Data Engineering.
  13. Run the kafka-consuming job.
  14. Validate that the content published by the kafka-publishing job is consumed by the kafka-consuming job in the Cloudera Data Engineering job runs or by running a command in the Kafka Broker node.

    Example

    kafka-console-consumer --from-beginning --bootstrap-server=[***KAFKA-BOOTSTRAP-SERVERS***] --topic spark-kafka --consumer.config kafka-temp.properties