Create a custom Cloudera Data Hub cluster within an existing AWS
environment.
To create a Cloudera Data Hub cluster on AWS, you must have an existing
AWS environment. Also, you should
make sure that the Cloudera Runtime version of the Data Lake cluster
matches the Runtime version of the Cloudera Data Hub cluster that you are
about to create; If these versions don't match, you may encounter warnings and/or
errors.Required role:DataHubCreator, EnvironmentAdmin at the scope of the environment where the Data
Hub is running, or Owner of the environment
Log in to the Cloudera web interface.
Navigate to the Cloudera Management Console > Environments >
click on an environment > click Create Data Hub.
Under Selected Environment, confirm that the selected environment is the one
where you would like to create your cluster.
Select Custom.
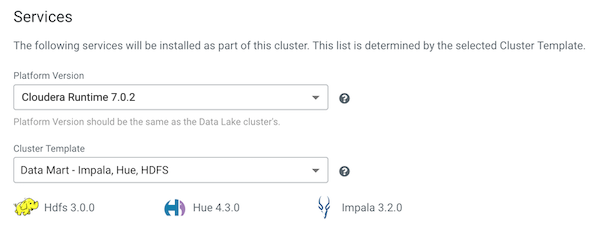
Under Platform Version, current Cloudera Runtime version
is pre-selected.
Under Cluster template, select the cluster template that you would like to use.
The selected cluster template determines which services are included in the
cluster. Select the cluster template and the list of services is automatically shown
below it:
For more information about cluster templates, refer to Cluster templates.
Specify General Settings for your cluster:
Parameter
Description
Cluster Name
Enter a name for your cluster. The name must be between 5 and 40 characters,
must start with a letter, and must only include lowercase letters, numbers, and
hyphens.
Tags
(Optional) Add tags that Data Hub should use to tag your AWS resources.
Click Add to add a tag, and then enter a key and value for each tag. Repeat
the steps if you would like to add more tags. For more information about tags,
refer to Tags.
Optionally, click on Advanced Options to modify advanced cluster settings.
For more information on these options, refer to LINK.
Once done, click on Provision Cluster.
You will be redirected to the Cloudera Data Hub cluster dashboard,
and a new tile representing your cluster will appear at the top of the page.
The following messages are written to the event history as your cluster is being
created:
 For more information about cluster templates, refer to Cluster templates.