Managing AI settings
Cloudera Data Visualization offers extensive site-wide configuration options, enabling users with administrative privileges to manage various settings crucial for organizational workflows. You can enable the AI visual, select the AI engine, and specify additional settings.
-
Click
 on the main
navigation bar to open the
Administration menu and
select Site Settings.
on the main
navigation bar to open the
Administration menu and
select Site Settings.
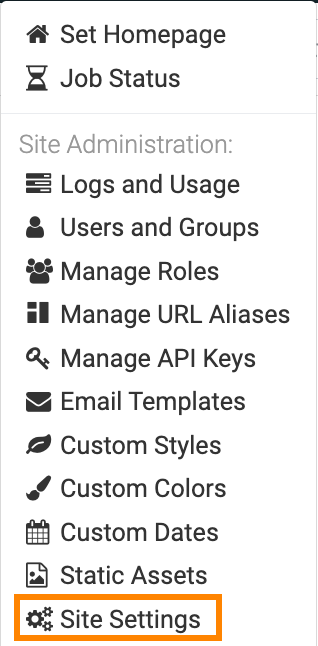
The Site Settings page opens on the Data menu.
General
In this AI Settings section, you can manage your general AI configurations.
Embeddings
In this AI Settings section, you can manage your embedding profiles. You can create new profiles, view the list of existing ones, and perform actions such as copying, editing, or deleting existing profiles, and setting a new default profile.
Creating a new embeddings profile
-
Click CREATE PROFILE.
The Create Profile modal opens.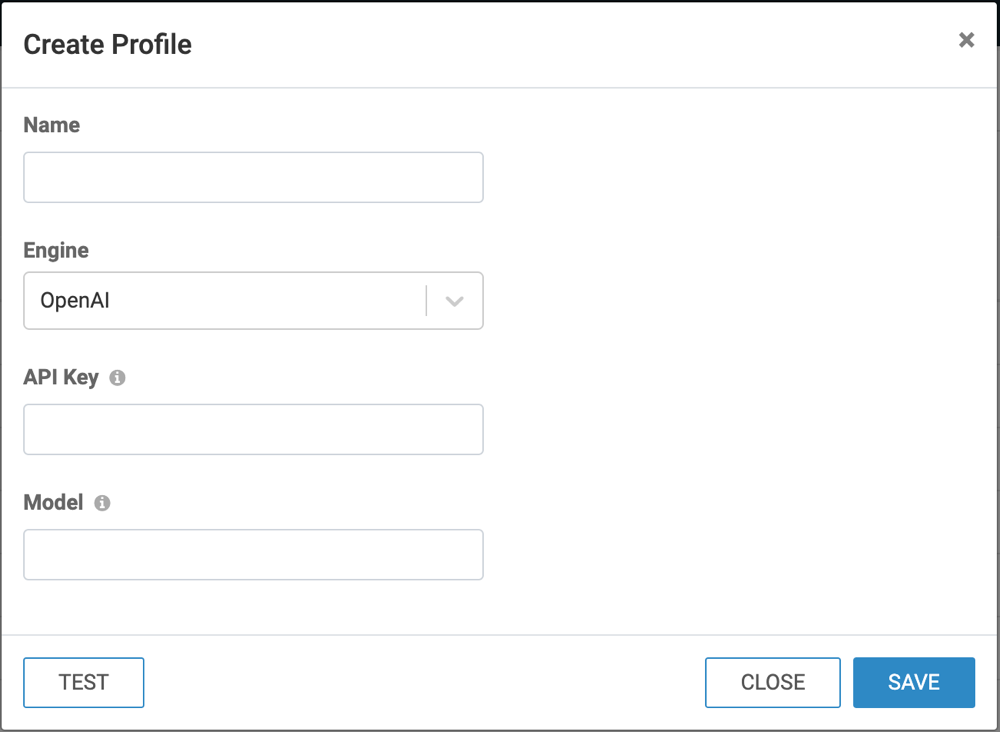
-
Provide a name for the profile.
-
Select the AI engine you want to use for the embeddings.
You have the following options available:- Cloudera AI Hosted MiniLM
- Cloudera AI Inference
- OpenAI
- OpenAI Azure
- Amazon Bedrock
- Other
-
Specify the settings for the selected AI engine.
-
Access Key: Required to access the external third-party AI service provider
-
Authorization API Key: Required to access the external third-party AI service provider
-
Service URL: URL for the embedding service used by the AI engine
-
Service input parameter name: Name for the embedding service input
-
Service response parameter name: Name for the embedding service response parameter
-
Maximum tokens: Maximum number of input tokens that can be processed to generate an embedding
The default value is 1000.
-
Authentication mode: Required to access the external third-party AI service provider
The available options for authentication are:-
JWT
Select this option to authenticate using JSON Web Token (JWT). Authentication is automatically handled with the JWT token and no further configuration is required.
-
API Key
Select this option to authenticate using an API Key. You must provide a valid API key to access the external service.
-
-
Service URL: URL for the embedding service used by the AI engine
-
Maximum tokens: Maximum number of input tokens that can be processed to generate an embedding
The default value is 1000. -
Model: Used for the embeddings
-
API Key: Required to access the external third-party AI service provider
Ensure you review the legal terms and conditions provided in the Info tooltip before proceeding.
-
Model: Used for the embeddings
-
Maximum tokens: Maximum number of input tokens that can be processed to generate an embedding
The default value is 1000.
-
API Key: Required to access the external third-party AI service provider
Ensure you review the legal terms and conditions provided in the Info tooltip before proceeding.
-
Service URL: URL for the embedding service used by the AI engine
-
Maximum tokens: Maximum number of input tokens that can be processed to generate an embedding
The default value is 1000.
-
AWS Credentials: Required to access the external third-party AI service provider
Ensure you review the legal terms and conditions provided in the Info tooltip before proceeding.
-
Model: The embedding model for processing queries and generating vector representations:
- amazon.titan-embed-text-v1 (default)
- amazon.titan-embed-text-v2:0
- global.cohere.embed-v4:0
- Custom – Allows specifying a different model.
-
Maximum tokens: Maximum number of input tokens that can be processed to generate an embedding
The default value is 1000.
-
API Key: Required to access the external third-party AI service provider
Ensure you review the legal terms and conditions provided in the Info tooltip before proceeding.
-
Service URL: URL for the embedding service used by the AI engine
- Custom Request/Response transformers: Use this textbox to provide your custom request and response transformer functions in valid Python.
-
Maximum tokens: Maximum number of input tokens that can be processed to generate an embedding
The default value is 1000.
-
- [Optional] Click TEST to validate the model using the specified settings.
- Click SAVE.
- After creating a new profile, save the Site Settings page to apply your changes.
Synchronizing embeddings profiles (available only for Cloudera AI environments supporting auto-discovery)
Synchronizing models is available in Cloudera AI environments that support model syncing.
-
Click SYNC CAII MODELS to synchronize models with Cloudera AI Inference
-
After syncing, save the Site Settings page to apply your changes.
-
If a previously synced profile no longer exists in Cloudera AI Inference or its state is neither loaded nor pending, it gets deleted in Cloudera Data Visualization during the synchronization process.
-
If there is a new AI Inference model in Cloudera AI Inference, it is added in Cloudera Data Visualization during the synchronization process.
-
If an existing model has changed in Cloudera AI, synchronizing updates it in Cloudera Data Visualization.
Managing embeddings profiles

The Site Settings page for embeddings profiles displays the existing profiles, including their names, engines, and status information. For Cloudera AI environments supporting auto-discovery, the type of the profile is also shown. See more about profile types below.
- Profile status
-
The statuses available across all environments are Default and Disabled.
- Profile type (available only for Cloudera AI environments supporting auto-discovery)
-
The Type column indicates how an embeddings profile was created and its current state:
-
Manual – Profile was created manually, all settings are editable.
-
Synced – Profile was created automatically by syncing with Cloudera AI Inference. For synced embeddings profiles, authentication mode is always JSON Web Token (JWT), so this feature is available only if JWT is available.
Synced profiles can have the following states:-
Loaded – The AI Inference model is registered and available. Most fields are read-only and updated automatically through synchronization. The following fields can be edited manually:
- Name
- Token limit
- Temperature
- Enable/disable streaming
-
Pending – The AI Inference model is not yet registered in Cloudera AI Inference.
- Pending profiles are disabled by default in Cloudera Data Visualization because they are not yet usable. They become active once successfully synchronized.
- A pending profile can automatically change to Loaded when sufficient resources become available, without manual action in Cloudera AI Inference.
- In Cloudera Data Visualization, click SYNC CAII MODELS to refresh the status. If the model has been registered since the last sync, the profile updates to Loaded.
-
-
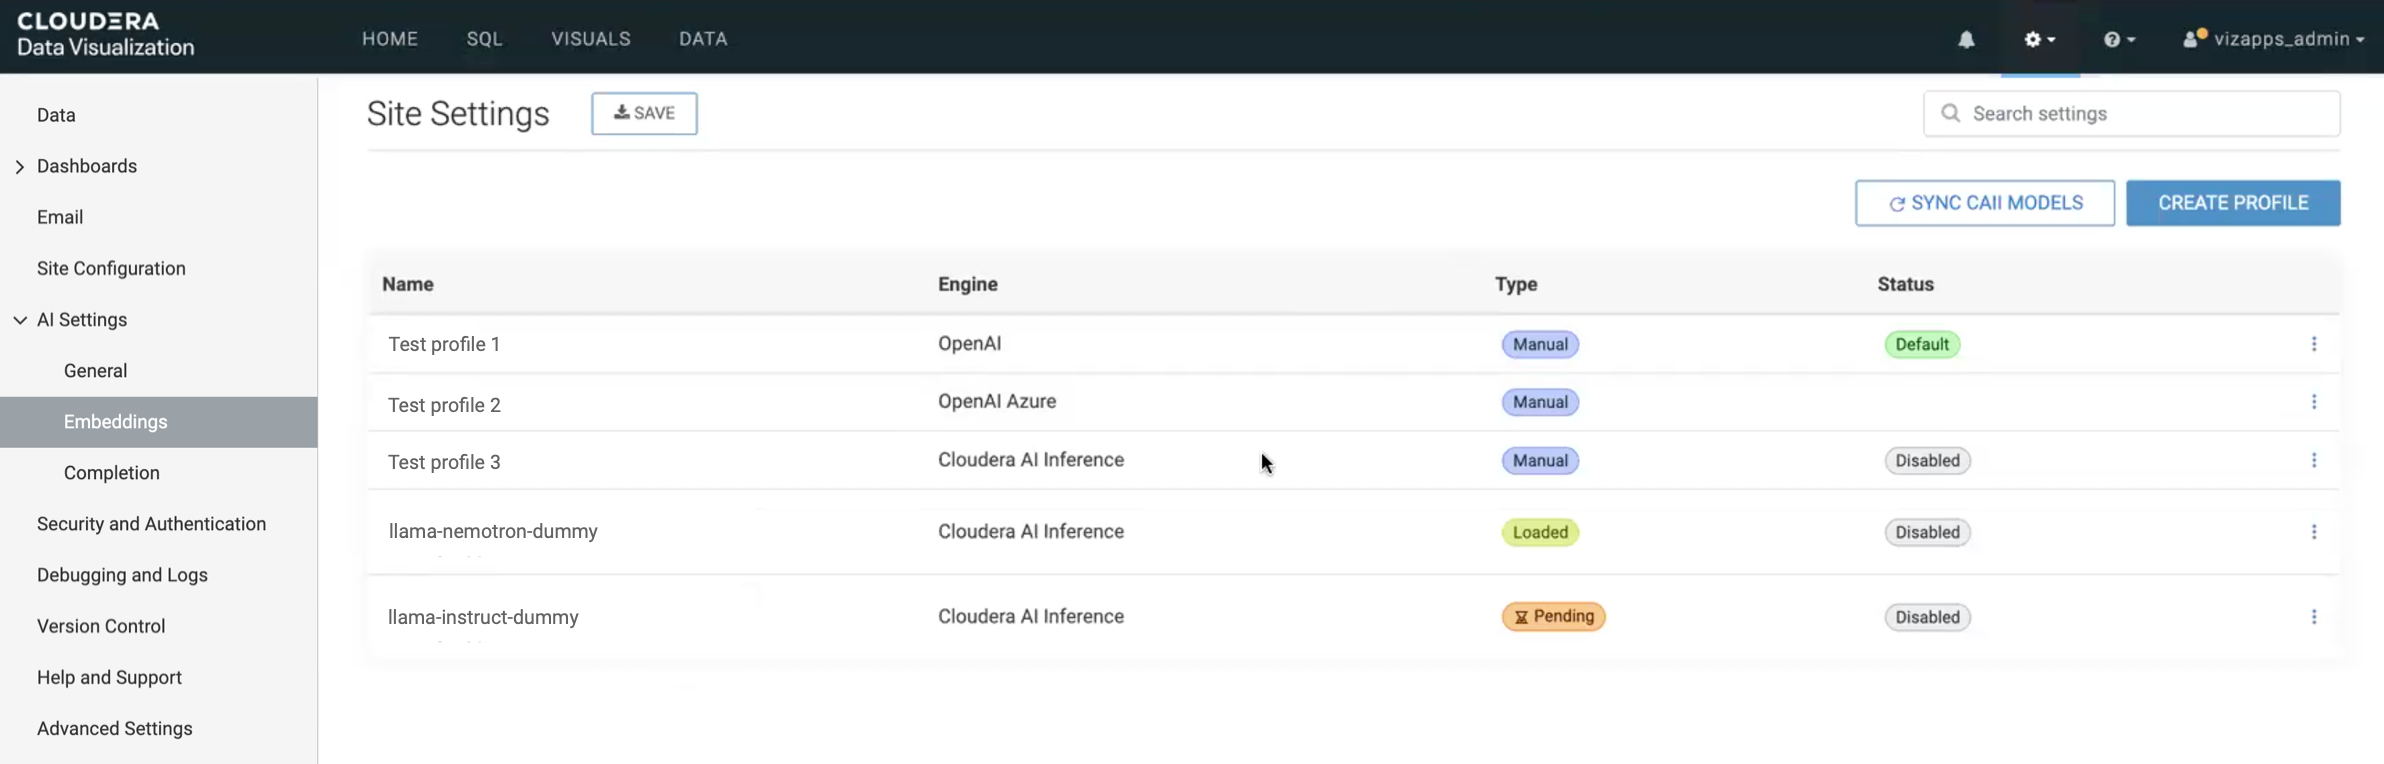
The list of profiles is sorted by status: default first, enabled profiles next, and disabled profiles last. For Cloudera AI environments supporting auto-discovery, profiles within the enabled and disabled categories are further sorted by type — manual first, loaded second, and pending last.
Action buttons for each profile can be accessed from a dropdown menu by clicking ![]() at
the end of the profile row.
at
the end of the profile row.
- Setting a profile as default
-
-
The Status column shows whether an embeddings profile is set as the default.
- The current default profile, for new AI visuals, is marked with the Default label.
- To change the default, find the profile you want to set as default, click
 at the end of profile row and select Set as
default.
at the end of profile row and select Set as
default.
-
- Editing a profile
-
- Click on the profile row and select Edit
Profile from the dropdown menu.
- Make the necessary changes.
- [Optional] Click TEST to validate the model with the new settings.
- Click SAVE.
- After modifying a profile, save the Site Settings page to apply your changes.
- Click
- Duplicating an existing profile
-
You can duplicate an existing embeddings profile to create a new profile instance.
- Find the profile you want to copy and click on the profile row
- Select Create Profile from the dropdown menu. All details are pre-filled from the original profile, except for the Name field.
- Enter a new name for the profile.
- Click SAVE.
- After creating a profile, save the Site Settings page to apply your changes.
- Find the profile you want to copy and click
- Disabling a profile
-
- The Status column shows whether a profile is enabled or disabled.
- Disabled profiles marked with the Disabled badge.
- To disable an active profile, click at the end of the row and select
Disable.
- When a profile is disabled, you can only re-enable. No other actions are available.
- Disabling the default profile auto-assigns a new default, which is a random active profile.
- If all profiles are disabled, the AI Assistant and Annotation features display warning messages, and the AI Summary is not shown.
- Deleting a profile
-
- Click on the profile row and select
Delete from the dropdown menu.
- Click YES to confirm the deletion.
- After deleting a profile, save the Site Settings page to apply your changes.
- Click
Completion
In this AI Settings section, you can manage completion profiles. You can create new profiles, view the list of existing ones, and perform actions such as copying, editing, deleting existing profiles, or setting a new default profile.
Creating a new completion profile
-
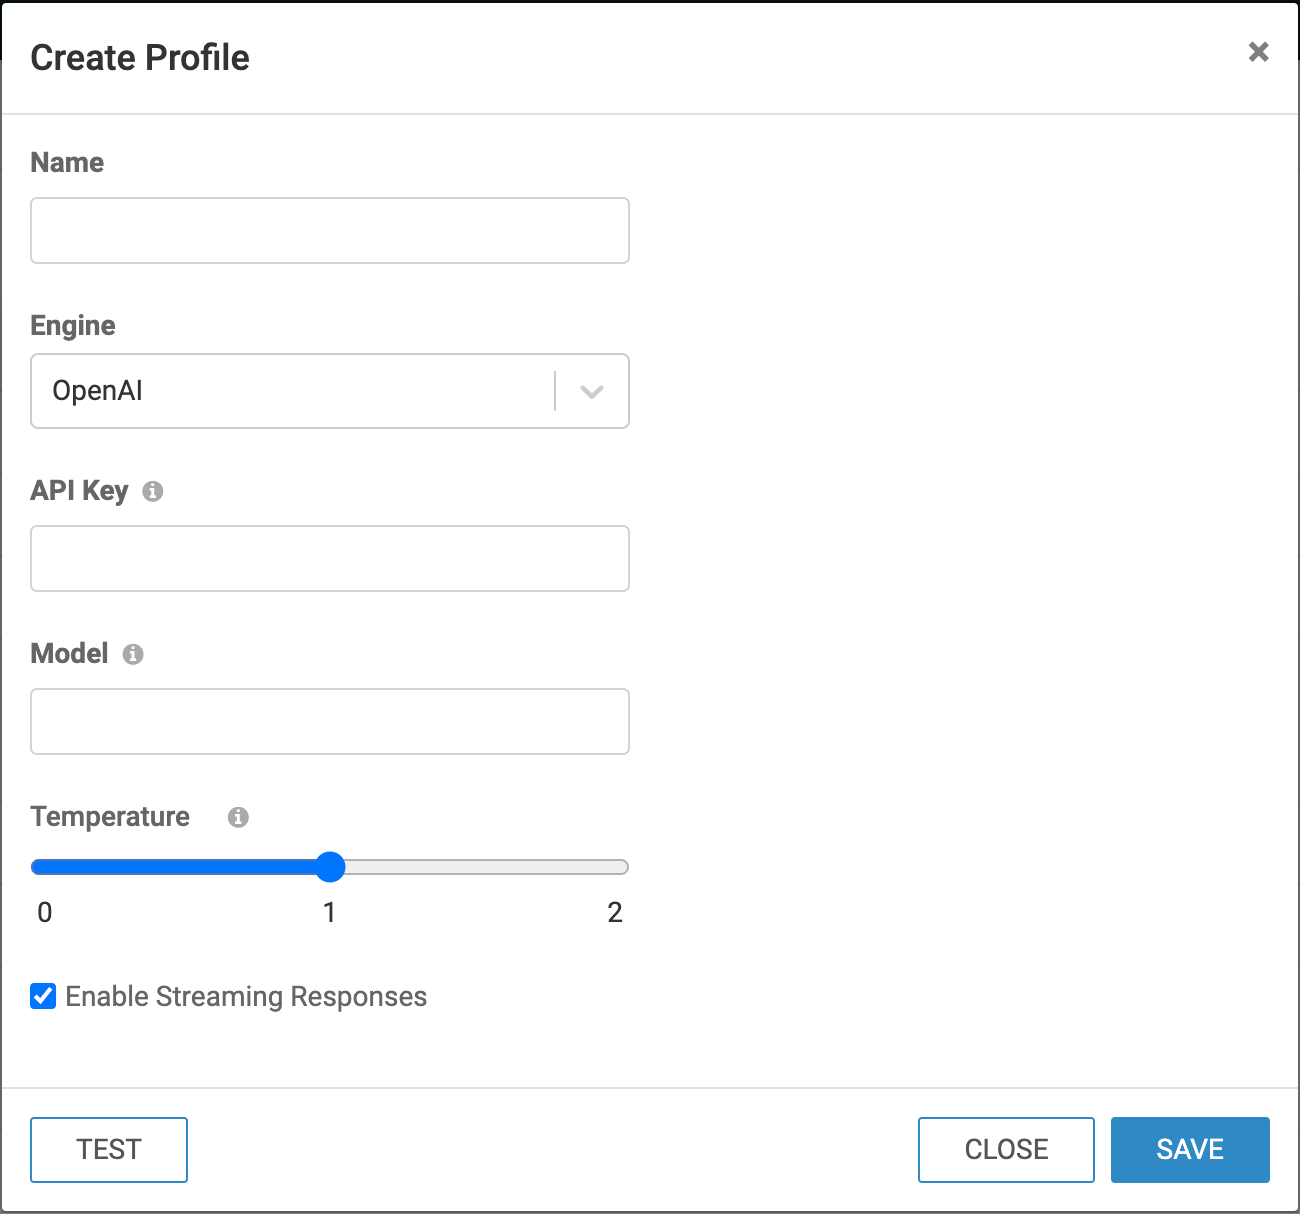
Click CREATE PROFILE.
The Create Profile modal window opens.
Synchronizing completion profiles (available only for Cloudera AI environments supporting auto-discovery)
Model synchronization is available in Cloudera AI environments that support automatic model discovery. Synchronizing ensures that completion profiles in Cloudera Data Visualization stay aligned with the models available in the Cloudera AI Inference service.
Managing completion profiles
The Site Settings page for completion profiles displays the existing profiles, including their names, engines, and status information. For Cloudera AI environments supporting auto-discovery, the type of the profile is also shown.
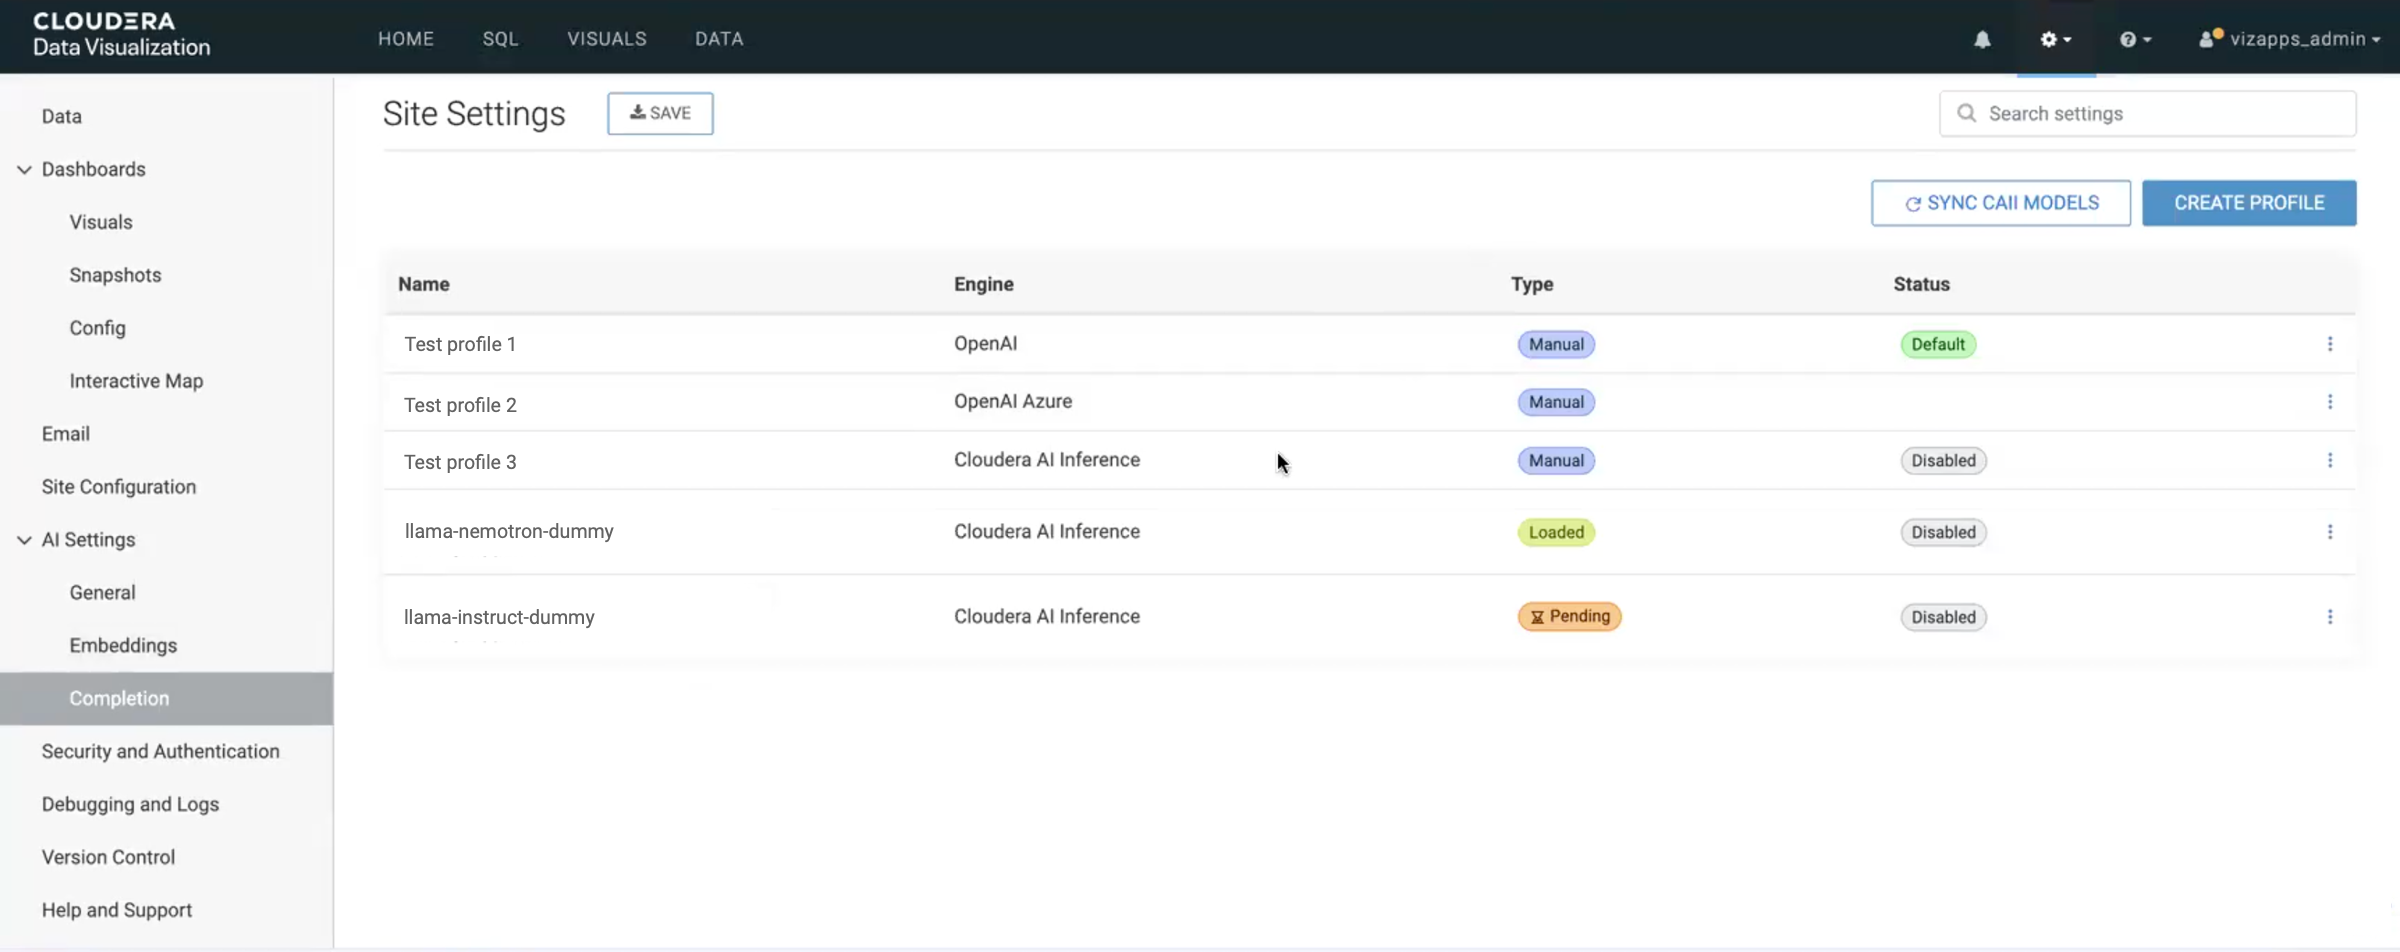
- Profile type (available only for Cloudera AI environments supporting auto-discovery)
-
The Type column indicates how a completion profile was created and its current state:
-
Manual – Profile was created manually, all settings are editable.
-
Synced – Profile was created automatically by synchronizing with Cloudera AI Inference. For synced completion profiles, authentication mode is always JSON Web Token (JWT), so this feature is available only also if JWT is available.
Synced profiles can have the following states:-
Loaded – The AI Inference model is registered and available. Most fields are read-only and updated automatically through synchronization. The following fields can be edited manually:
- Name
- Token limit
- Temperature
- Enable/disable streaming
-
Pending – The AI Inference model is not yet registered in Cloudera AI Inference.
- Pending profiles are disabled by default in Cloudera Data Visualization because they are not yet usable. They become active once successfully synced.
- A pending profile can automatically change to Loaded when sufficient resources become available, without manual action in Cloudera AI Inference.
- In Cloudera Data Visualization, click SYNC CAII MODELS to refresh the status. If the model has been registered since the last sync, the profile updates to Loaded.
-
-
- Profile status
-
The statuses available across all environments are Default and Disabled.
The list of profiles is sorted by status: default first, enabled profiles next, and disabled profiles last. Disabled profiles are displayed greyed out to distinguish them from active ones. For Cloudera AI environments supporting auto-discovery, profiles within the enabled and disabled categories are further sorted by type — manual first, loaded second, and pending last.
Action buttons for each profile can be accessed from a dropdown menu by clicking ![]() at
the end of the profile row.
at
the end of the profile row.
- Setting a profile as default
-
- The Status column shows whether a completion profile is set as the default.
- The current default profile, for new AI visuals, is marked with the Default label.
- To change the default, find the profile you want to set as default, click at the end of the profile row and select Set
as default.
- Editing a profile
-
- Click on the profile row and select Edit
Profile from the dropdown menu.
- Make the necessary changes.
- [Optional] Click TEST to validate the model with the new settings.
- Click SAVE.
- After modifying a profile, save the Site Settings page to apply your changes.
- Click
- Duplicating an existing profile
-
You can duplicate an existing completion profile to create a new profile instance.
- Find the profile you want to copy and click on the profile row
- Select Create Profile from the dropdown menu. All details are pre-filled from the original profile, except for the Name field.
- Enter a new name for the profile.
- Click SAVE.
- After creating a profile, save the Site Settings page to apply your changes.
- Find the profile you want to copy and click
- Disabling a profile
-
- The Status column shows whether a profile is enabled or disabled.
- Disabled profiles marked with the Disabled badge.
- To disable an active profile, click at the end of the row and select
Disable.
- When a profile is disabled, you can only re-enable. No other actions are available.
- Disabling the default profile auto-assigns a new default, which is a random active profile.
- If all profiles are disabled, the AI Assistant and Annotation features display warning messages, and the AI Summary is not shown.
- Deleting a profile
-
- Click on the profile row and select
Delete from the dropdown menu.
- Click YES to confirm the deletion.
- After deleting a profile, save the Site Settings page to apply your changes.
- Click