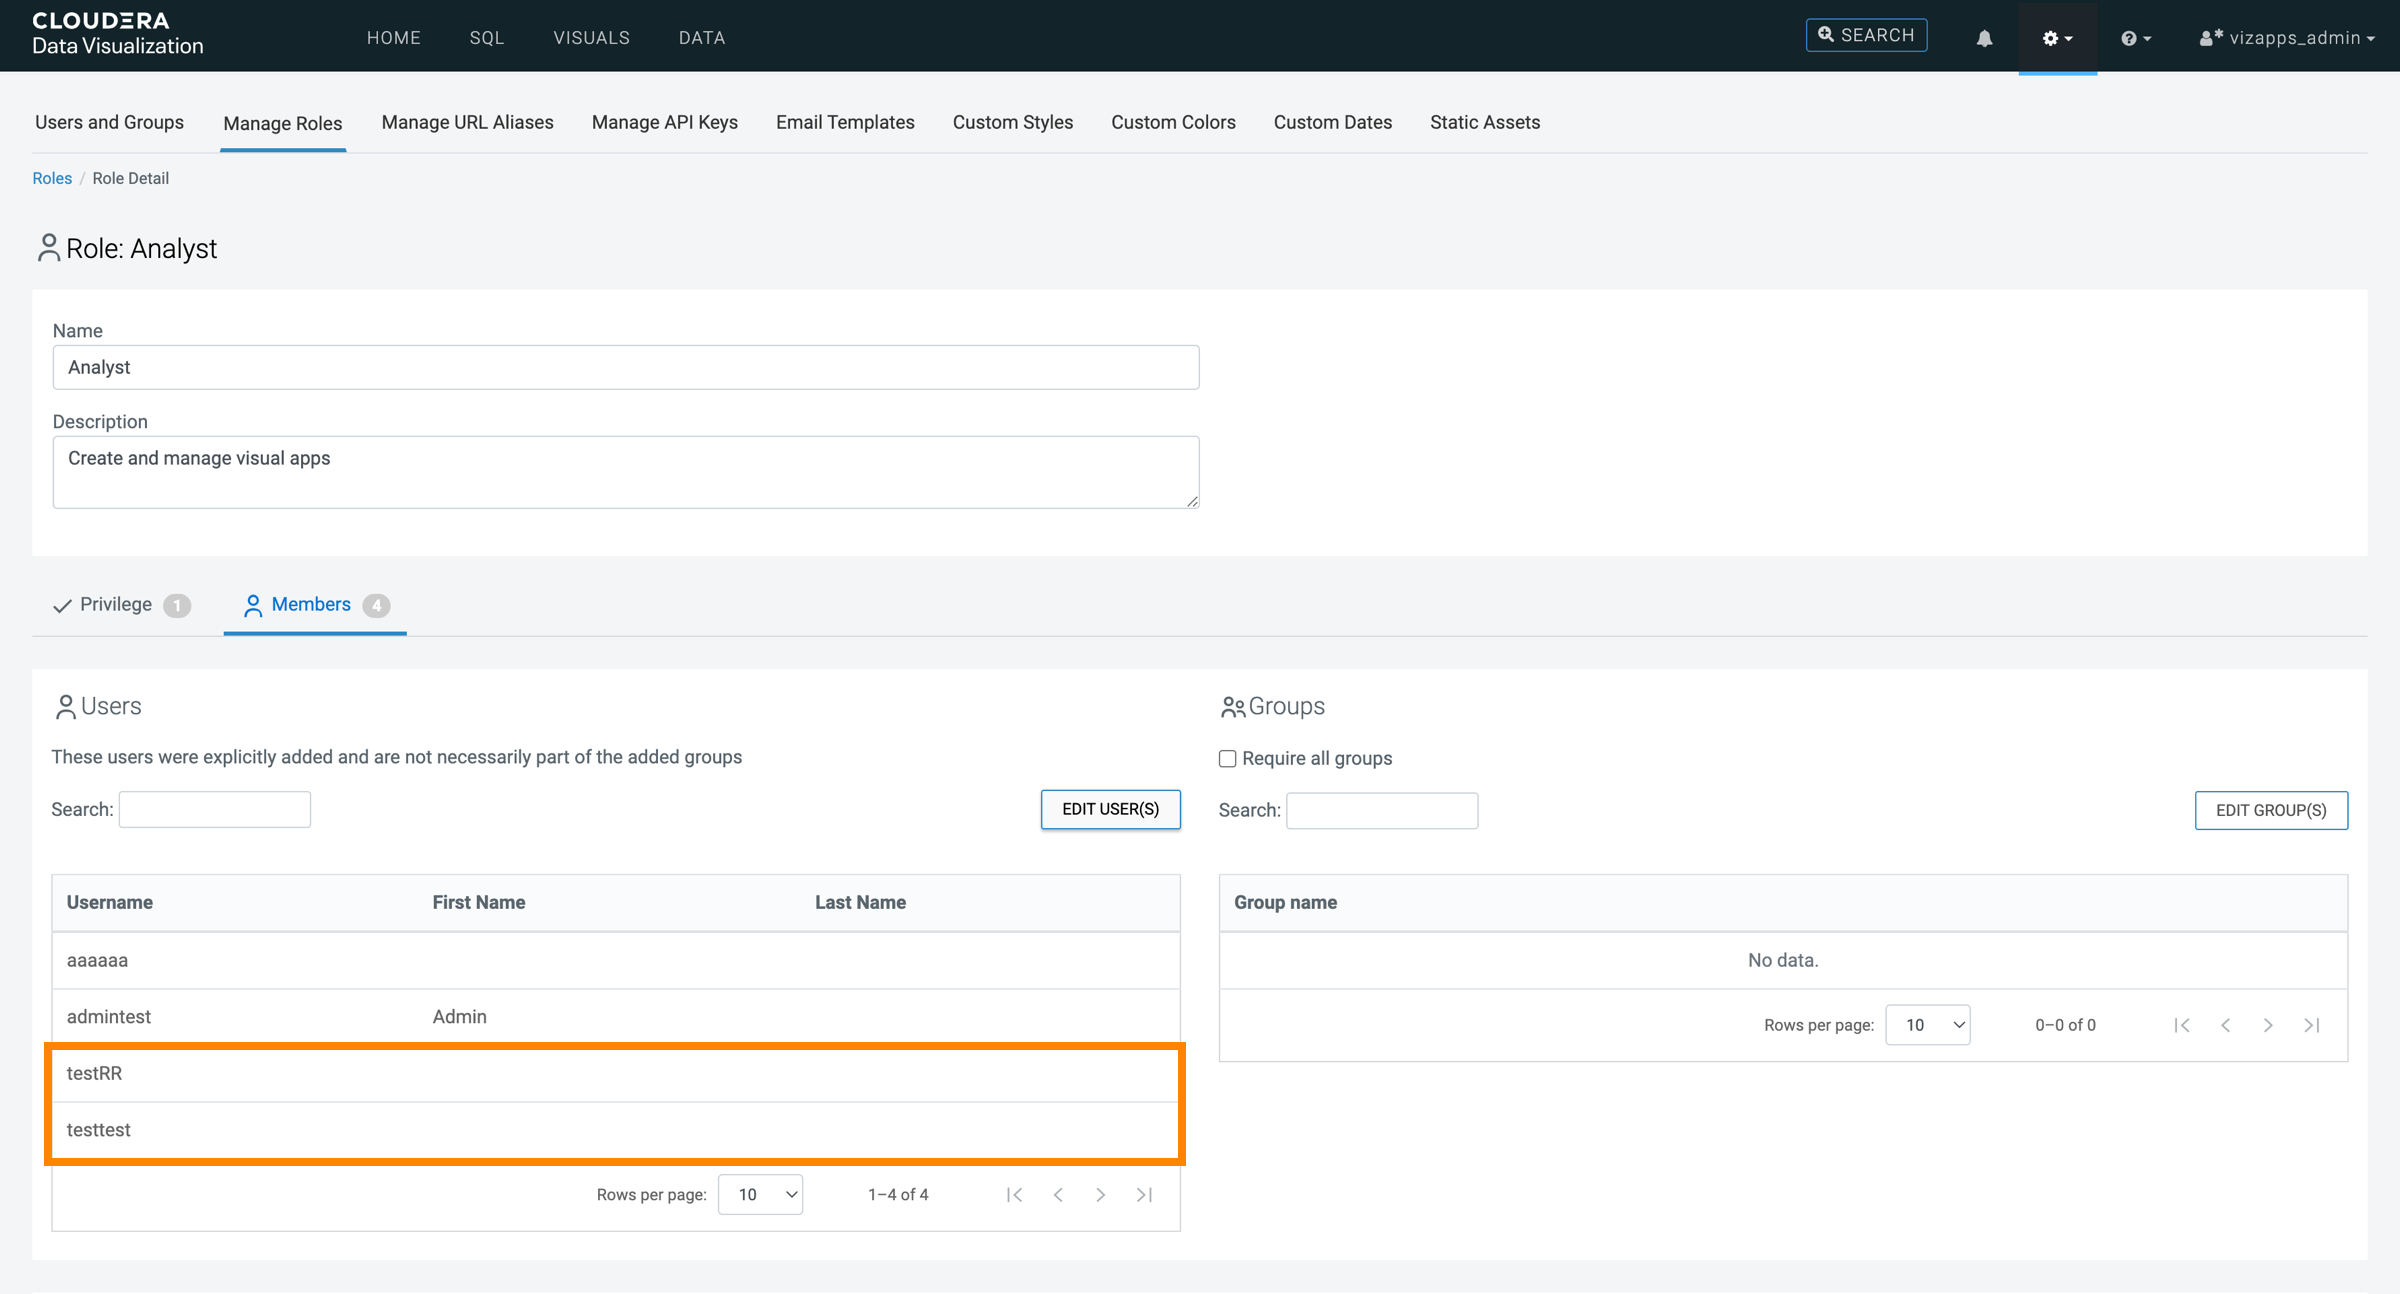
Assigning a role to multiple users
You can add several users to a role at the same time in Cloudera Data Visualization.
-
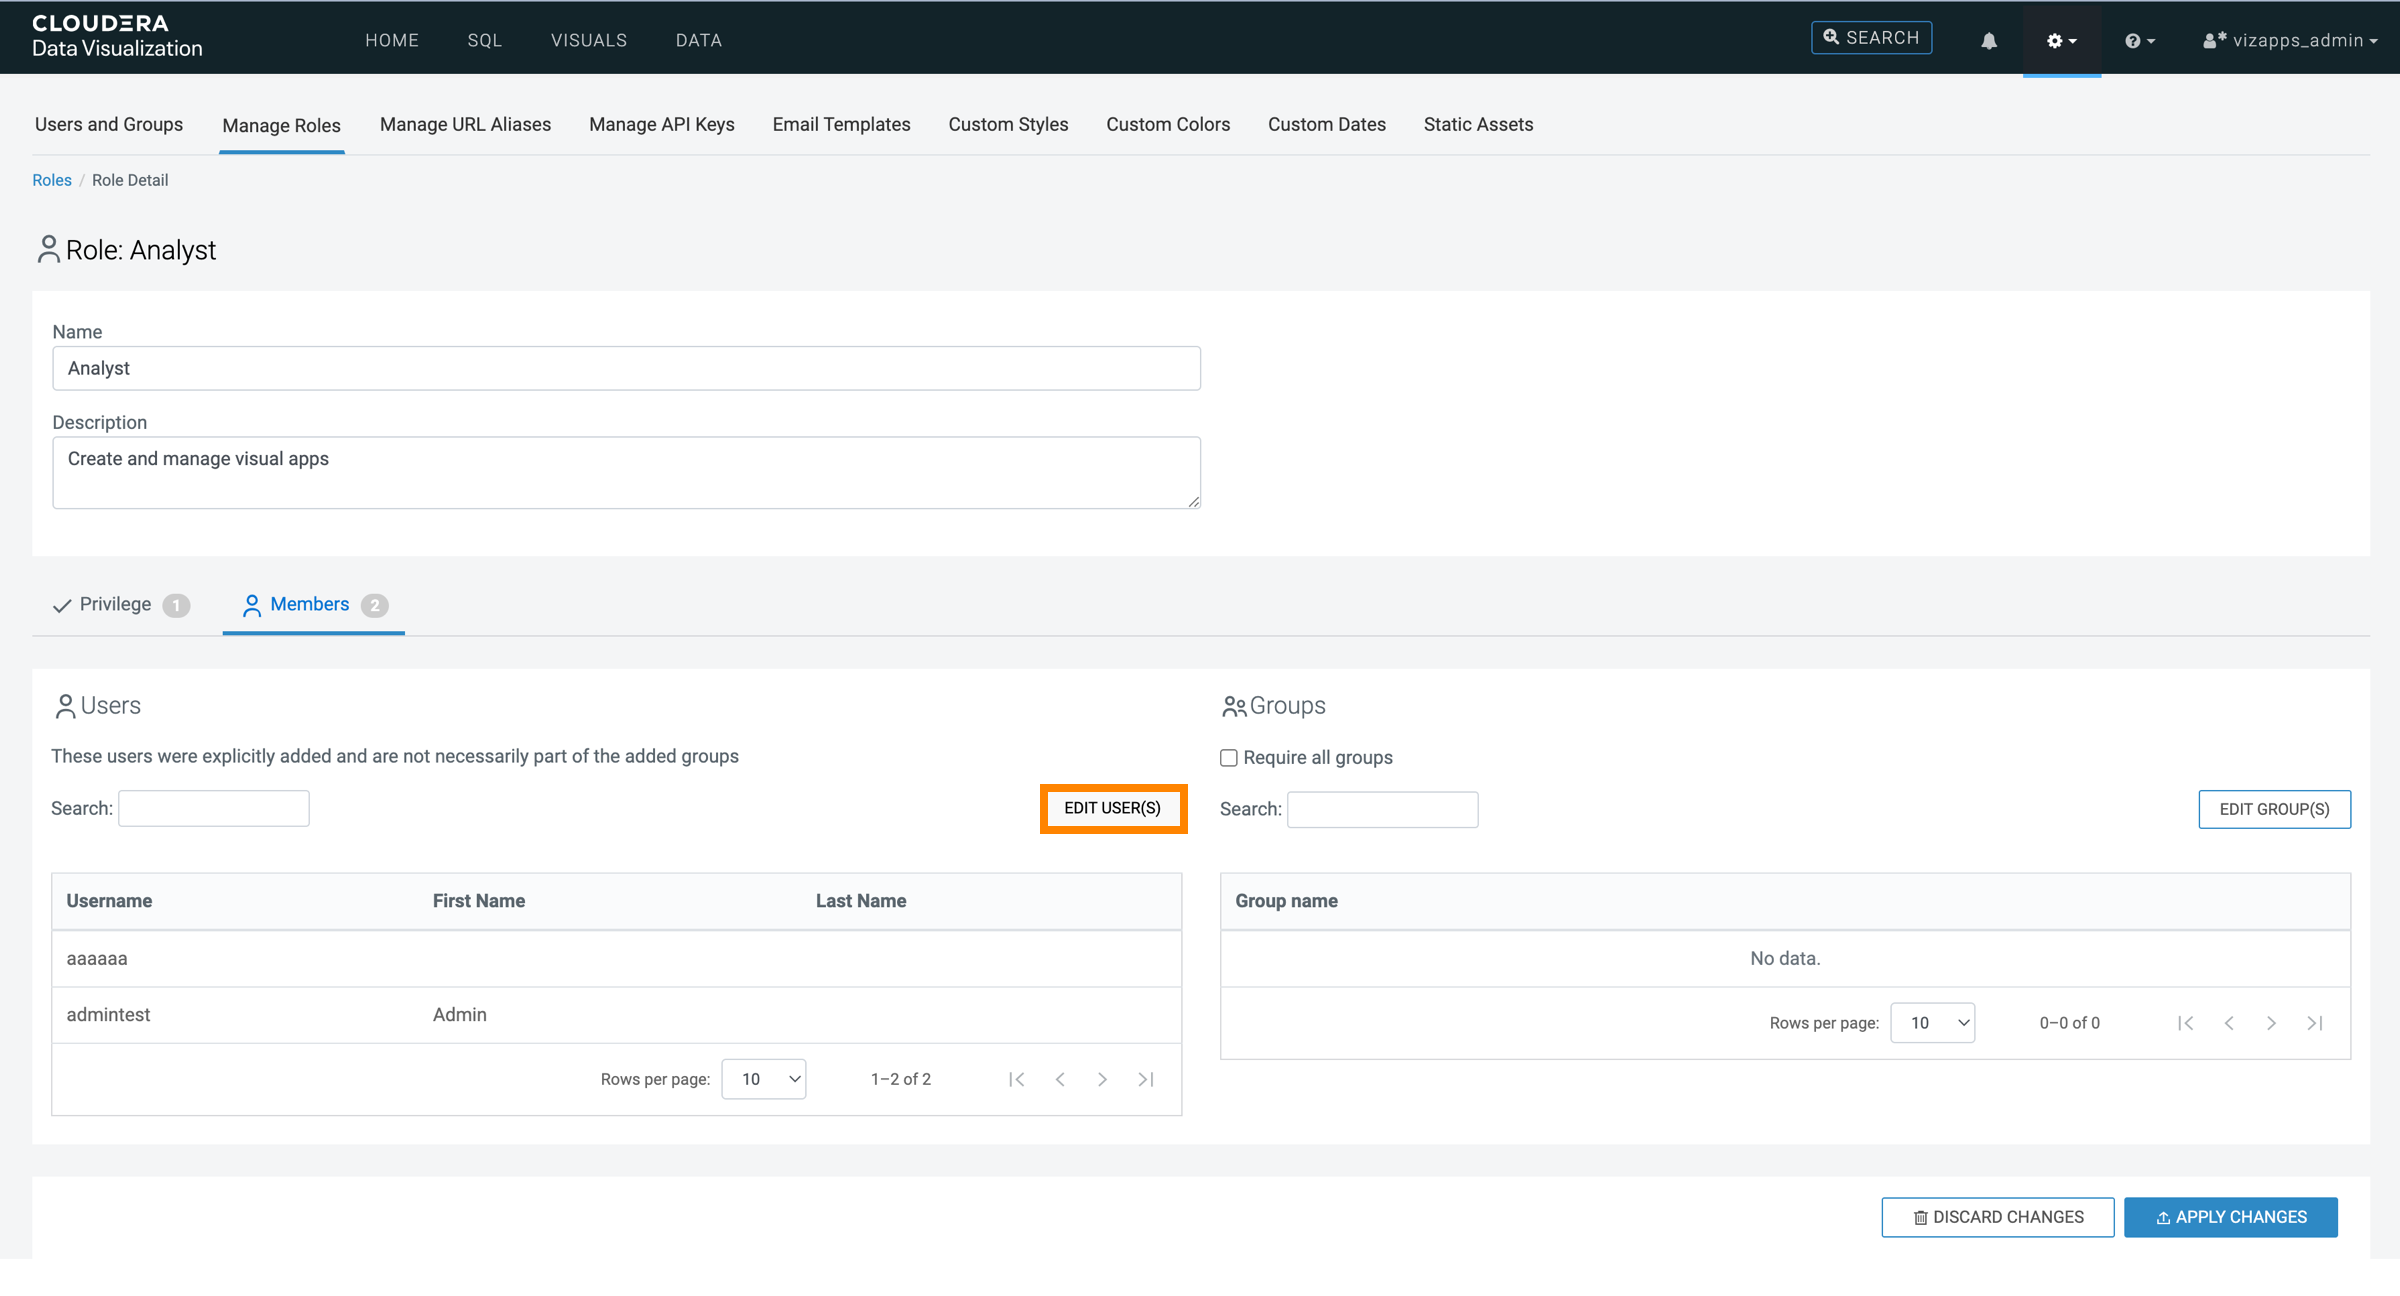
In the Users section of the the Members
tab, click EDIT USER(S).
-
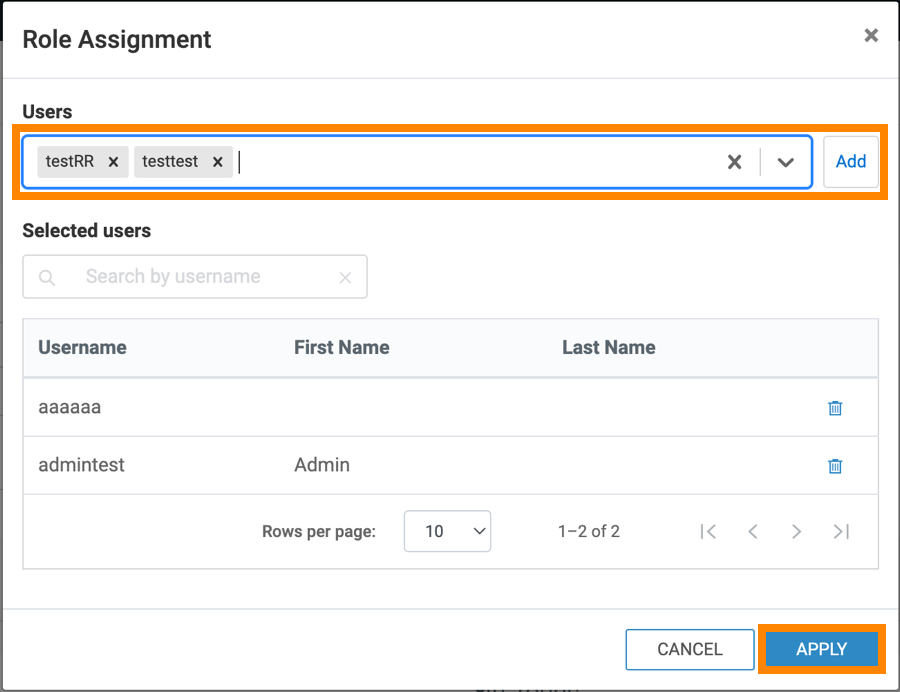
Add users to the role.
You can add users in the following ways:
- Search and select existing users
-
- Use the Search field to find users by name.
- Select one or more users from the filtered list.
- Click ADD to move them to the Selected users list.
- Click APPLY.
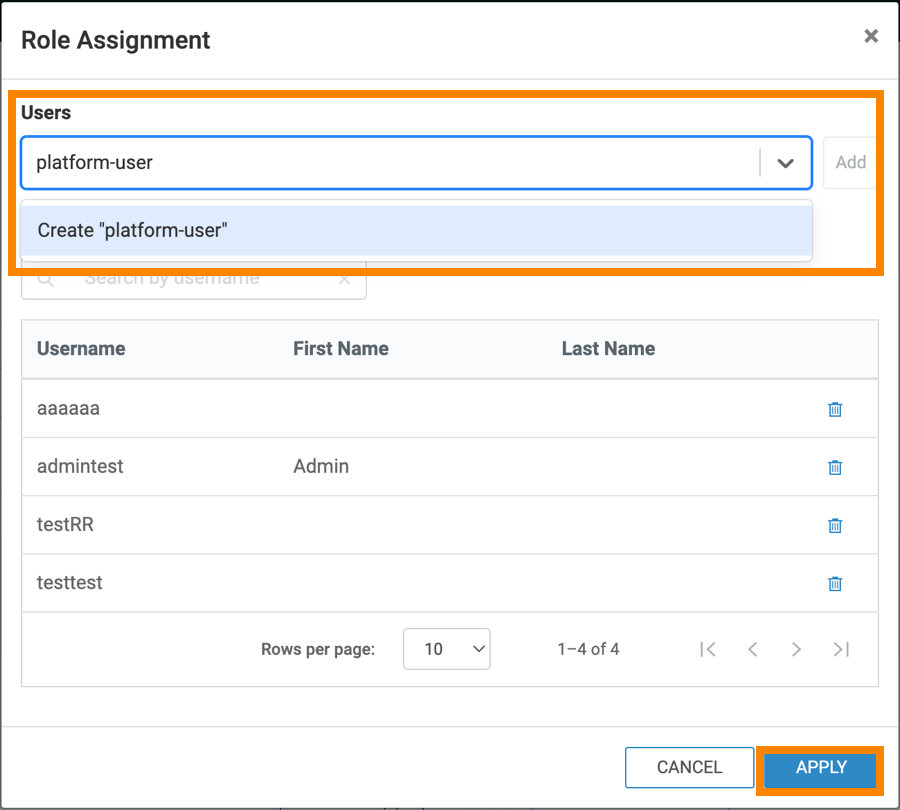
- Add externally defined users (LDAP authentication)
-
If you are using LDAP authentication, you can assign roles to users who are not yet stored locally (for example, users who have not logged in).
-
In the Users text field, type the username.
-
Click Create to add the username to the list.
-
Repeat as needed.
-
Click ADD, to move them to the Selected users list.
- Click APPLY.
-
-
Click APPLY.
A confirmation message appears briefly to indicate the update was successful.