Assigning groups to roles

This example demonstrates how to assign groups to roles to control access across the organization using role-based group membership.

Example scenario:

  • There are three distinct access levels across the organization: Data Admins, Analysts, and Visual Consumers.
  • There are three teams: Marketing, Sales, and Operations.

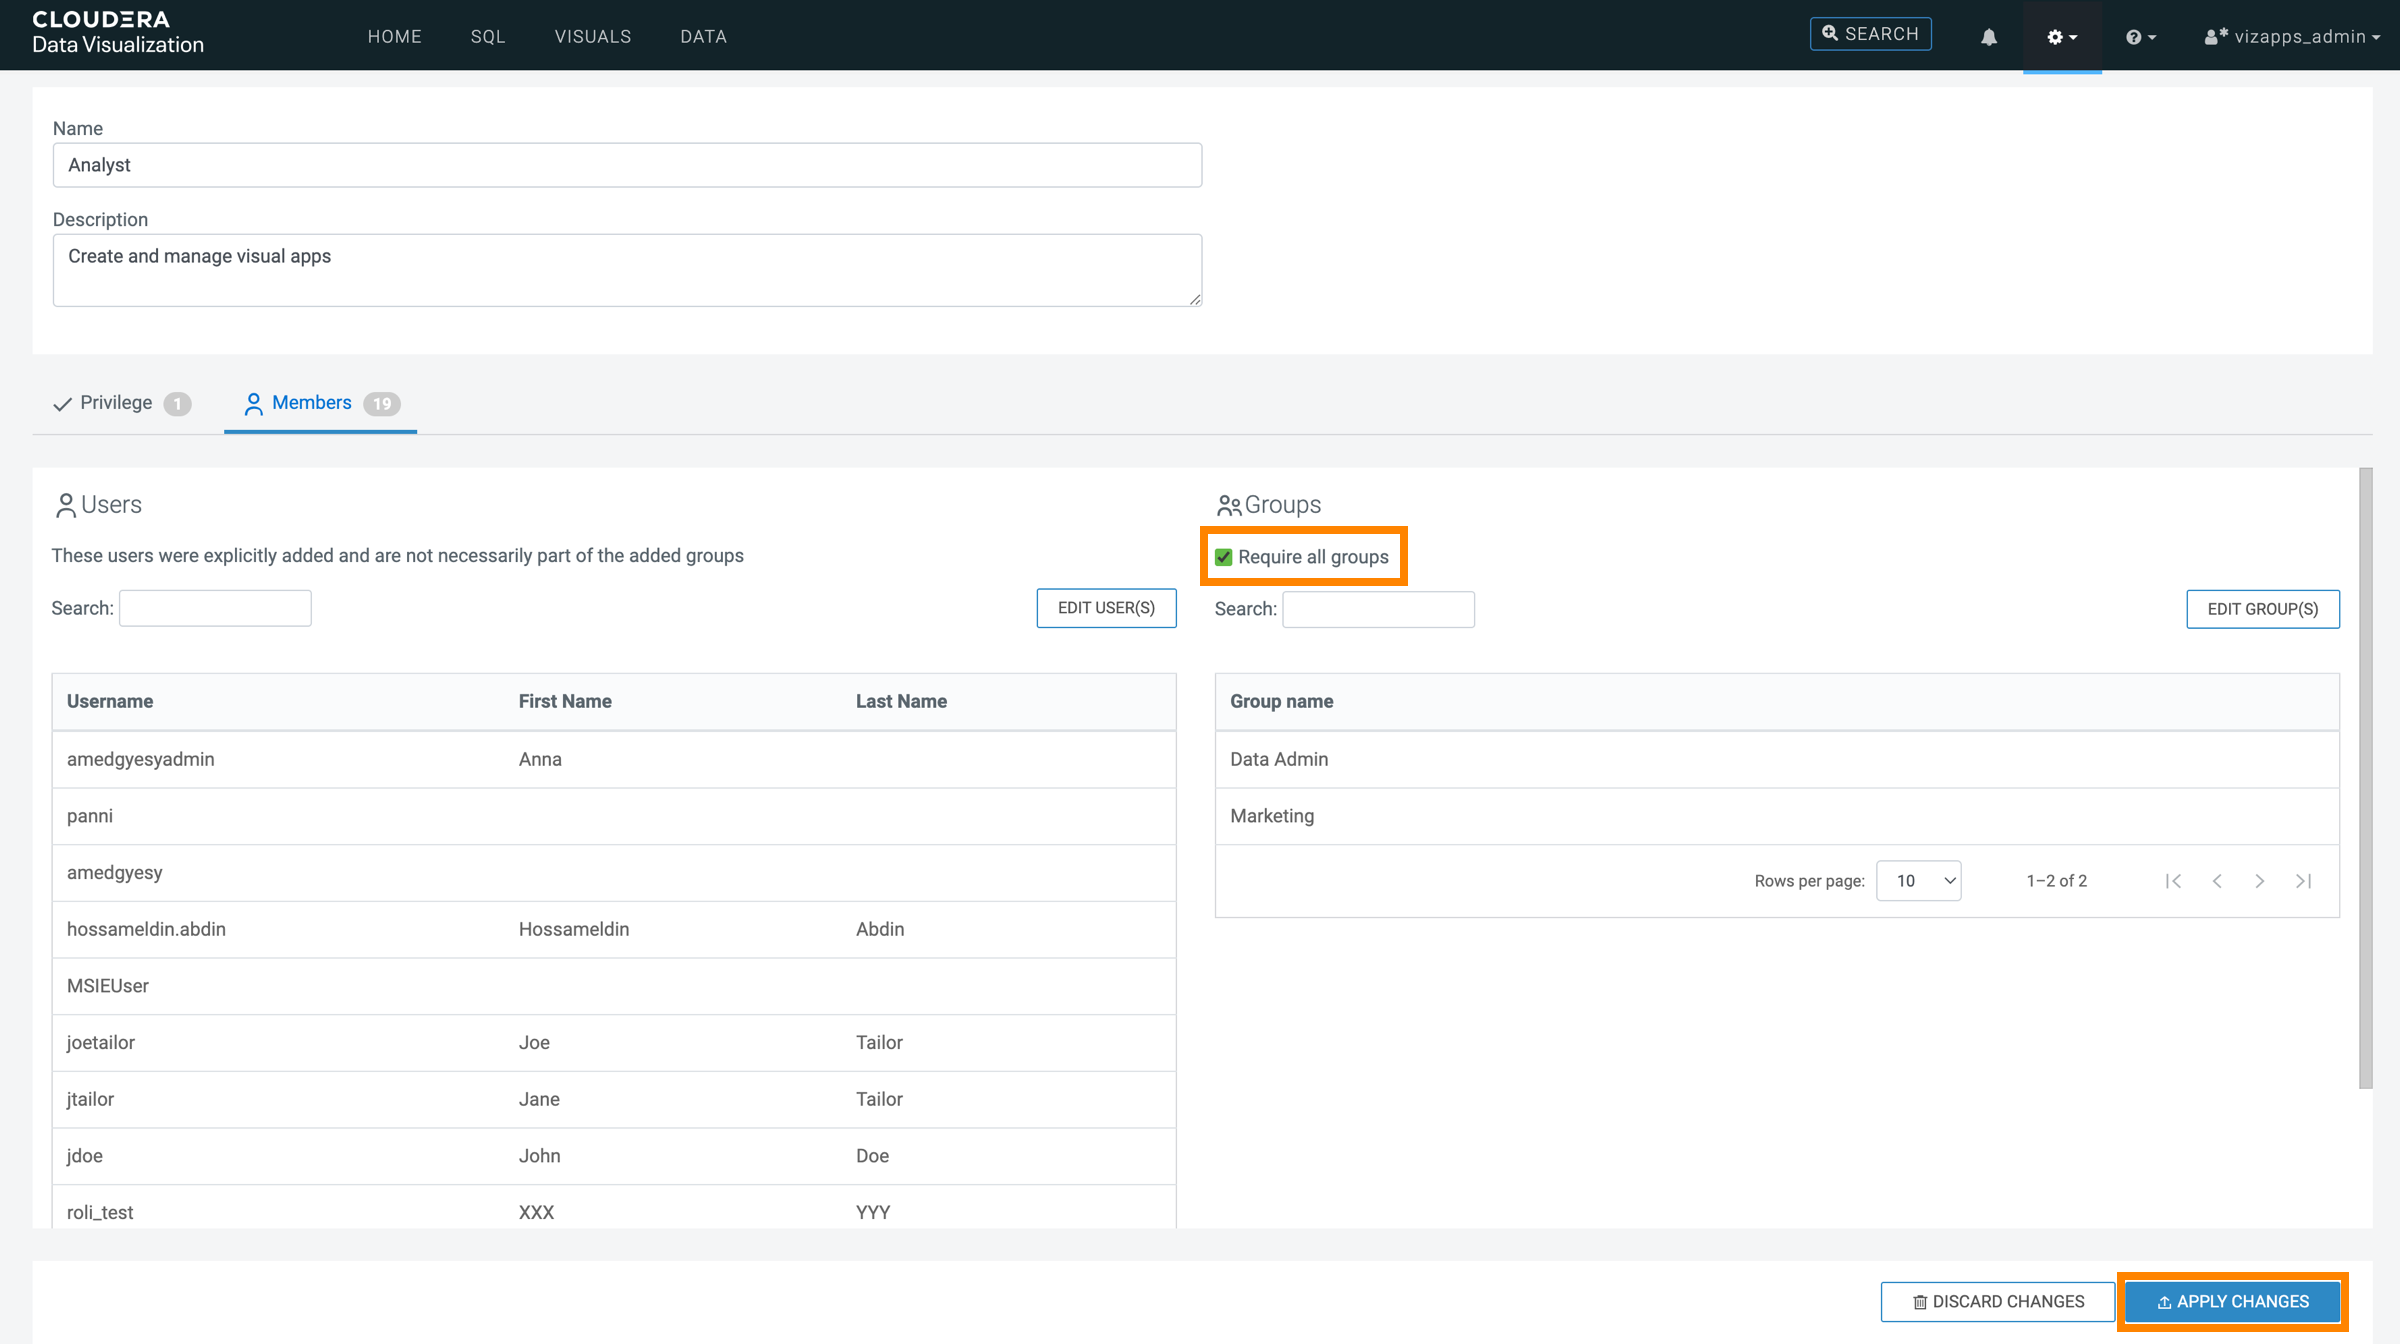
The Require all groups option is used to ensure that users must belong to both groups to receive the role.

  1. On the main navigation bar, click the Gear icon and select Manage Roles.
  2. On the Manage Roles page, click the Edit icon for the role you want to update.
  3. On the Role Detail page, open the Members tab.
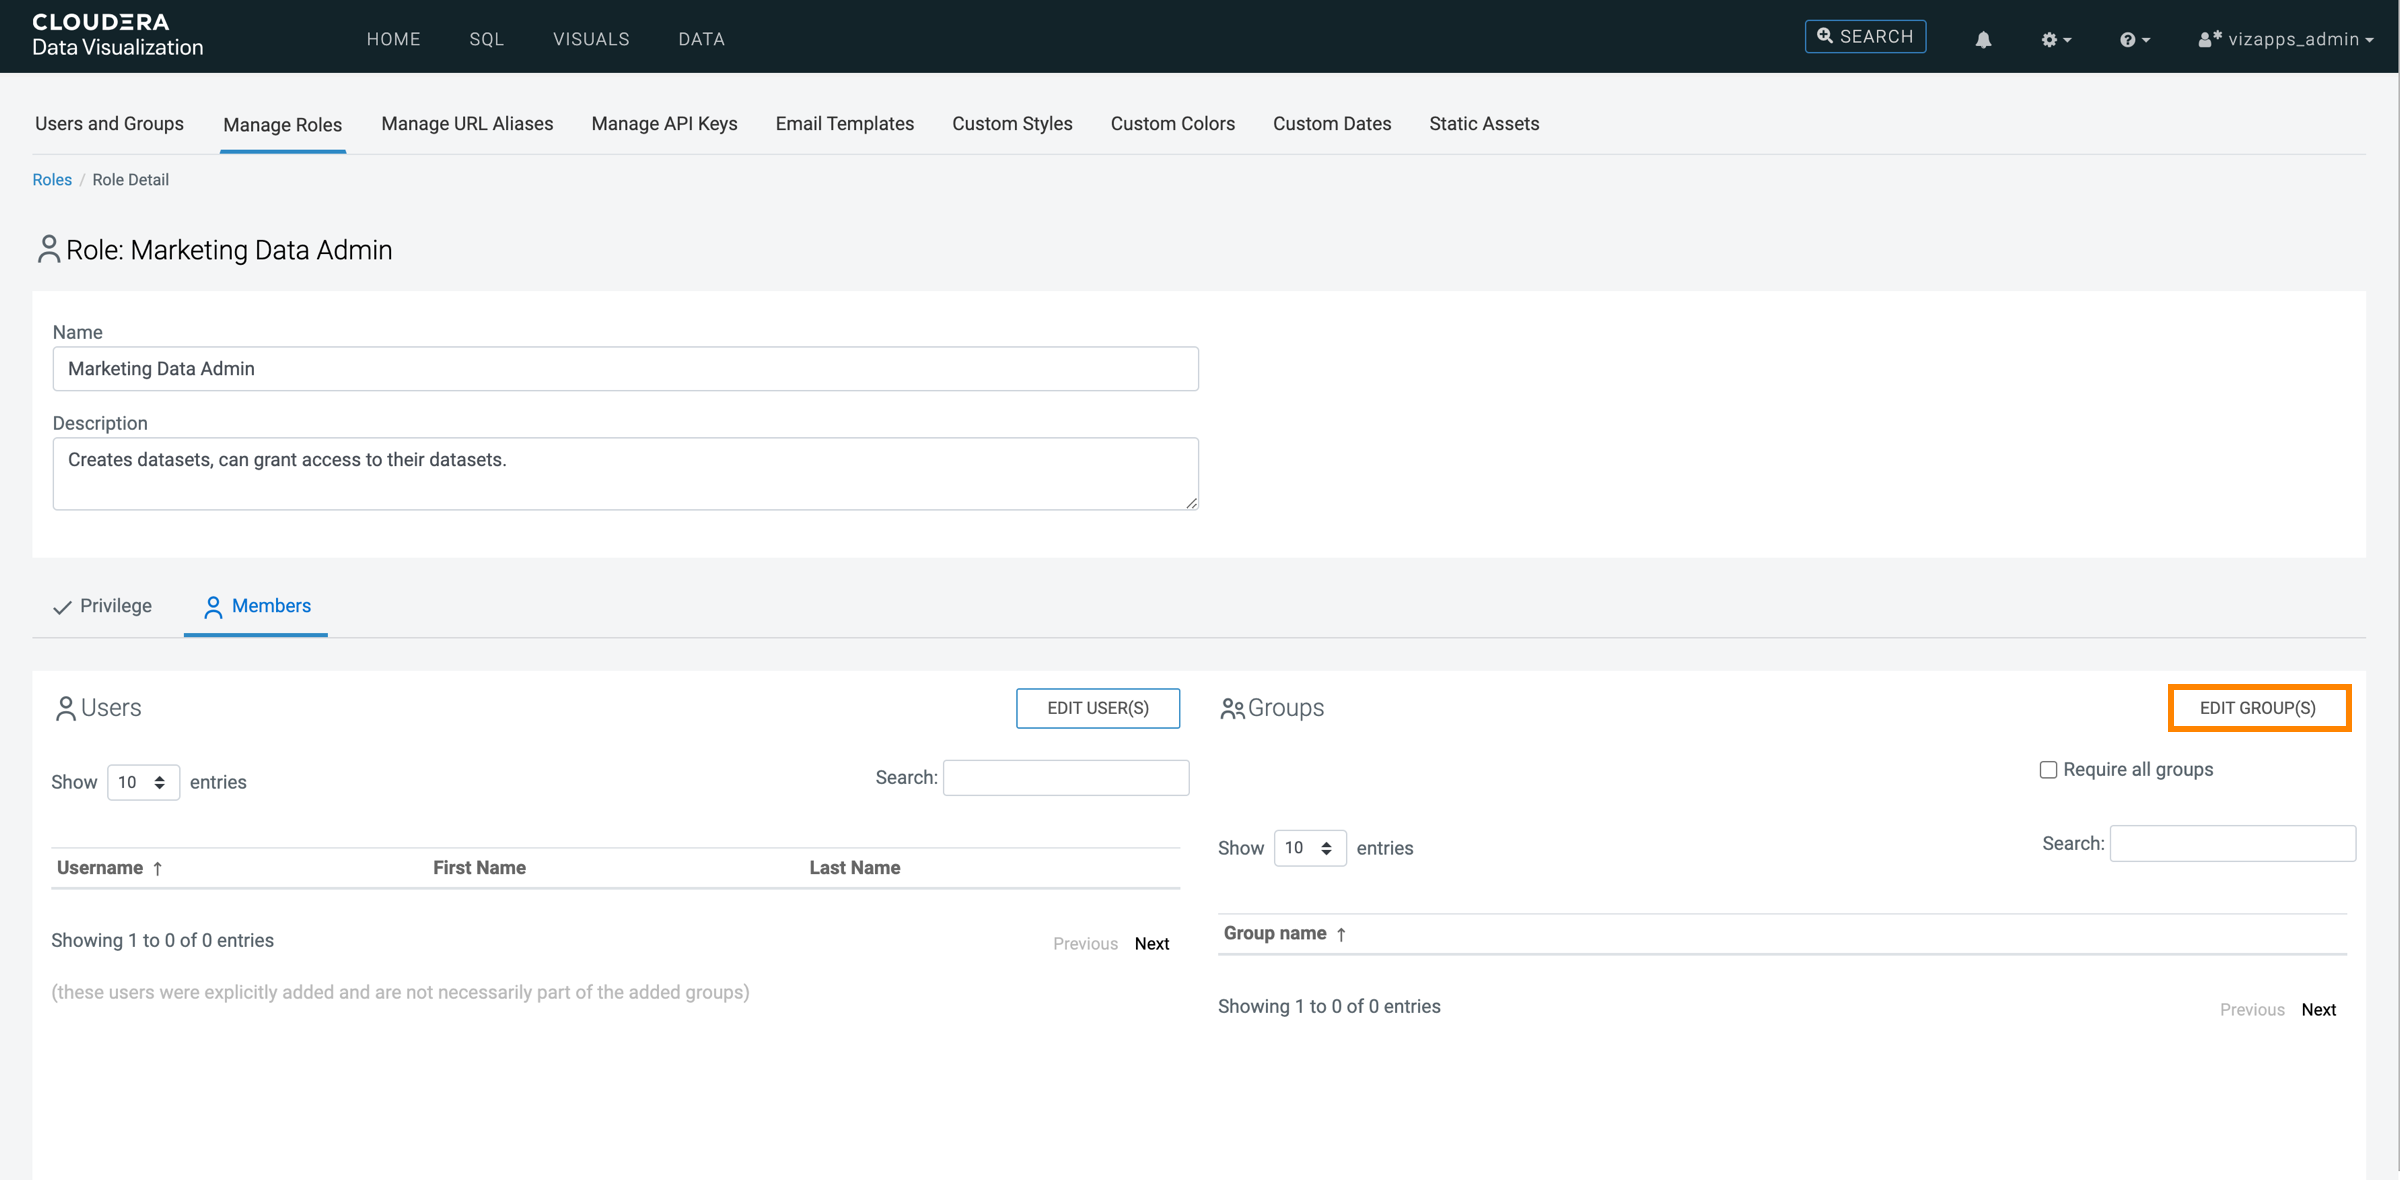
  4. In the Groups section, click EDIT GROUP(S).

    The Role Assignment modal appears.

  5. Select the groups you want to assign from the dropdown list.
  6. Click ADD, then click APPLY.

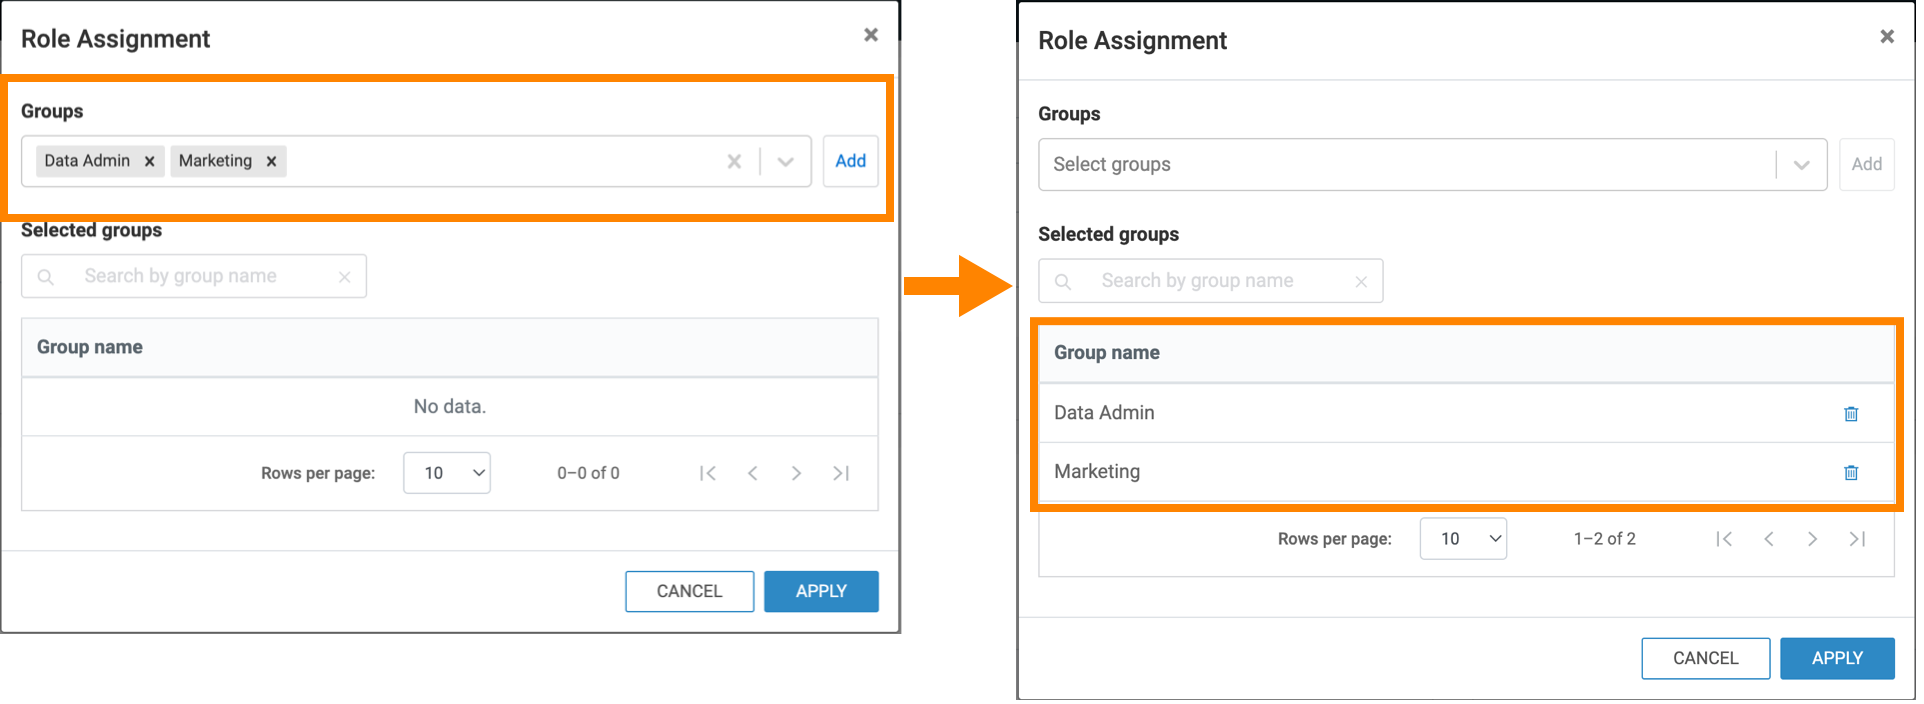
    The Groups list now contains the newly added groups.

  7. Enable Require all groups.
  8. Click APPLY CHANGES.

    A confirmation message appears briefly.

  9. Repeat these steps for each role listed in the table below.
    Table 1. Roles and their group assignments
    Role Name Assigned groups
    Marketing Data Admin
    • Data_Admins
    • Marketing
    Marketing Analyst
    • Analysts
    • Marketing
    Marketing Visual Consumer
    • Visual_Consumers
    • Marketing
    Sales Data Admin
    • Data_Admins
    • Sales
    Sales Analyst
    • Analysts
    • Sales
    Sales Visual Consumer
    • Visual_Consumers
    • Sales
    Operations Data Admin
    • Data_Admins
    • Operations
    Operations Analyst
    • Analysts
    • Operations
    Operations Visual Consumer
    • Visual_Consumers
    • Operations