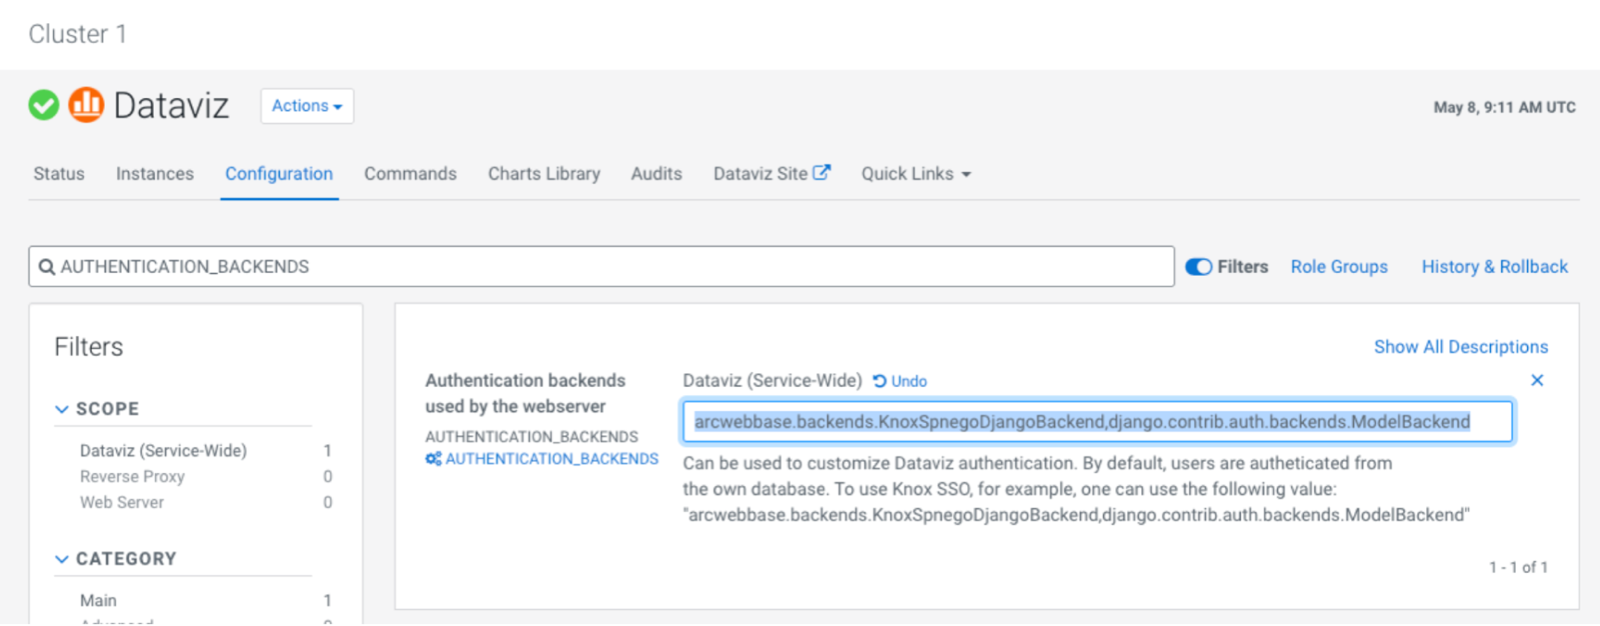
You can configure Cloudera Data Visualization to use Knox Single Sign-On (SSO)
if Knox is available in your cluster. The setup requires a Kerberized environment and includes
configuring both Cloudera Data Visualization and Knox.
The cluster must be Kerberized.
Cloudera Data Visualization must be installed and Knox must be
available on your cluster.
Kerberos authentication must be enabled for Cloudera Data Visualization.
If not already configured, enable Kerberos
authentication for Cloudera Data Visualization.
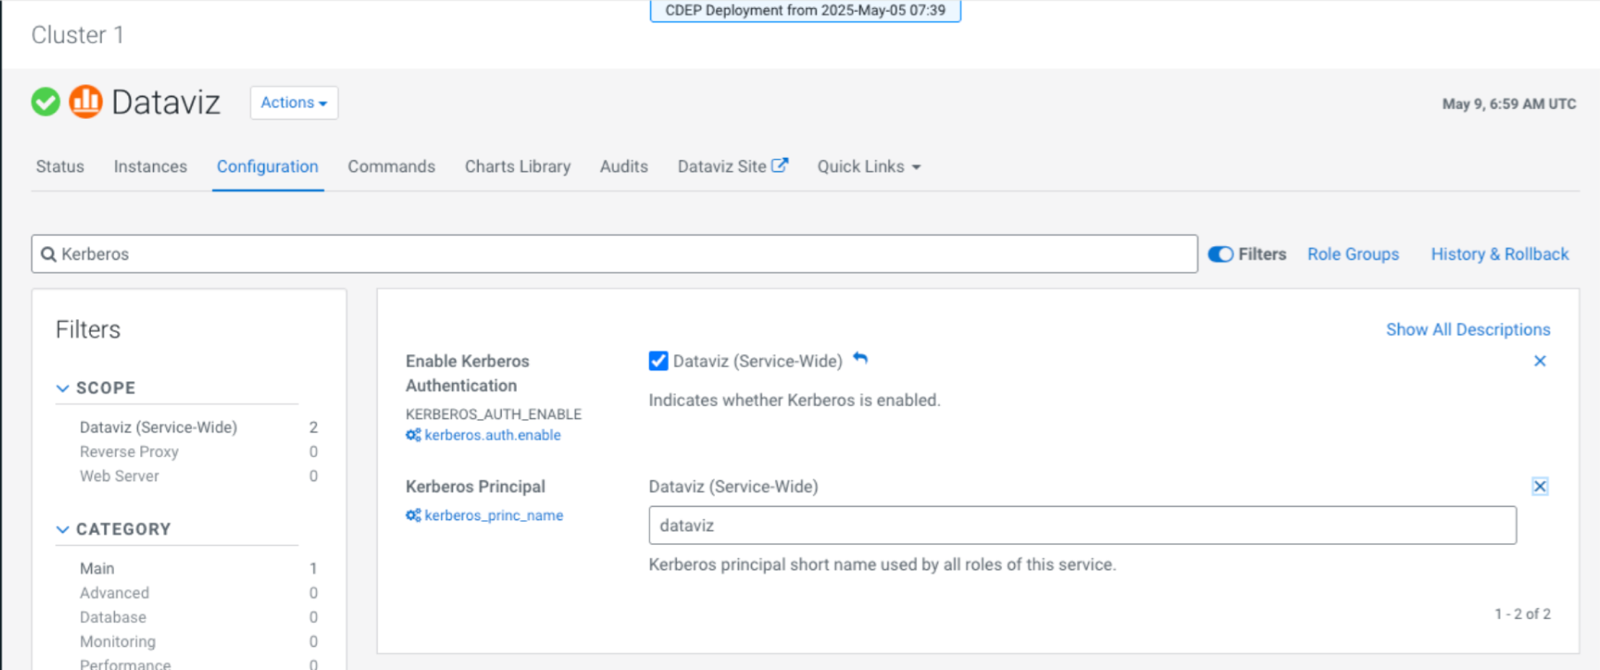
In Cloudera Manager, go to Clusters and select
the Dataviz service.
Click the Configuration tab.
In the Search bar, type kerberos to
filter the relevant settings.
Find the Enable Kerberos Authentication
property.
Check the Dataviz (Service-Wide) box next to
Enable Kerberos Authentication.
For Kerberos Principal, enter the Kerberos
username (principal short name) the Cloudera Data Visualization service should
use.
Click Save Changes.
Restart the Dataviz service for the changes to take effect.
Kerberos is now enabled for Cloudera Data Visualization, which is a
prerequisite for enabling Knox SSO.
Data access considerations
When using Cloudera Data Visualization with Knox SSO in a Kerberized environment, data access
behavior depends on whether impersonation is enabled on the data connection.
Impersonation disabled (default)
Queries run as the Cloudera Data Visualization service user.
Ensure the service user has READ/SELECT permissions on the underlying data
sources (for example, Hive or Impala tables) queried by visuals.
Impersonation enabled (optional)
Queries use the permissions of the logged-in user authenticated through
Knox.
The service user’s permissions on the data sources are not used for query
authorization.
This allows data access to be controlled based on individual user privileges
instead of the service user.
If you enable impersonation for Cloudera Data Visualization with Knox in a
Kerberized environment, additional proxy user configuration is required.
Hive configuration:
Add the following properties to core-site.xml
to allow the Cloudera Data Visualization service user to impersonate other
users:
Make the Dataviz service definition available to Knox.
Locate DATAVIZ-KNOX-[***version***].tgz on
theCloudera archive site and download it to the node where the Knox service is
running.
This file is co-located with the Cloudera Data Visualization CSD on the
archive site and must be manually downloaded to each Knox host.
For example, to
download DATAVIZ-KNOX-8.0.4-b47.p1.67141340.tgz to
/tmp, run the following
command:
cd /tmp;
wget https://archive.cloudera.com/p/cdv/8.0.4/redhat8/yum/DATAVIZ-KNOX-8.0.4-b47.p1.67141340.tgz
SSH to the Knox node.
ssh [***knox-node***]
Replace [***knox-node***] with the hostname or IP address of
your Knox node.
Navigate to the temp directory and extract the archive to the Knox services
directory.
cd /tmp
tar xzf /tmp/DATAVIZ-KNOX-[***version***].tgz -C /opt/cloudera/parcels/CDH/lib/knox/data/services
Replace [***version***] with the version number of the
DATAVIZ-KNOX archive you downloaded.
Verify that the Cloudera Data Visualization service was extracted
correctly.
ls -la /opt/cloudera/parcels/CDH/lib/knox/data/services | grep dataviz
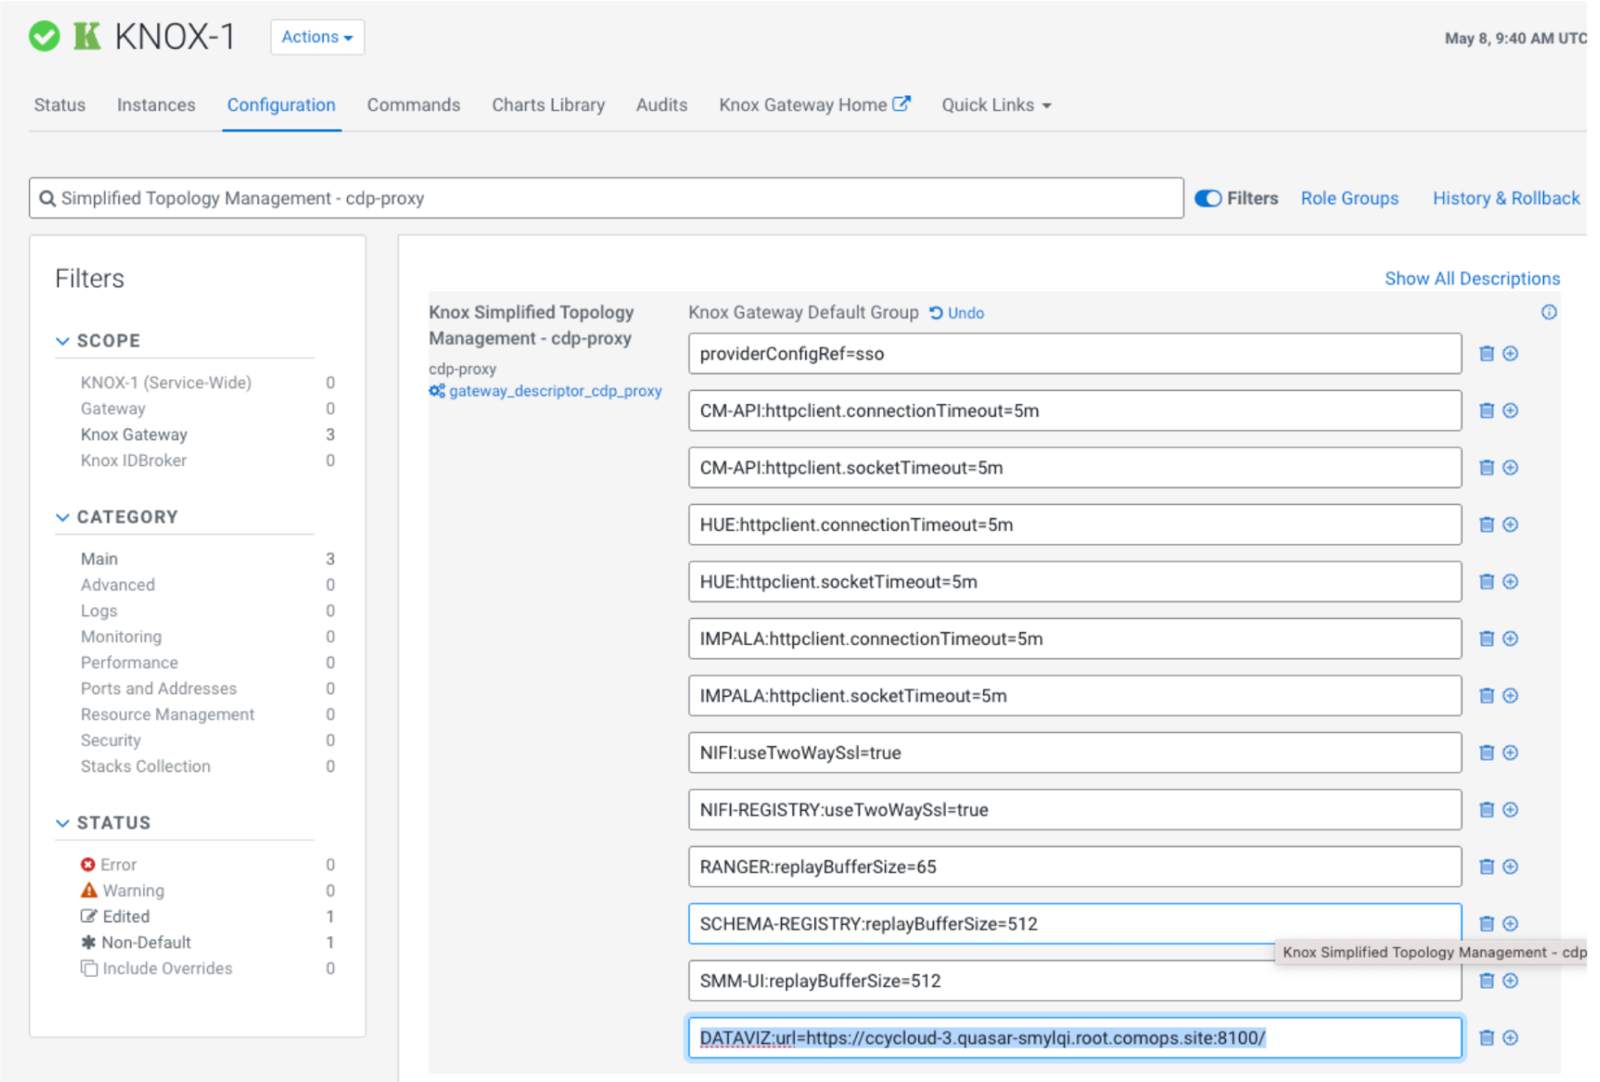
Update the Knox cdp-proxy topology.
In Cloudera Manager, go to Clusters and select the Knox
service.
Click the Configuration tab.
Search for the Knox Simplified Topology Management -
cdp-proxy property.
Edit the cdp-proxy topology by adding a new service entry for Cloudera Data Visualization.
DATAVIZ:url=[***dataviz-service-url***]
In Cloudera Manager, locate Knox > > Simplified Topology Management.
Save the topology changes.
Restart the Knox service.
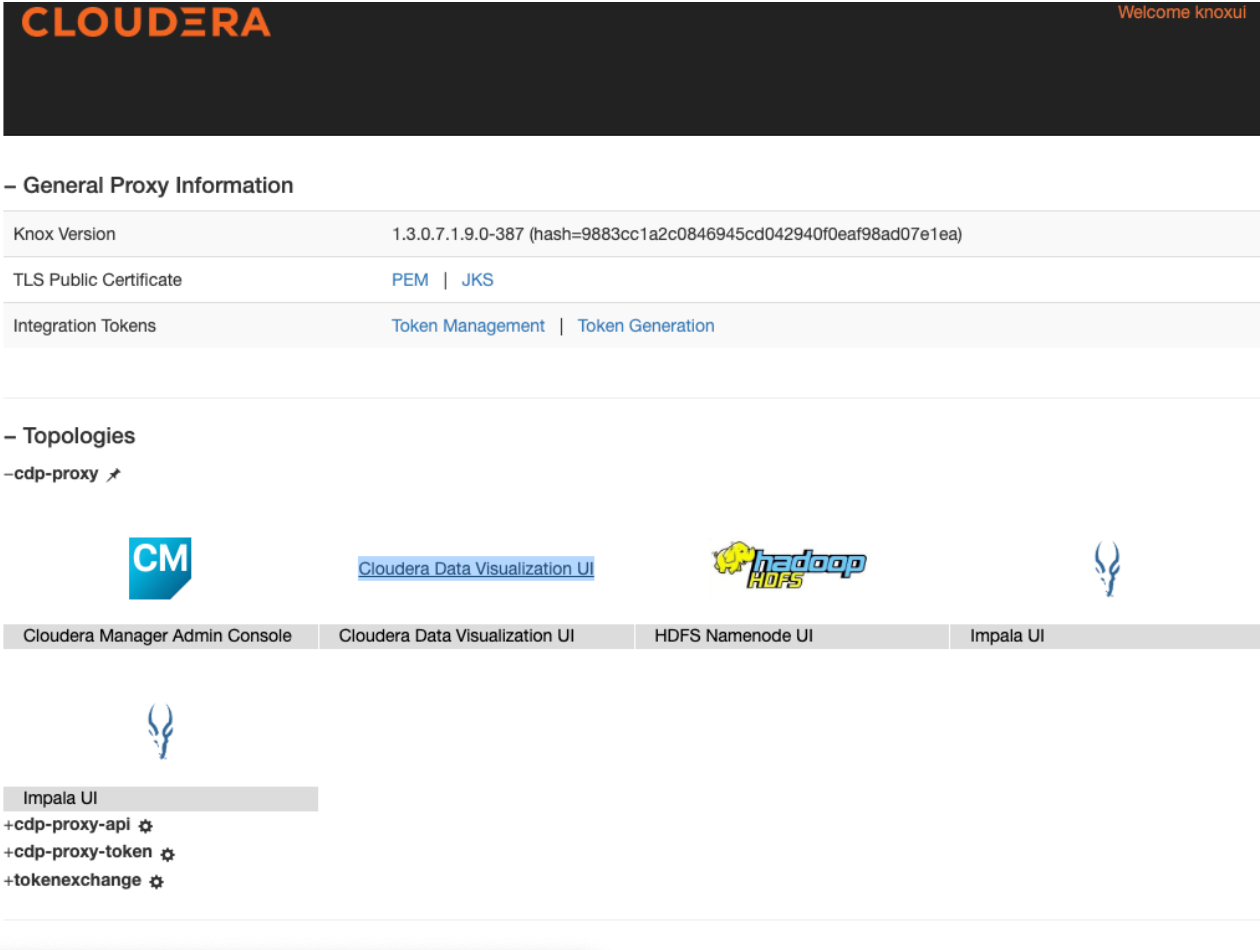
Once configuration is complete, Cloudera Data Visualization will be
accessible through Knox at:
https://[***knox-host**]:[***port***]/gateway/cdp-proxy/dataviz/
Alternatively, you can also access Cloudera Data Visualization using the
Knox Gateway home page.
Access will be granted based on the identity authenticated by Knox.