After creating a data extract, you can modify its configuration, including the refresh
schedule, target table settings, and selected fields.
-
Click DATA on the main navigation bar.
The Data view opens, displaying the
Datasets tab by default.
-
Click Data Extracts.
The
Data Extracts view is displayed, showing all data extracts
defined in the
Cloudera Data Visualization instance.

-
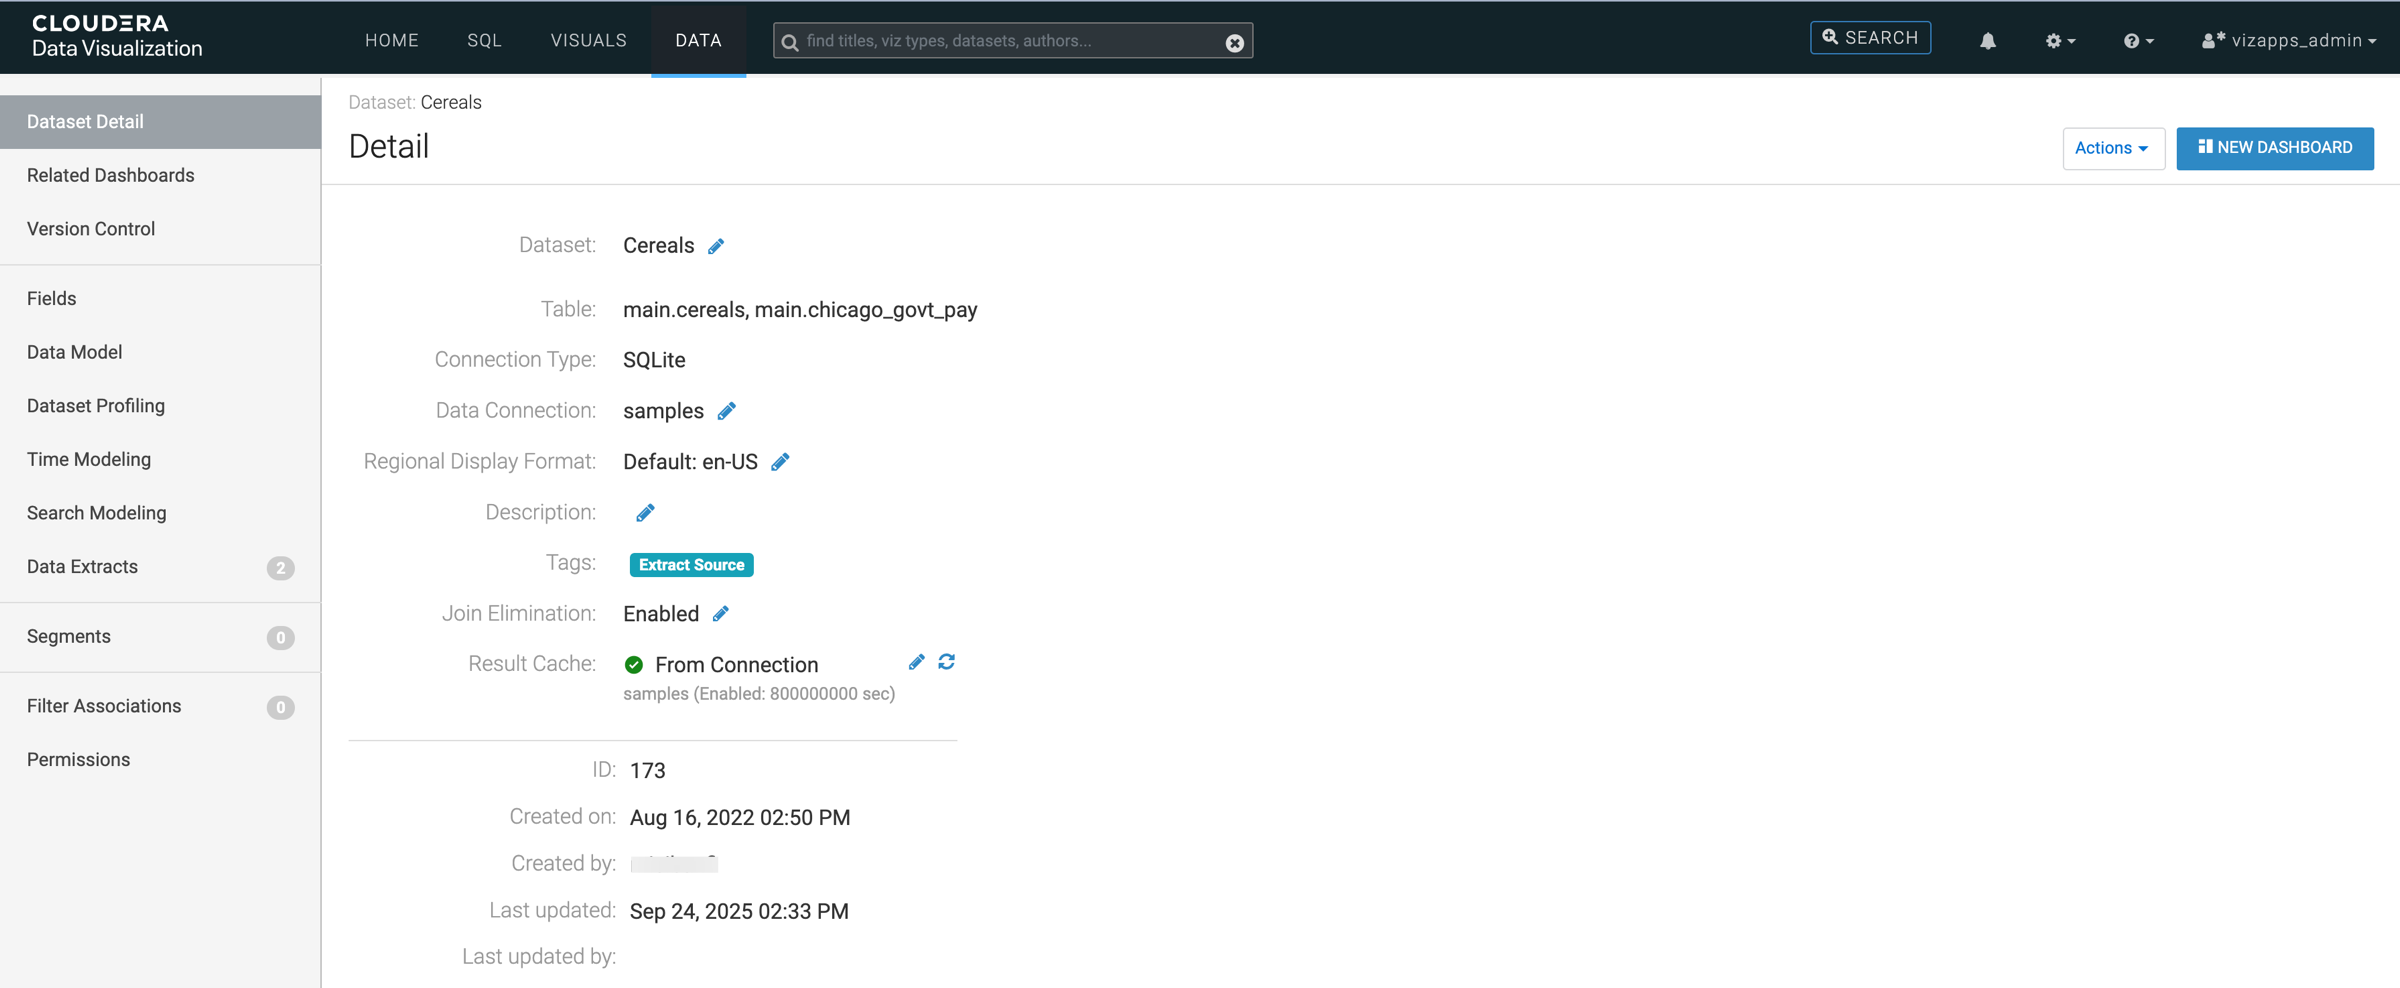
Locate the data extract you want to edit and click the source dataset name.
The
Dataset Detail view is displayed.
-
Click Data Extracts in the left navigation panel.
The
Dataset Detail view is displayed, showing the data extracts
defined on the selected dataset.

-
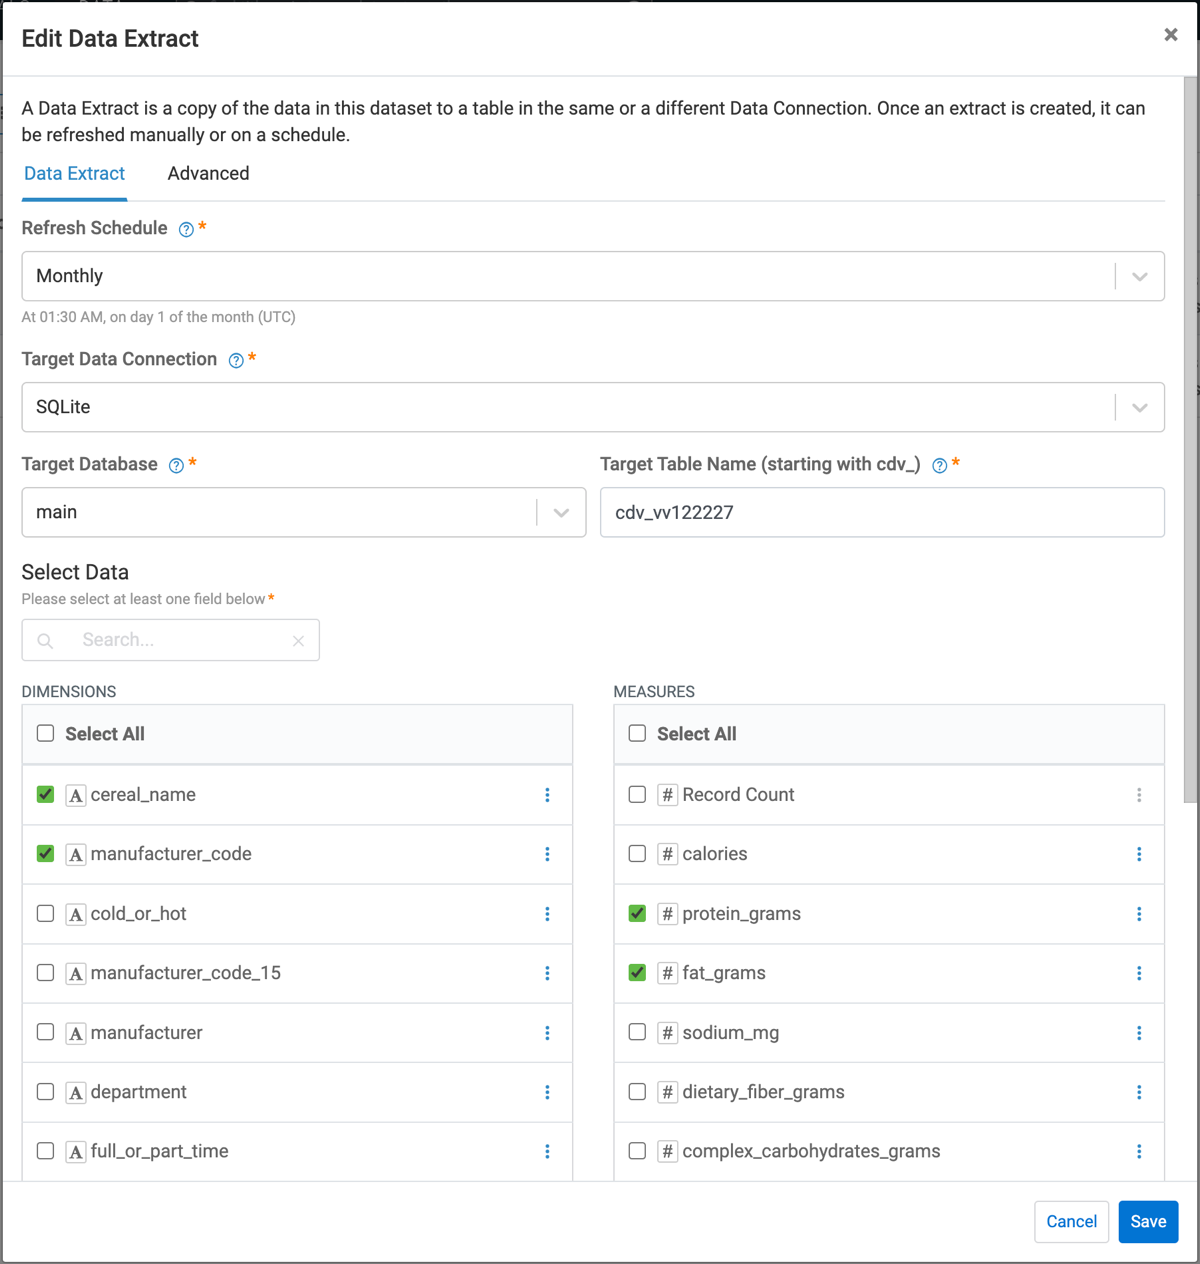
Locate the data extract you want to edit and click EDIT at the
end of the extract row.
The
Edit Data Extract modal opens.
-
Update any of the available fields as needed.
-
- Refresh schedule
- You can modify the data extract’s refresh schedule.
-
- Target data connection
- You can change the connection used by the extract.
-
- Target database
- You can change the database used by the extract.
-
- Target table name
- You can update the name of the table where the extract is stored.
-
- Data from imension and measure columns
- You can add or remove fields included in the extract.
- Optional:
If you want to send an email confirmation about the extract's status, switch to the
Advanced tab of the Edit Data Extract
modal.
In the Advanced tab, you can:
-
Select what event(s) you want to be notified about - success, failure or
both.
-
Add one or more email addresses as recipients.
-
Edit the subject line of the notification email.
-
Enable or disable query rewrites.
-
Click Save to finalize your changes.