You learn how to use the dw restore-cluster command, which you can
use either to pass the environment's Cloudera resource name (crn) or to pass the identifier
of an activated environment.
Passing the Cloudera resource name (crn) will activate the cluster from the backup
file and restore all the entities and database contents.
Passing an activated
environment resource name will restore all the entities and database contents to the
running environment. Passing the environment identifier is useful when you need to
change activation parameters, but requires manual reactivation.
In the steps below,
use dw restore-cluster to pass the Cloudera resource name (crn)
to activate the cluster.
You have a public Azure cluster and your Azure cluster must run
version 1.6.3-b319 (released May 5, 2023) or later.
You cannot automatically activate a public Azure cluster that runs
version 1.6.2-b197 (released Feb 13, 2023) or earlier.
You have a private Azure cluster and your Azure cluster must run
version 1.9.1-b233 (released July 26, 2024) or later.
You cannot automatically activate a private Azure cluster that runs
version 1.8.7-b37 (released March 26, 2024) or earlier.
Create a CLI skeleton file to serve the base file for the restore command.
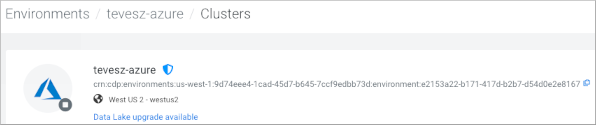
For example, replace your environment resource name placeholder <your cluster name>
with the environment resource name of the newly activated cluster (for example
env-npk886 shown step 3 of Reactivating the environment).
{
    "clusterId": "crn:cdp:environments:us-west-1:98765432-abcd-45d7-b645-7ccf9edbb73d:environment:00000000-7bf2-4aeb-af71-f2bf2c038588",
    "operationId": "62408134-3d8c-46e8-a914-0f427fc3b1b1",
    "action": "Create",
    "message": "the cluster will be created",
    "dbcRestorePlans": [
        {
            "ref": "test-aws-dl-default",
            "id": "warehouse-1692719478-xrm4",
            "action": "Create",
            "message": "the SDX-type DB Catalog will be created based on the data referenced in the backup as test-aws-dl-default"
        }
    ],
    "hueRestorePlans": [
        {
            "ref": "test-aws-dl-default",
            "id": "warehouse-1692719478-xrm4",
            "action": "LoadOrOverwrite",
            "message": "Hue restore is started for warehouse-1692719478-xrm4 DB Catalog, referenced in the backup data as test-aws-dl-default. Restore will overwrite Hue database with the backup if it isn't empty."
        }
    ],
    "hiveRestorePlans": [
        {
            "ref": "test-hive",
            "action": "Create",
            "message": "the test-hive Hive Virtual Warehouse will be created and attached to the warehouse-1692719478-xrm4 DB Catalog"
        }
    ],
    "impalaRestorePlans": [
        {
            "ref": "test-impala",
            "action": "Create",
            "message": "the test-impala Impala Virtual Warehouse will be created and attached to the warehouse-1692719478-xrm4 DB Catalog"
        }
    ],
    "vizRestorePlans": [
        {
            "ref": "test-viz",
            "action": "Create",
            "message": "the test-viz Data Visualization will be created"
        }
    ]
    }
After several minutes the environment will be activated, the Virtual
Warehouses will be created in the new cluster and attached to the Database
Catalog. The Virtual Warehouse and Data Visualization ids will be changed.
The Data Visualization database will be recovered. However, because
this is a new deployment, the recovered connections will be broken.