Workarounds for Cloudera Data Visualization with Hive and Impala
Follow the guidelines to start Cloudera Data Visualization on premises with Hive and Impala Virtual Warehouses and Hive and Impala Base.
Starting Cloudera Data Visualization on premises for Hive and Impala Virtual Warehouses
For starting Cloudera Data Visualization
on premises for Hive and Impala Virtual Warehouses,
switch to LDAP Authentication mode and add your username and
password in the Edit Data Connection page:
- Select the required connection in the left navigation and click
Edit Connection.
Figure 1. Selecting the required connection for editing 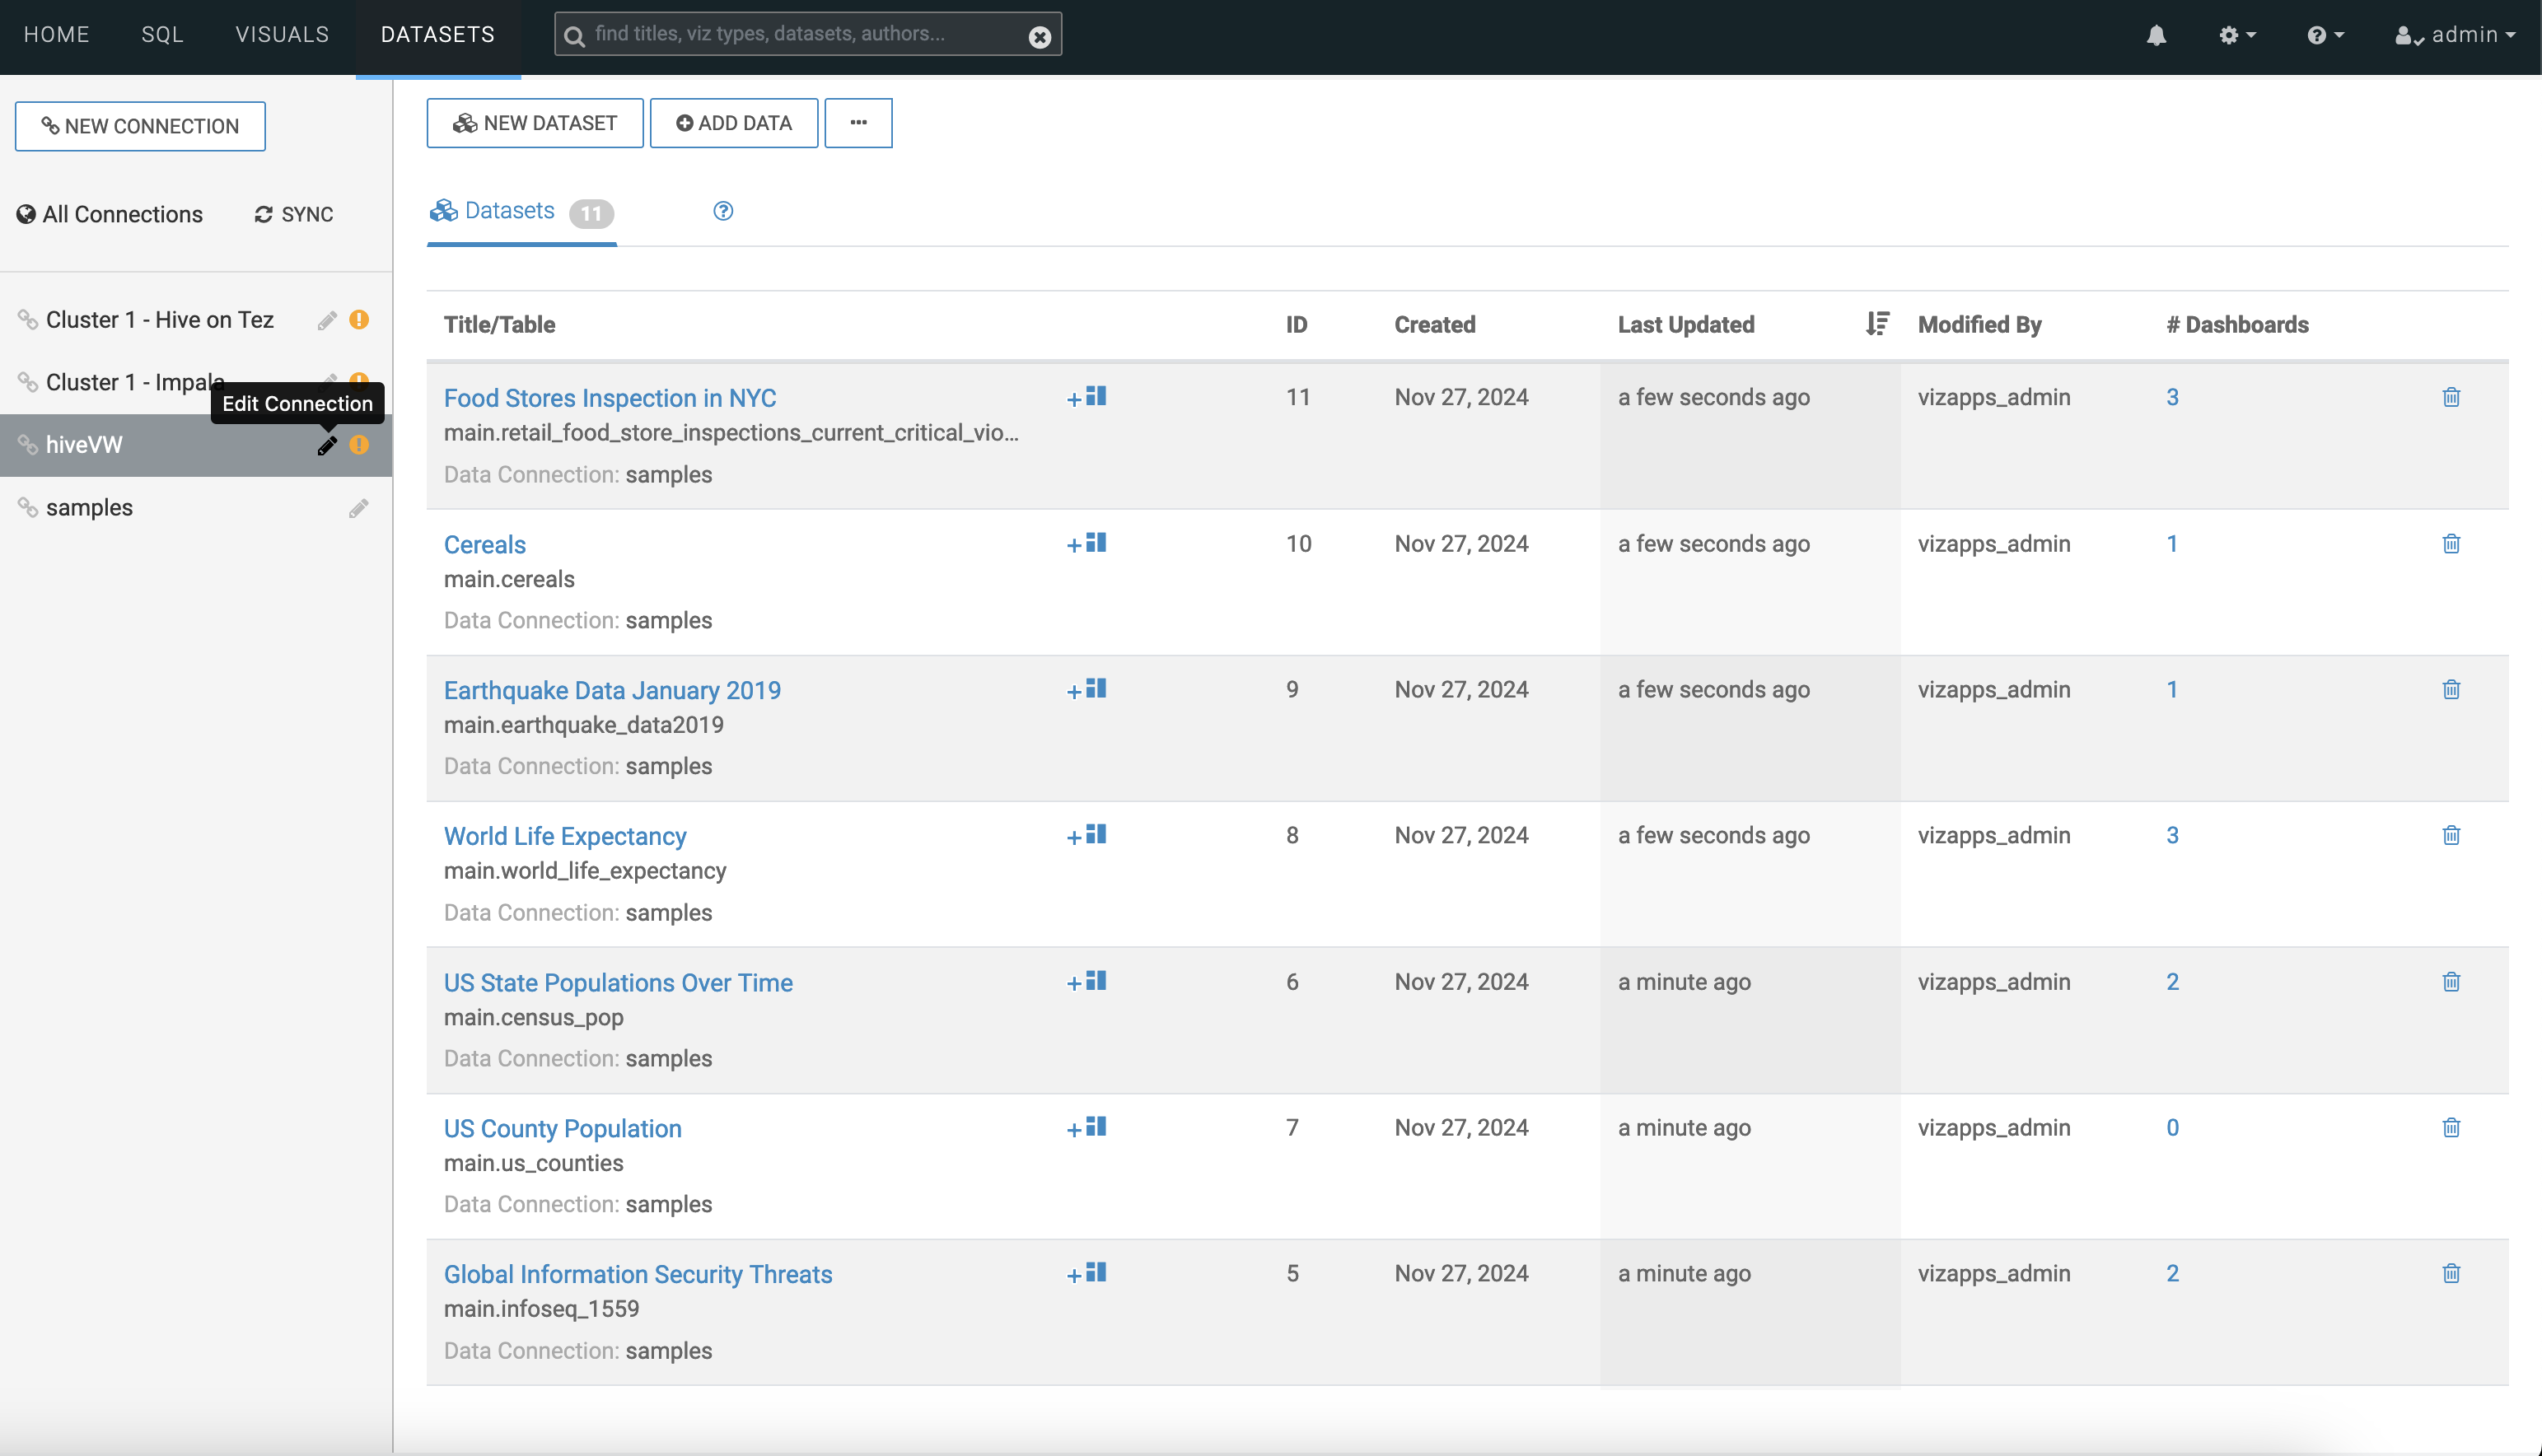
- Provide your username and password.
Figure 2. Provide username and password 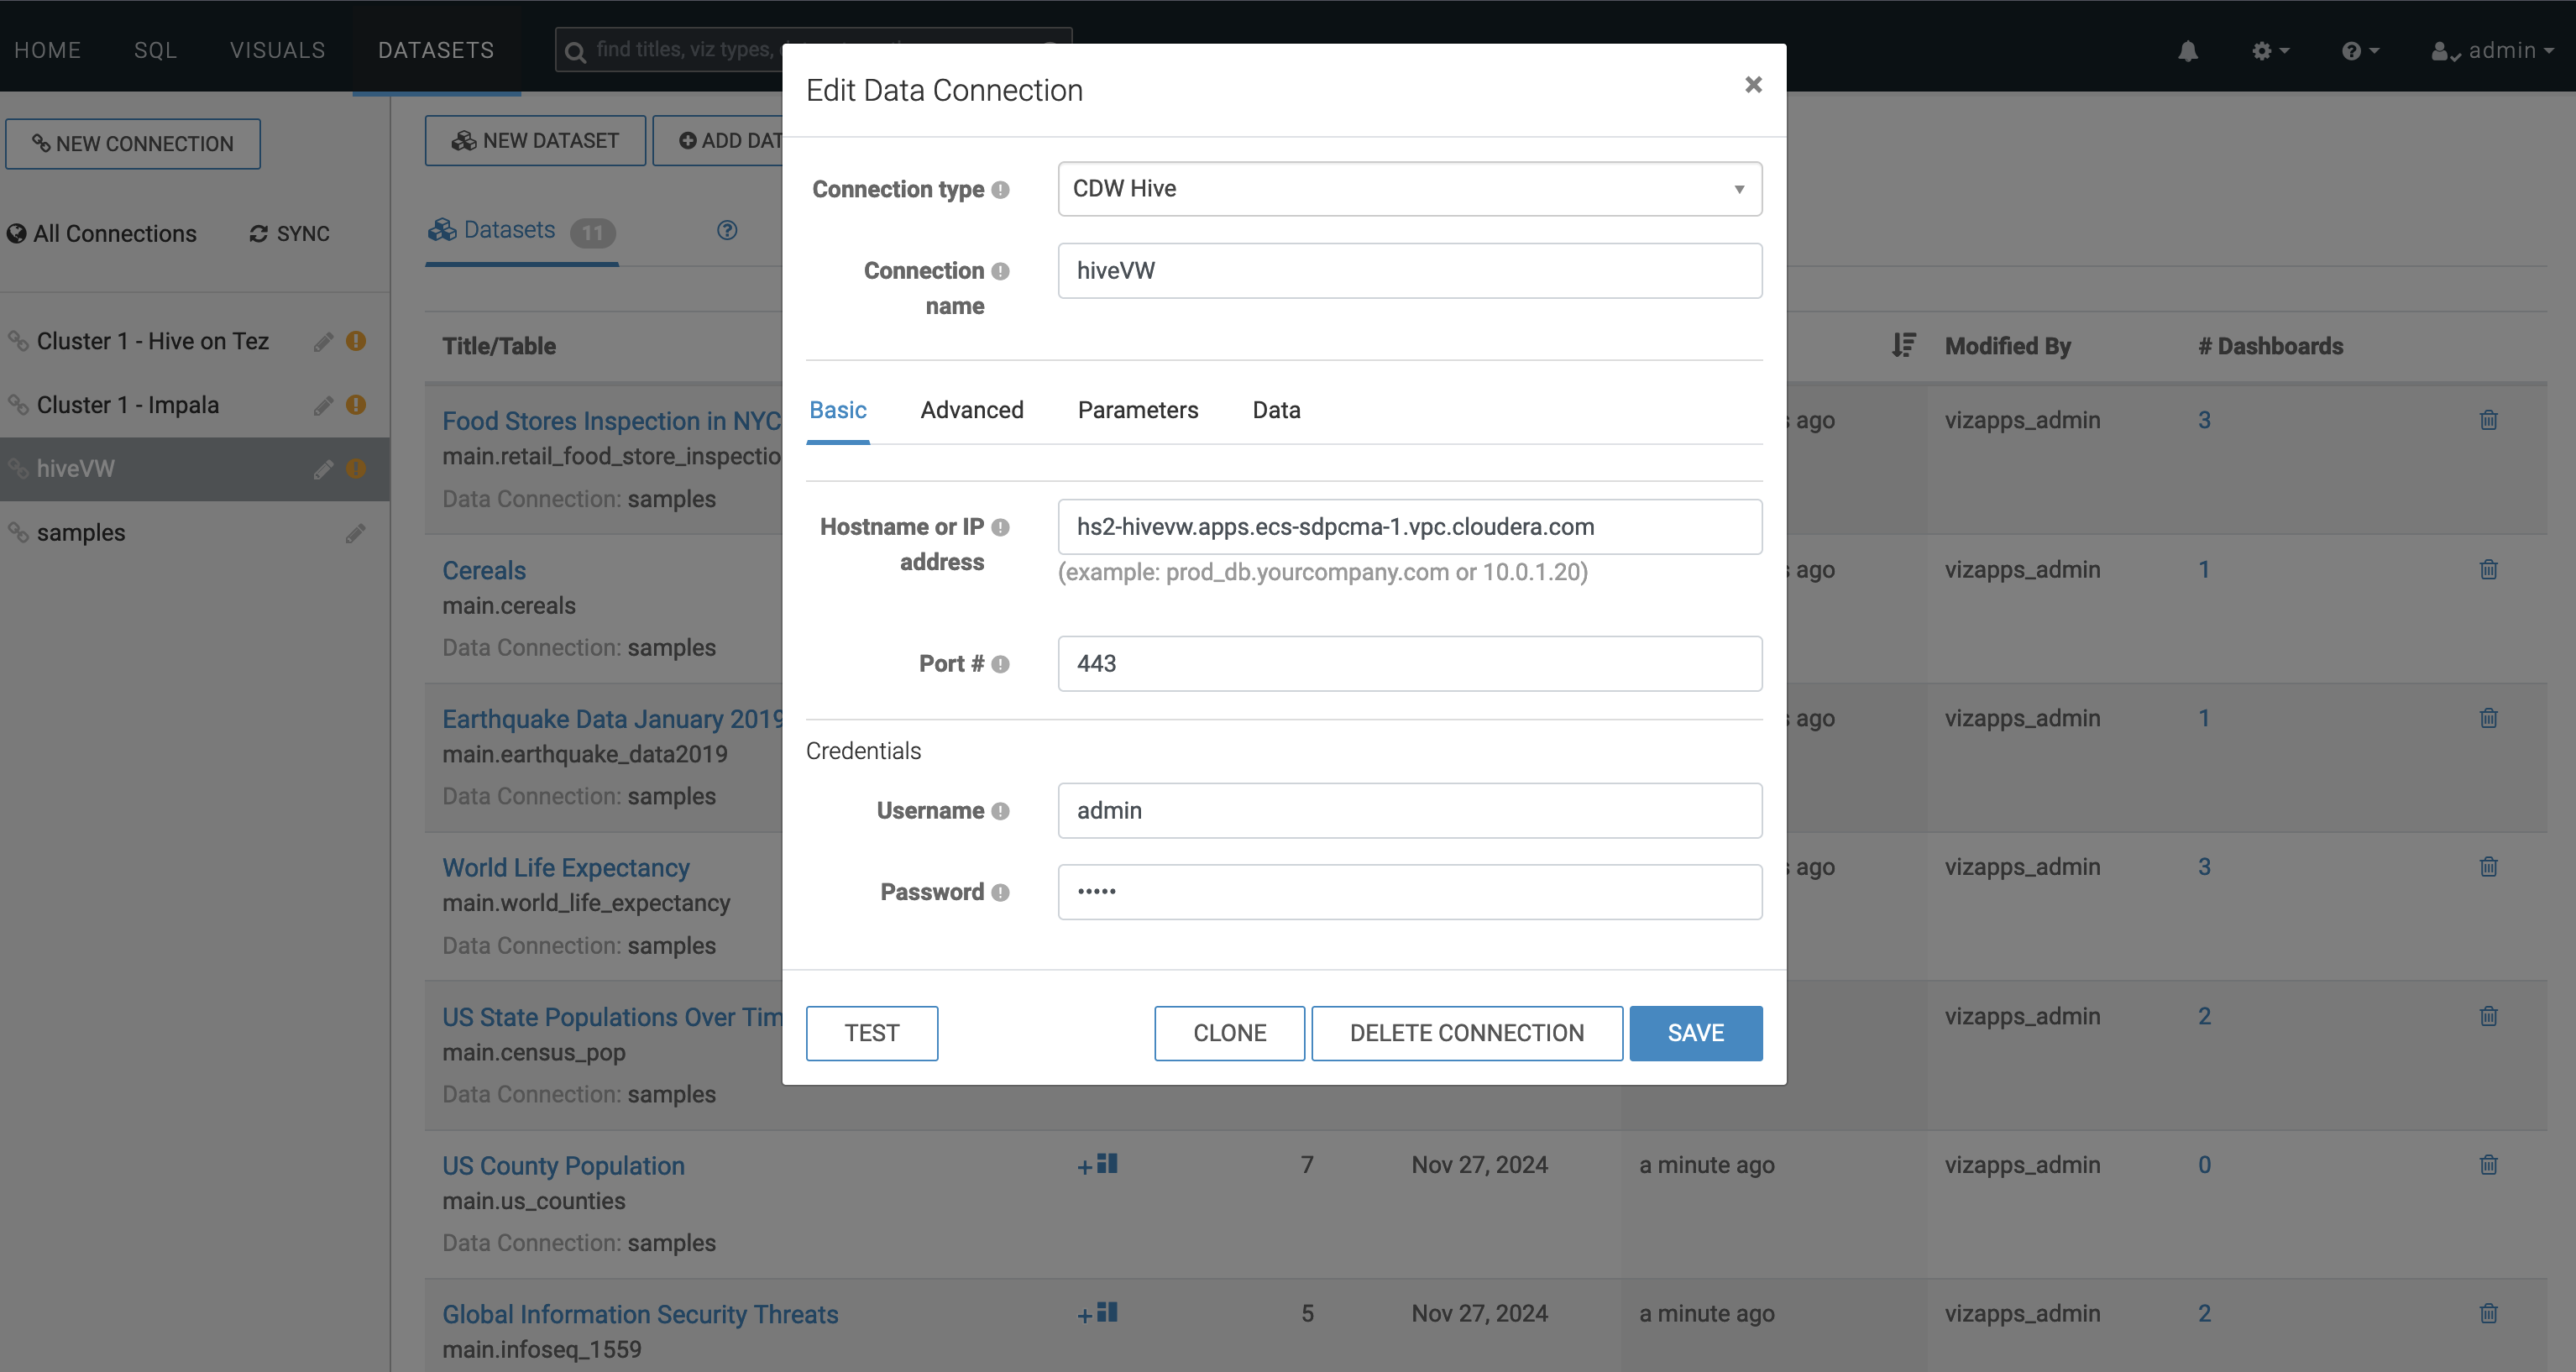
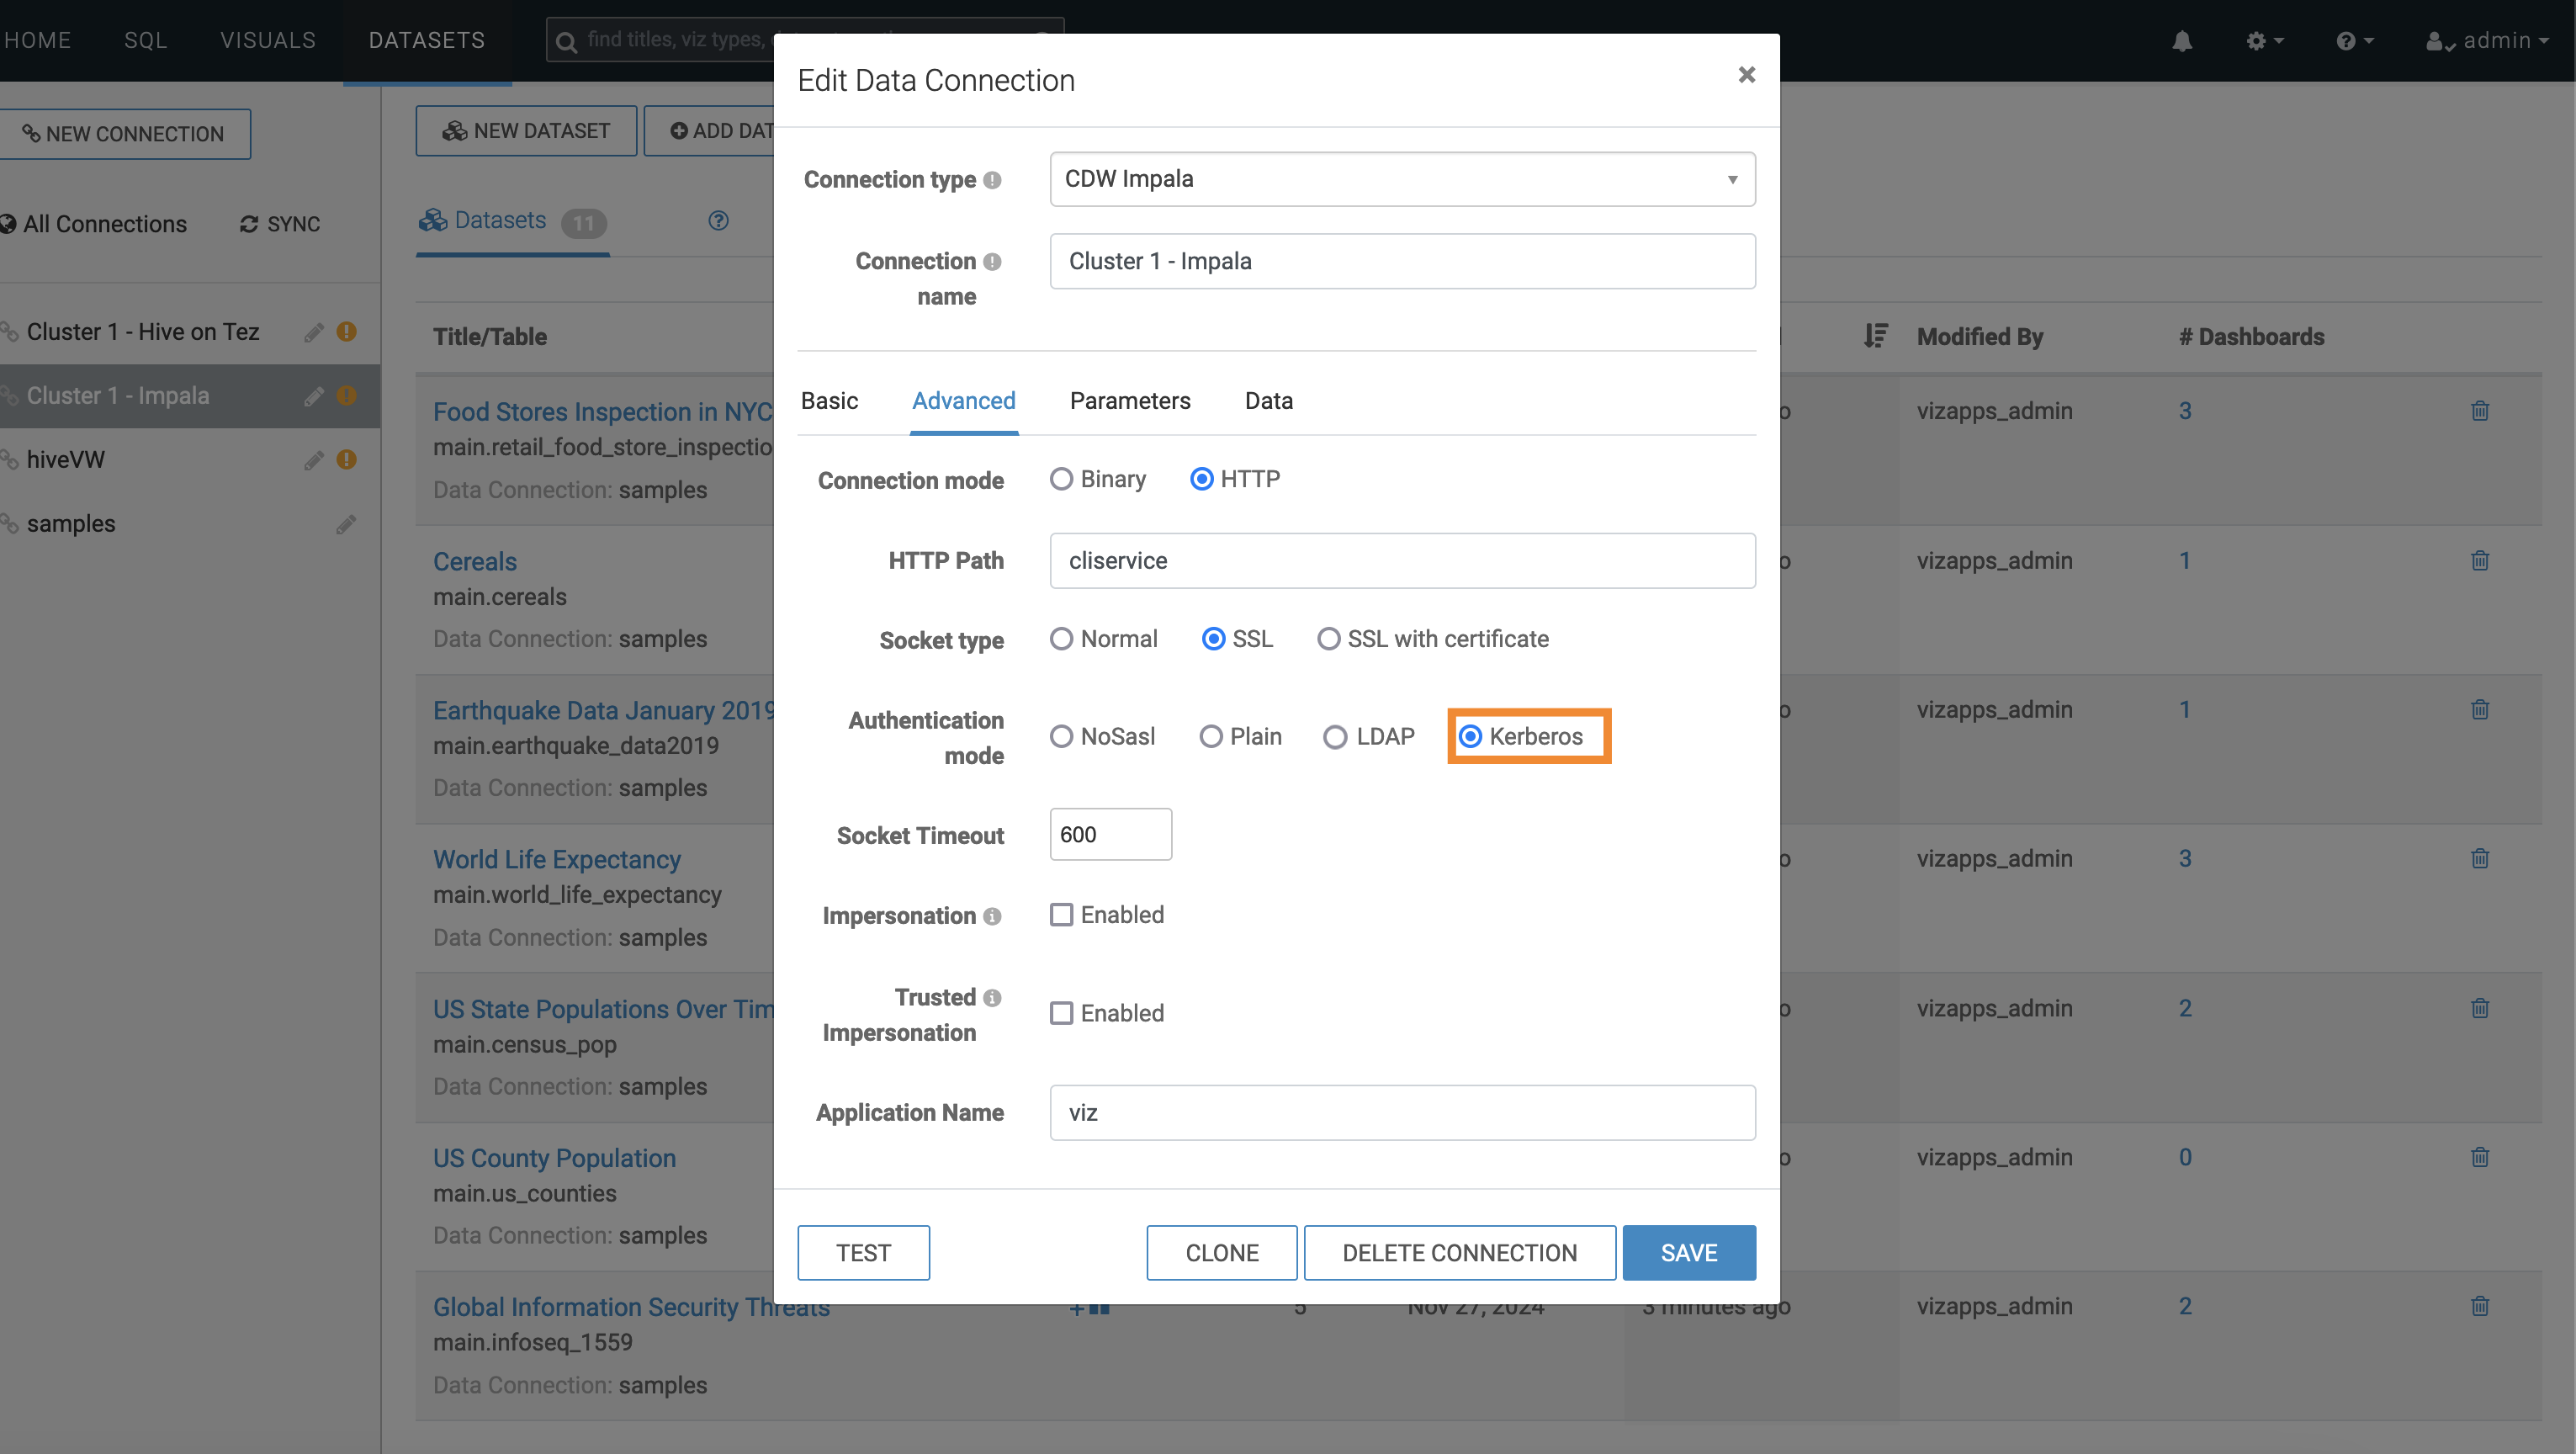
Starting Cloudera Data Visualization on premises for Hive and Impala
For starting Cloudera Data Visualization
on premises for Hive and Impala switch to Kerberos
Authentication mode in the Edit Data
Connection page:
- Select the required connection in the left navigation and click
Edit Connection.
Figure 3. Selecting the required connection for editing 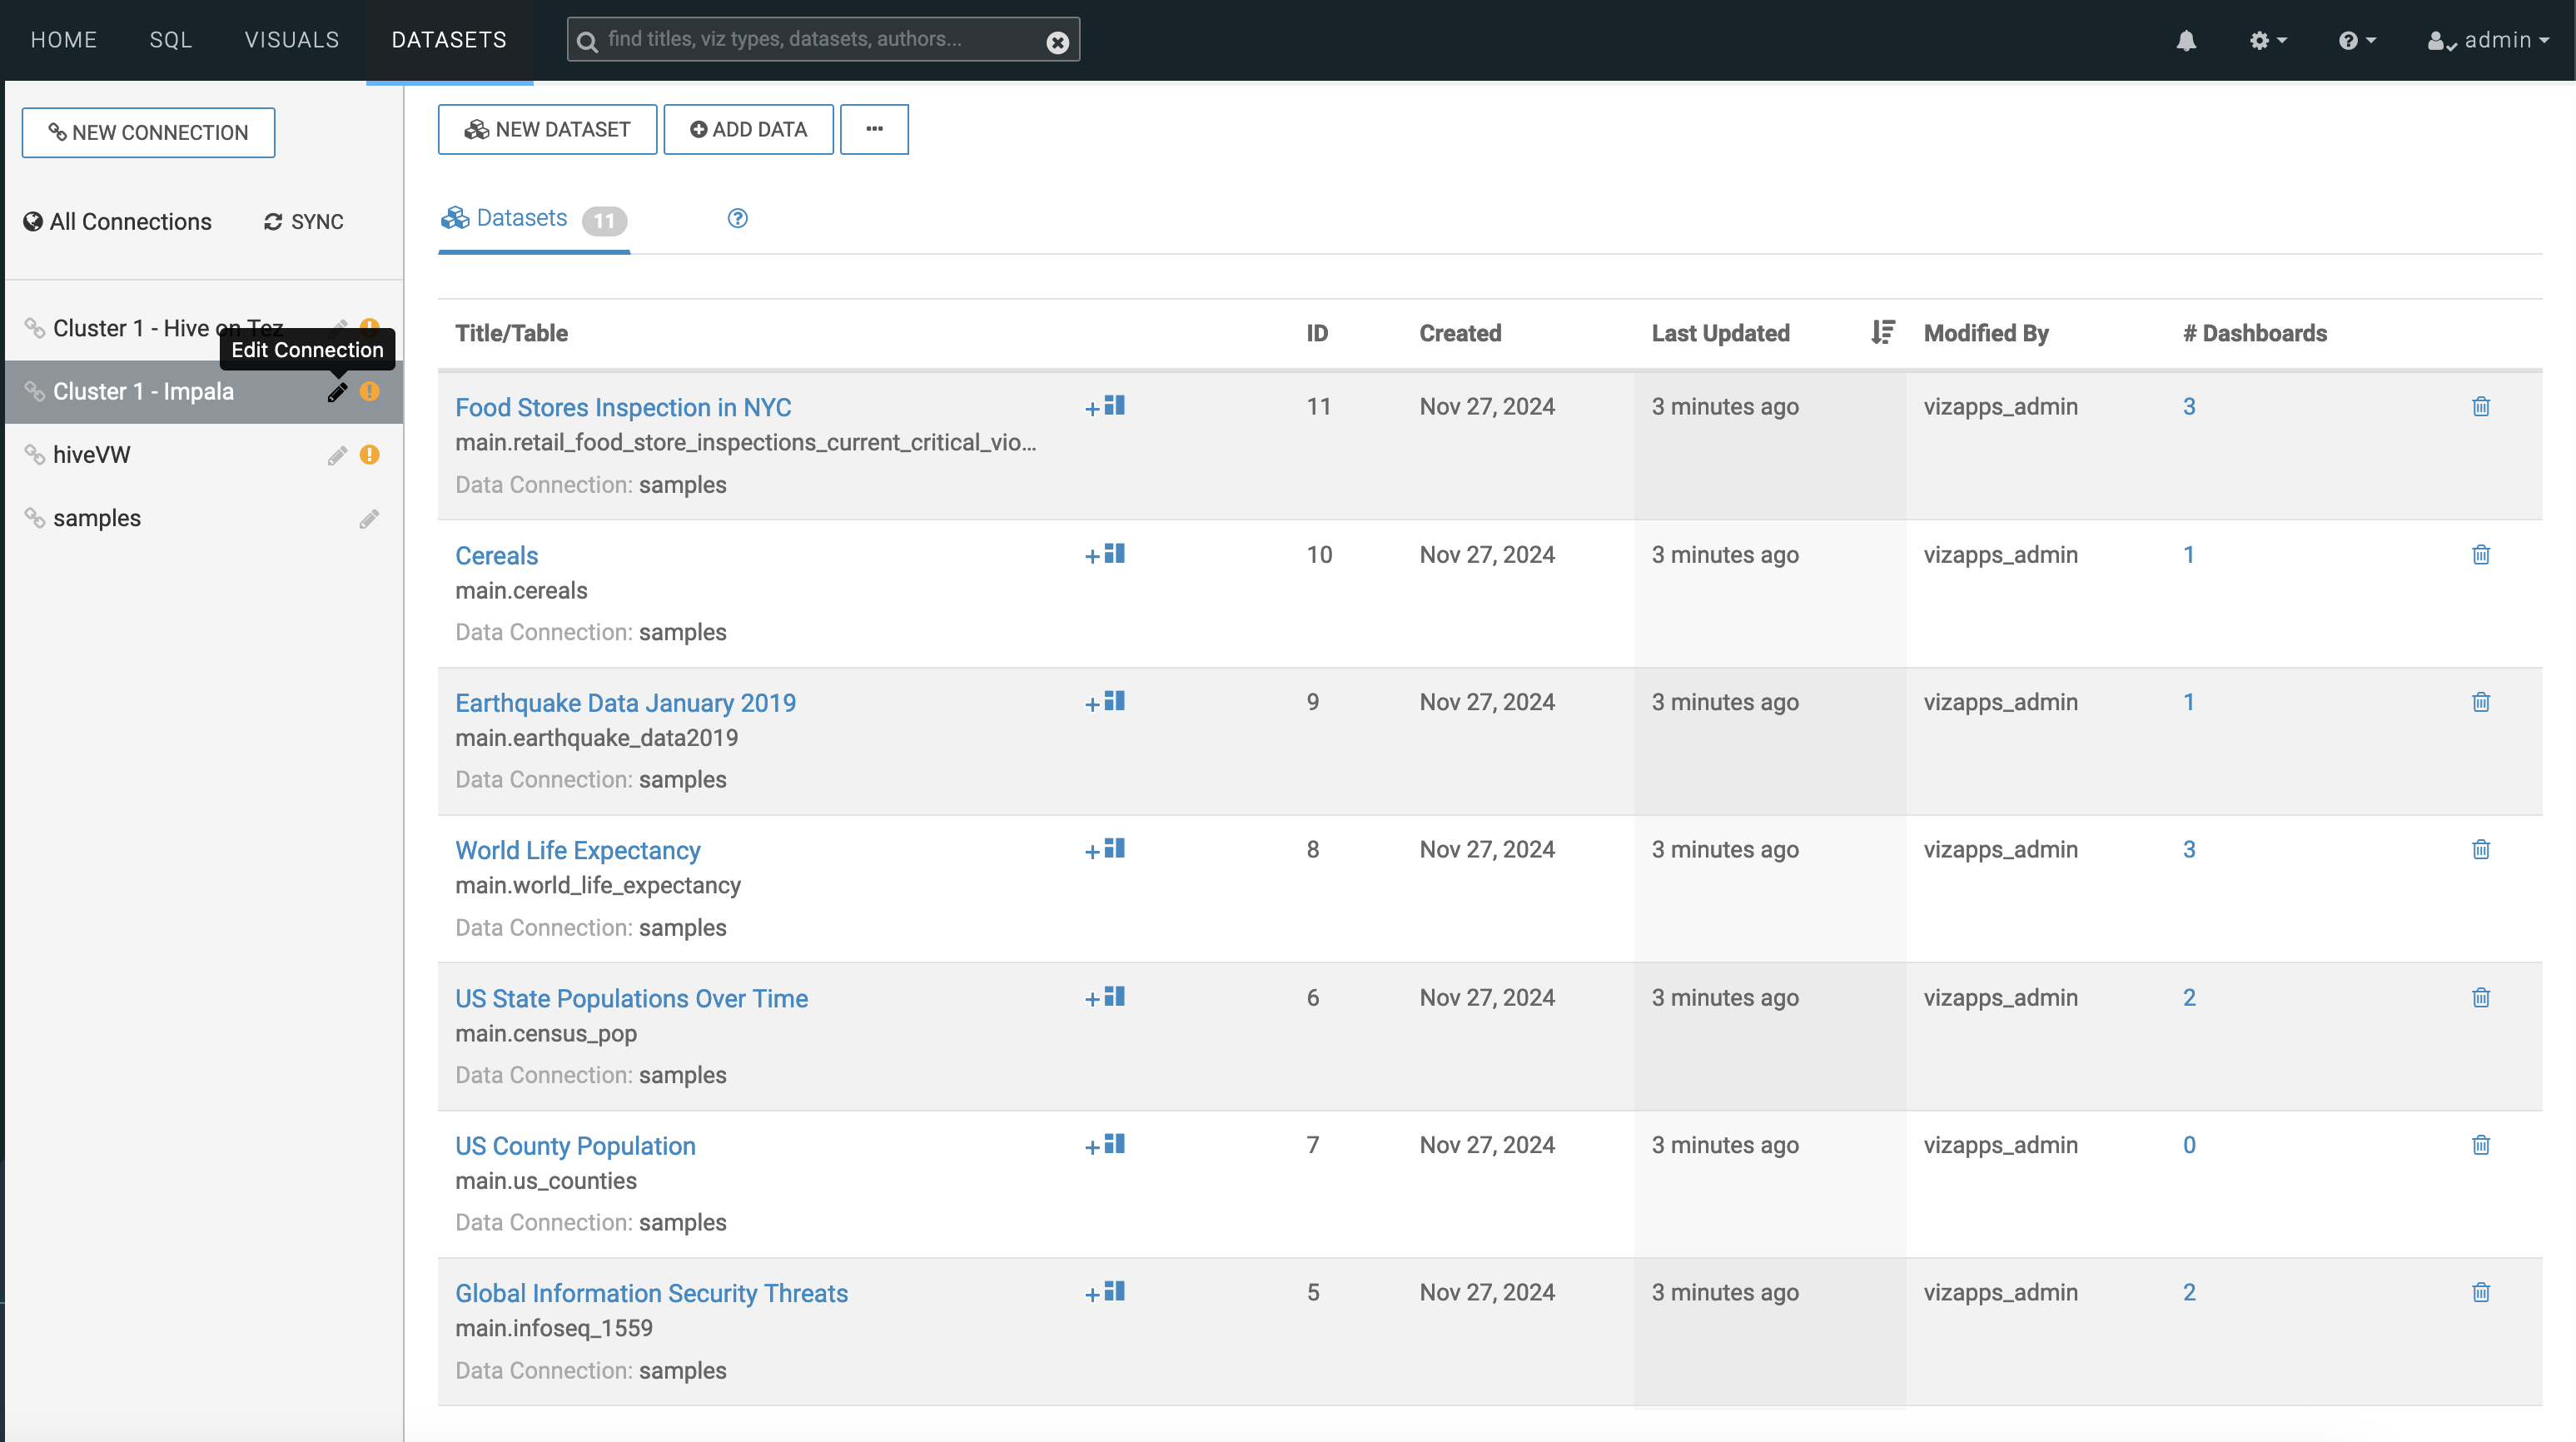
- Select the Advanced tab in the Edit Data
Connection window.
Figure 4. Selecting the Advanced tab 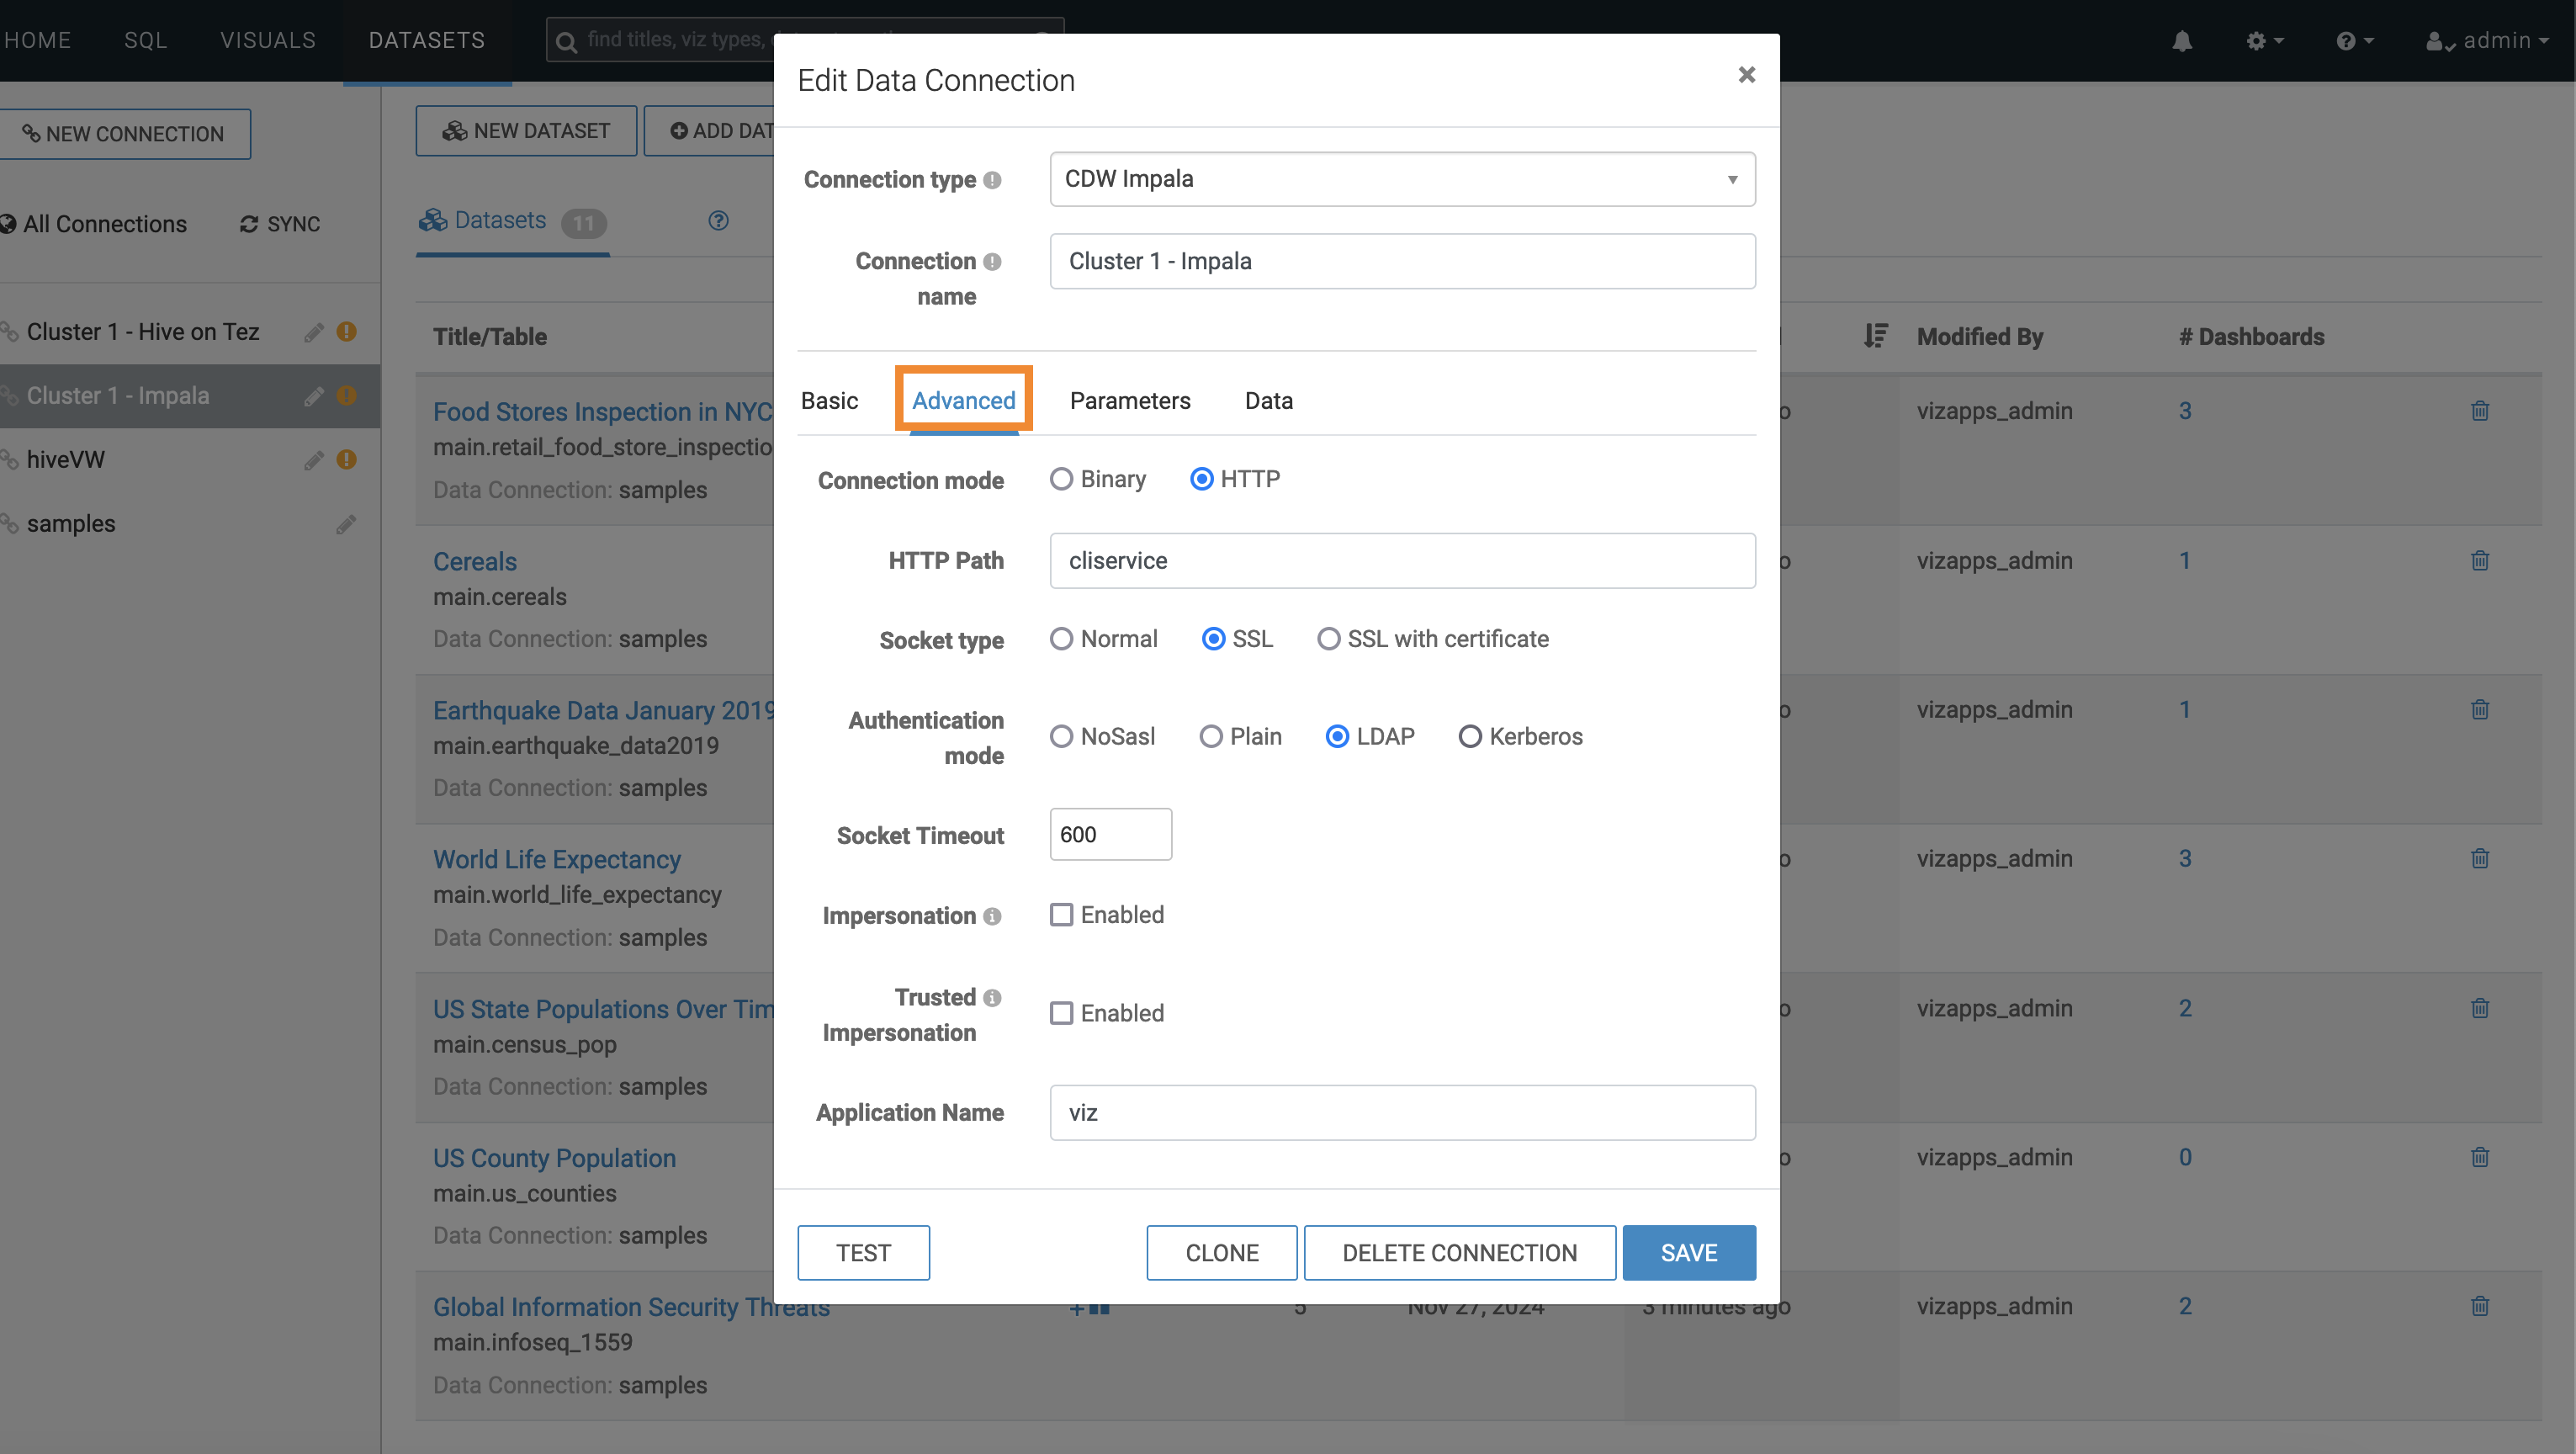
- Select Kerberos as Authentication
mode in the Edit Data Connection
window.
Figure 5. Select Kerberos for authentication