Importing Model to Cloudera AI Registry in air-gapped environment
You can import the Hugging Face models listed on the Model Hub page into your Cloudera AI Registry.
Download the following script to enable downloading Model repositories from the Hugging Face or NVIDIA NGC catalog and uploading Models to on premises storage providers.
Download the script from here: https://raw.githubusercontent.com/cloudera/Model-Hub/refs/heads/main/airgap-scripts/pvc/1.5.5/import_to_airgap.py
The script has the following parameters:
| Parameter | Value | Description |
|---|---|---|
-do |
Activates the download mod | |
-rt |
hf or ngc |
Repository type: use hf for Hugging Face. Use
ngc for NVIDIA NGC catalog. |
-t |
hf_hVQbUsafafafafadfadfsNAynASXJoTCWHAEkj |
Hugging Face API token for authentication (required for private or gated Models) The Hugging Face token ( Models or Models that require authentication. For more information about tokens, see:https://huggingface.co/docs/hub/en/security-tokens |
-p |
$PWD/models |
Local destination path where Model files are downloaded (uses the current working directory) |
-ri |
Nvidia/Llama-3.1-Nemotron-70B-Instruct-HF |
Repository ID for the Model on Hugging Face |
-
Click Import on the model you want to import.
The Import Model page displays.
Figure 1. Import model 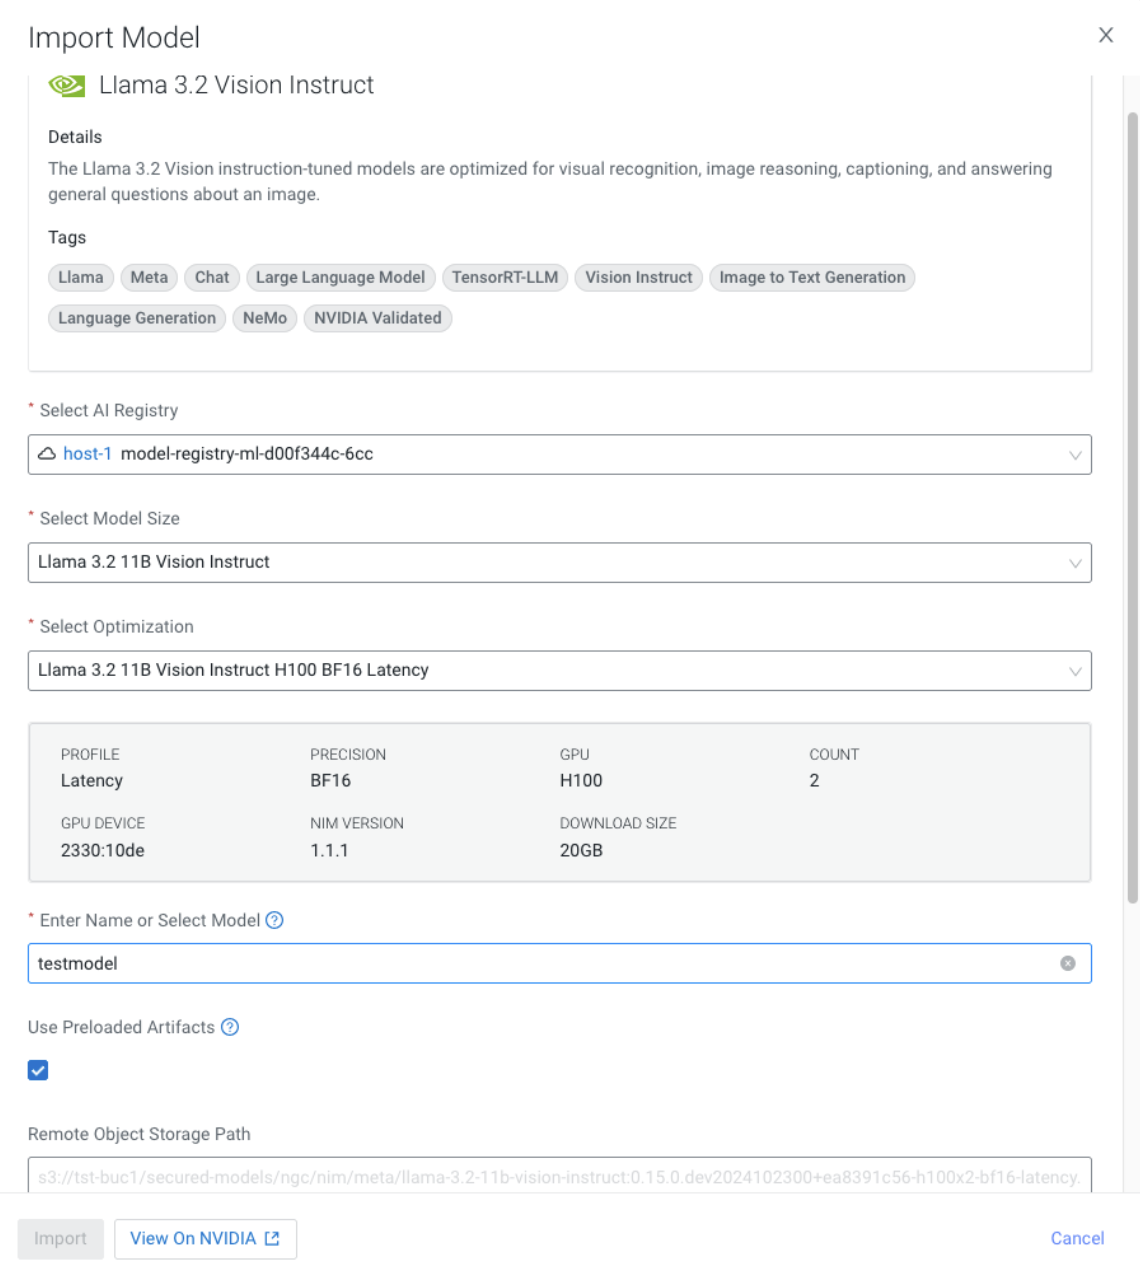
You can click Cloudera AI Registry in the left navigation menu to view the newly imported Model.