Use case: Portfolio Advisory Workflow
Learn about an example Portfolio Advisory Workflow. You act as a portfolio management and optimization manager who assigns tasks to colleagues. You must format the arguments for "task," "context," and "coworker" as strings. The goal is to delegate the user request and report the run details to the user.
- Click the Create button in the Agentic Workflows window. The Create New Workflows page displays.
- Enter a Workflow Name and click the Create Workflow button. The draft workflow is created, and the Edit Workflow page displays.
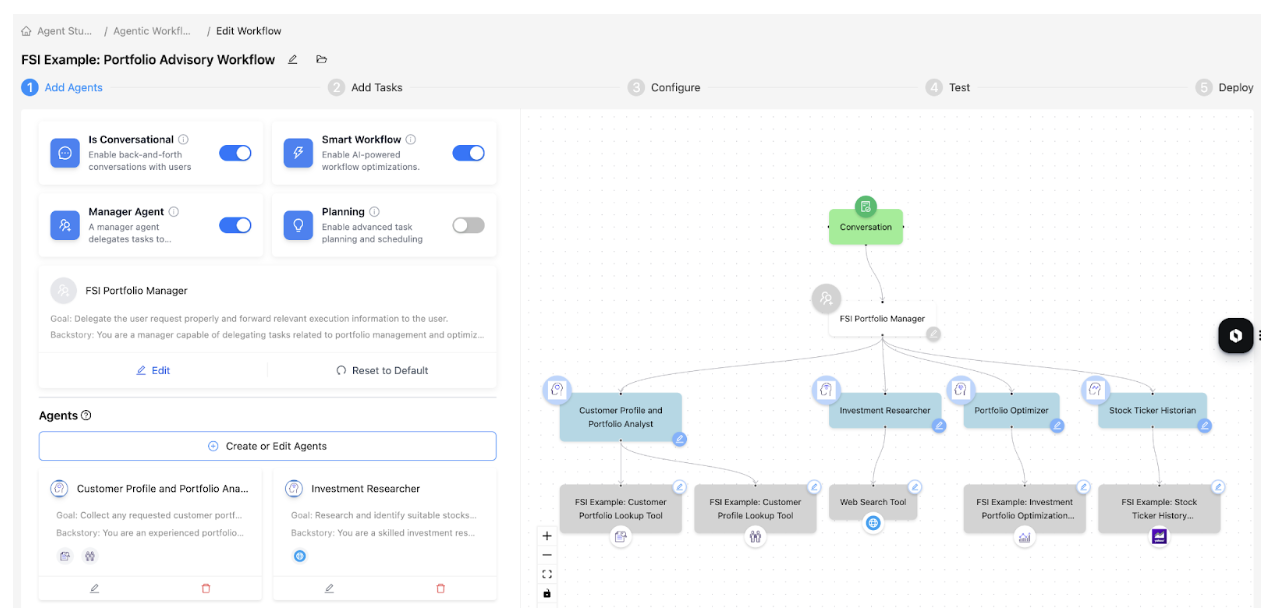
- Select the Is Conversational, Smart Workflow, Manager Agent, and Planning toggles as required.
-
Click the Create or Edit Agents button. The Create or Edit Agents page
displays.
- Manually enter the necessary details or use the Cloudera Generate with AI feature. If using the Generate with AI feature, in the input box, describe the Agent function, then click the Apply the Suggestions option.
- Select the Artifacts Files toggle and add the recommended tools.
- Optional: Add an MCP server to the Agent by clicking the Add MCP Server button, if required.
- Click the Create Agent button
- The Workflow chart displays.
-
You can further edit your tools by clicking the Edit button on the tool.
- You can test your tool by entering the tool parameters in the Playground tab.
- Make your changes and click the Save tool button.
-
Once all the agents are created, click the Save & Next button on the Add
Agents tab.
- On the Add Tasks tab, the tasks are already listed, as this is a conversational workflow. Click the Save & Next button to proceed to the next step in the workflow configuration.
-
On the Configure tab, set the following parameters:
-
Set the Max New Tokens parameter to 4096. This value represents the maximum
number of new tokens the agents and the manager agent can generate during LLM
calls.
- Set the Temperature parameter to 0.1. The temperature controls the variability or creativity in the agent responses generated by the LLM. A higher temperature value results in more diverse and creative responses. A lower temperature value results in less varied and more deterministic responses.
- Enter your user key in the user_key_1 field of the Sample Tools parameter.
- Enter your Serper API key in the serper_api_key field of the Web Search Tool parameter.
- Click the Save and Next button.
-
Set the Max New Tokens parameter to 4096. This value represents the maximum
number of new tokens the agents and the manager agent can generate during LLM
calls.
-
On the Tests tab, perform the following actions:
- Add your Workflow Overview, Key Features, Sample Prompts, Expected Outputs, and Usage Tips in the Capability Guide.
- Upload different artifacts while testing the conversational workflow and then the workflow uses these artifacts as input. All the artifacts that are either uploaded or generated are stored in the artifact directory on the right side panel.
- Enter your prompt and click the Run button to execute the workflow. Because the Smart Workflow feature is enabled, an execution plan is created, and the tasks are further split into sub-tasks and assigned to an Agent.
- The tasks are executed one after the other. The results are displayed.
- Once the test is complete, click the Save & Next button to proceed to the deployment stage.
-
On the Deploy tab, you can perform the following actions:
- Click the Deploy button to initiate the deployment of the workflow. The deployment process typically takes about five to seven minutes to complete.
- Go to the Agentic Workflow homepage to view the deployed workflow
- Click the Save Template button to create a reusable template of the workflow. This template can serve as a reference for future use.
- (Optional) Click the Test button to return to the previous page and retest the workflow.