Uploading Model Repositories for an air-gapped environment
The Model artifacts must be manually transferred, uploaded to the cloud
storage utilized by the Cloudera AI Registry and Cloudera AI Inference service.
Before you begin
You will need to obtain the data lake bucket or container information for your cloud
provider to use as the destination for the model artifacts.
In the Cloudera console, click the Management
Console tile.
Click Environments, then select your AWS
environment.
On the Environment details page, click
Summary.
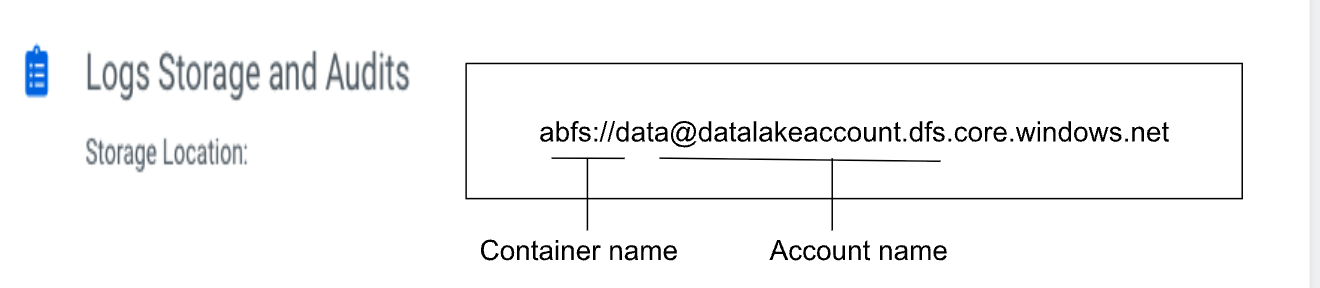
Scroll down to the Logs Storage and Audit field
and copy the storage location.
Omit /logs from the location.
Example: If the log
storage location is
s3://datalakebucket/datalakeenv-dl/logs,
the datalake bucket is
s3://datalakebucket/datalakeenv-dl. The
final destination for the model artifacts will be
s3://datalakebucket/datalakeenv-dl/modelregistry/secured-models.
In the Cloudera console, click the Management
Console tile.
Click Environments, then select your AWS
environment.
On the Environment details page, click
Summary.
Scroll down to the Logs Storage and Audit field
and copy the storage location.Example: If the log storage location is
data@datalakeaccount.dfs.core.windows.net,
the container name is data, and the account
name is datalakeaccount. You will need this
information for the --account and
--container parameters when running the
upload script.
Run the import_to_airgap.py script to upload the model
artifacts to a secured location in your cloud environment.