Creating backup of Control Plane

The Backup and Restore Manager in the CDP Private Cloud Data Services Management Console helps you to back up Kubernetes namespaces and resources on Embedded Container Service (ECS) and OpenShift Container Platform (OCP). This topic shows how to create a backup of the Kubernetes namespaces and resources in the Control Plane.

Ensure that the following prerequisites are complete:
  • You must have the PowerUser role.
  • For OCP, ensure that a VolumeSnapshotClass is installed with a CSI driver that matches the CSI driver for the storage class used.
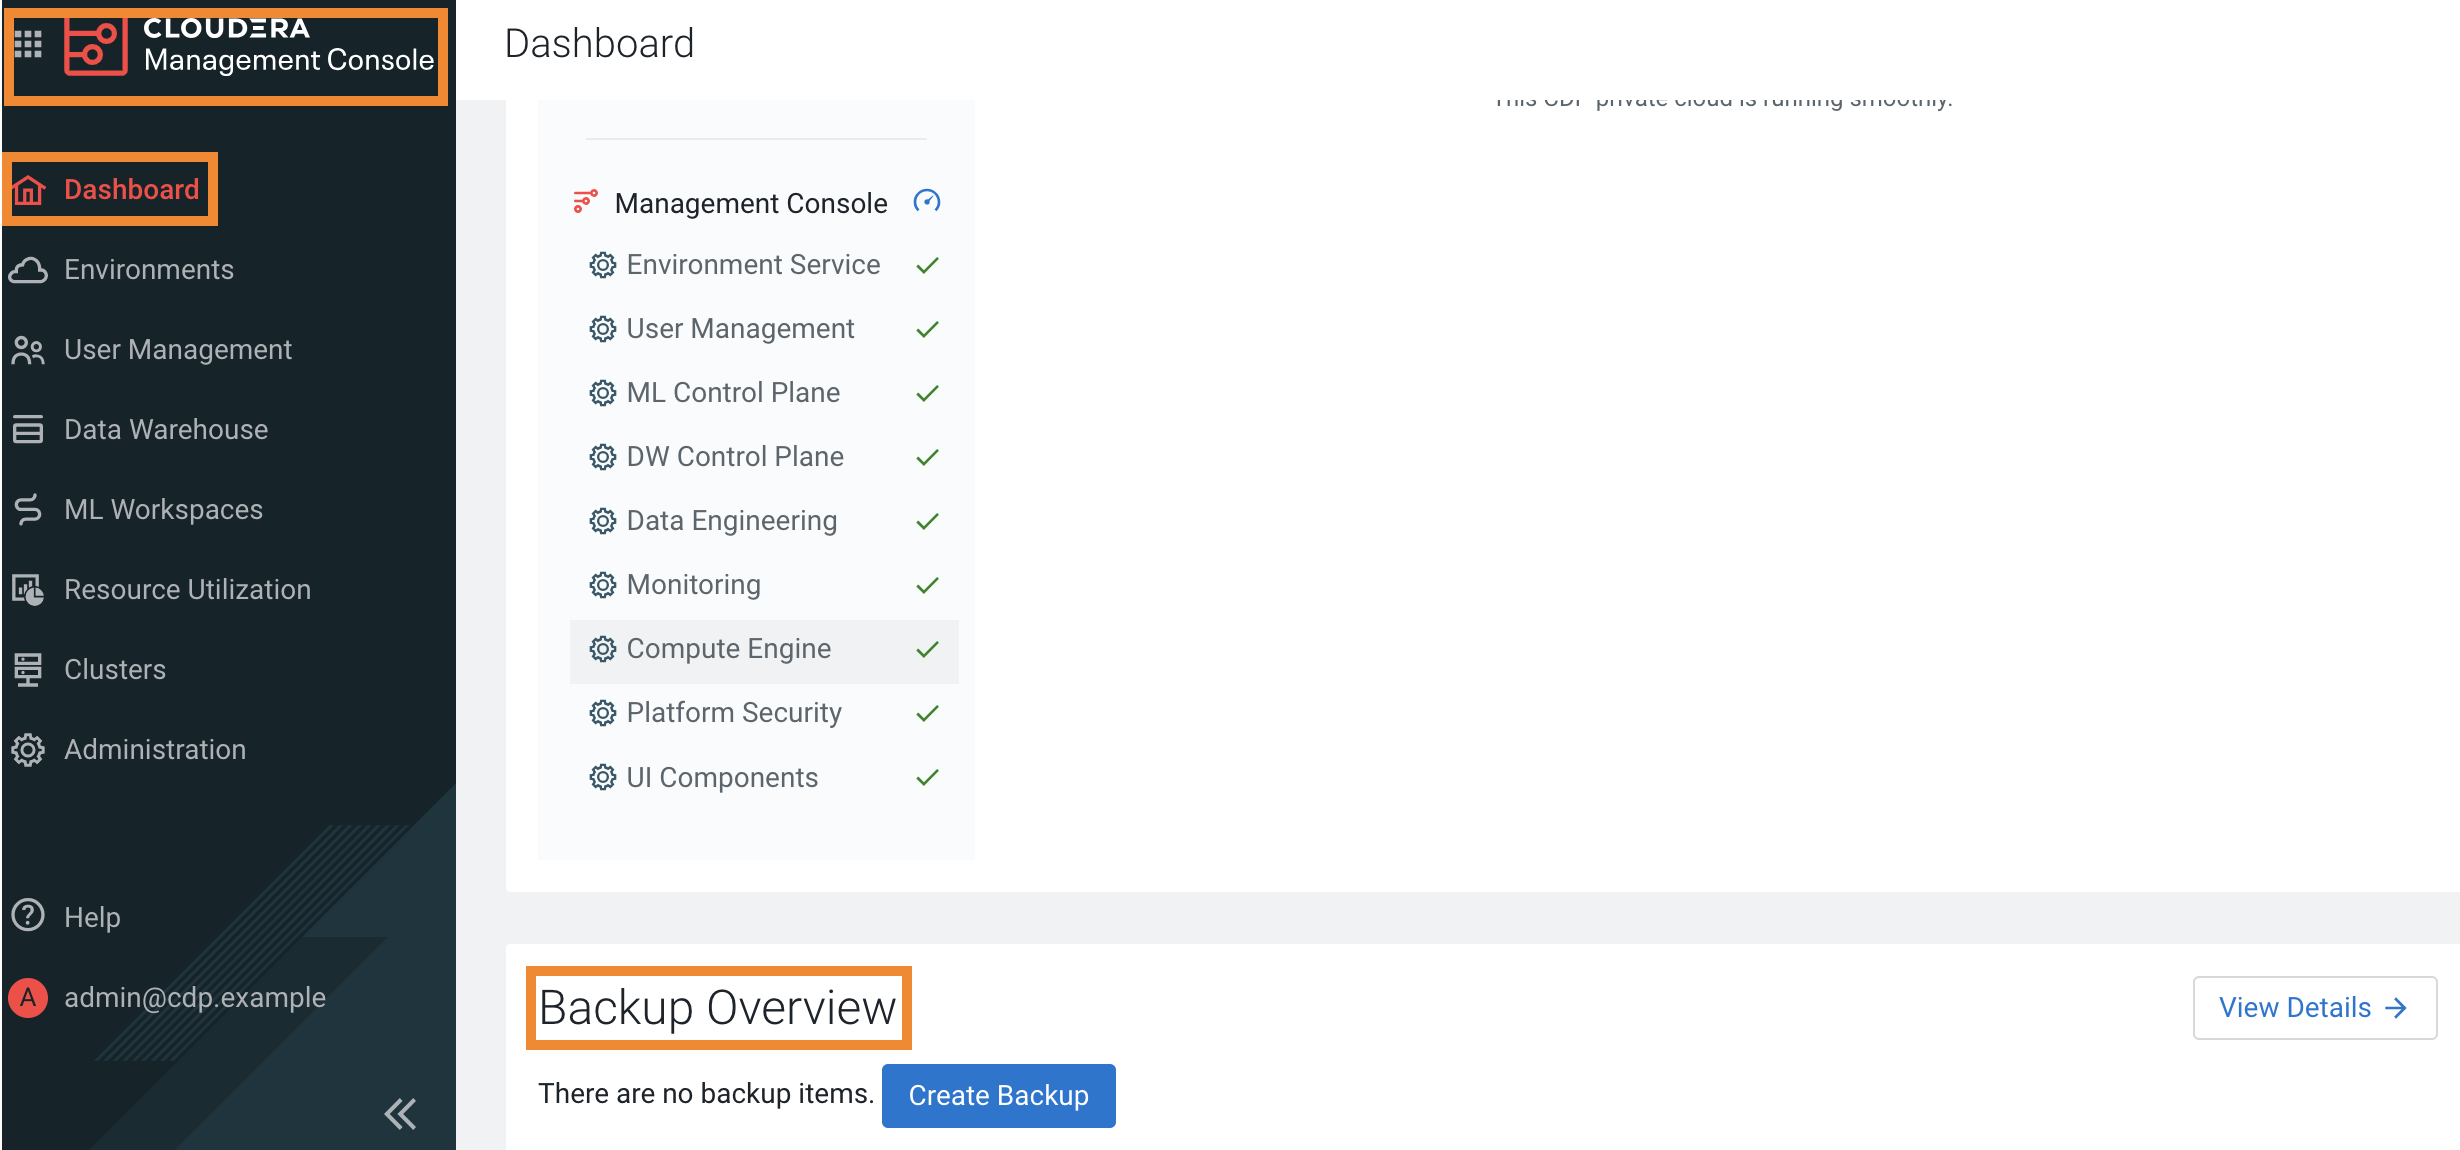
When you create a backup of the Control Plane, Data Recovery Service (DRS) initiates the backup event or job for the chosen backup entity, assigns an ID called backupCrn to the backup event, and creates a backup of the persistent volume claim (PVC) snapshots of the Control Plane namespaces and the backup event's PVC. CRN or Customer Resource Number is the Cloudera-specific identifier provided for an event or job.
  1. Go to the CDP Private Cloud Data Services Management Console > Dashboard > Backup Overview section.
    The sample image shows the View Details option in the Backup Overview section on the Management Console Dashboard page.
  2. Click Create Backup in the Backup Overview section to create the first backup.
    The sample image shows the Create Backup option to create the first backup in the Backup Overview section.
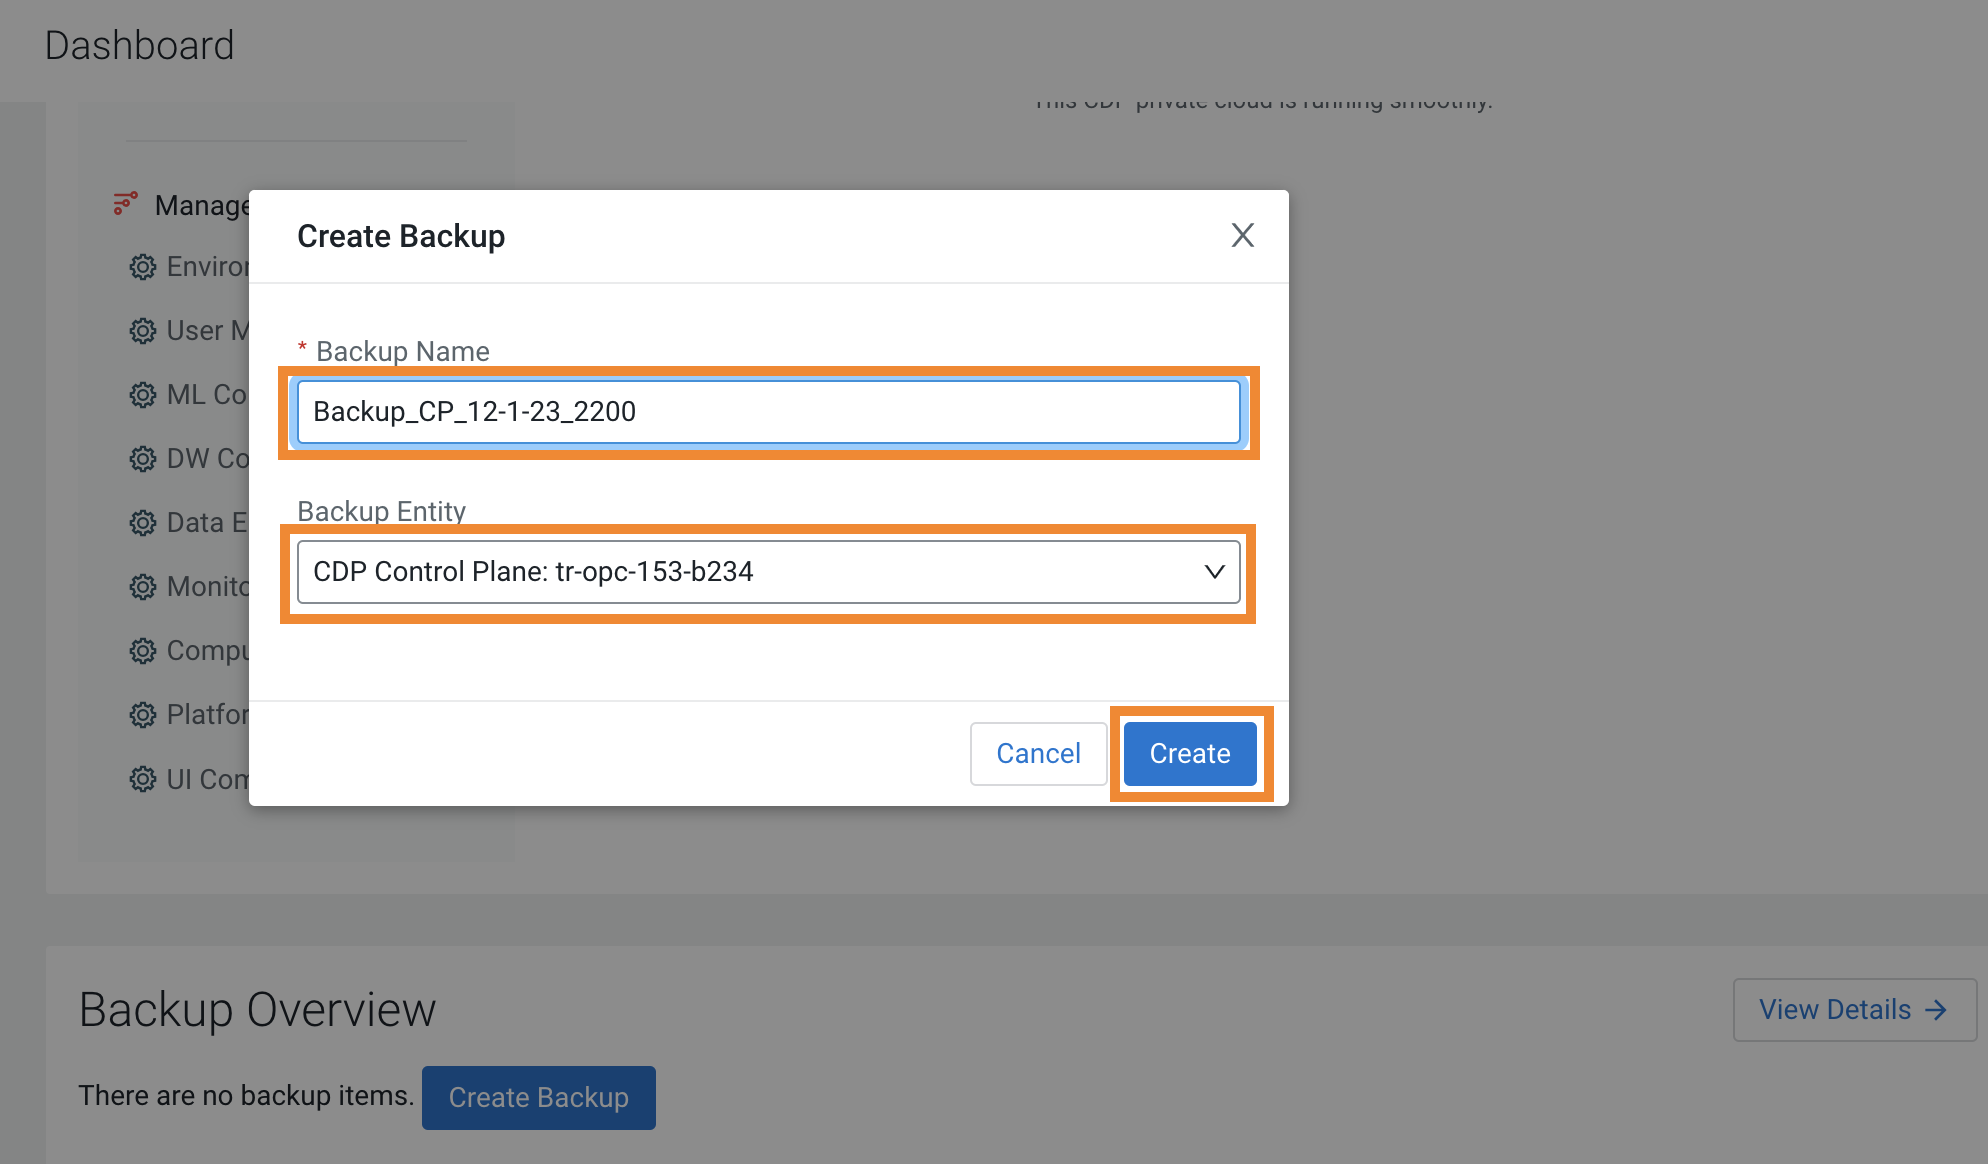
  3. Enter a unique Backup Name and choose the Backup Entity that you want to back up in the Create Backup modal window, and then click Create.
    The sample image shows the Create Backup modal window where you enter a backup name, choose the backup entity, and click create to create a backup.
  4. DRS initiates the backup event and generates a backupCRN which is an automatically assigned ID for the backup event.
    The backup event appears in the Backup Overview section.
    The sample image shows the columns that appear when backups are available in the Backup Overview section.
  5. Click View Details. The Backup and Restore Manager page appears.
    The sample image shows the backup CRN as CRN on the Backups tab in Backup and Restore Manager.
  6. The backupCRN appears as a CRN on the Backup and Restore Manager page that you can click to view the backup event details.
    The sample image shows the backup CRN as CRN on the Backups tab in Backup and Restore Manager.
  7. For subsequent backups, click New Backup on the Backup and Restore Manager page.
    The sample image shows the backup CRN as CRN on the Backups tab in Backup and Restore Manager.
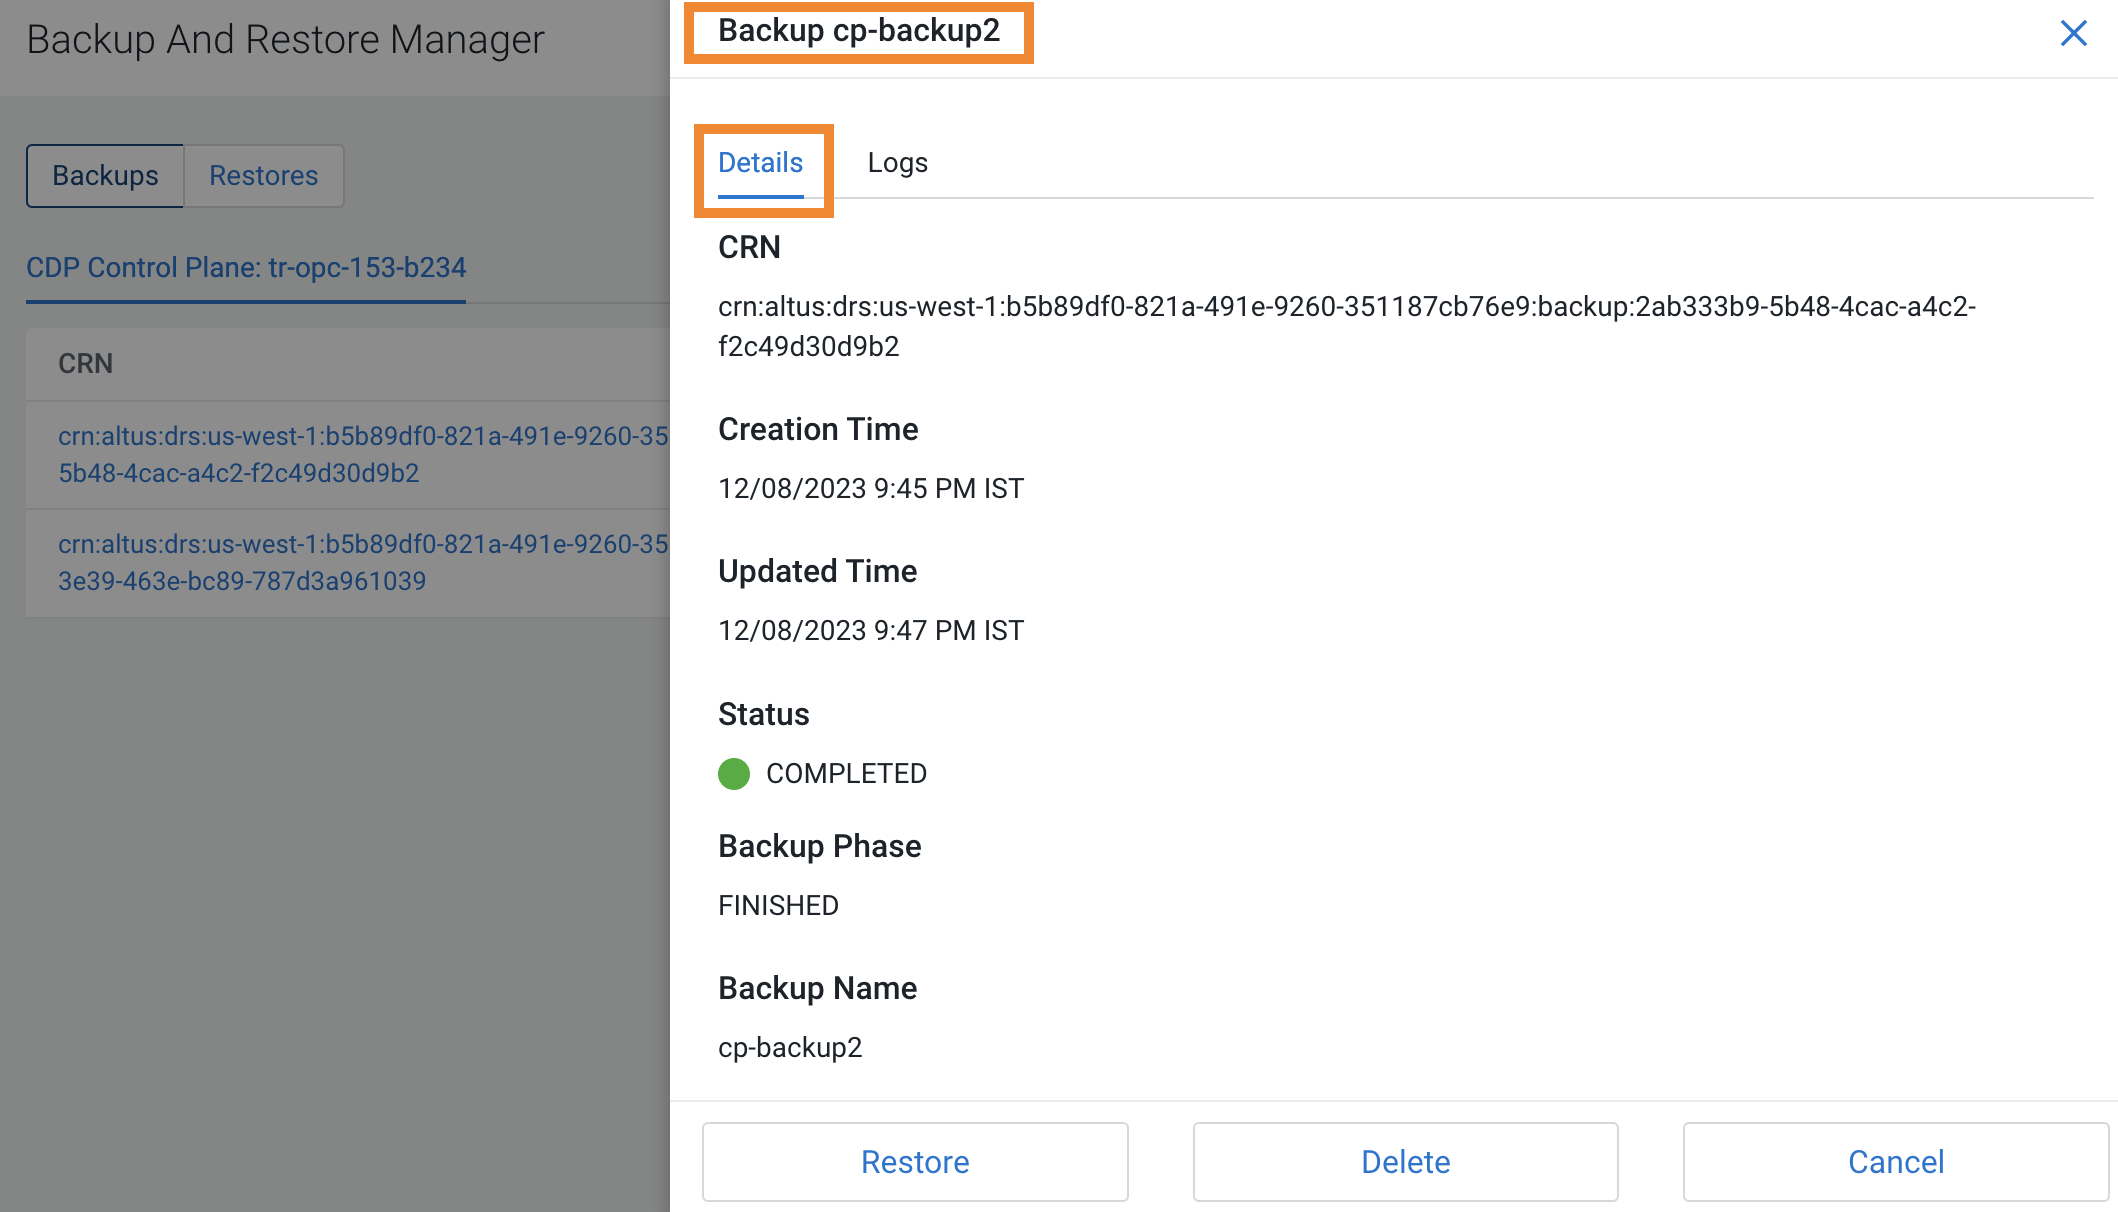
  8. Click the CRN to view more details about it on the Backup [***BACKUP NAME***] modal window. For example, the following image shows the Backup cp-backup2 modal window.
    The sample image shows the backup CRN as CRN on the Backups tab in Backup and Restore Manager.