Assigning account roles to groups
When you assign a role to a group, the role is also assigned to all user and machine user accounts in the group.
Required role: PowerUser
Steps

-
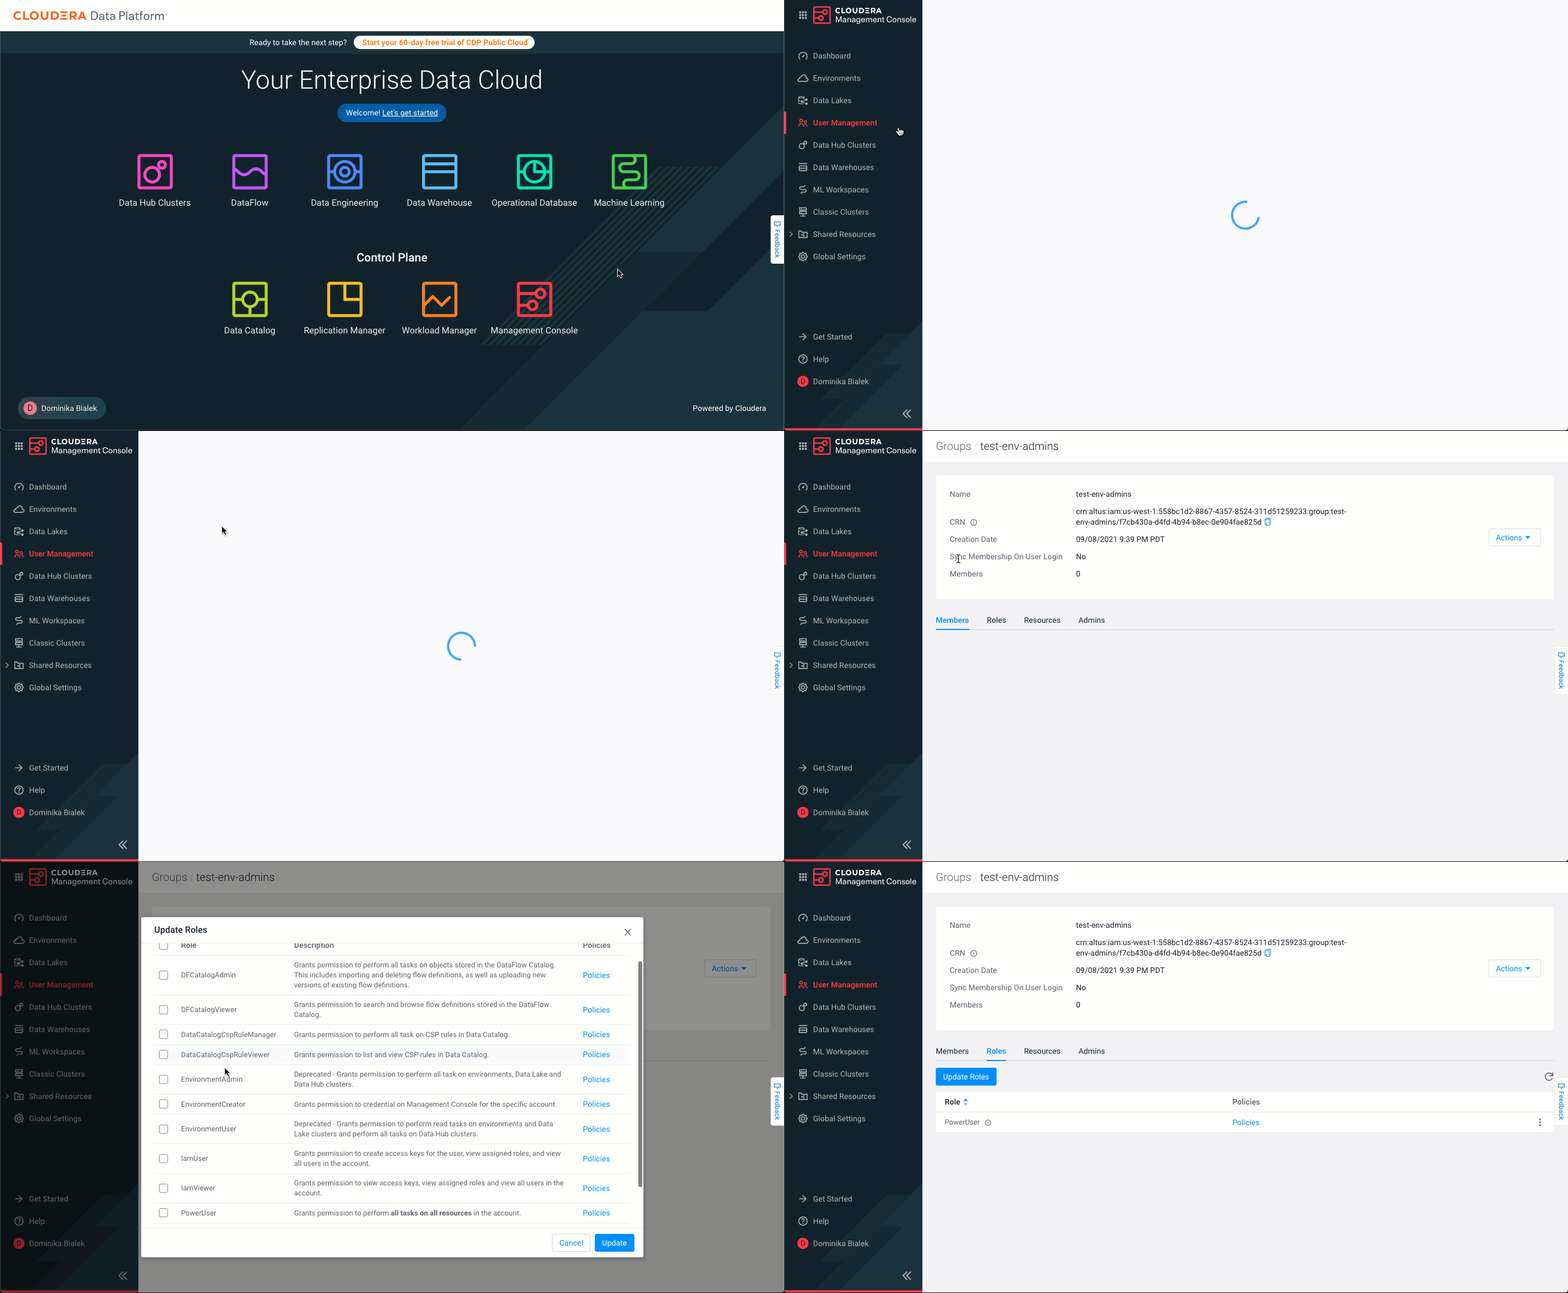
Sign in to the Cloudera console.
-
From the Cloudera home page, click Cloudera Management Console.
-
In the User Management section of the side navigation panel, click Groups.
The Groups page displays the list of all Cloudera groups.
-
Click the name of the group to which you want to assign a role.
The group details page displays information about the group.
-
Click the Roles tab.
-
Click Update Roles.
-
On the Update Roles window, select the roles you want to assign to the group.
-
To view the permissions that the role grants to the group, click Policies. To remove a role from the group, clear the selected role.
-
Click Update.
The roles that you select displays in the list of group roles.
To remove a role from a group, click Unassign Role next to the role that you want to remove. Click OK to confirm that you want to remove the role permissions from the group.
You can use the following command to assign a role to a group:
cdp iam assign-group-role \
--group-name <value> \
--role <value>
The --role parameter requires the CRN of the Cloudera role. You
can use the cdp iam list-roles command to list resource roles with role
CRNs.
To get a list of the roles assigned to a group:
cdp iam list-group-assigned-roles \
--group-name <value>
What to do next
You need to perform user sync for the change to take effect. See Performing user sync.
