Enabling the telemetry network communication for Cloudera Observability
Learn how to enable the network communication between Telemetry Publisher and Cloudera Observability.
Verify that you have the following values before enabling the Telemetry Publisher
service, as you will be required to supply their values during this task.
- The Telemetry Publisher access credentials, which are required to register the Telemetry Publisher account.
- The Databus endpoint EC2 service
and S3 URLs for your cloud region:
- For a US-based Control Plane cloud
region, use:
https://dbusapi.us-west-1.sigma.altus.cloudera.comhttps://cloudera-dbus-prod.s3.us-west-2.amazonaws.com - For a EU-based Control Plane cloud
region, use:
https://dbusapi.eu-1.cdp.cloudera.comhttps://mow-prod-eu-central-1-sigmadbus-dbus.s3.eu-central-1.amazonaws.com - For a AP-based Control Plane cloud
region, use:
https://dbusapi.ap-1.cdp.cloudera.comhttps://mow-prod-ap-southeast-2-sigmadbus-dbus.s3.ap-southeast-2.amazonaws.com
- For a US-based Control Plane cloud
region, use:
-
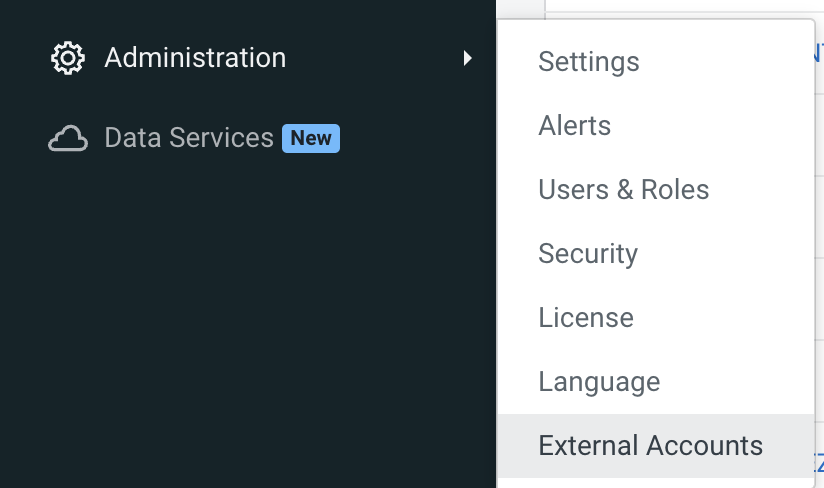
Back in the Cloudera Manager Home
page, from the navigation panel, select Administration
and then External Accounts.
-
In the External Accounts page, click the Altus
Credentials tab, which displays your resource access account
certificates.
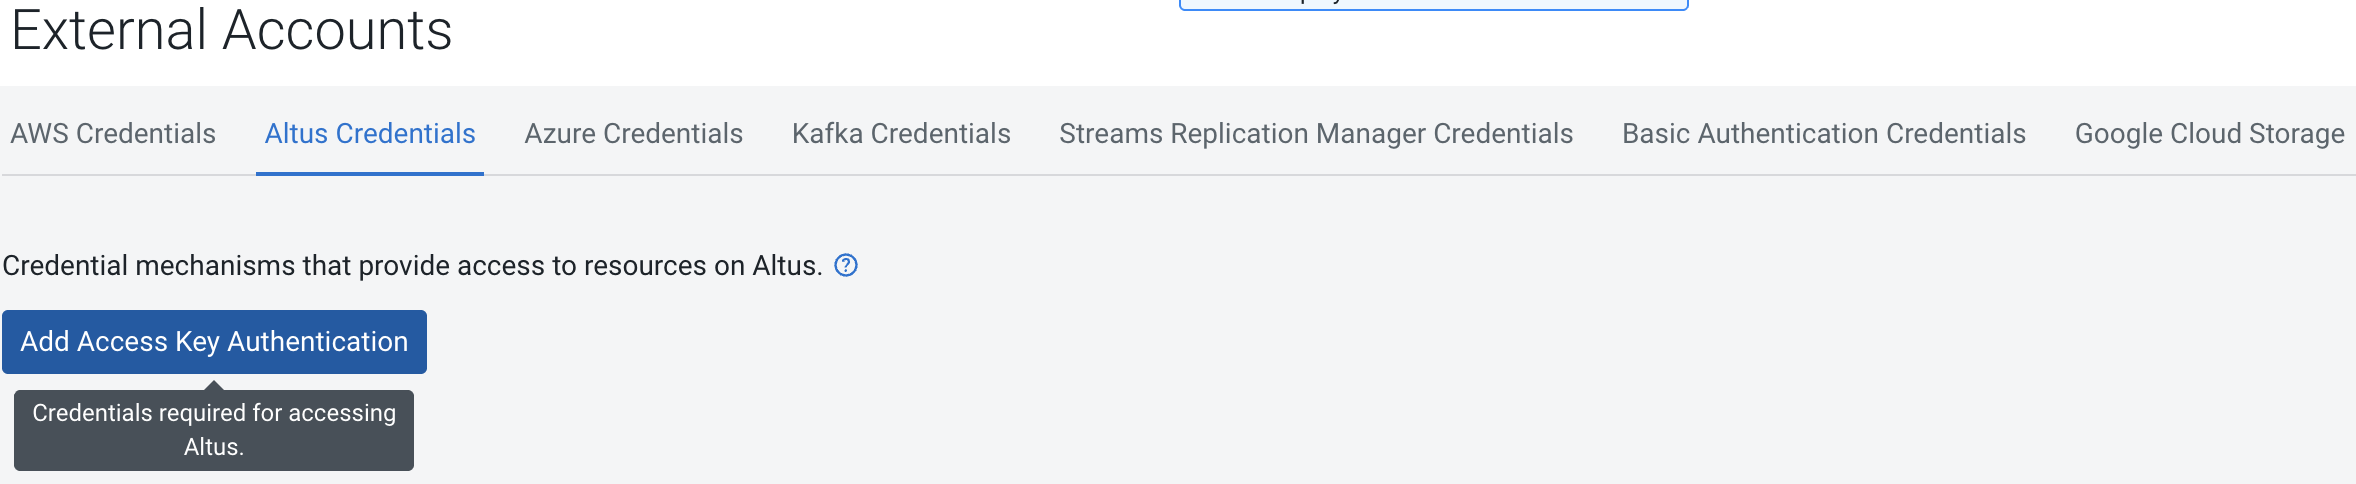
-
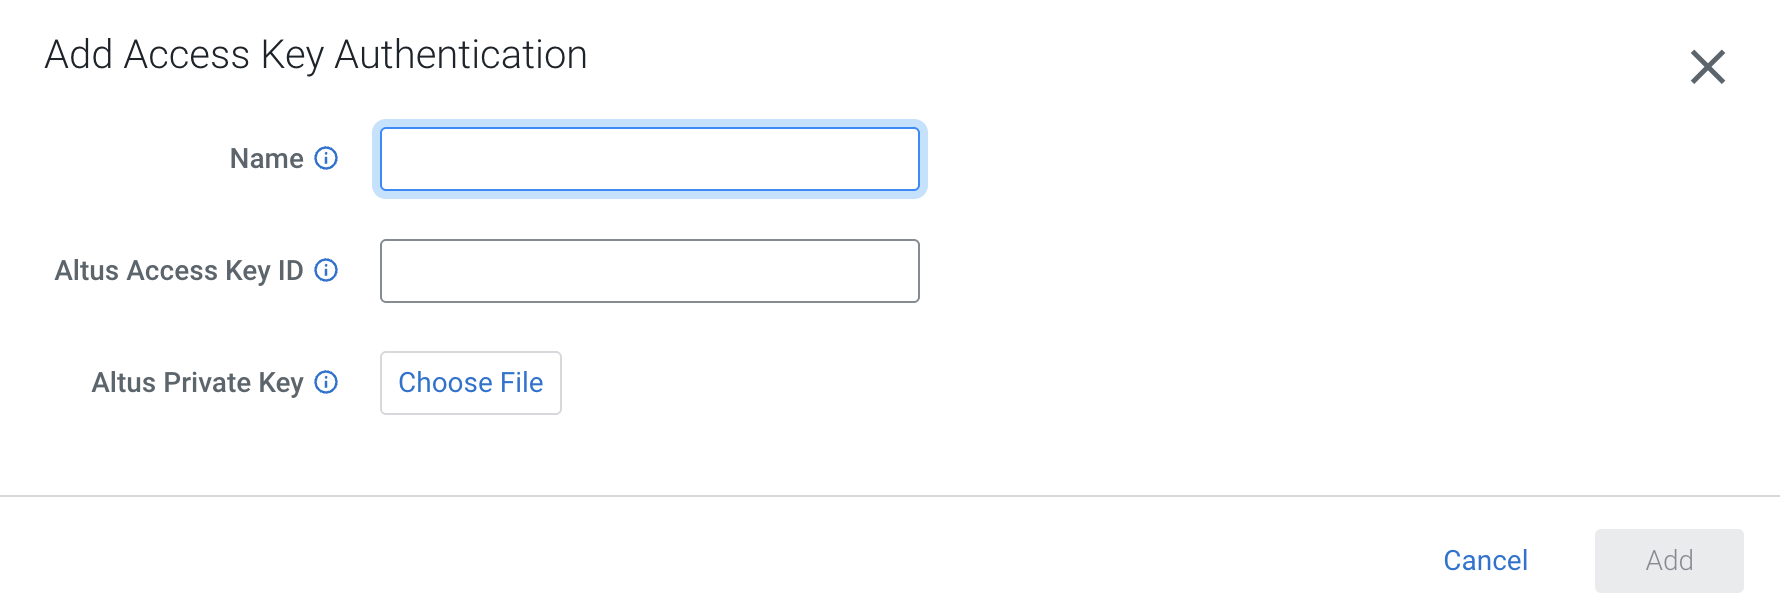
Add a new Telemetry Publisher access account certificate by clicking
Add Access Key Authentication and then in the
Add Access Key Authentication dialog box do the
following: