Configure Databricks in Cloudera Octopai
Learn how to integrate Databricks with Cloudera Octopai Data Lineage based on your catalog type, including Unity Catalog, Hive Metastore, or hybrid (Unity Catalog and Hive Metastore) deployments.
Before configuring Databricks in Cloudera Octopai, review the prerequisites that apply to your catalog environment. The configuration requirements vary depending on whether you use Unity Catalog, Hive Metastore, or a hybrid deployment combining both.
Requirements for Unity Catalog
Unity Catalog environments require system table access and Databricks SQL connectivity. To extract lineage, Cloudera Octopai must authenticate with a service principal and query Unity Catalog lineage system tables.
Requirements for Hive Metastore
For environments using only Hive Metastore, ensure that the user or machine identity meets the following requirements:
- Permission to view and access the workspace folders containing the notebooks.
- Read access to the projects or directories selected for metadata extraction.
- Can view the relevant Hive Metastore objects referenced by the notebooks.
When working with Hive Metastore, ensure that a cluster is active and running during the extraction process. If the cluster is stopped or unavailable, Spark cannot execute the metadata queries, and metadata retrieval fails.
Requirements for Unity Catalog and Hive Metastore Hybrid Deployments
In hybrid environments, the following requirements must be met:
- Unity Catalog prerequisites, including SQL Warehouse access and permissions.
- Hive Metastore assets must also be included.
- Cloudera Octopai combines metadata sources to provide extended lineage coverage.
Perform the following steps to configure Databricks in Cloudera Octopai:
-
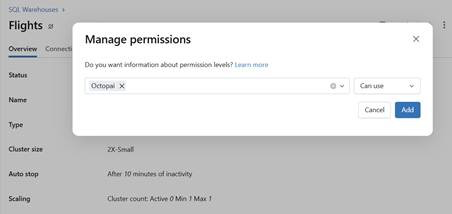
Enable or create an SQL Warehouse (required)
Cloudera Octopai relies on querying Databricks system tables, which requires a running SQL Warehouse.
You must ensure the following:- Create or enable a Databricks SQL Warehouse.
- Allow access to required system schemas.
Perform the following steps:
- In Databricks, go to the SQL Warehouses tab.
- If no SQL Warehouse exists,, click Create SQL Warehouse and configure it as required.
- Assign the service principal Manager permissions to the
warehouse by selecting Can use.
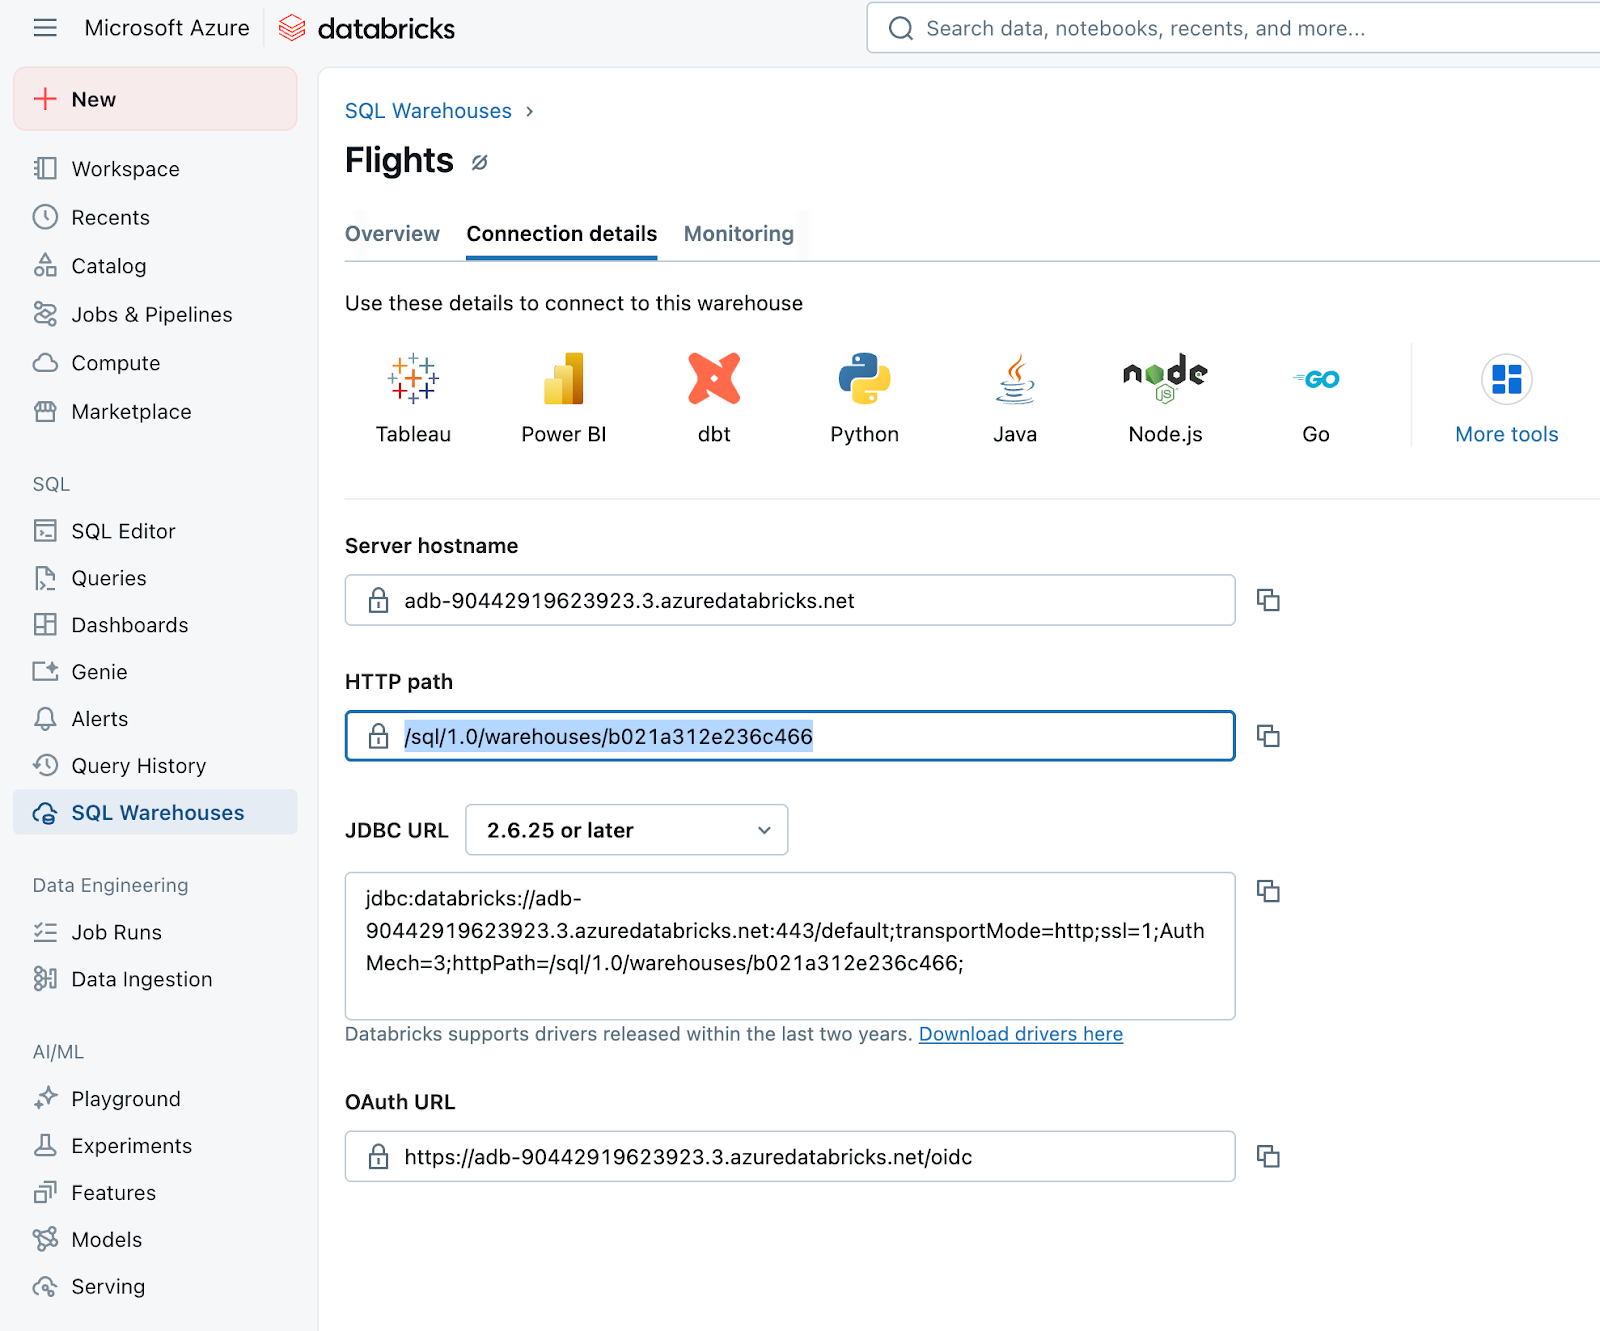
- Open the SQL Warehouse and go to Connection details.
- Copy the HTTP path. You will need this path for the integration process.
-
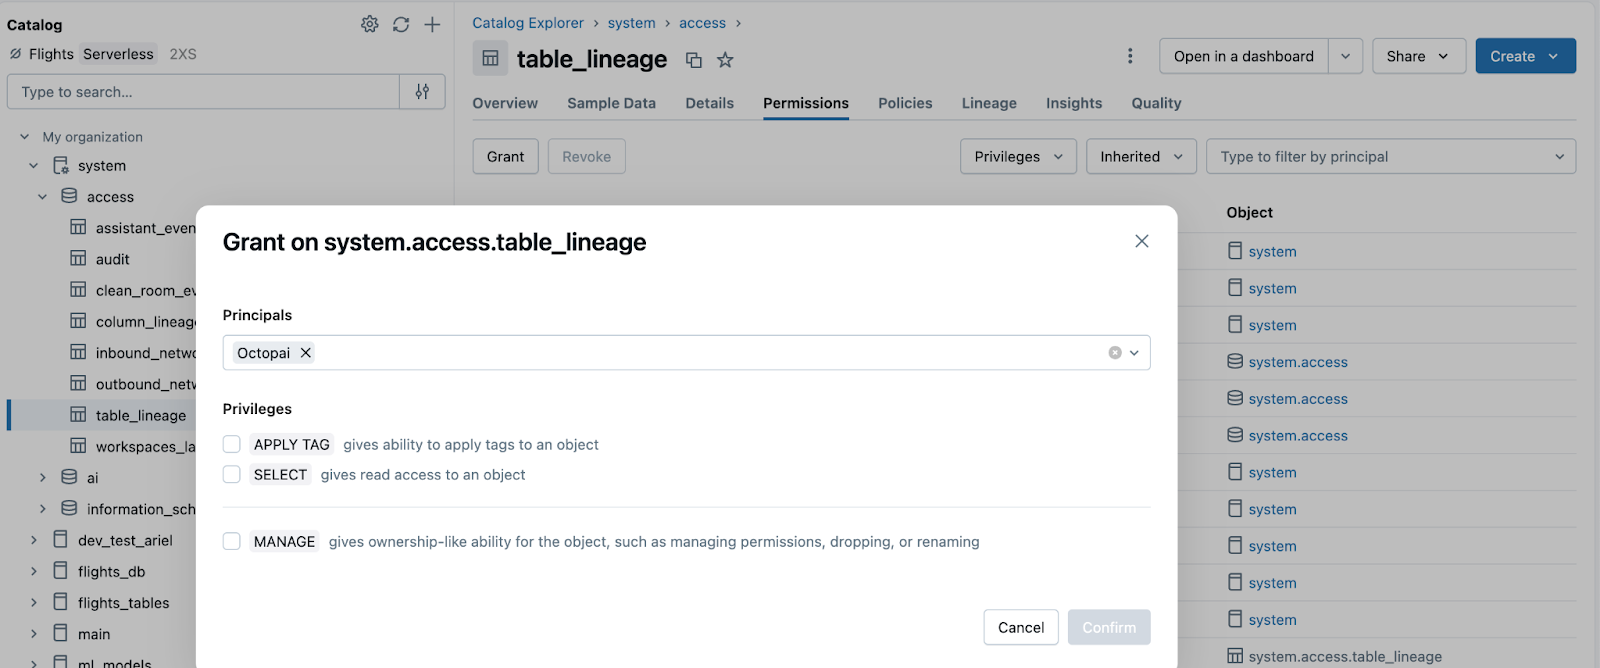
Grant Unity Catalog Lineage Permissions (required)
The service principal must have SELECT access on the system lineage tables (system.access.table_lineage and system.access.column_lineage) and read access on relevant catalogs and schemas.
- Open the Catalog in Databricks.
- Search for:
- Catalog:
system - Schema:
access - Tables:
table_lineageandcolumn_lineage
- Catalog:
- The tables are automatically created by Databricks.
- For each table, perform the following steps:
- Open the Permissions tab.
- Click Grant.
- Select the service principal created earlier.
- Enable Select Permission.