IBM DataStage
IBM DataStage integration with Cloudera Octopai Data Lineage enables users to export and manage DataStage projects and metadata efficiently. Each project must be exported as a separate file, with specific configurations for ISX or DSX methods, ensuring compatibility with the Cloudera Octopai Client.
Tool Permissions Prerequisites
Warning: Missing permissions could end up in broken lineages.
IBM DataStage Client version 8.5 or later installed
Open Server Port to DataStage Server Machine
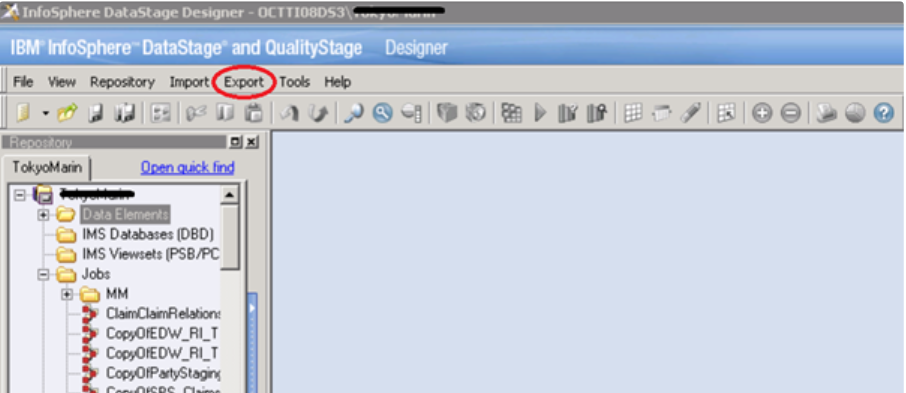
How to export IBM DataStage jobs
- Open DataStage Designer (Client).
- Choose project and connect.
- Click Export -> DataStage
Components ->
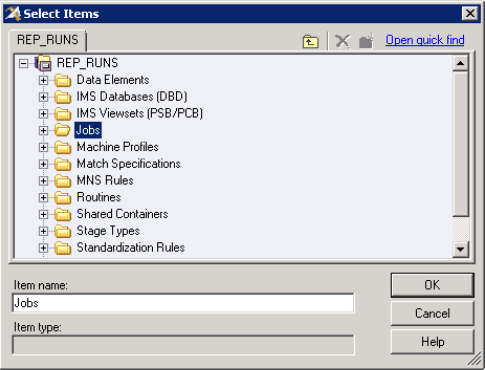
- Click Add and choose folder jobs from the pop window:
Select Items.
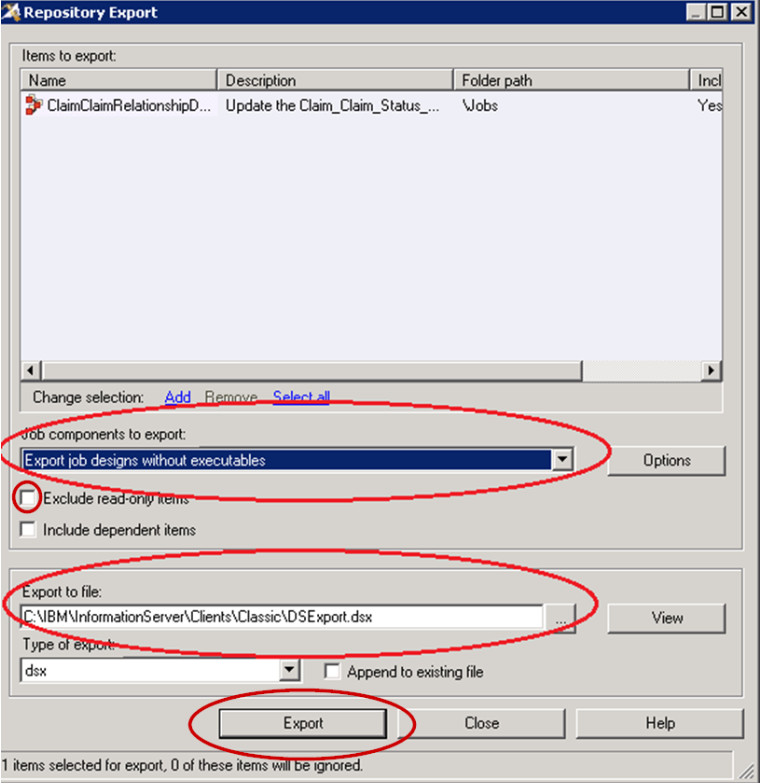
- Configure destination file name and location:
- At the drop-down list of the Job components to export:, choose Export job designs without executables.
- Uncheck the Exclude read-only items option.
- Choose the export file destination and type a name for the DSX file – Export to file.
- Click the Export button.
- The extracted file will appear in the destination defined folder. Use this file as the source for your Cloudera Octopai metadata DataStage connection in the Cloudera Octopai Client.
- Ensure appropriate permissions to the path to allow the Cloudera Octopai Client to access the file with the user running it.
DataStage automation requires the customer to extract the DataStage project using the following methods.
ISX Method:
Each project for each Server needs to be in a separate zip file. Each project will be displayed as a different connection name in the Cloudera Octopai application:
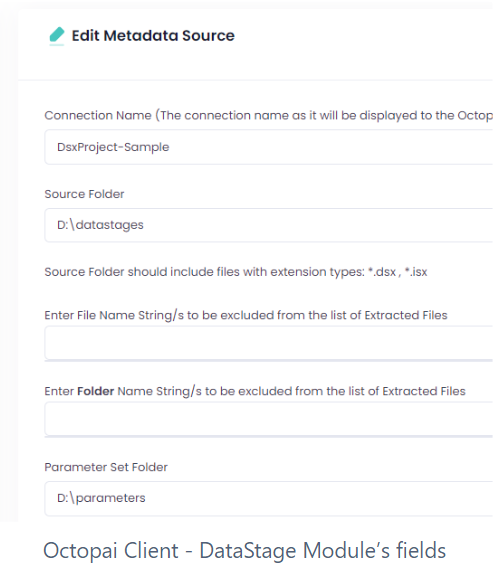
Octopai Client - DataStage Module’s fields
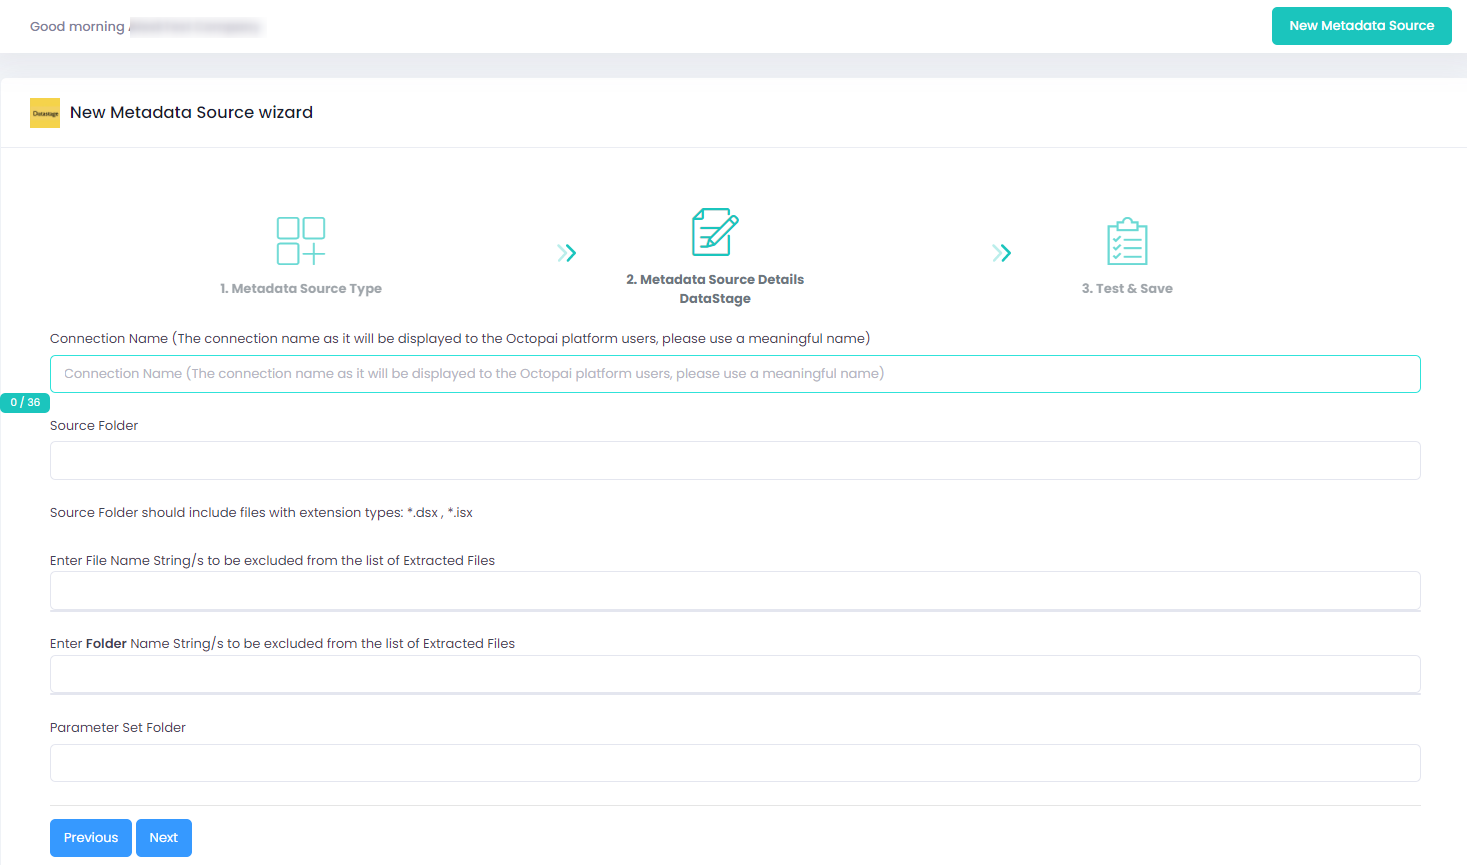
In the Source Folder, there needs to be only one ISX file that resembles one project.
In the Parameter Set Folder, there needs to be the parameters file for that one project. (the format is TXT)
The Parameter Set file should follow this convention: “Isx_File_Name_DSPARAMS.txt”. (For example, if we have a project named project.isx , the Parameter file name will be project_DSPARAMS.txt )
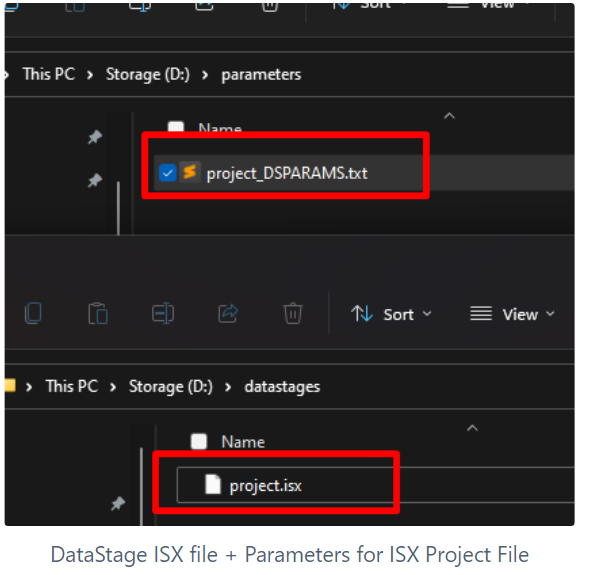
The result from this module should look like the following:
DSX Method:
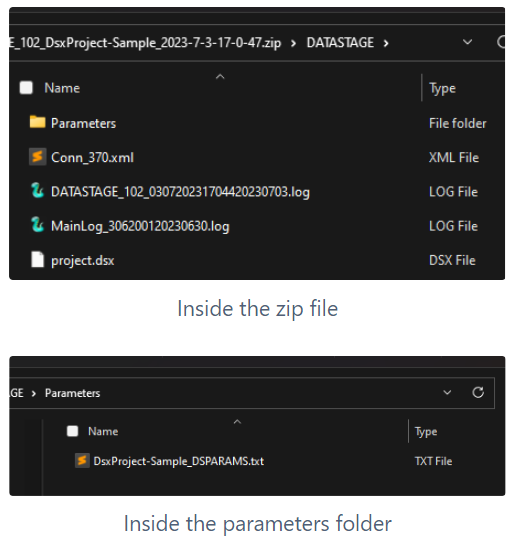
Each project for each Server needs to be in a separate zip file. The connection name specified in the Cloudera Octopai Client will be the Name of the parameter file:
In the Source Folder, there needs to be only one DSX file that resembles one project.
In the Parameter Set Folder, there needs to be the parameters file for that one project. (the format is TXT) The Parameter Set file should follow this convention: “ConnectionName_DSPARAMS.txt”. (For example, if the Connection Name given while creating this connection was DsxProject-Sample , the Parameter file name will be DsxProject-Sample_DSPARAMS.txt )
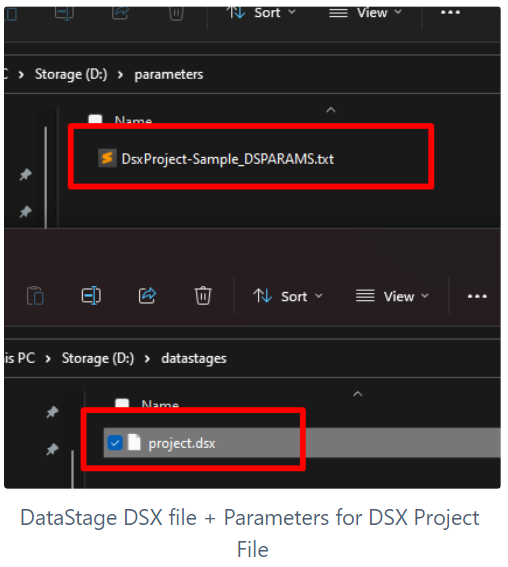
The result from this module should look like the following:
DataStage: Export of parameter files
-
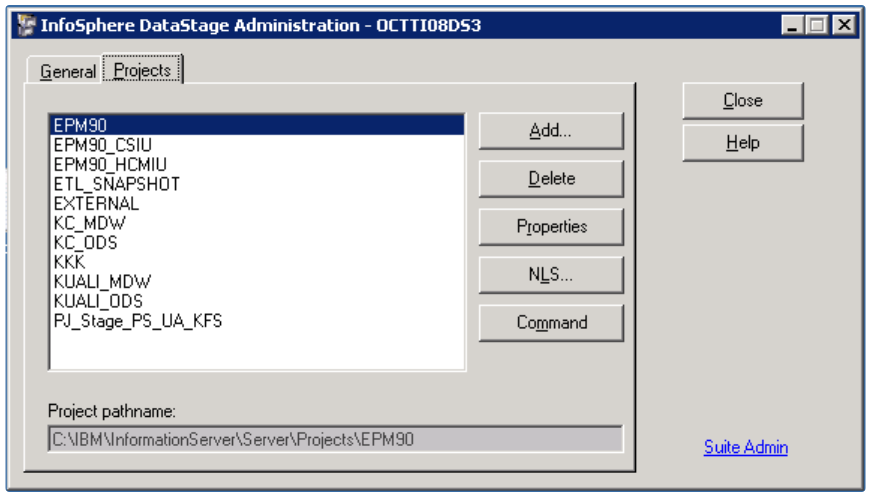
Go to the Administrator Client.
- Choose the relevant Project and click on Properties.
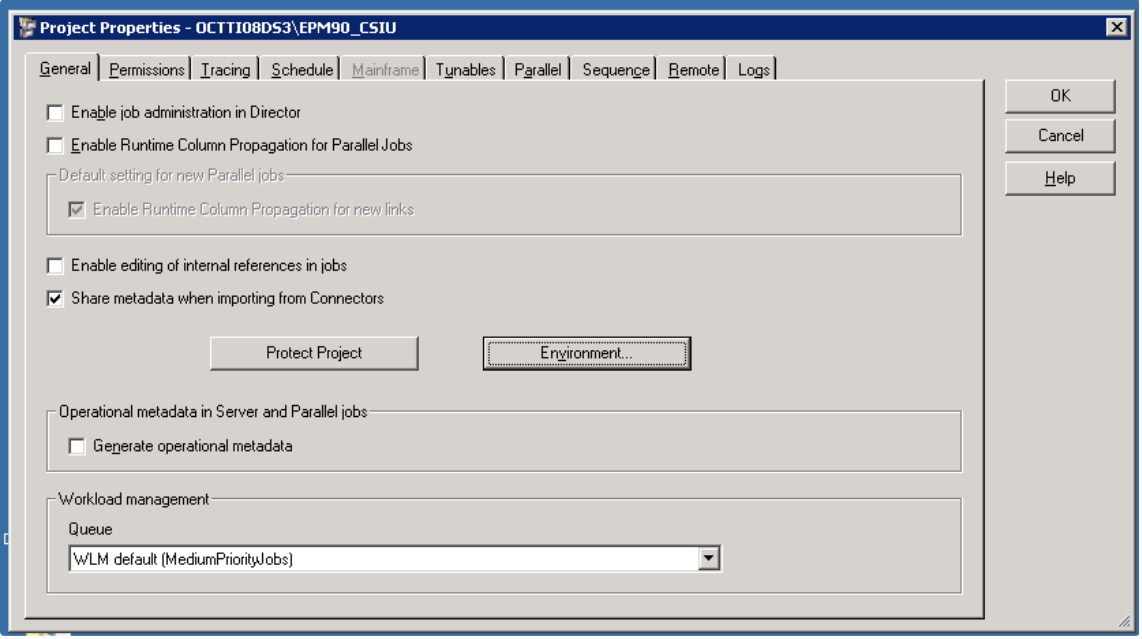
- Click on the Environment button.
- Go to User Defined and click on Export to File.

- The new file name (.env) will be created - save it as Name of Project _DSPARAMS.txt.
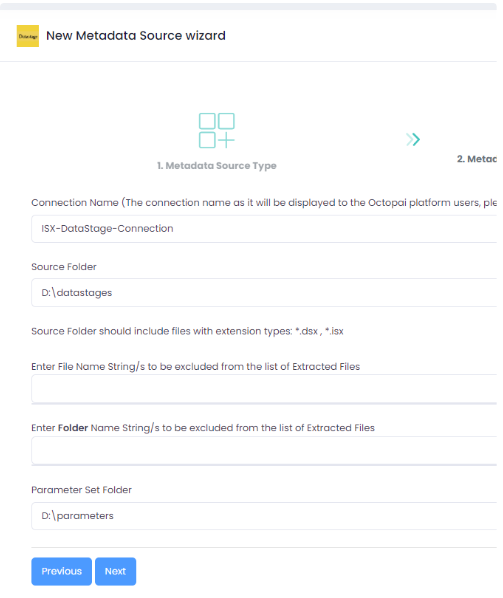
Setting up DataStage Metadata Source
How to verify the extracted Metadata File
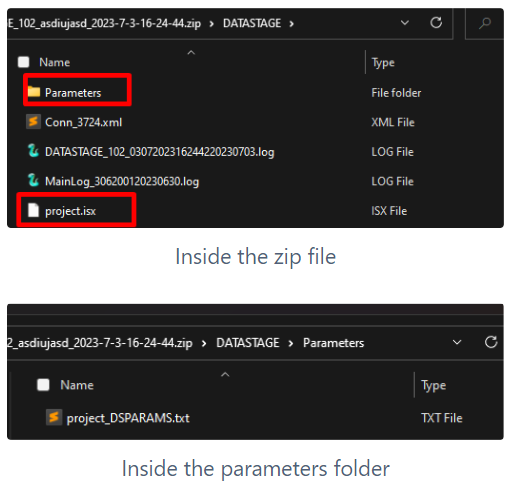
Access the Cloudera Octopai Target Folder (TGT)
- Go to the TGT Folder located on the Server where the Cloudera Octopai Client is installed. By default: C:\Program Files (x86)\Octopai\Service\TGT
- Open the zip file having the Connector Name. Example:

- Verify its content: Quantity & Quality of inner files
Troubleshoot
Error during the extraction:
- Check the permissions
-
Send the log with the connector number and name to
Cloudera Support
- C:\Program Files (x86)\Octopai\Service\log
