Configuring Impala connector with HiveServer as the metadata source
Configure the Apache Impala connector in Octopai Client to extract metadata through the Impala service over an ODBC connection, using username and password or Kerberos authentication.
In HiveServer mode, Octopai Client connects to the Impala service through an Open Database Connectivity (ODBC) data source name (DSN). You configure the DSN once, choose either username and password or Kerberos authentication, and then add a matching connection in Octopai Client.
Ensure the following are available before you configure the connector:
- An Impala ODBC driver that matches your Octopai Client architecture (32-bit or 64-bit). You can download the driver from the Impala ODBC driver download page.
- For Kerberos authentication, MIT Kerberos for Windows. You can download the releveant distribution from MIT Kerberos Distribution. The default installation path is C:\Program Files\MIT\Kerberos\. Verify that C:\Program Files\MIT\Kerberos\bin\kinit.exe exists.
- For Kerberos authentication, the Kerberos configuration file
krb5.ini from your administrator, placed at
C:\ProgramData\MIT\Kerberos5\krb5.ini, with your realm
and key distribution center (KDC), for example:
[libdefaults] default_realm = YOUR.REALM dns_lookup_realm = false dns_lookup_kdc = false ticket_lifetime = 24h renew_lifetime = 7d forwardable = true [realms] YOUR.REALM = { kdc = kdc.example.com admin_server = kdc.example.com } [domain_realm] .example.com = YOUR.REALM - For Kerberos authentication, a keytab file with the extension .keytab for your service principal, stored securely on the Octopai Client machine, for example C:\Octopai\keytabs\impala.keytab.
-
For Authentication method, select the method that matches
the DSN, and enter the connection details.
- For Username and Password, enter a Connection Name, the DSN Name that you created, the UserName, and the Password.
- For Kerberos, enter a Connection
Name, the DSN Name that you created,
the Keytab Path (for example,
C:\Octopai\keytabs\impala.keytab), and the
Kerberos Principal (for example,
impala@YOUR.REALM).
Figure 1. Hive Server metadata source with Username and Password authentication 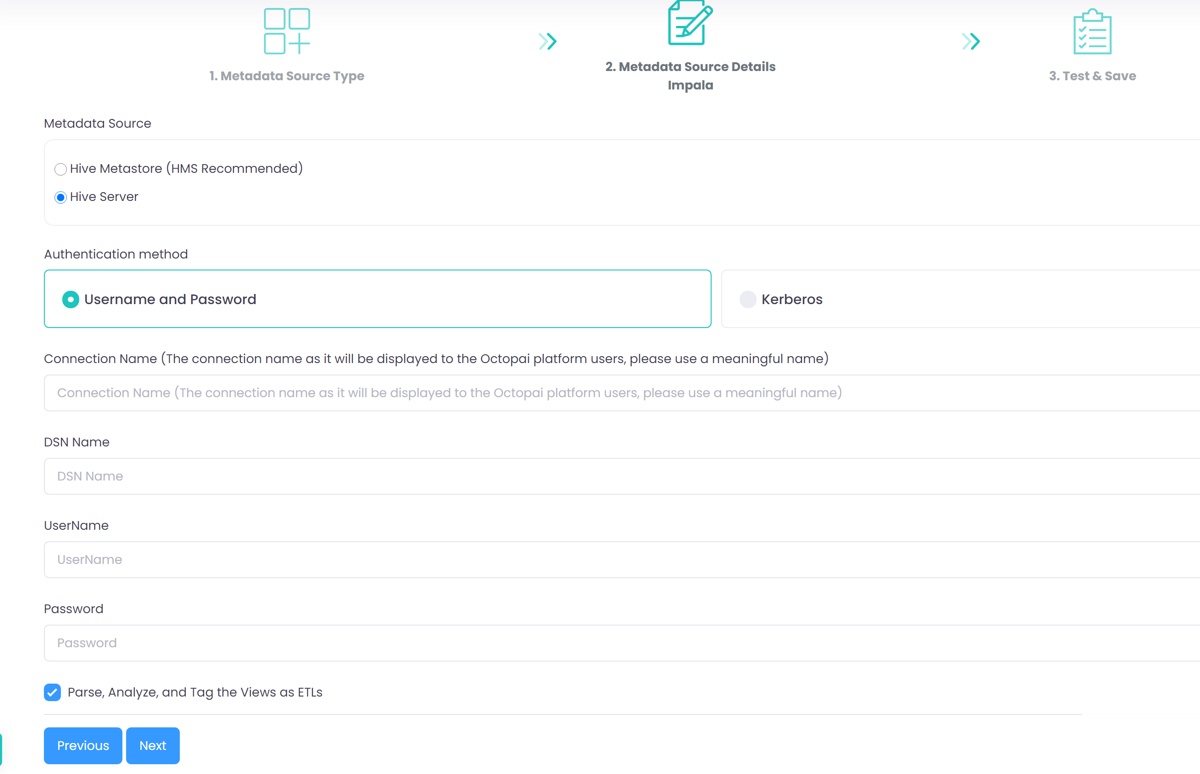
Figure 2. Hive Server metadata source with Kerberos authentication 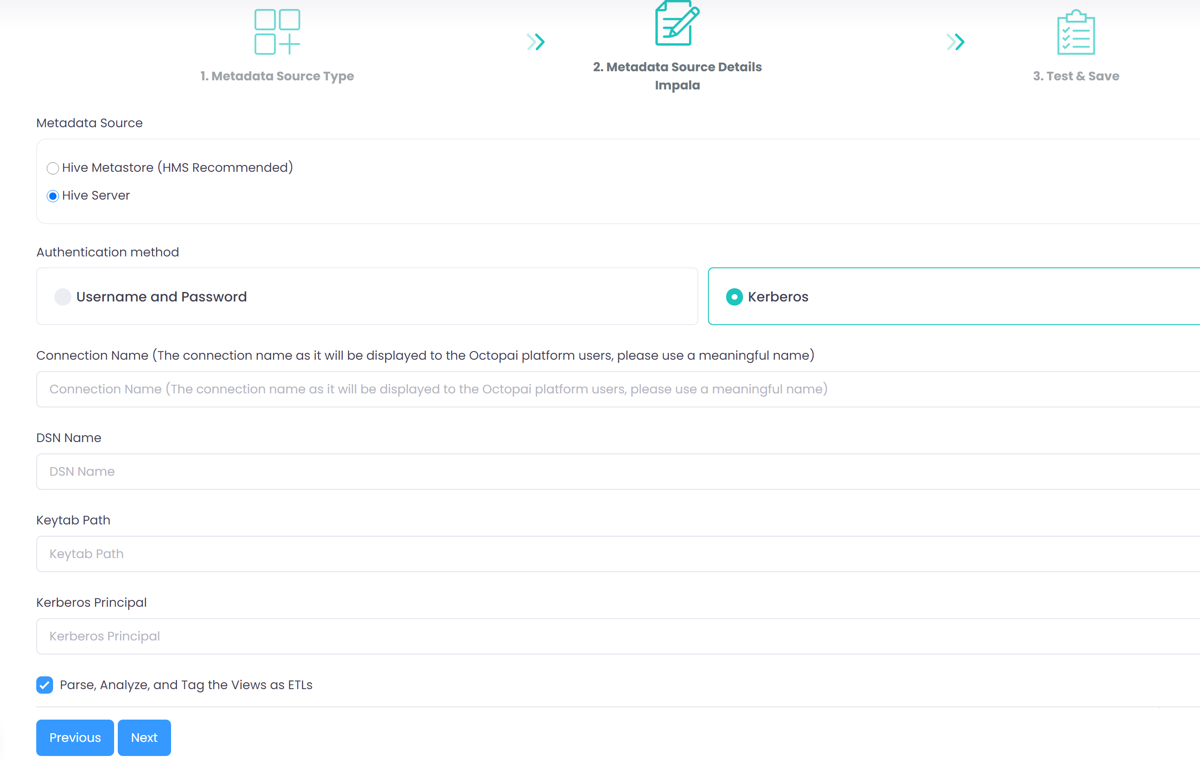
To verify the extracted metadata, navigate to the target folder (TGT) on the server where Octopai Client is installed. The default location is C:\Program Files (x86)\Octopai\Service\TGT. Locate the compressed file for the Impala connector, for example Impala_Metadata_Export.zip, and verify the quantity and quality of the extracted files.
If the connection or extraction fails, verify the following and try again:
- Permissions on the Impala server and the ODBC connection.
- The DSN configuration, including the correct hostname, port, and authentication.
- For Kerberos, the krb5.ini configuration, the keytab, and the file permissions.
- That the Impala service is running and reachable.
If the problem persists, send the log file with the connector name and number to Cloudera Support. The log is at C:\Program Files (x86)\Octopai\Service\log.
