Configuring Kafka and Kafka Connect Connector in Cloudera Octopai

Learn how to configure Kafka and Kafka Connect connector in Cloudera Octopai Client using Kerberos authentication (SASL/GSSAPI).

Before configuring Kafka and Kafka Connect connectors in Cloudera Octopai Client, ensure the following components are available and properly configured:

  • Kerberos infrastructure: Active Kerberos Key Distribution Center (KDC), valid Kerberos realm configuration, and network connectivity from the Octopai Client host to the KDC.
  • MIT Kerberos for Windows: Install MIT Kerberos for Windows on the machine running Cloudera Octopai Client. The default installation path is C:\Program Files\MIT\Kerberos\bin\kinit.exe. Cloudera Octopai Client uses kinit to acquire Kerberos tickets.
  • Kerberos configuration file: The Kerberos configuration file must exist at C:\ProgramData\MIT\Kerberos5\krb5.ini.

    Example configuration:

    [libdefaults]
                                default_realm = ROOT.COMOPS.SITE
                                dns_lookup_realm = false
                                dns_lookup_kdc = false
                                ticket_lifetime = 24h
                                renew_lifetime = 7d
                                forwardable = true
                                
                                [realms]
                                ROOT.COMOPS.SITE = {
                                kdc = ccycloud-1.cdp.root.comops.site
                                admin_server = ccycloud-1.cdp.root.comops.site
                                }
                                
                                [domain_realm]
                                .root.comops.site = ROOT.COMOPS.SITE
                                root.comops.site = ROOT.COMOPS.SITE
  • Kerberos credentials: Obtain a Kerberos principal (for example, kafka-user@REALM) and its associated keytab file (for example, C:\octopai\kafka-user.keytab). Ensure the keytab file is securely stored and accessible.
  • Kafka cluster configuration: Ensure the Kafka cluster is configured with SASL/GSSAPI enabled, the Kafka service principal is configured on the brokers (for example, kafka/hostname@REALM), and the broker hostnames are resolvable using fully qualified domain names.
  1. Create a keytab file.

    On a Kerberos administration server, create a keytab file for the Kerberos principal used by Cloudera Octopai Client using this command:

    ktutil
                            addent -password -p kafka-user@REALM -k 1 -e aes256-cts
                            wkt /path/to/kafka-user.keytab
                            quit

    Or request the keytab file from your Kerberos administrator using this command:

    kadmin -q "ktadd -k /path/to/kafka-user.keytab kafka-user@REALM"

    Copy the keytab file securely to the Windows server running the Cloudera Octopai Client.

  2. Verify Kerberos authentication before configuring Kafka or Kafka Connect.
    1. Open PowerShell.
    2. Navigate to the Kerberos binaries directory:
      cd "C:\Program Files\MIT\Kerberos\bin"
    3. Obtain a Kerberos ticket:
      .\kinit.exe -kt "C:\octopai\kafka-user.keytab" kafka-user@REALM
    4. Confirm the validity of the ticket:
      .\klist.exe
  3. Configure Kafka metadata source in Cloudera Octopai Client.
    1. Start a new connection:
      1. Open Cloudera Octopai Client.
      2. Select New Connection.
      3. Choose Kafka from the vendor list.
    2. Provide basic connection information using the following values:
      • Bootstrap Servers:

        Kafka broker hostnames and ports

        Example: kafka1.example.com:9092

      • Schema Registry URL (optional):

        Example: http://schema-registry.example.com:8081

    3. Select Kerberos as the authentication method.
    4. Configure Kerberos settings:
      • Kerberos principal:

        Example: kafka-user@REALM

      • Keytab path:

        Absolute path to the keytab file

        Example: C:\octopai\kafka-user.keytab

    5. To test the connection, click Test Connection.
    6. Click Save to store the connection.
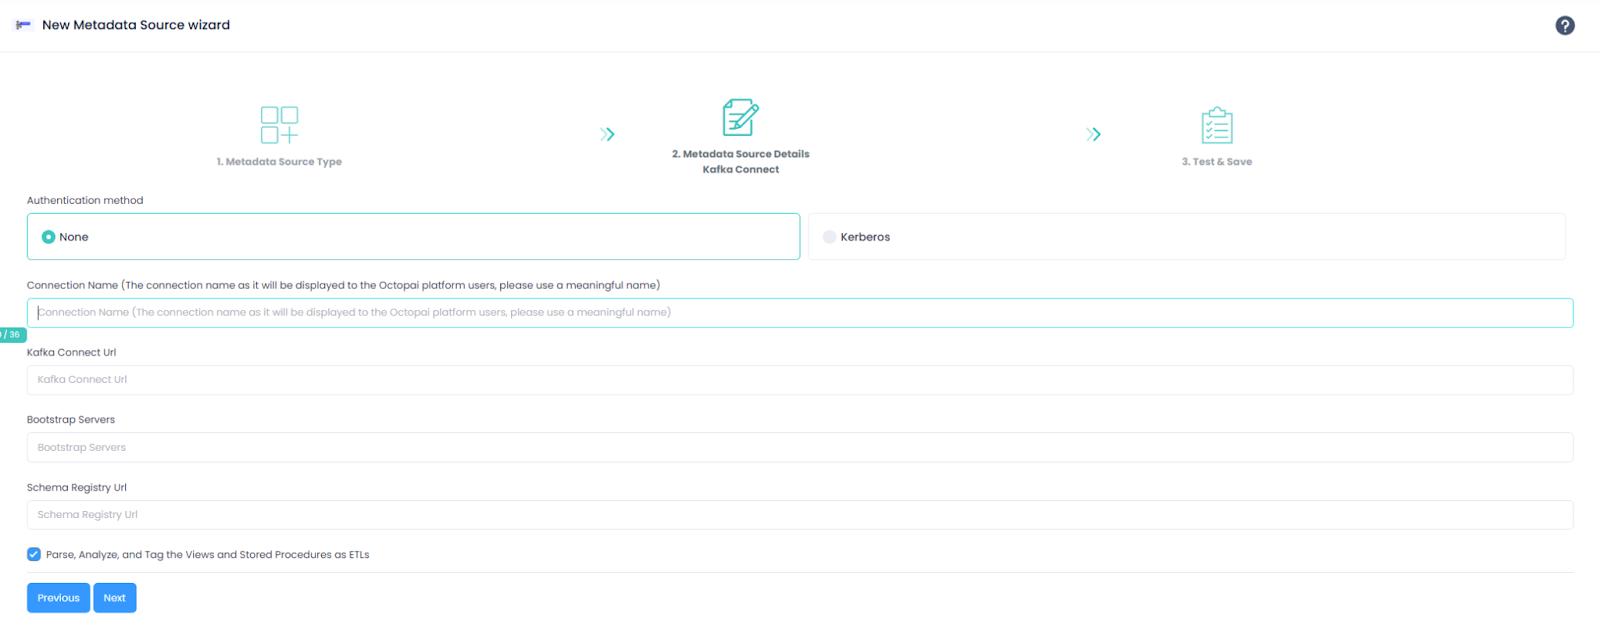
  4. Set up the Kafka Connect metadata source.


    1. Configure connection parameters without authentication.
      If the authentication method is None, provide the following values:
      • Kafka Connect URL:
        • Required
        • Kafka Connect REST endpoint
      • Bootstrap Servers:
        • Required
        • Kafka broker hostnames
      • Schema Registry URL:
        • Optional
    2. Configure connection parameters with Kerberos authentication.

      If the authentication method is Kerberos, follow the steps described earlier to configure Kerberos.

      Required additional fields:

      • Kerberos principal
      • Keytab path
  5. Verify the extracted metadata files.
    1. After the extraction completes, navigate to this folder:
      C:\Program Files (x86)\Octopai\Service\TGT
    2. Open the ZIP file matching the connector name.
    3. Verify the presence and structure of the extracted files.

Kerberos authentication errors:

  • Verify the principal format: username@REALM
  • Confirm the keytab path and permissions.
  • Validate the realm configuration in krb5.ini

Kafka connectivity issues:

  • Verify the network connectivity.
  • Use fully qualified domain names.
  • Confirm the SASL listener configuration.

Ticket expiration:

  • Verify the ticket_lifetime and renew_lifetime values.
  • Adjust the renewal configuration, if required.

Clock skew:

Synchronize the system time:

w32tm /resync /force

Error during the extraction:

  • Collect the logs from C:\Program Files (x86)\Octopai\Service\log


  • Send the logs with the connector number and name to Cloudera Support.