Power BI & Power BI Report Server
Learn how to configure Power BI and Power BI Report Server to integrate with Cloudera Octopai.
Tool Permissions Prerequisites
- Local Folder - Read Permission for Cloudera Octopai Windows NT User on Power BI local folder - *.pbix files.
- Shared folder (SMB/Remote) - Full Control permission for Cloudera Octopai Windows NT User on Power BI shared folder (SMB/Remote) - *.pbix files.
- Power BI Web (Cloud App) - Azure Registered Application with relevant permissions (Please use the provided Power BI Settings for the Cloudera Octopai Extraction file) and a Power BI Premium user.
- Power BI Web (Cloud App) - Client Secret Authentication (Open the Power BI Settings for Cloud Version Guide).
- Azure Registered Application with relevant permissions (Open the Power BI Web App Registration Guide).
- Tenant ID.
- Client Secret.
- ‘Browse’ and 'Content Manager' Role assigned for reports you would like extracted.
Permissions and configurations setup in Microsoft Azure
* Changes in Azure and PowerBI portals typically take 15-30 minutes to apply but may take up to 24 hours in some cases.
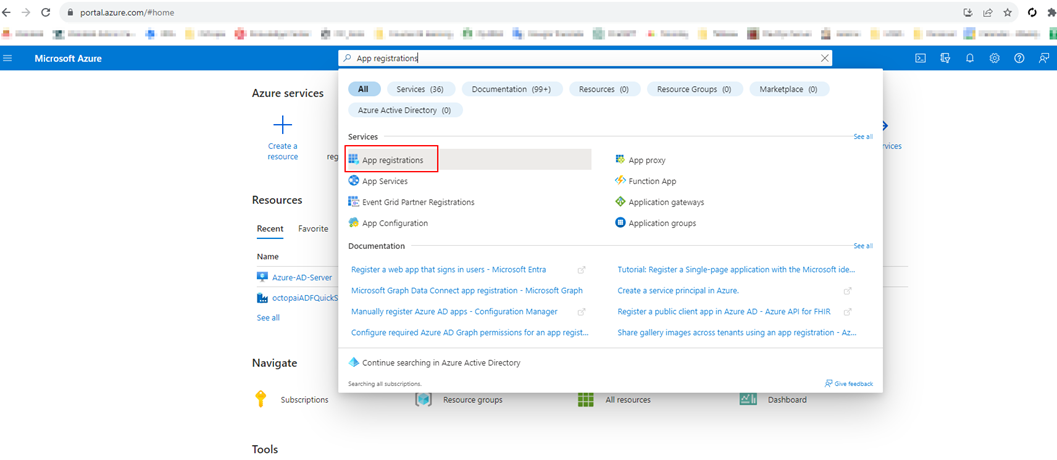
Go to https://portal.azure.com/
Then, go to App registrations.
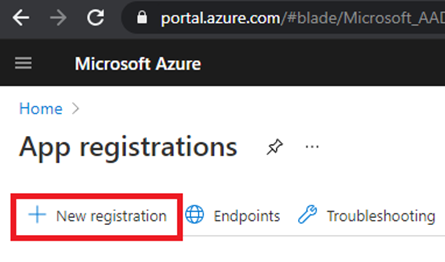
Click New Registration.
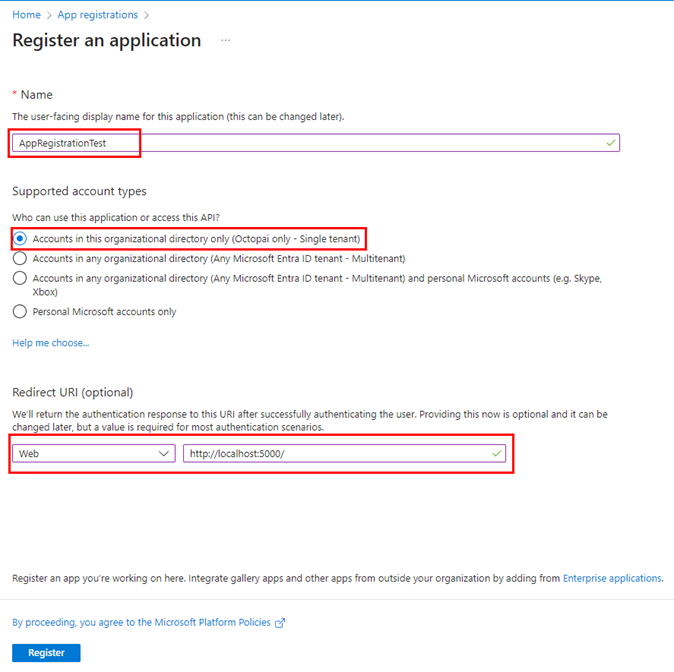
Configure as below and click Register.
Go to Authentication tab > Configure as following > Click Save

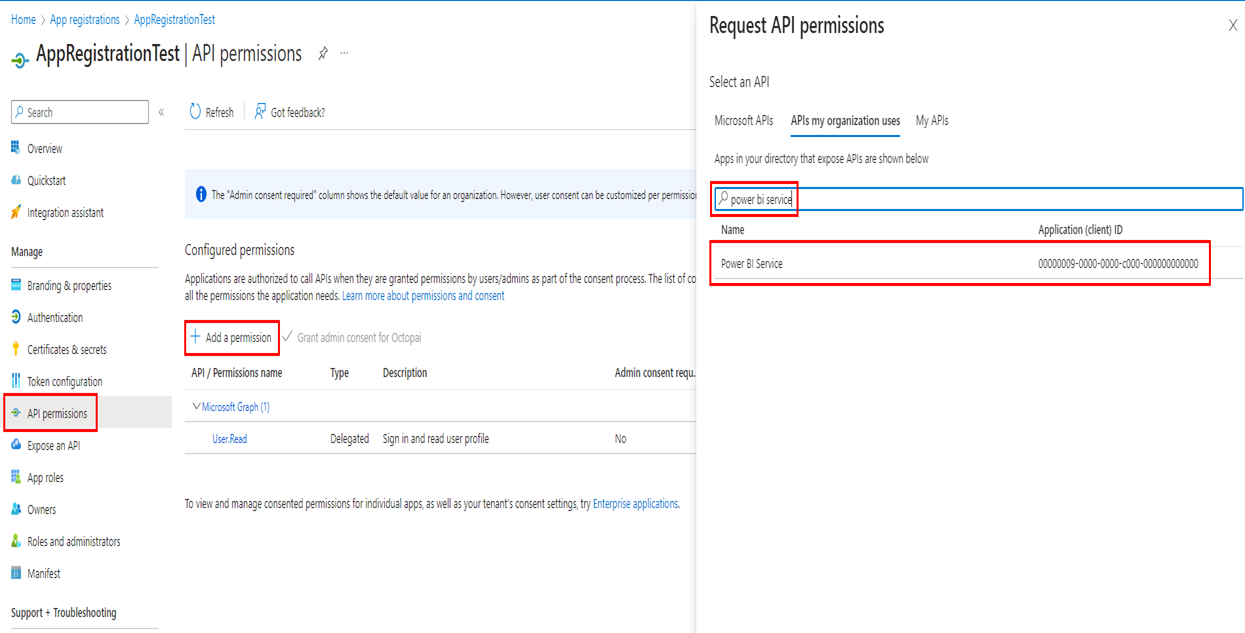
Click the API Permissions tab > Click Add permission > Click APIs my organization uses.
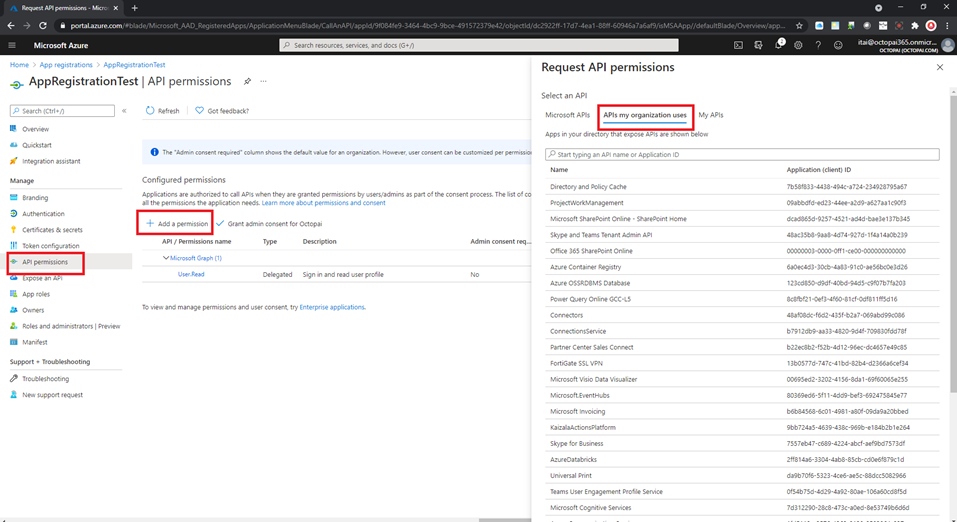
Search for Power bi Service > Click on Power bi Service.
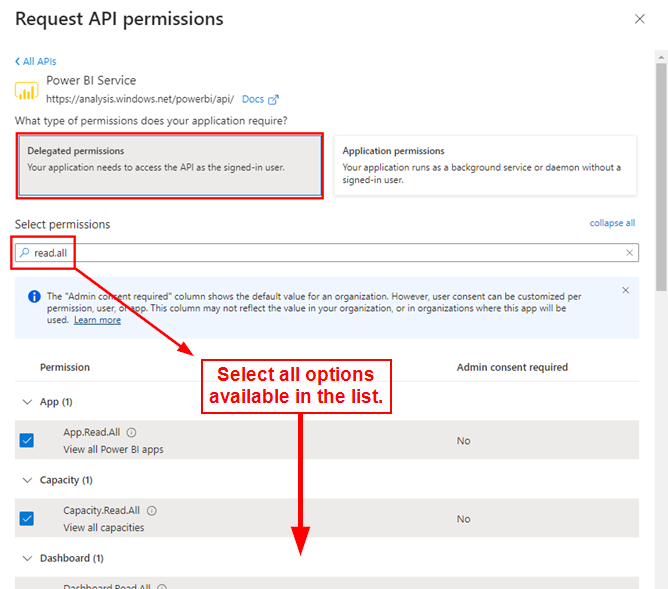
Click Delegated permissions > Search “Read.All” and check ALL related permissions > click Add permission.
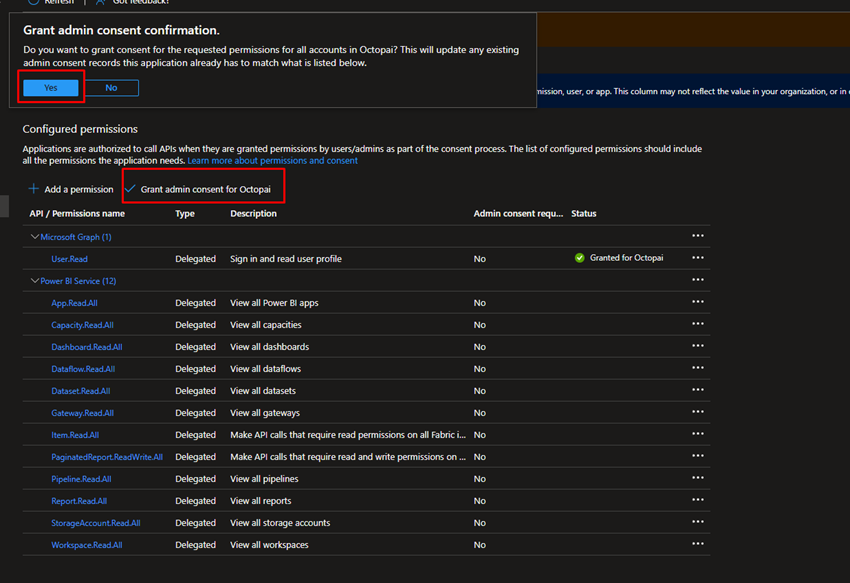
Click Grant admin consent for <Your domain name> > Click Yes
That summarizes the guidelines for creating the AppRegistration and granting it the proper permissions.
Security Group and PowerBI Portal configuration setup
- Please make sure you completed Permissions and configurations setup in Microsoft Azure.
- The workspace license mode must be Premium Per User.
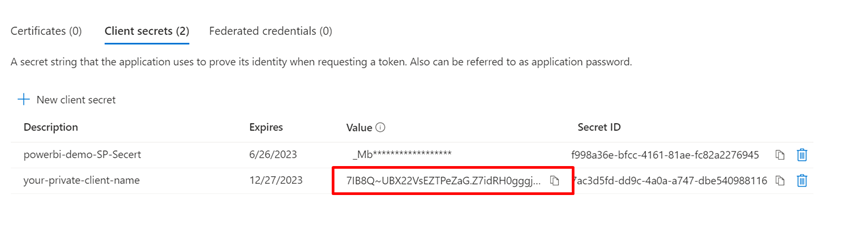
In the Azure portal, go to Certificates & secrets > New client secret.
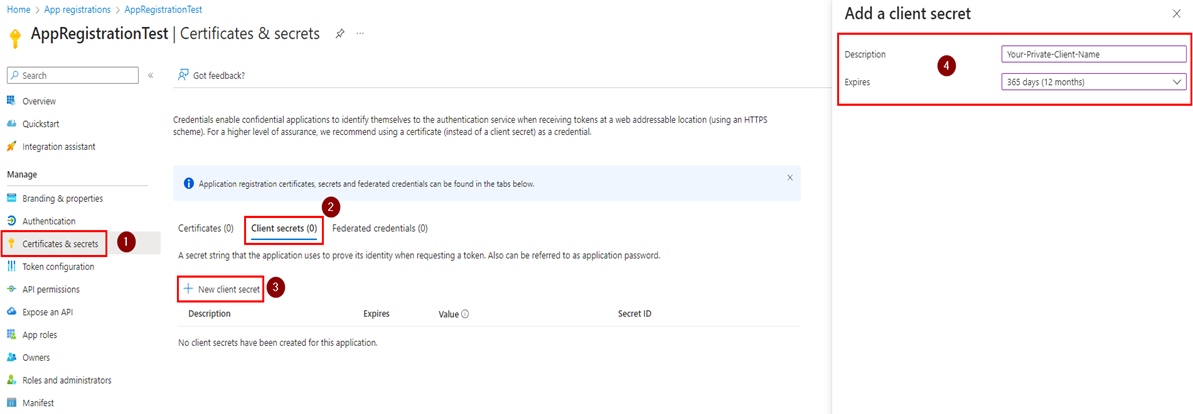
Please copy the Secret value, we will need it later for the OC authentication.
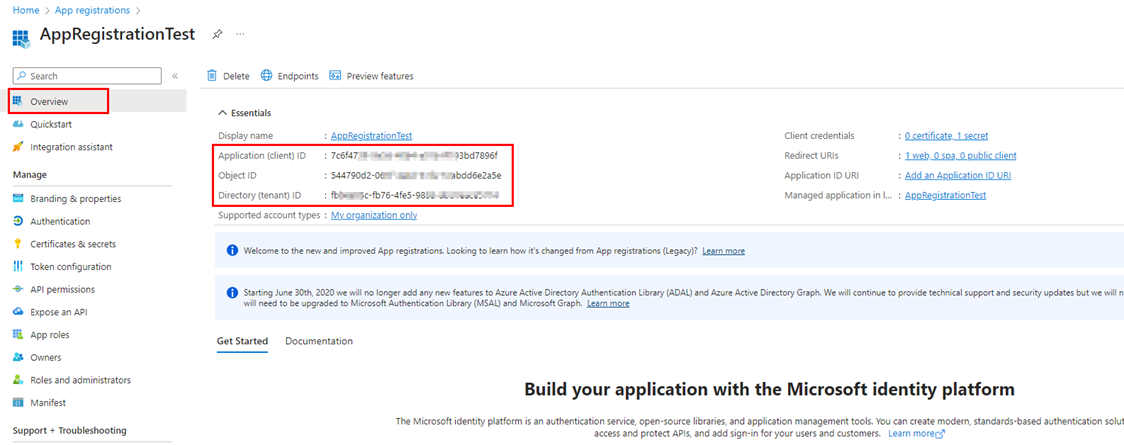
In the Overview tab, we will see the relevant information for the Cloudera Octopai Client.
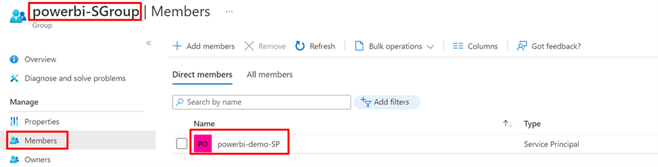
Create Security Group: We will need to create a group in https://portal.azure.com/ under groups OR ADD your Service Principal to an existing group.
(App Registration name = Principal service name)
Power BI Settings (https://app.powerbi.com/home):
Required license type: Workspace License mode must be Premium Per User.

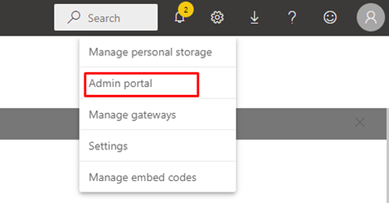
Admin Tenant settings: https://app.powerbi.com/home
Go to Settings - > Admin portal → Tenant settings.
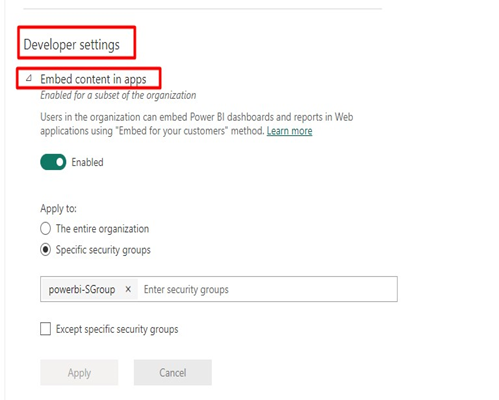
We need to enable the following: Under Tenant settings go to Developer Settings. Enable “Embed content in apps” and “Allow service principals to use Power BI APIs”. Choose the security group that the Service Principal is in.

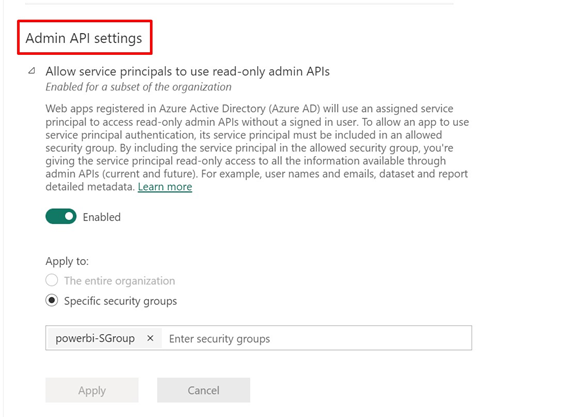
Under Admin API settings enable and add the specific group that the Service Principal is in.
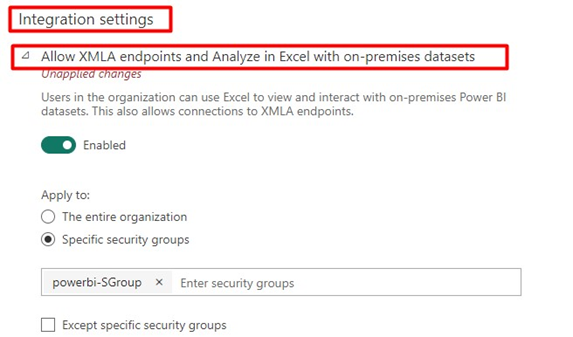
Under Integration settings enable and add the specific group that the Service Principal is in.
Workspace settings:
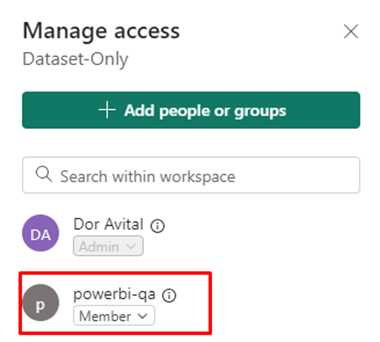
Go to your desired workspace and click Access.

Add the security group you’ve created or the Service Principal to the workspace and give it a Member role.
If you are experiencing trouble with extracting your metadata using the Cloudera Octopai Client, please ensure you have followed all steps in this guide and wait for Microsoft to apply the new configurations across your organization.
Power BI Report Server
Please assign your (application) user with ‘Browse’ and 'Content Manager' roles for reports you would like to see in Cloudera Octopai.
For the Cloudera Octopai Client connector, use the following URL structure:
http:\\comapny-url.com OR http:\\<IP>
Setting up Power BI Metadata Source
Metadata Sources are set on the Cloudera Octopai Client
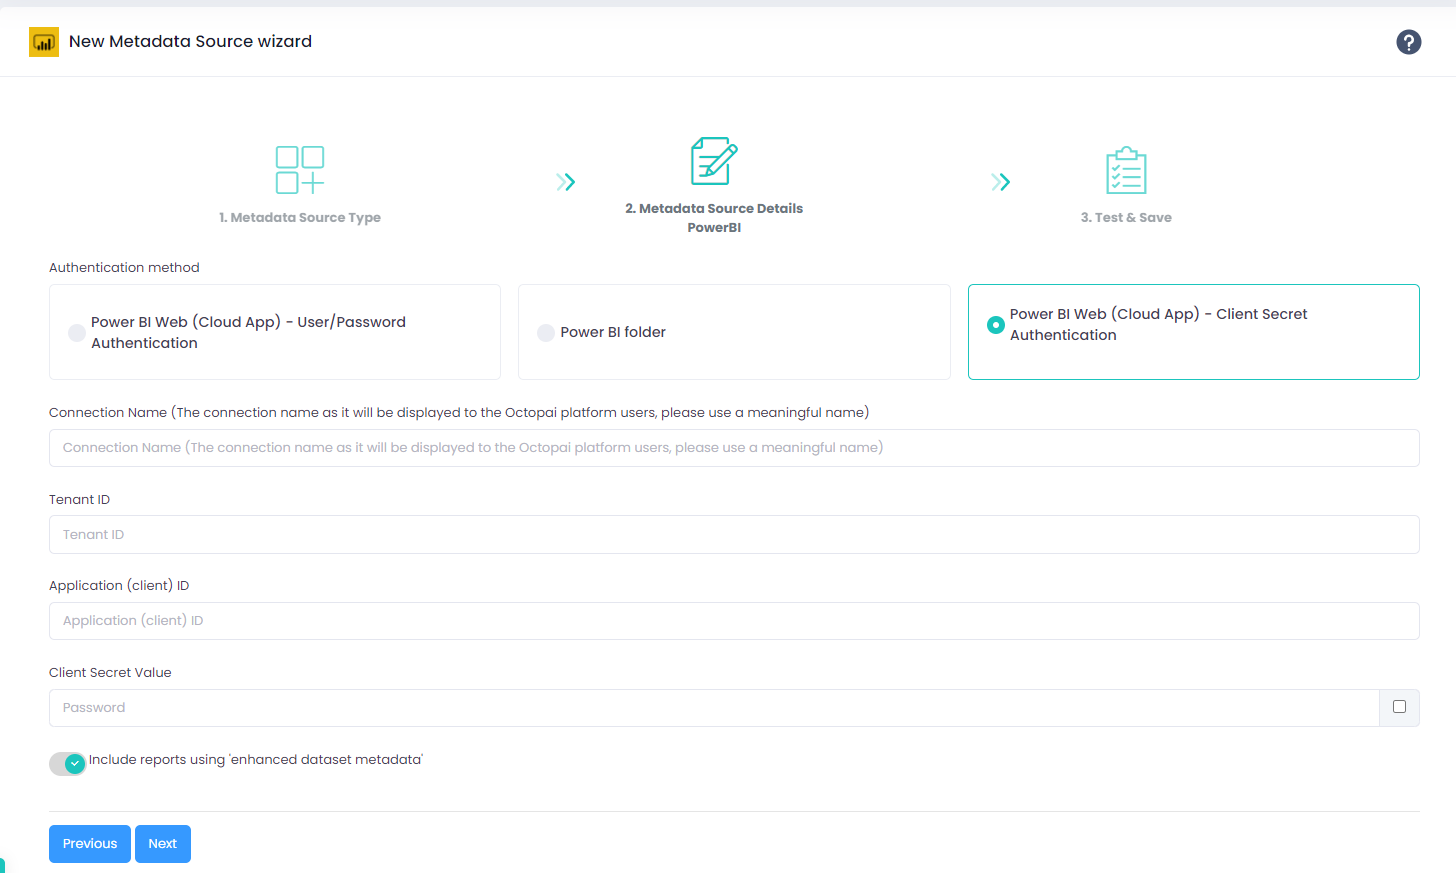
- Connection Name - Give a meaningful name, as it will be displayed to the Cloudera Octopai platform users.
- Tenant ID - Available in the 'App registrations' section under the application you created.
- Application (Client) ID - Available in the 'App registrations' section under the application you created.
- Client Secret - Generated in 'App registrations > Certificates & secrets'.
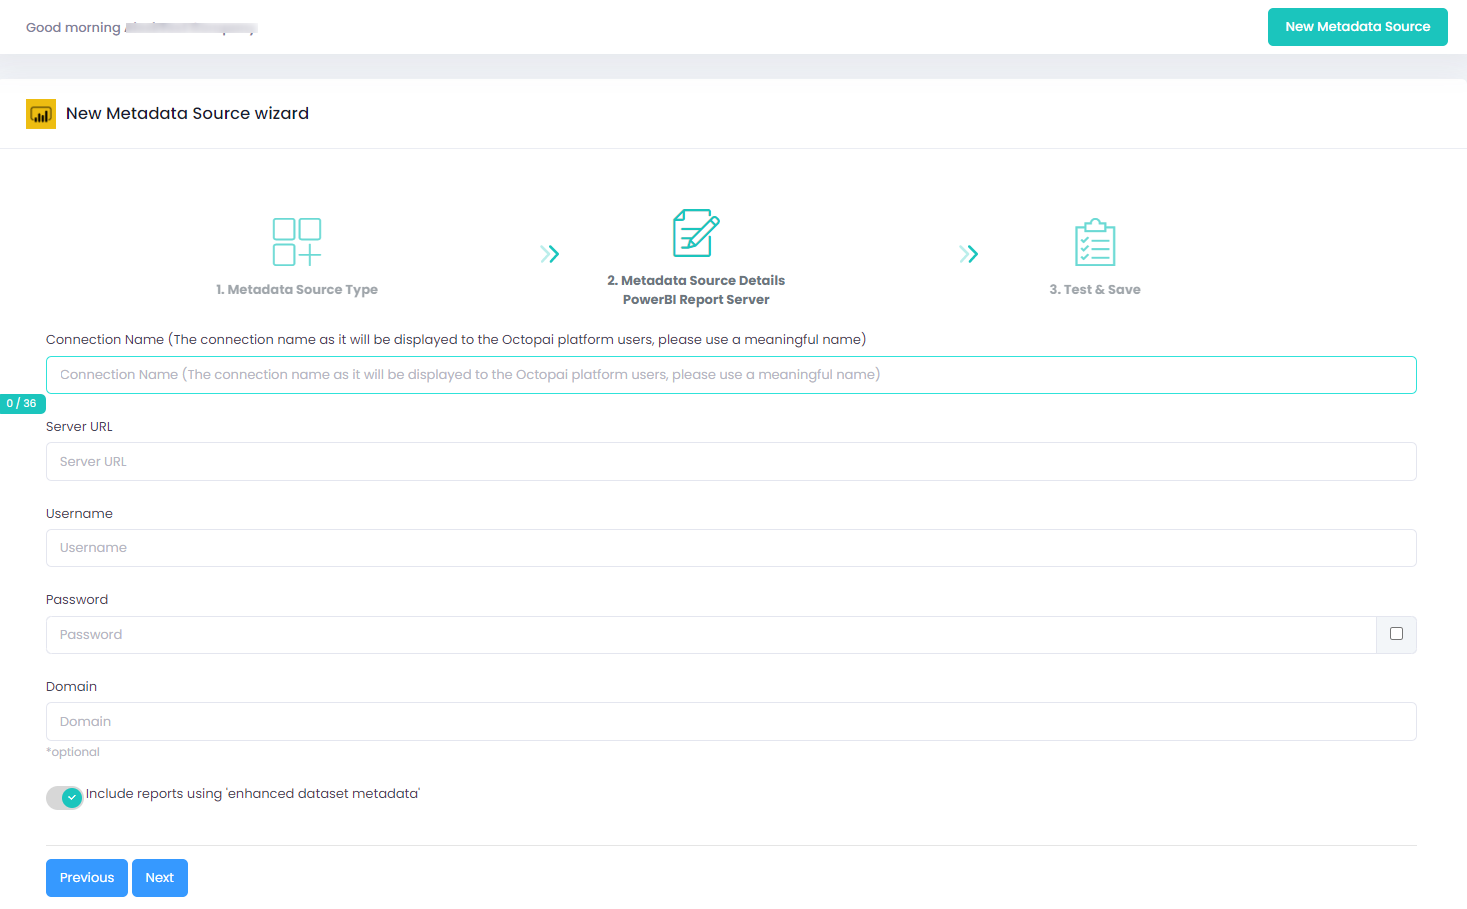
- Connection Name - Give a meaningful name, as it will be displayed to the Cloudera Octopai platform users.
- Server URL - The Report Server's URL.
- Username - The user that is granted the needed roles.
- Password - The user's password.
- Domain (optional) - Only if the user is in a domain.