QlikView
How to configure the Cloudera Octopai QlikView connector.
-
Read Permission for Cloudera Octopai Windows NT User to the QlikView Log files folder.
-
Generate QlikView log files
-
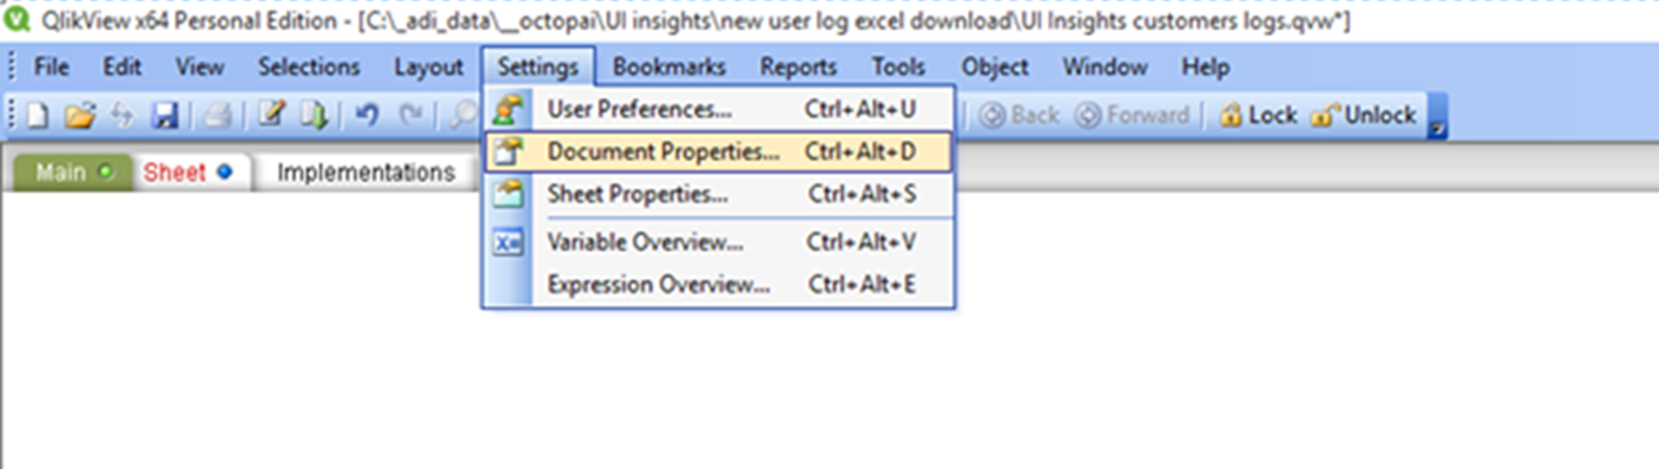
Choose “Settings” > “Document Properties”.
-
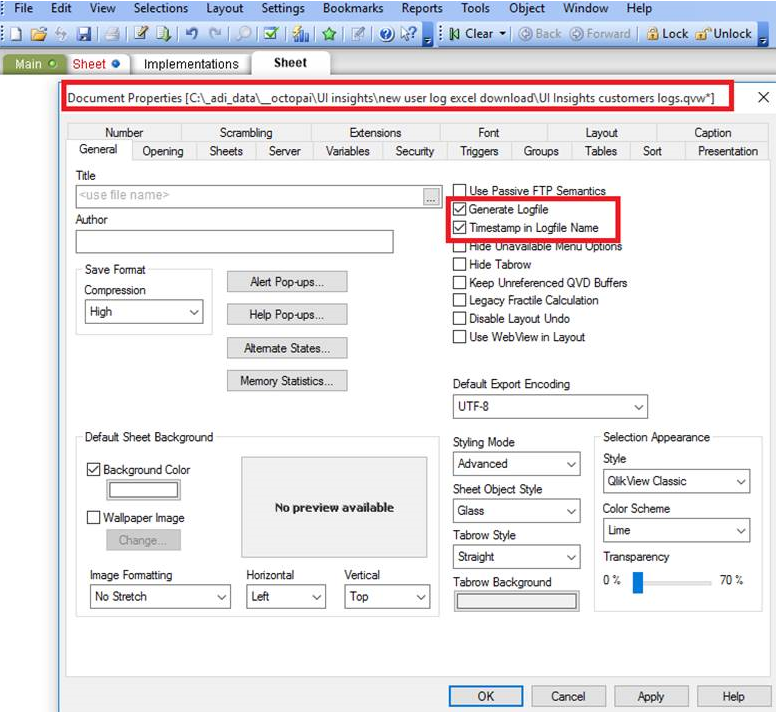
Copy and save the Header – This is the location of the log files that will be used
for the Cloudera Octopai Application.
-
Choose “Settings” > “Document Properties”.
-
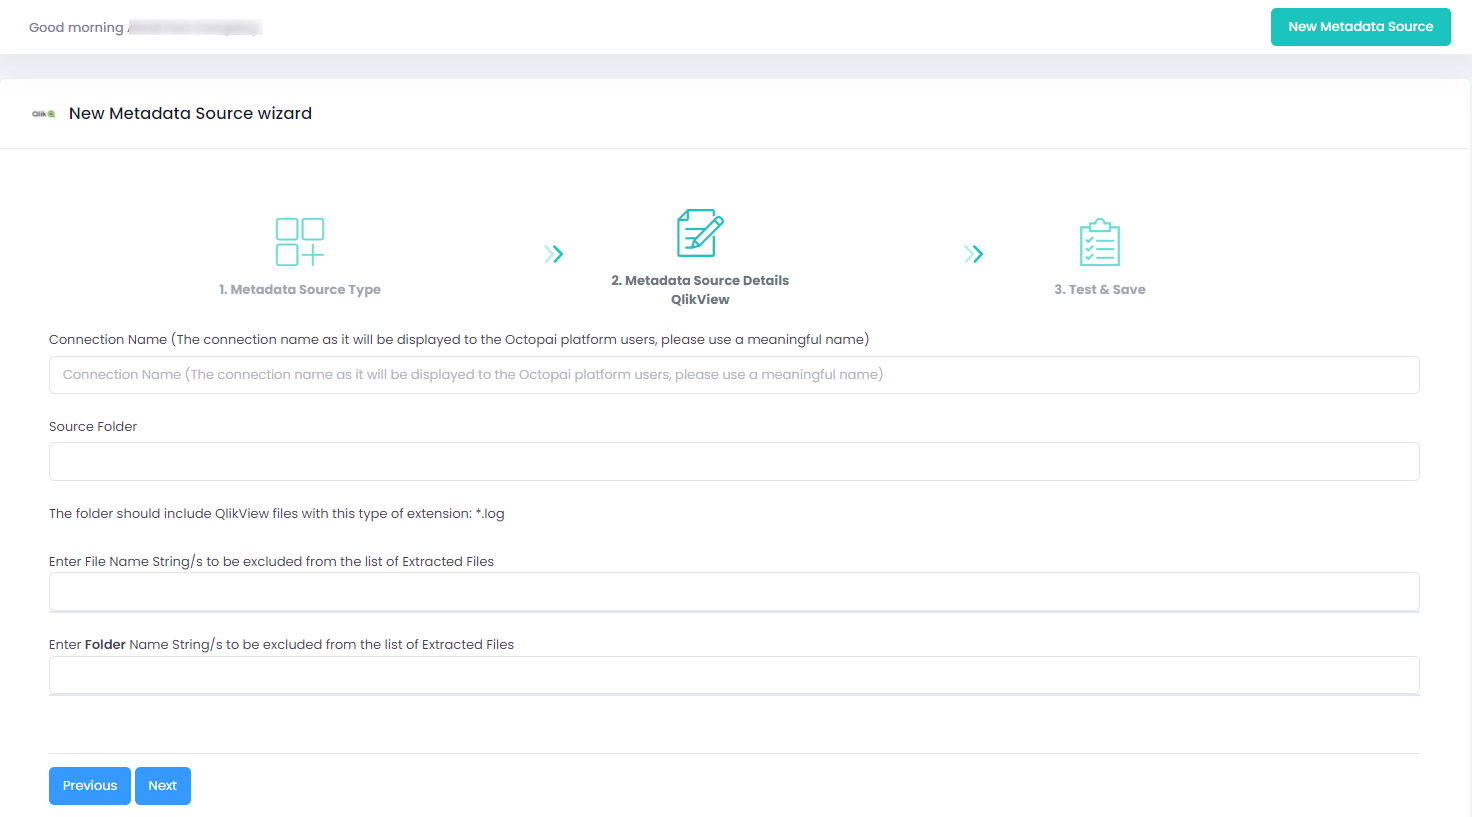
Set up QlikView Metadata Source
If an error occurred during the setup, perform the following troubleshooting steps:
- Check the permissions.
- Send the log with the connector number and name to Cloudera Octopai Support.