Google BigQuery
Learn how to configure Google BigQuery as a metadata source for Cloudera Data Lineage (formerly Octopai).
Tool Permissions Prerequisites
Google Service Account (SA) integrated with Cloudera Data Lineage.
How to establish a Google Cloud Service Account
Creating a Google Cloud Service Account (SA)
- Open the Google Cloud Console and navigate to your desired project.
- Access the IAM & Admin menu and select 'Service Accounts'.
-
Click on 'Create Service Account' to initiate the creation process.
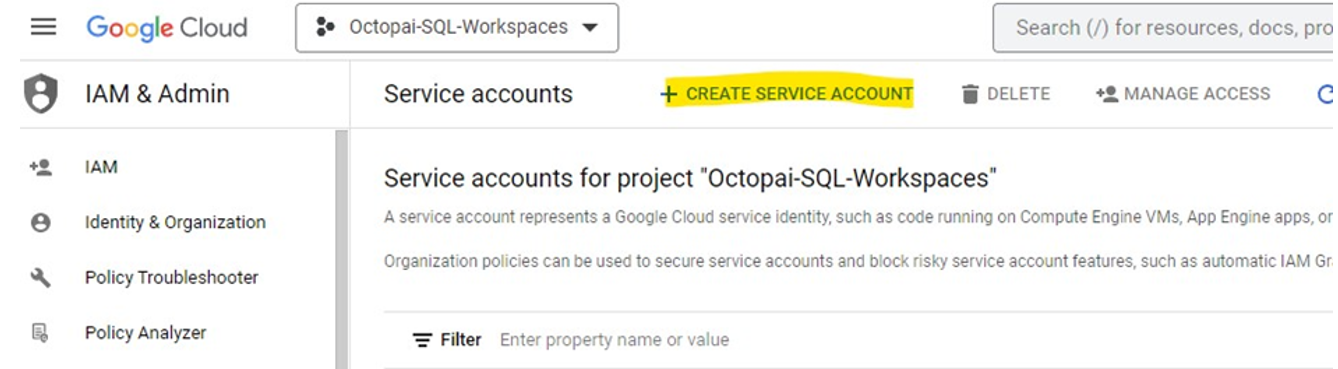
-
Assign a unique, identifiable name to your Service Account. Upon clicking 'Create and Continue', an Identity and Access Management (IAM) principal will be instantiated automatically.
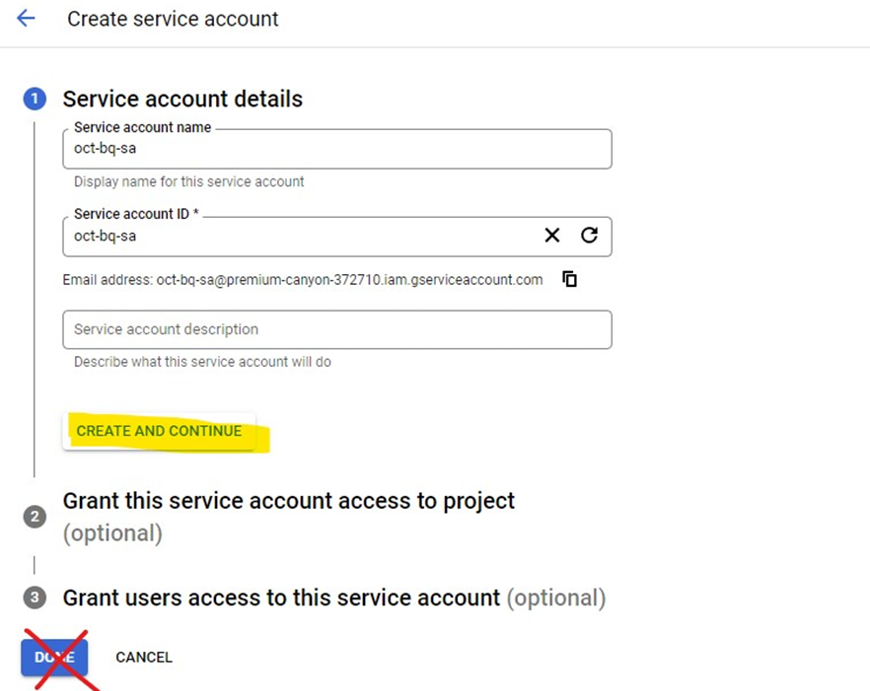
-
From the 'roles' dropdown menu, select both 'BigQuery Data Viewer' and 'BigQuery Job User' to assign necessary permissions to your Service Account.
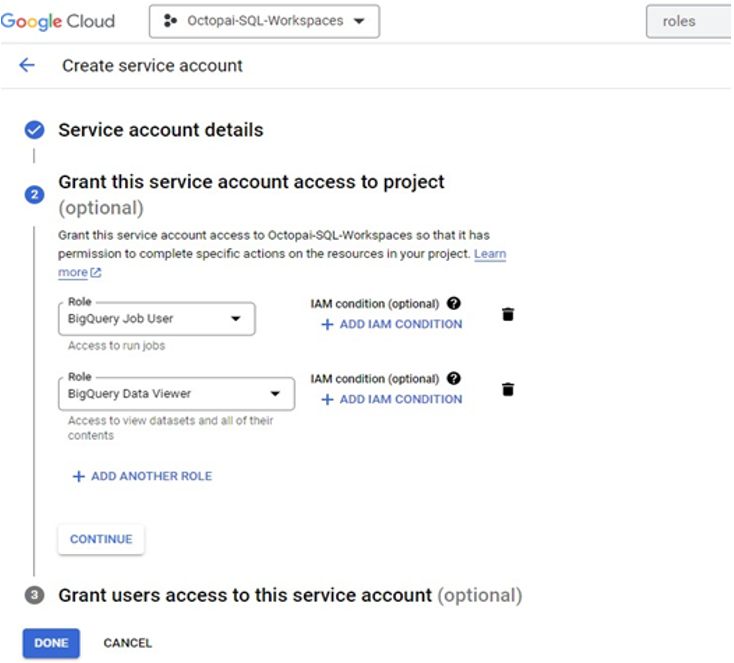
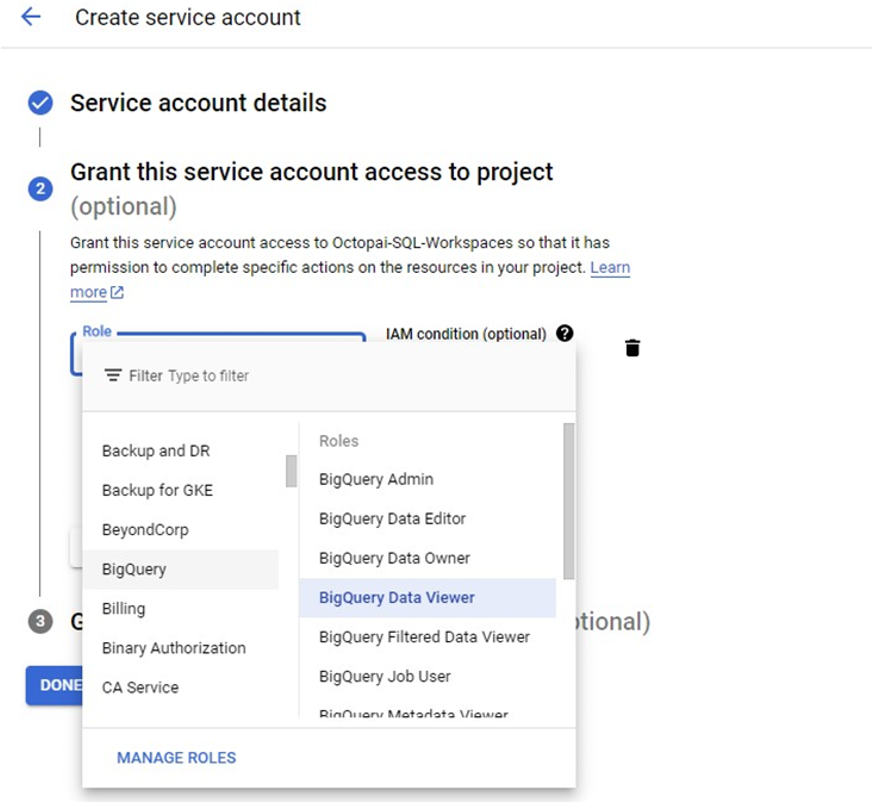
- Complete the Service Account creation process by clicking 'Done'.
-
Access the newly created Service Account and navigate to the 'KEYS' tab.
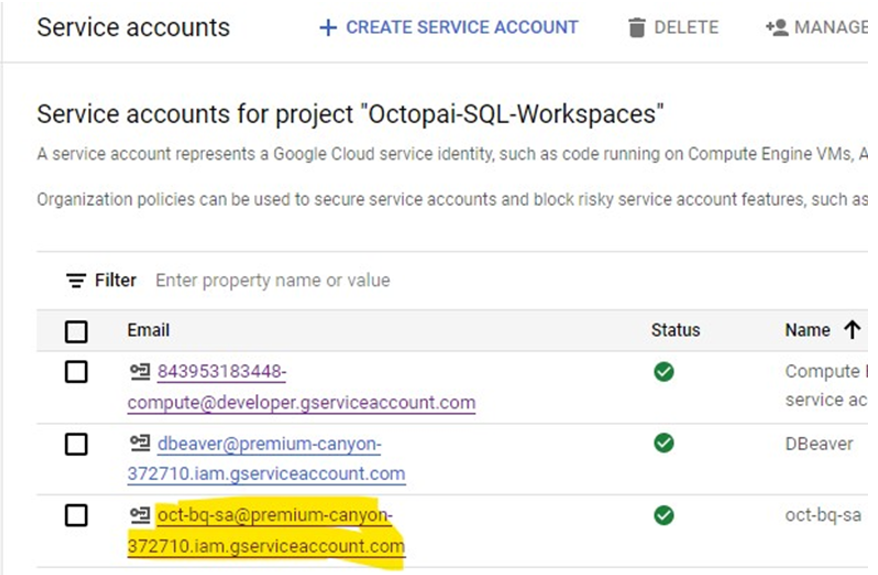
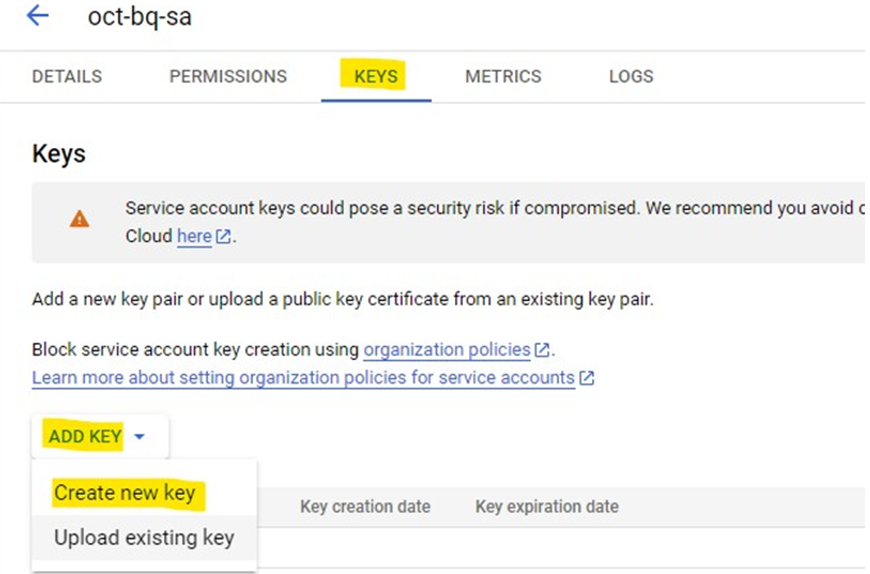
Generating a Service Account Key
-
Click on 'ADD KEY', then 'Create new key'. Make sure to select the JSON format. The key will automatically be downloaded to your local system.
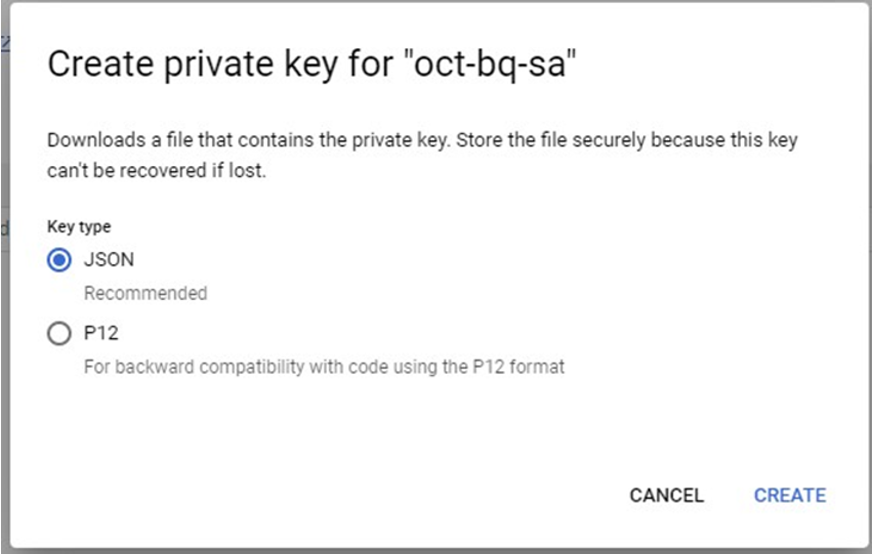
Configuring Cloudera Data Lineage with BigQuery:
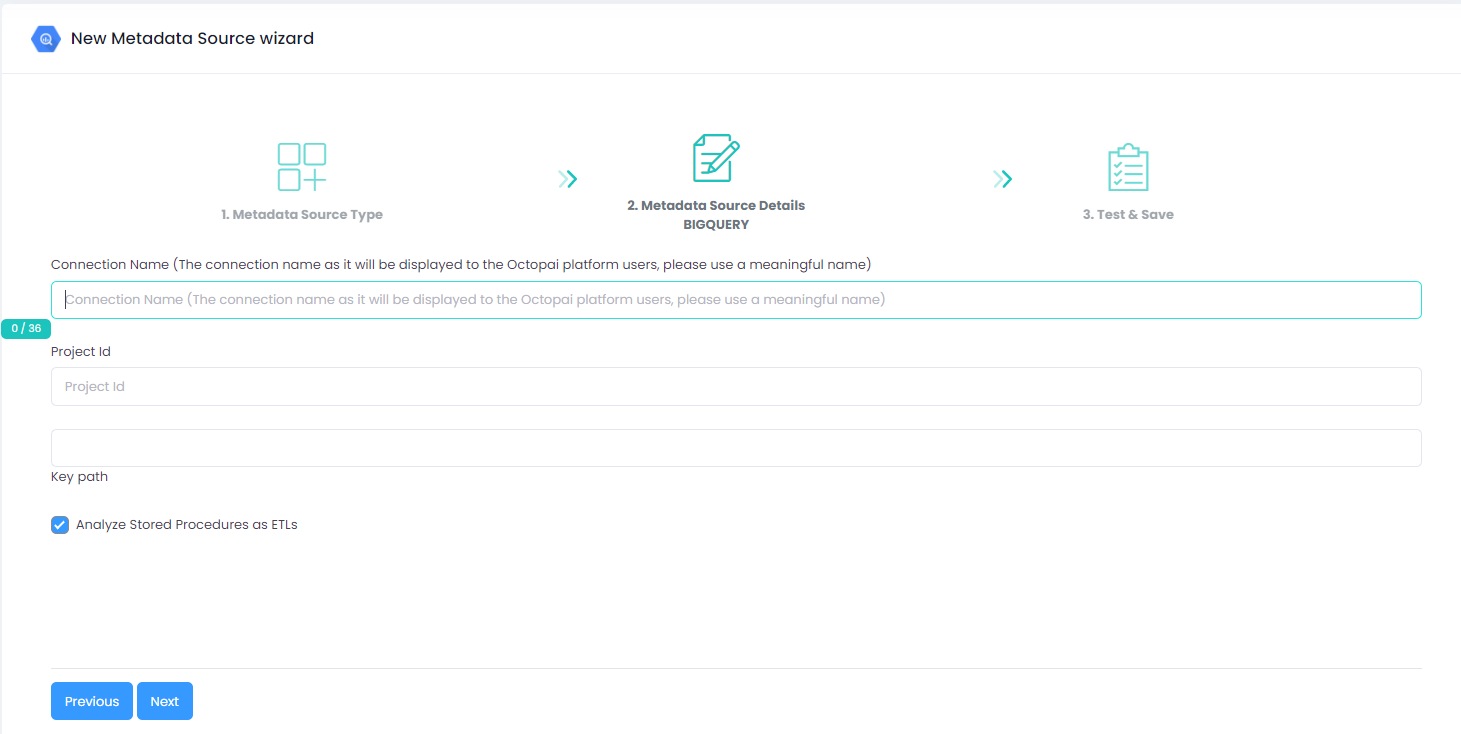
- Open Cloudera Data Lineage and start the creation of a new metadata source, choosing 'BigQuery' as your source.
- Assign a descriptive name to this metadata source for easy reference in the future.
- Input the Project ID associated with your Google Cloud project. This can be found within the downloaded JSON file (under the 'project_id' field) or in the project selector on the Google Cloud Console.
- Specify the file path where your downloaded JSON key file is stored in the 'Key Path' field.
- Save your settings and initiate the connection by clicking 'Save and Run'.
Setting up Google BigQuery Metadata Source
Metadata Sources are set on the Octopai Client
If your datasets are not in the US multi-region, see Configure the BigQuery region.
Verify extraction results
After a successful run, confirm the metadata archive in the target folder. See Verify extracted metadata files.
Troubleshoot
If an error occurs during the extraction, see Troubleshoot connector extraction failures.