Adding a Ranger security zone
How to add a new Ranger Security Zone.
-
On the Security Zone page, click the + icon.
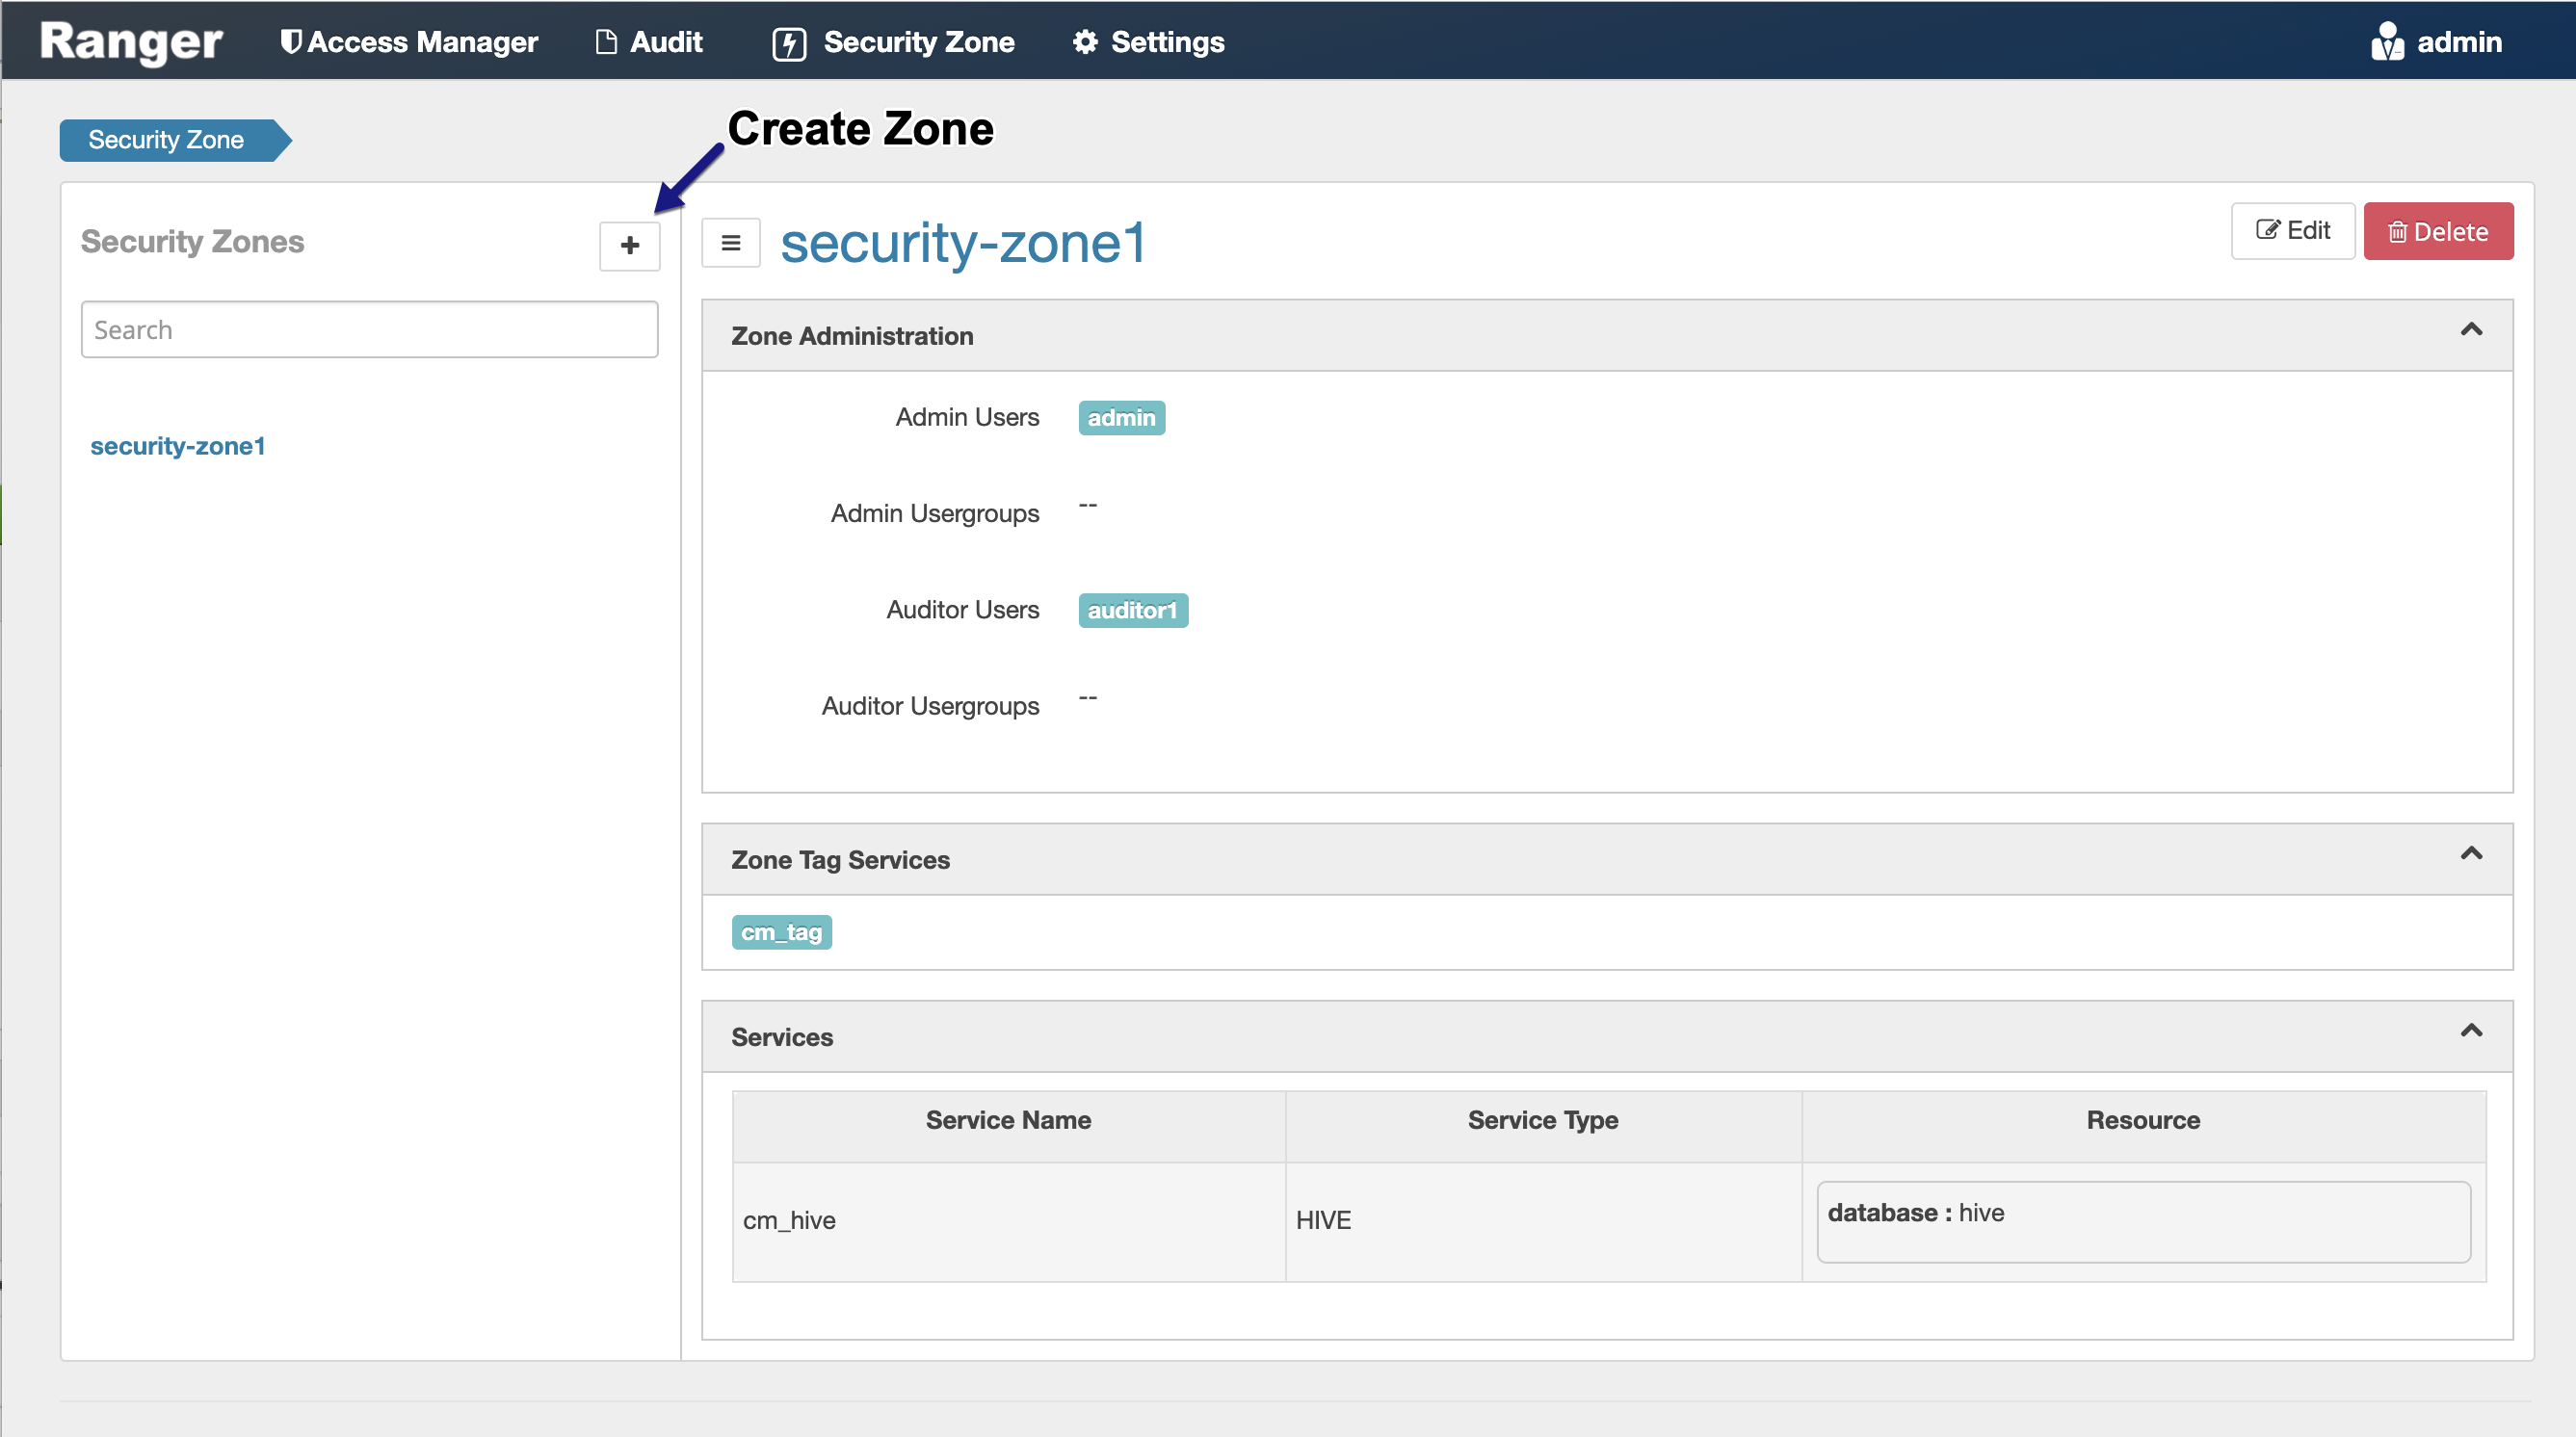
The Create Zone page appears.
-
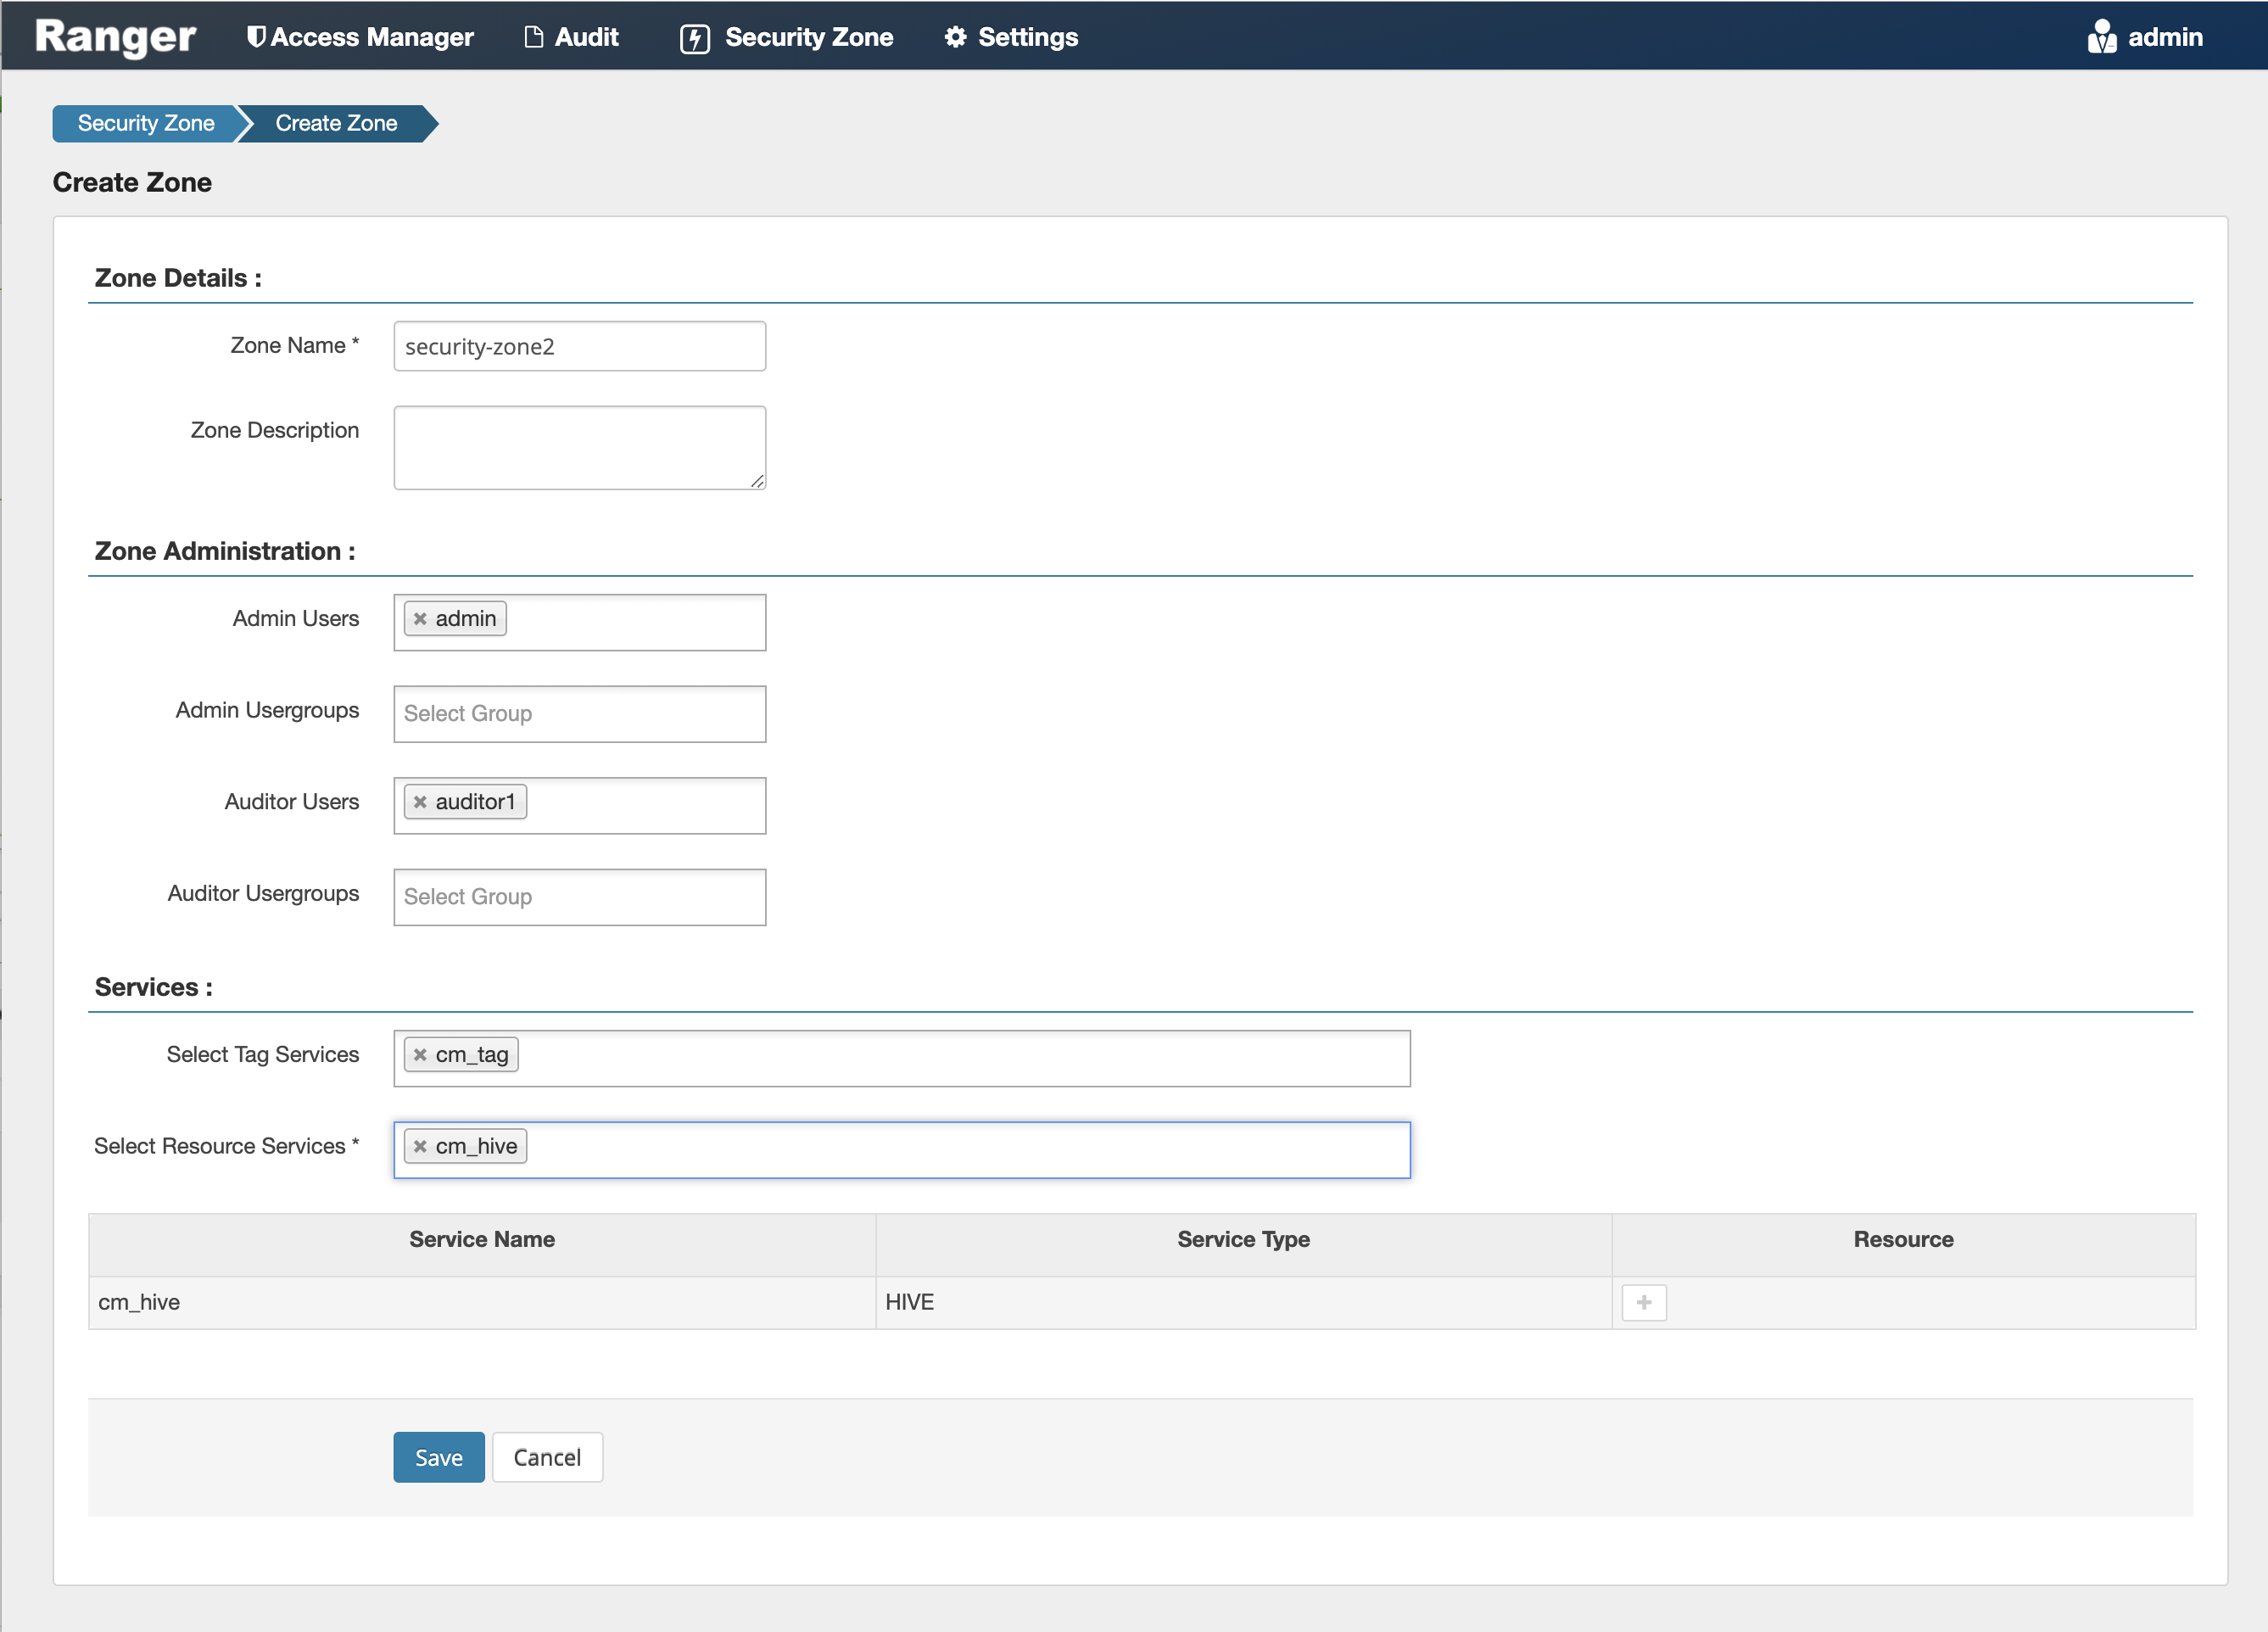
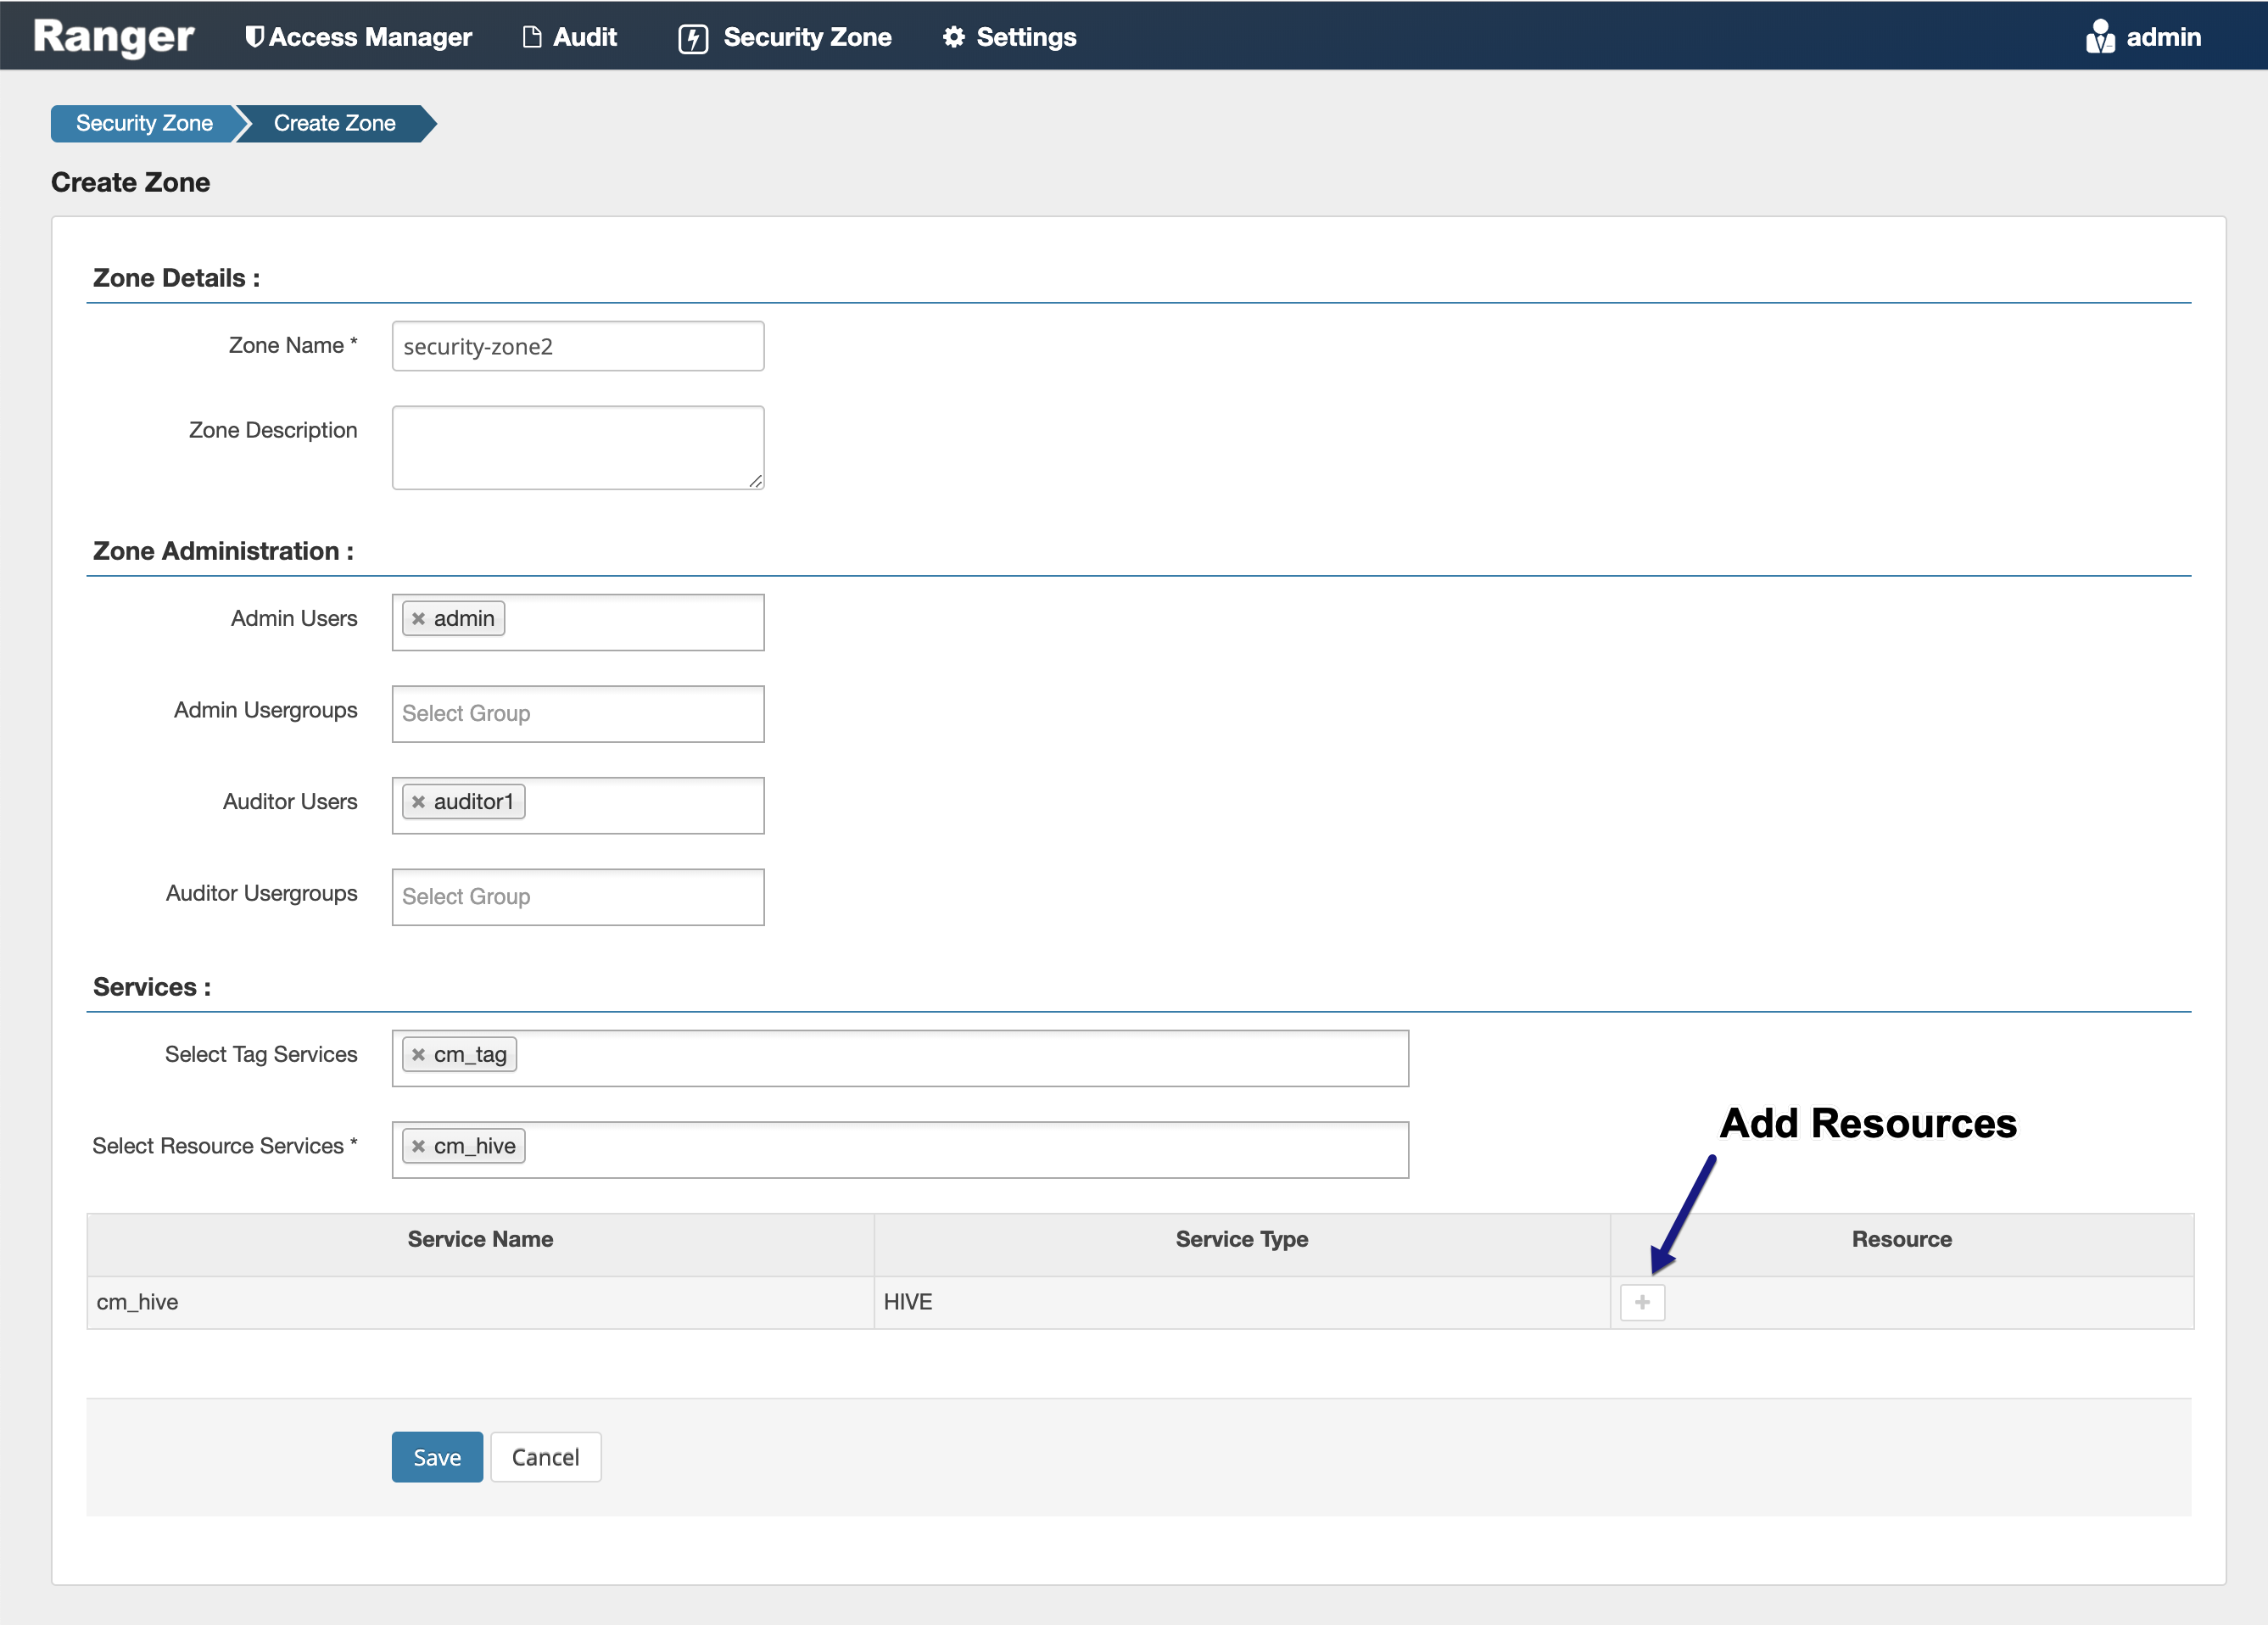
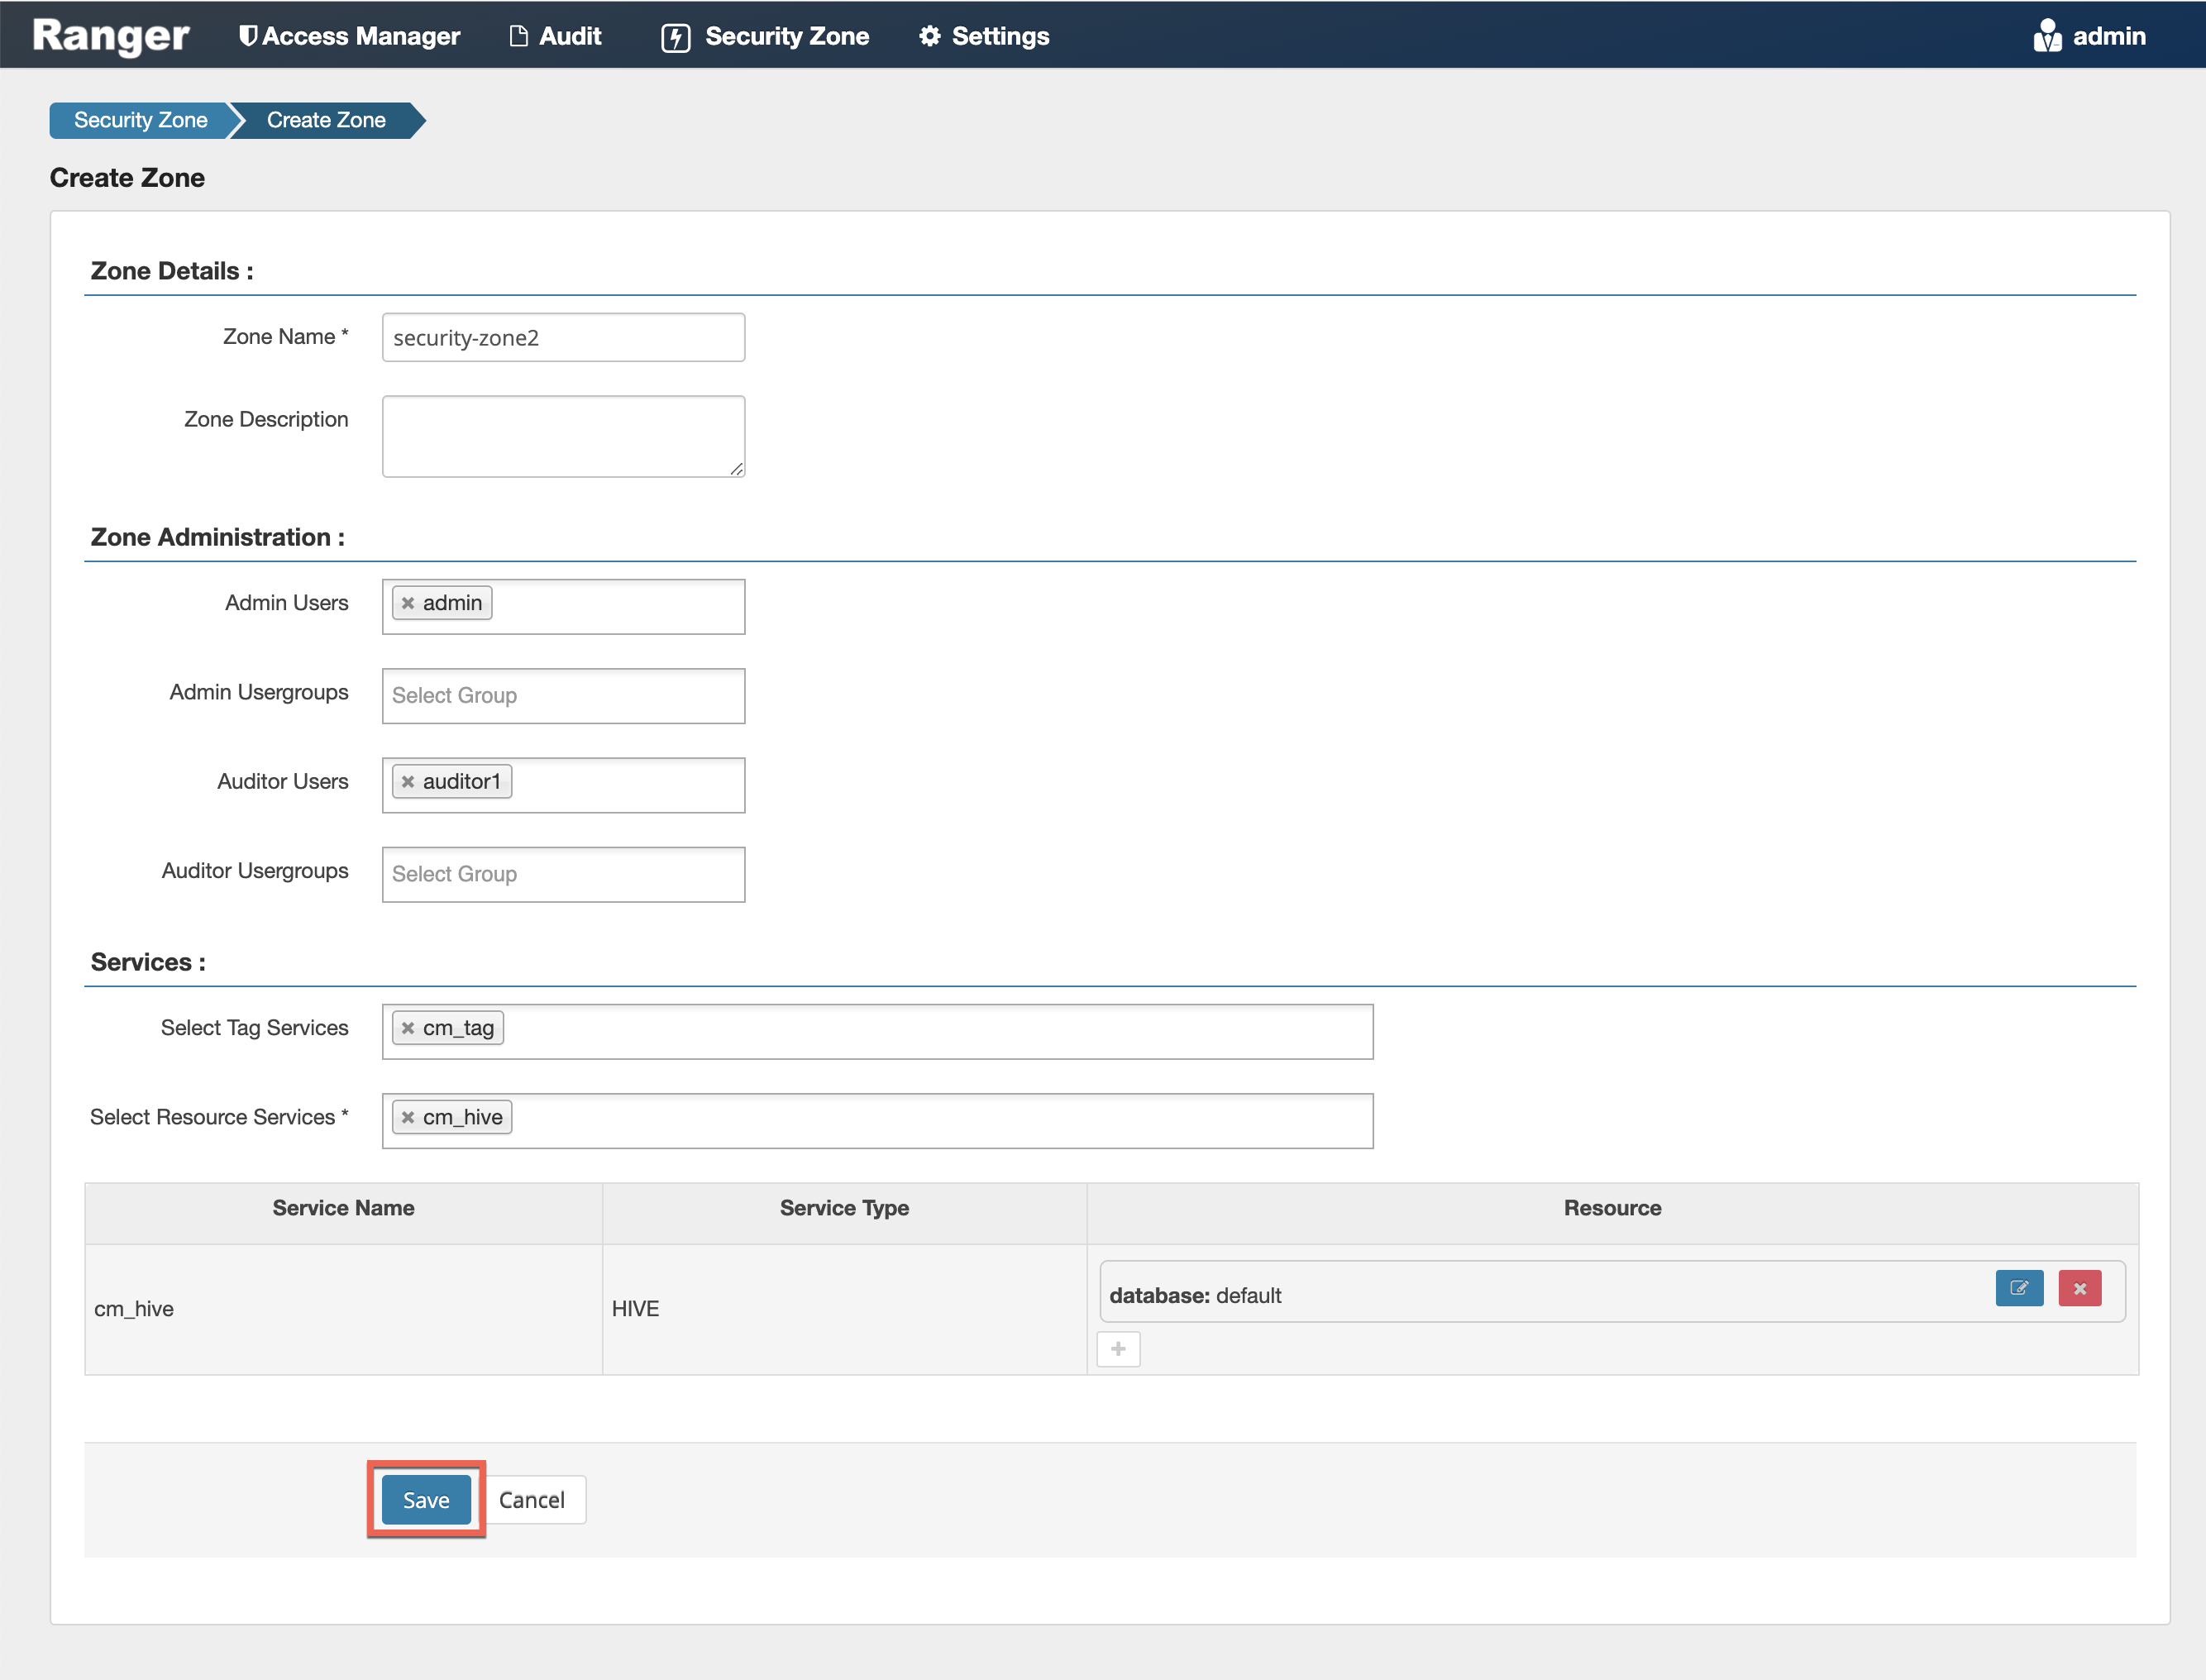
Selected Services are listed in the Services table. To add resources for each
selected service, click the + icon in the Resources column for the applicable
service.
-
Use the Add/Edit Resources pop-up to specify resources for the service, then click
Save.
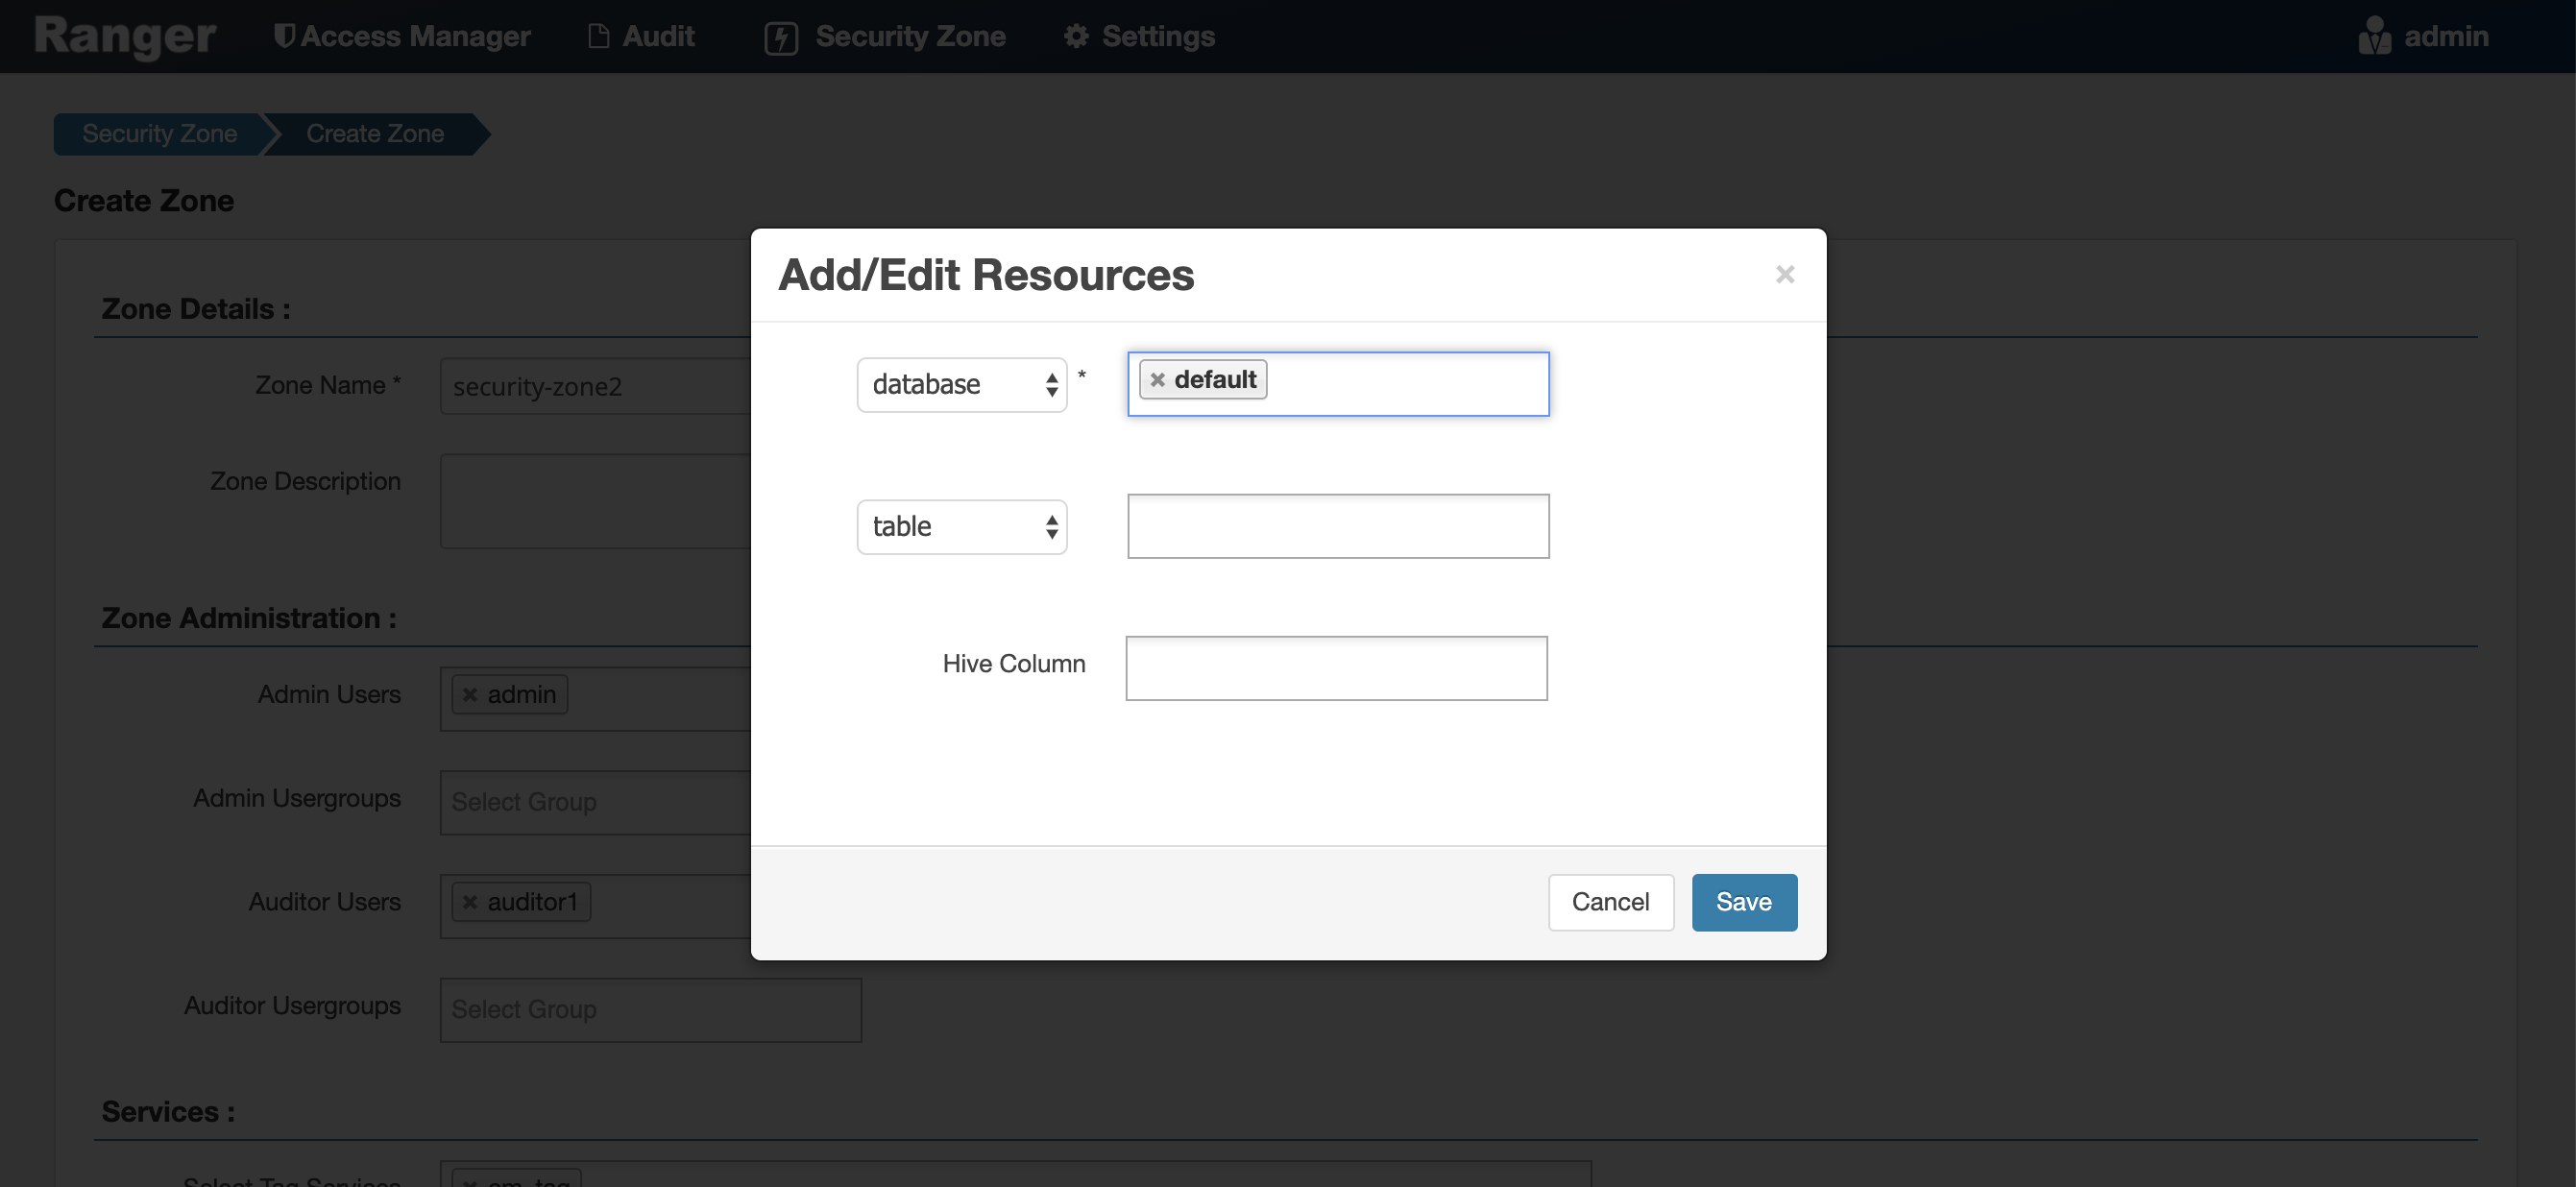 The resources are listed in the Resources column of the Services table.
 -
Click Save at the bottom of the Create Zone page to save the new security
zone.
-
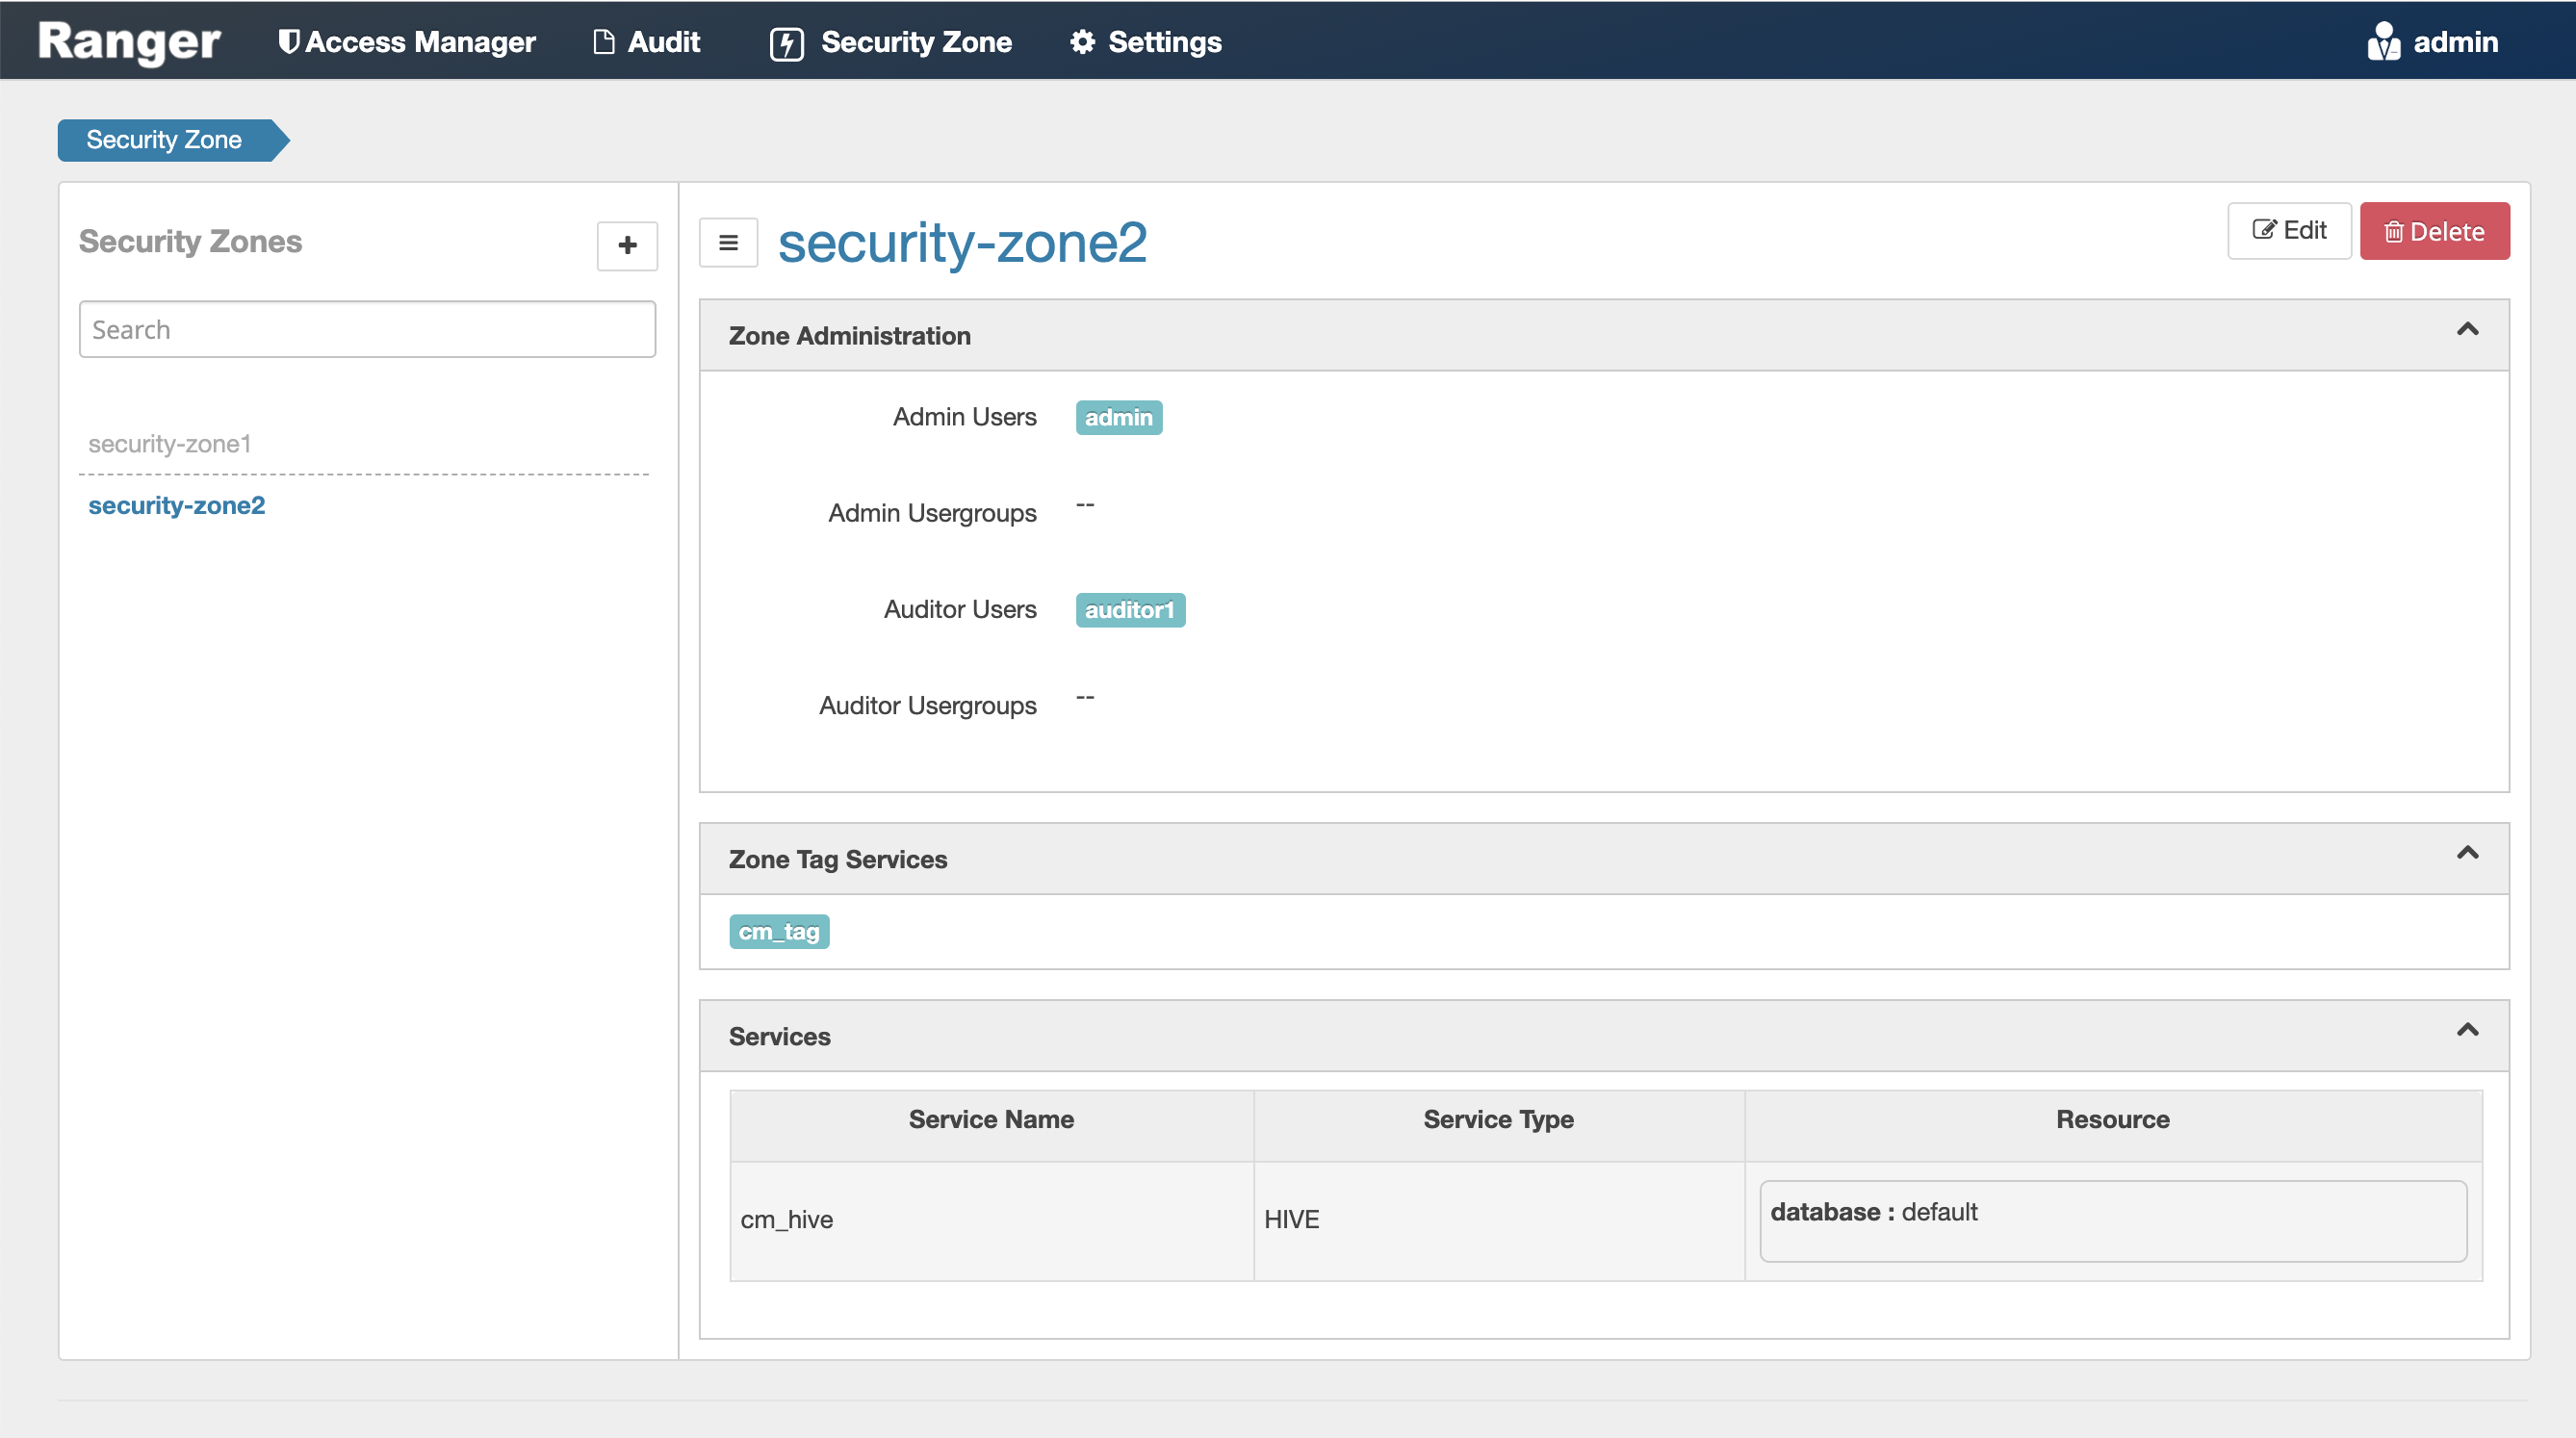
The new security zone is listed on the Security Zone page.
-
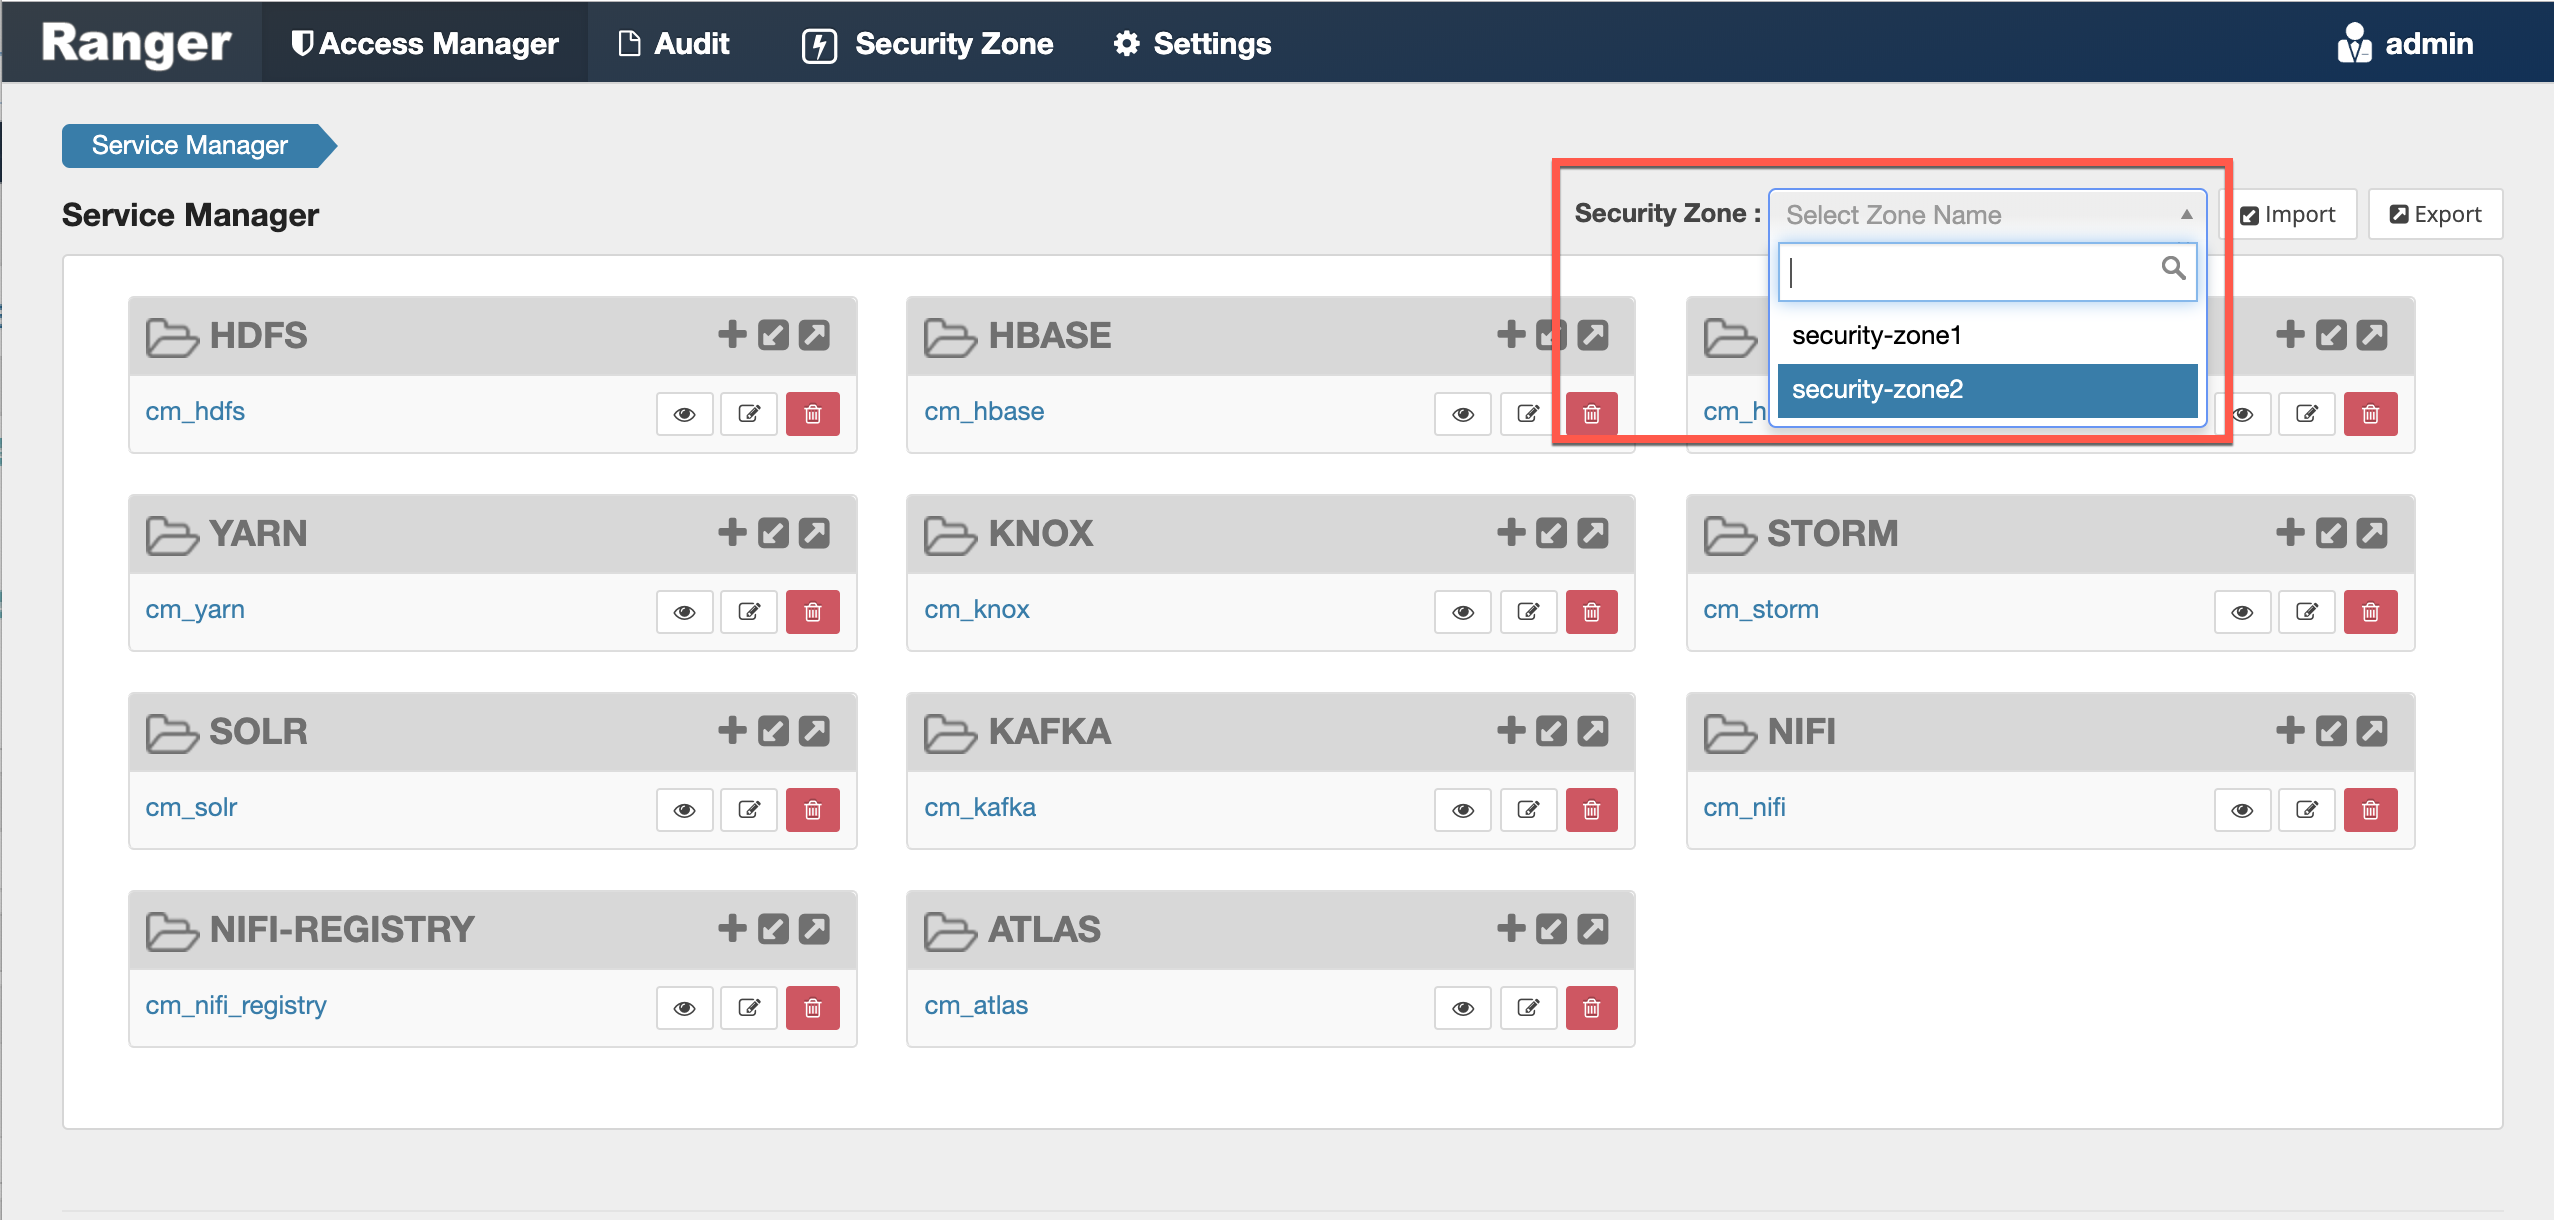
After security zones have been created, you can use the Security Zone selection box
on the Service Manager page to display the services assigned to the selected security
zone. A Zone Name column appears in the table on the Audit > Access page, and also in
the Access Manager > Reports tables.