Writing data to Ozone in an unsecured cluster with Kafka Connect
You can use the
HDFS Sink Connector
developed by Cloudera,
i
to write Kafka topic data to
Ozone in an unsecure
cluster. Connector deployment and configuration is done using the SMM UI.
The following
steps walk
you through how the
Cloudera-developed
HDFS Sink Connector can be set up
and deployed using the SMM UI.
In addition to the
connector setup, these steps also describe how you can create a test topic
and populate it with data using Kafka command line tools. If you already have a topic that
is ready for use and do not want to create a test topic, you can skip steps 1 through 3.
These steps deal with topic creation, message
consumption,
and message production.
These
steps
are
optional.
An unsecure CDP PvC Base cluster with Kafka,
SMM,
and Ozone is set up and configured.
The
messages you produced with
kafka-console-producer
appear. In addition, you can switch
to the
terminal session that is running
kafka-console-producer and produce additional messages. These new
messages
appear
in real time in the session running
kafka-console-consumer.
Deploy and configure
an
HDFS Sink Connector:
In Cloudera Manager, select the Streams Messaging Manager service.
Click Streams Messaging Manager Web UI.
Click the Connect option in the left-side menu.
Click + New Connector to add a new connector.
Go to the Sink Connectors tab and select the HDFS Sink
Connector.
On the UI the HDFS Sink Connector is represented by its class name, which is
com.cloudera.dim.kafka.connect.hdfs.HdfsSinkConnector.
Ensure
that you replace the values of hdfs.uri and
hdfs.output with valid Ozone paths. The template gives an example
of how these paths should look like. Replace any other values depending on your
cluster
configuration
and requirements.
Click Validate.
The validator displays any JSON errors in your configuration. Fix any errors that
are displayed. If your JSON is valid, the JSON is valid message
is displayed in the validator.
Click Next.
Review your connector configuration.
Click Deploy
.
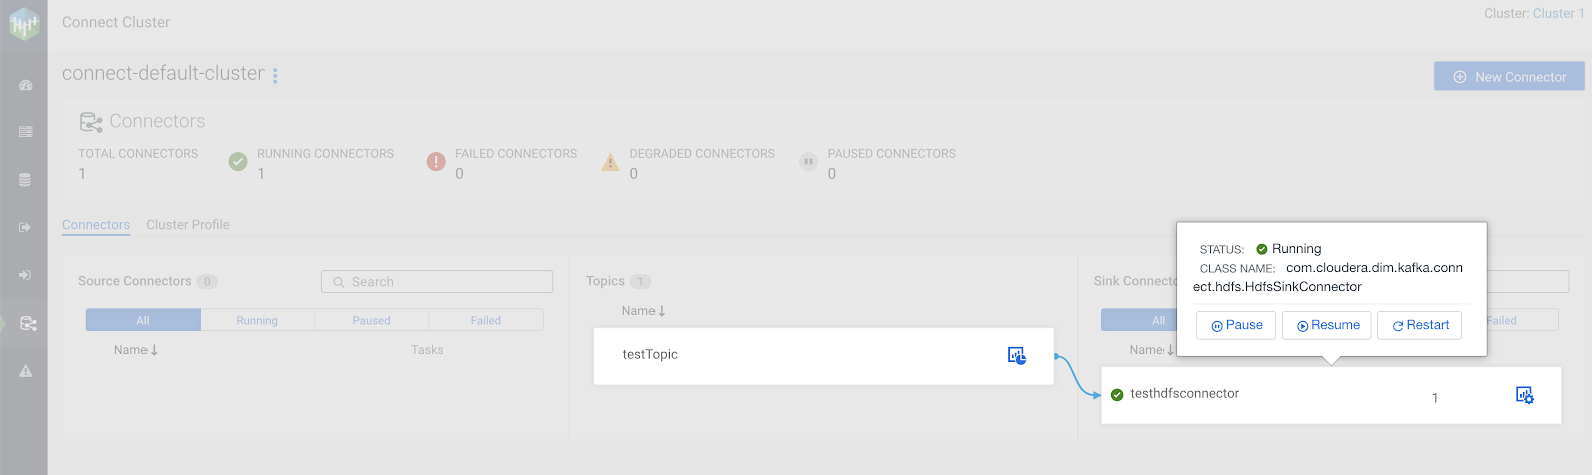
Verify that connector deployment is successful:
In the SMM UI, click the Connect option in the left-side
menu.
Click on either the topic or the connector you created.
If
connector deployment is successful, a flow is displayed between the topic you
specified and the connector you created.
Verify that topic data is written to Ozone.
You can do this by
listing
the files under the o3fs:// location you specified in the connector
configuration.