Adding tag-based policies
Tag-based policies enable you to control access to resources across multiple Hadoop components without creating separate services and policies in each component. You can also use Ranger TagSync to synchronize the Ranger tag store with an external metadata service such as Apache Atlas.
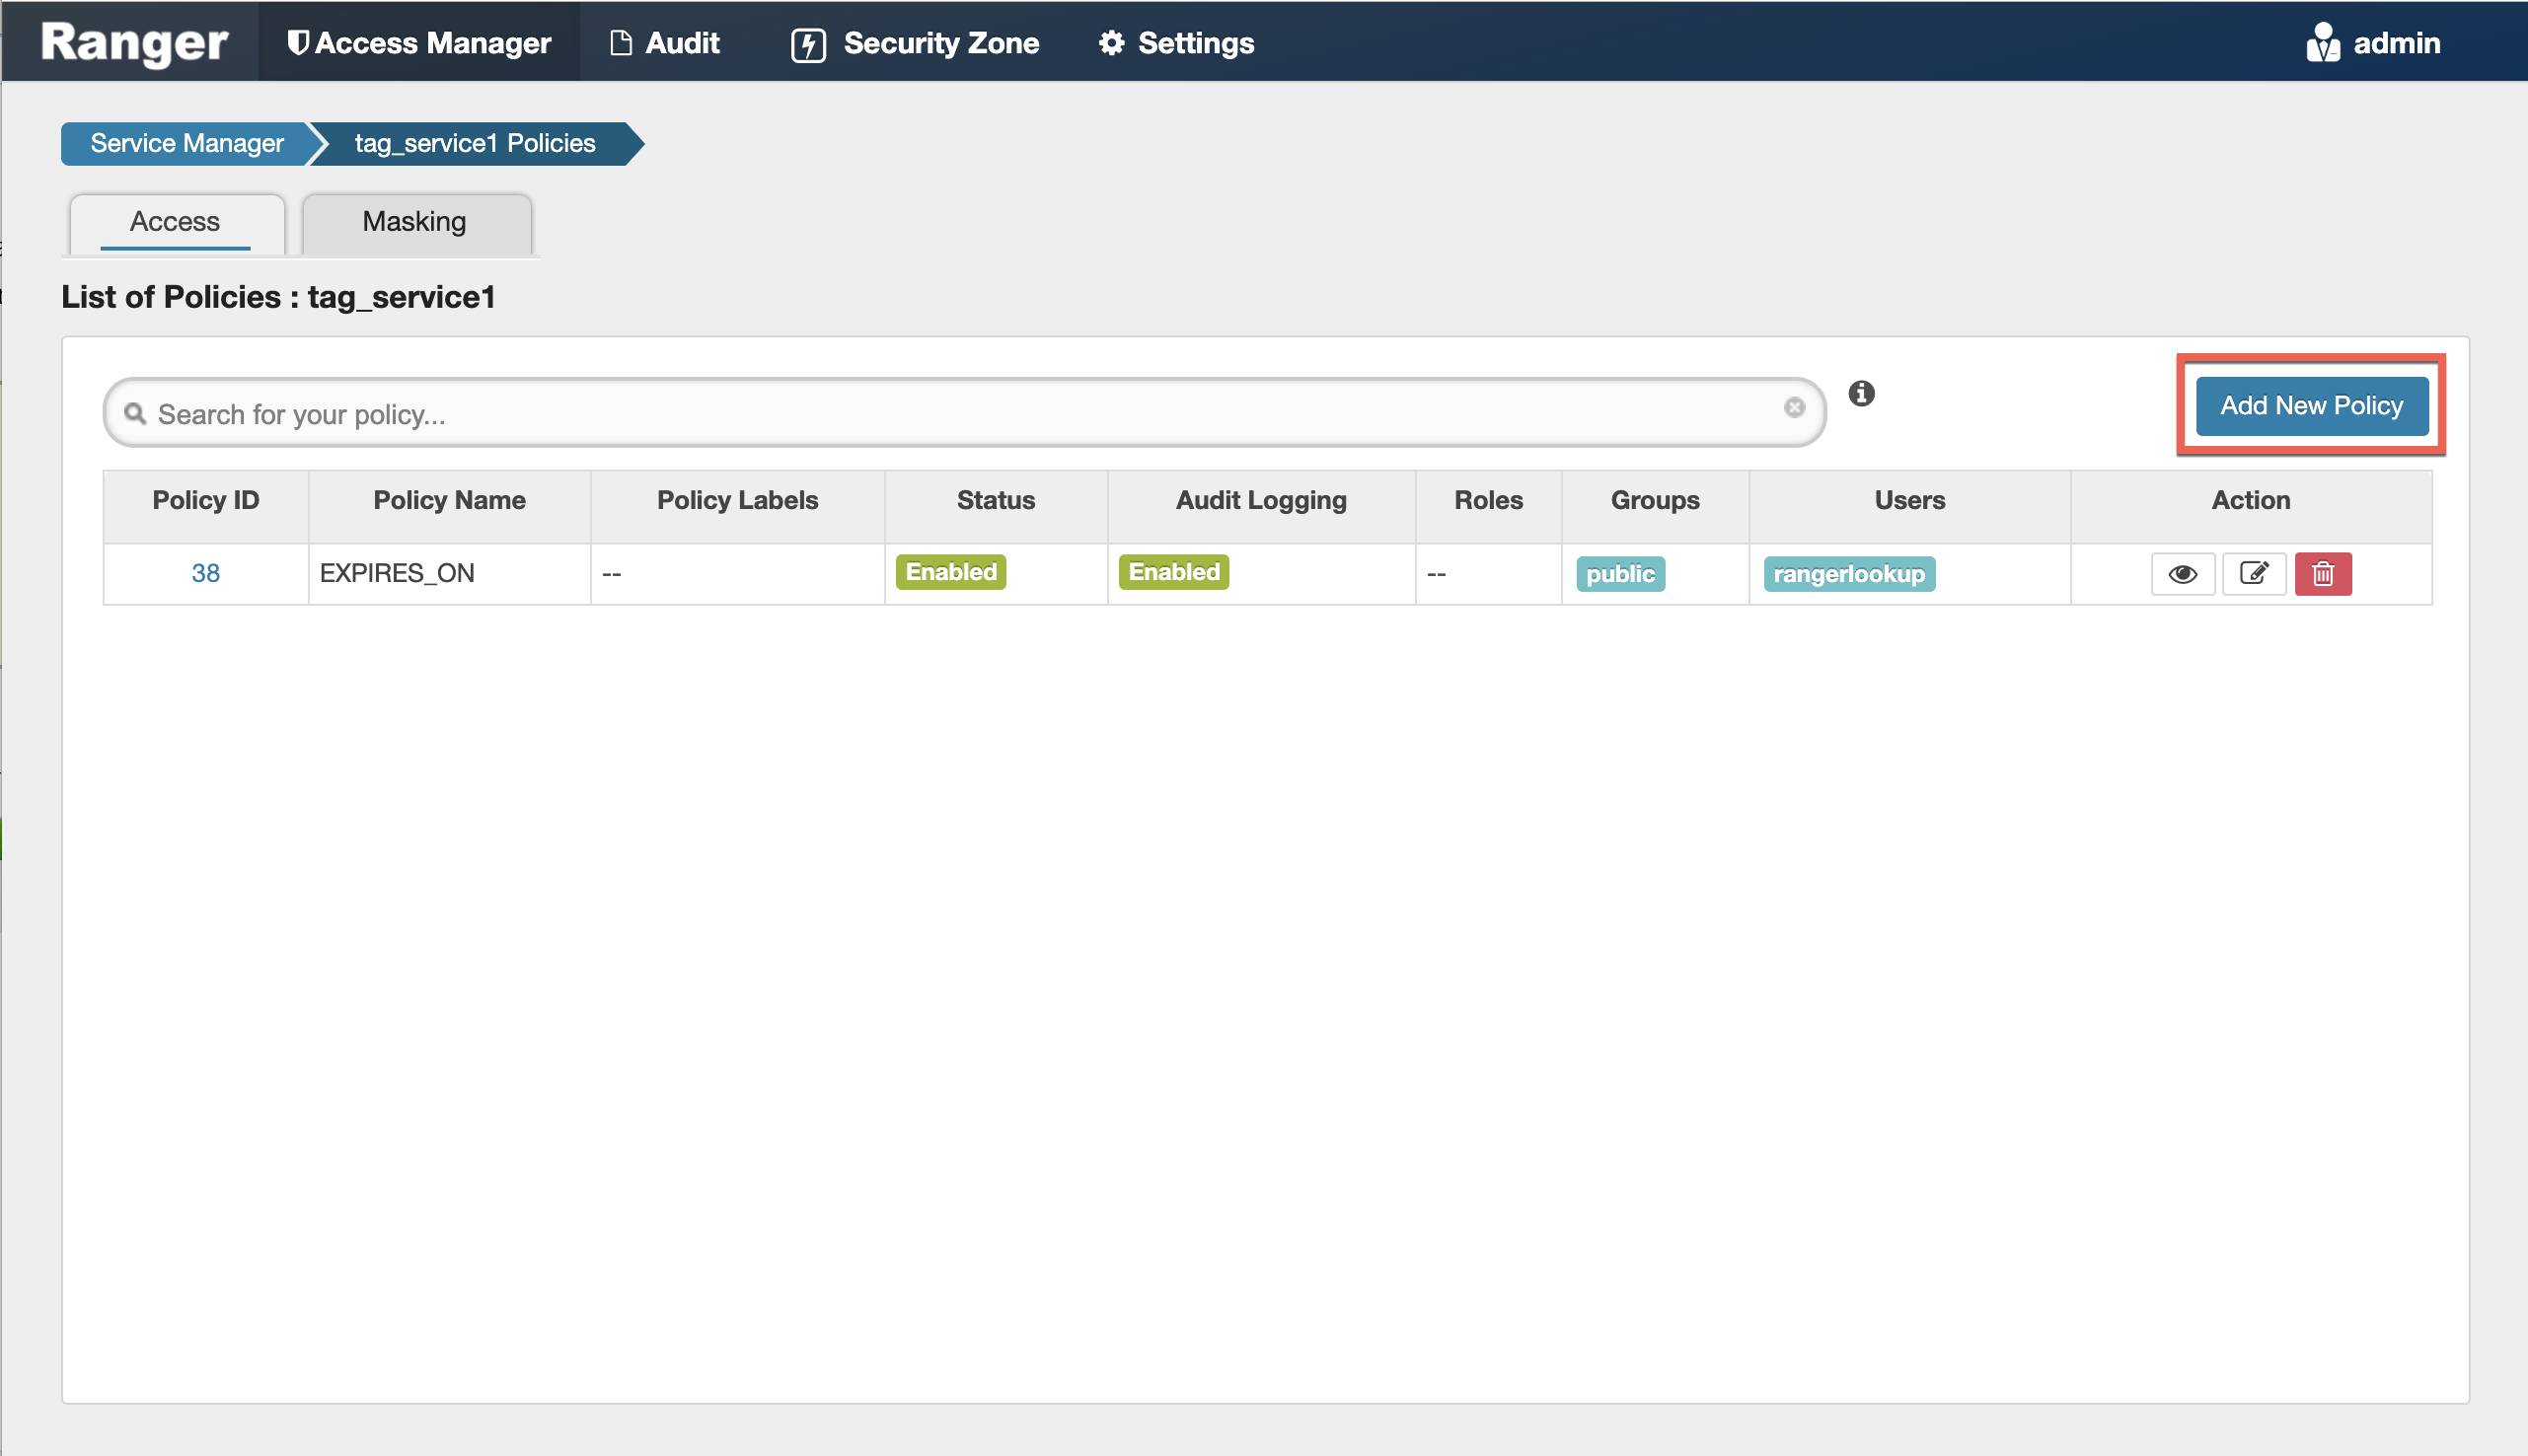
- Select Access Manager> Tag Based Policies, then select a tag-based service.
-
Thee List of Policies page appears with the Access tab selected by default. Click
Add New Policy.
 The Create Policy page appears:
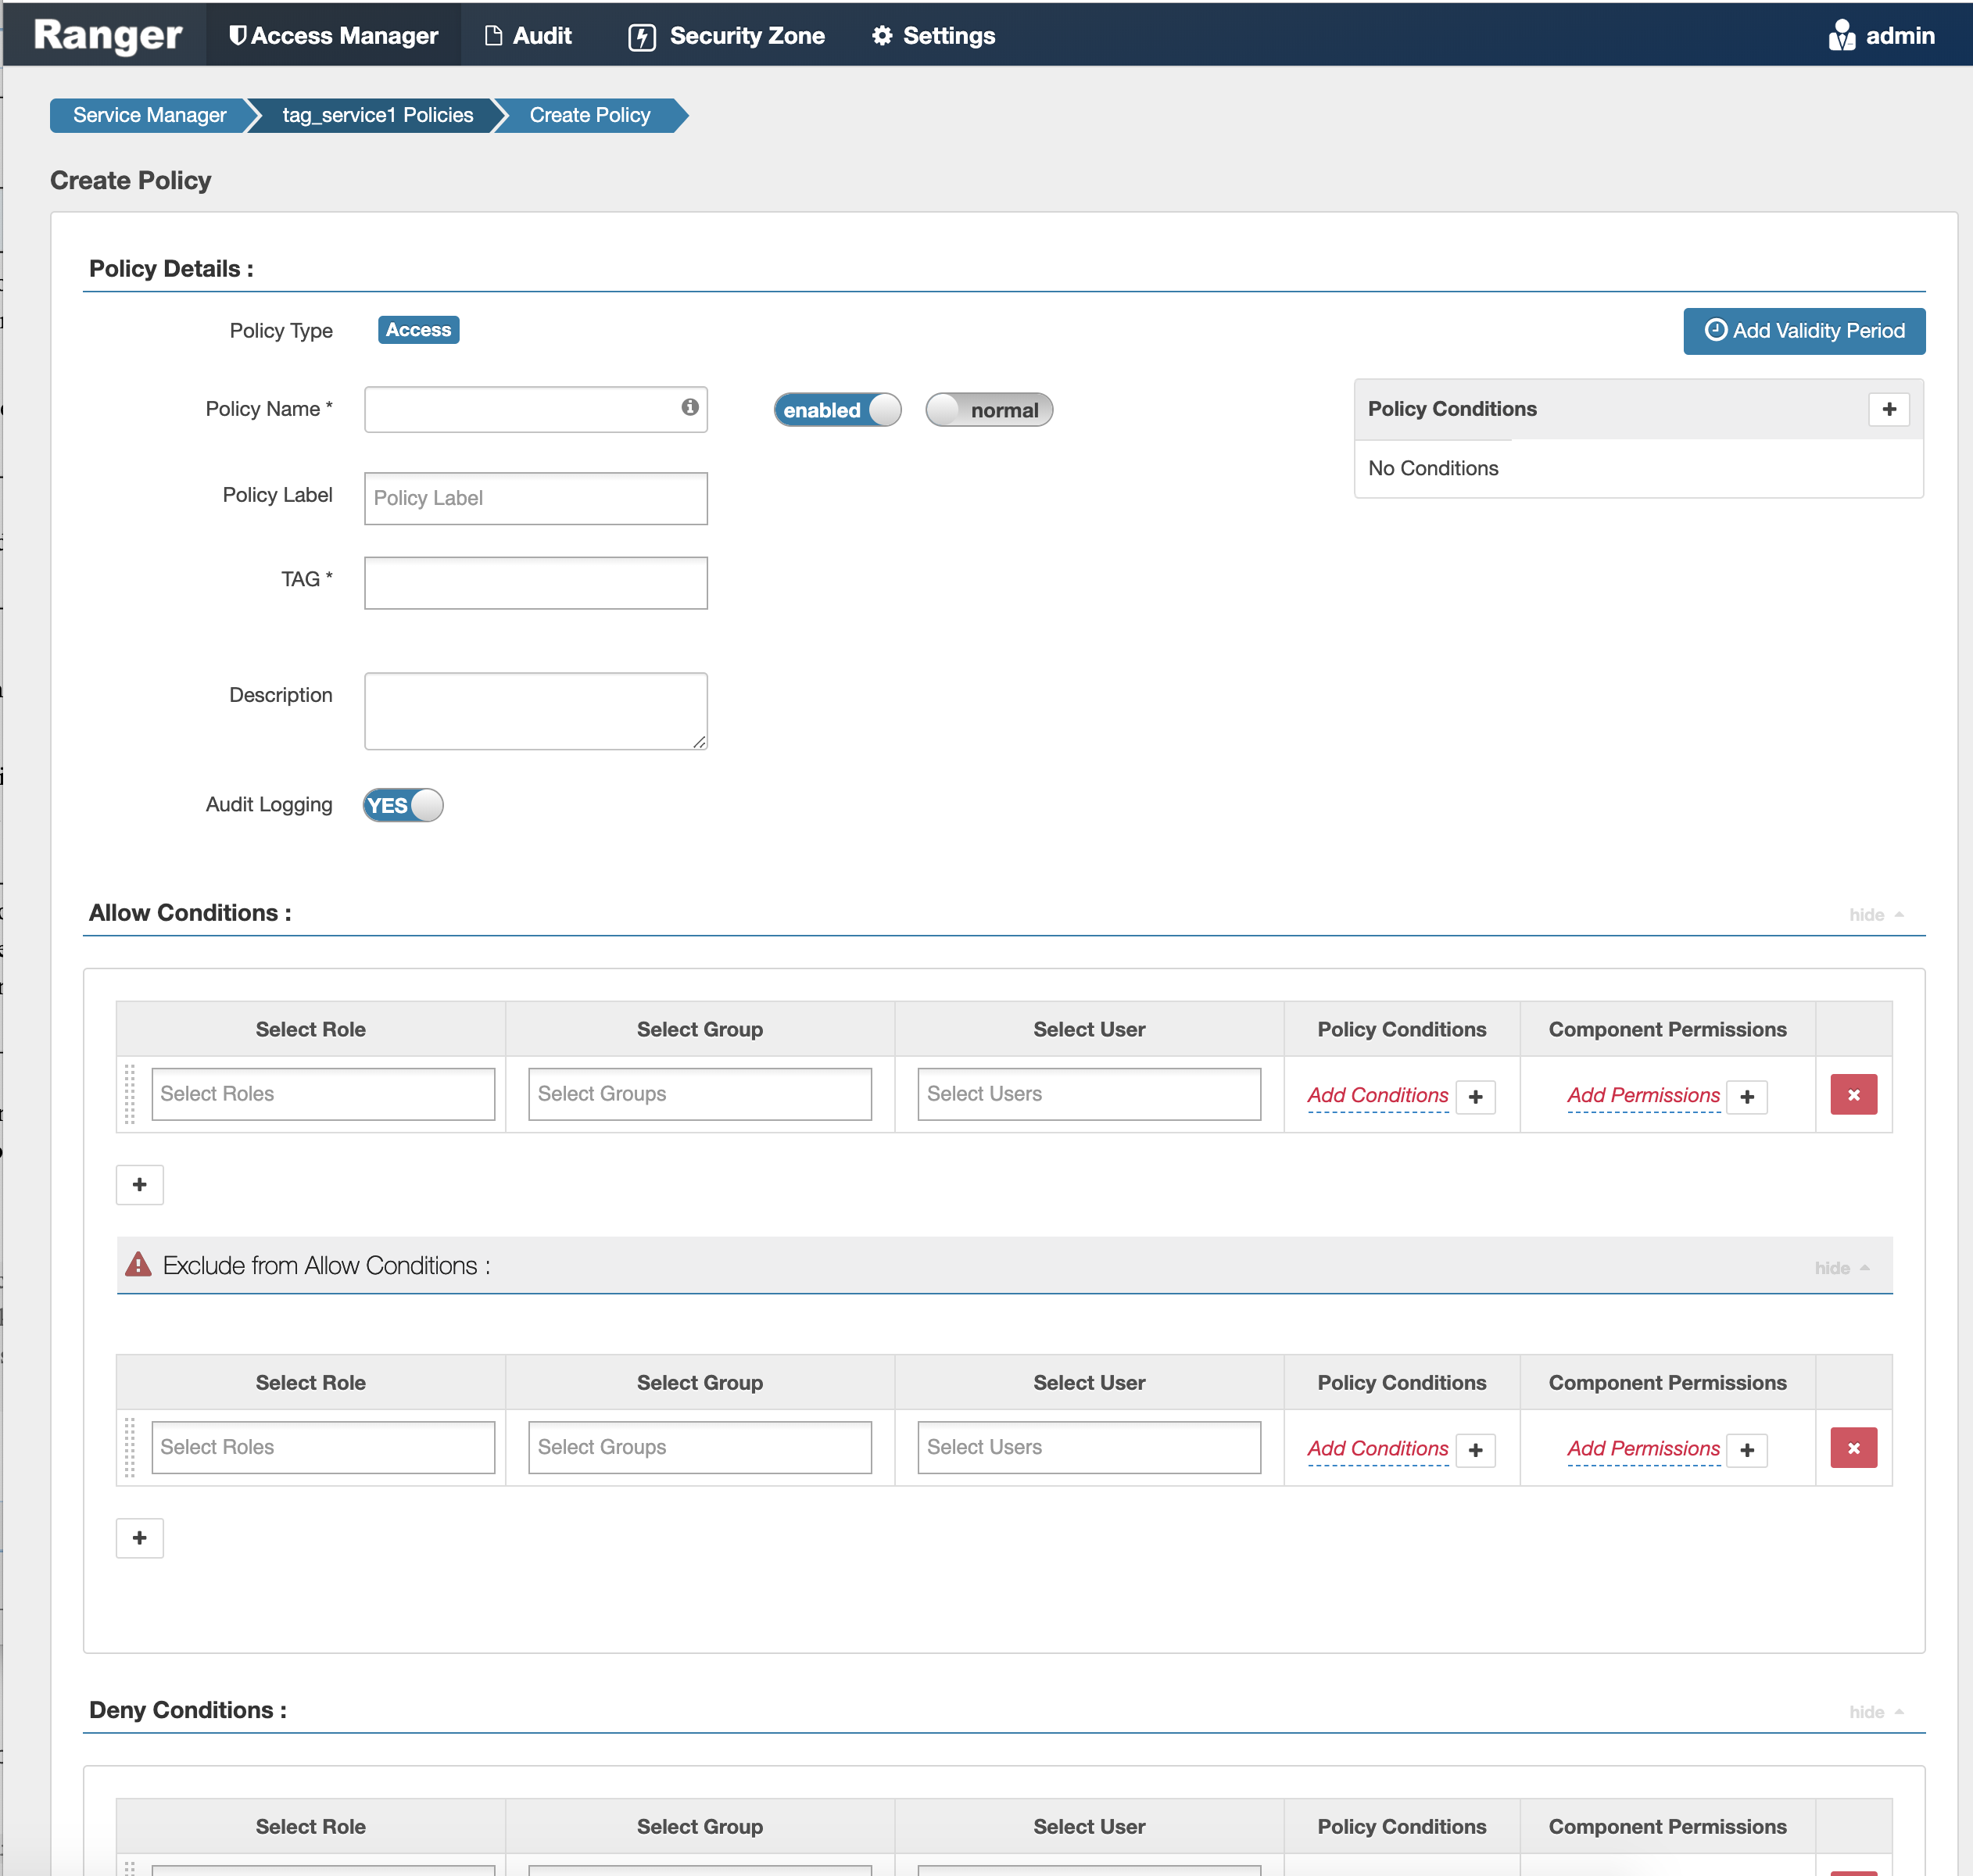
- Enter information on the Create Policy page as follows:
Table 1. Policy Details Field Description Policy Type Set to Access by default. Policy Name Enter a unique policy name. This name cannot be duplicated across the system. This field is mandatory. normal/override Enables you to specify an override policy. When override is selected, the access permissions in the policy override the access permissions in existing policies. This feature can be used with Add Validity Period to create temporary access policies that override existing policies. TAG Enter the applicable tag name. Description (Optional) Describe the purpose of the policy. Audit Logging Specify whether this policy is audited. (De-select to disable auditing). Policy Label Specify a label for this policy. You can search reports and filter policies based on these labels. Add Validity Period Specify a start and end time for the policy. Policy Conditions (applied at the policy level) Click the + icon to add policy conditions. Currently "Accessed after expiry_date? (yes/no)" is the only available policy condition.
"Accessed after expiry_date (yes/no)?": To set this condition, type yes in the text box, then click the check mark button to add the condition.
Enter boolean expression: Available for allow or deny conditions on tag-based policies. For examples and details, see
Using Tag Attributes and Values in Ranger Tag-Based Policy Conditions
.Click Save to save the policy condition.
Table 2. Allow, Exclude from Allow, Deny, and Exclude from Deny Conditions Label
Description
Select Role Specify the roles to which this policy applies. Select Group Specify the group to which this policy applies. To designate the group as an Administrator for the chosen resource, specify Admin permissions. (Administrators can create child policies based on existing policies).
The public group contains all users, so setting a condition for the public group applies to all users.
Select User Specify a particular user to which this policy applies (outside of an already-specified group) OR designate a particular user as Admin for this policy. (Administrators can create child policies based on existing policies). Policy Conditions (applied at the item level) Click Add Conditions to add policy conditions. Currently "Accessed after expiry_date? (yes/no)" is the only available policy condition.
"Accessed after expiry_date (yes/no)?": To set this condition, type yes in the text box, then click the check mark button to add the condition.
Enter boolean expression: Available for allow or deny conditions on tag-based policies. For examples and details, see
Using Tag Attributes and Values in Ranger Tag-Based Policy Conditions
.Component Permissions Click Add Permissions to add or edit component conditions. To add component permissions, enter the component name in the text box, then use the check boxes to specify component permissions. Click the check mark button to add the chosen component conditions to the policy. - You can use the Plus (+) symbols to add additional conditions. Conditions are evaluated in the order listed in the policy. The condition at the top of the list is applied first, then the second, then the third, and so on.
- You can use Deny All Other Accesses to deny access to all other users, groups, and roles other than those specified in the allow conditions for the policy.
- Click Add to add the new policy.