Manage Knox Gateway tokens
You can enable, disable, or revoke tokens via the Knox homepage.
-
To access Knox token management, go to
https://KNOX_GATEWAY_HOST:PORT/GATEWAY_PATH/homepage/home,
e.g.
https://localhost:8443/gateway/homepage/home. Click on Token Management. A compact view of all tokens generated within the system is shown in a single table with the following information.
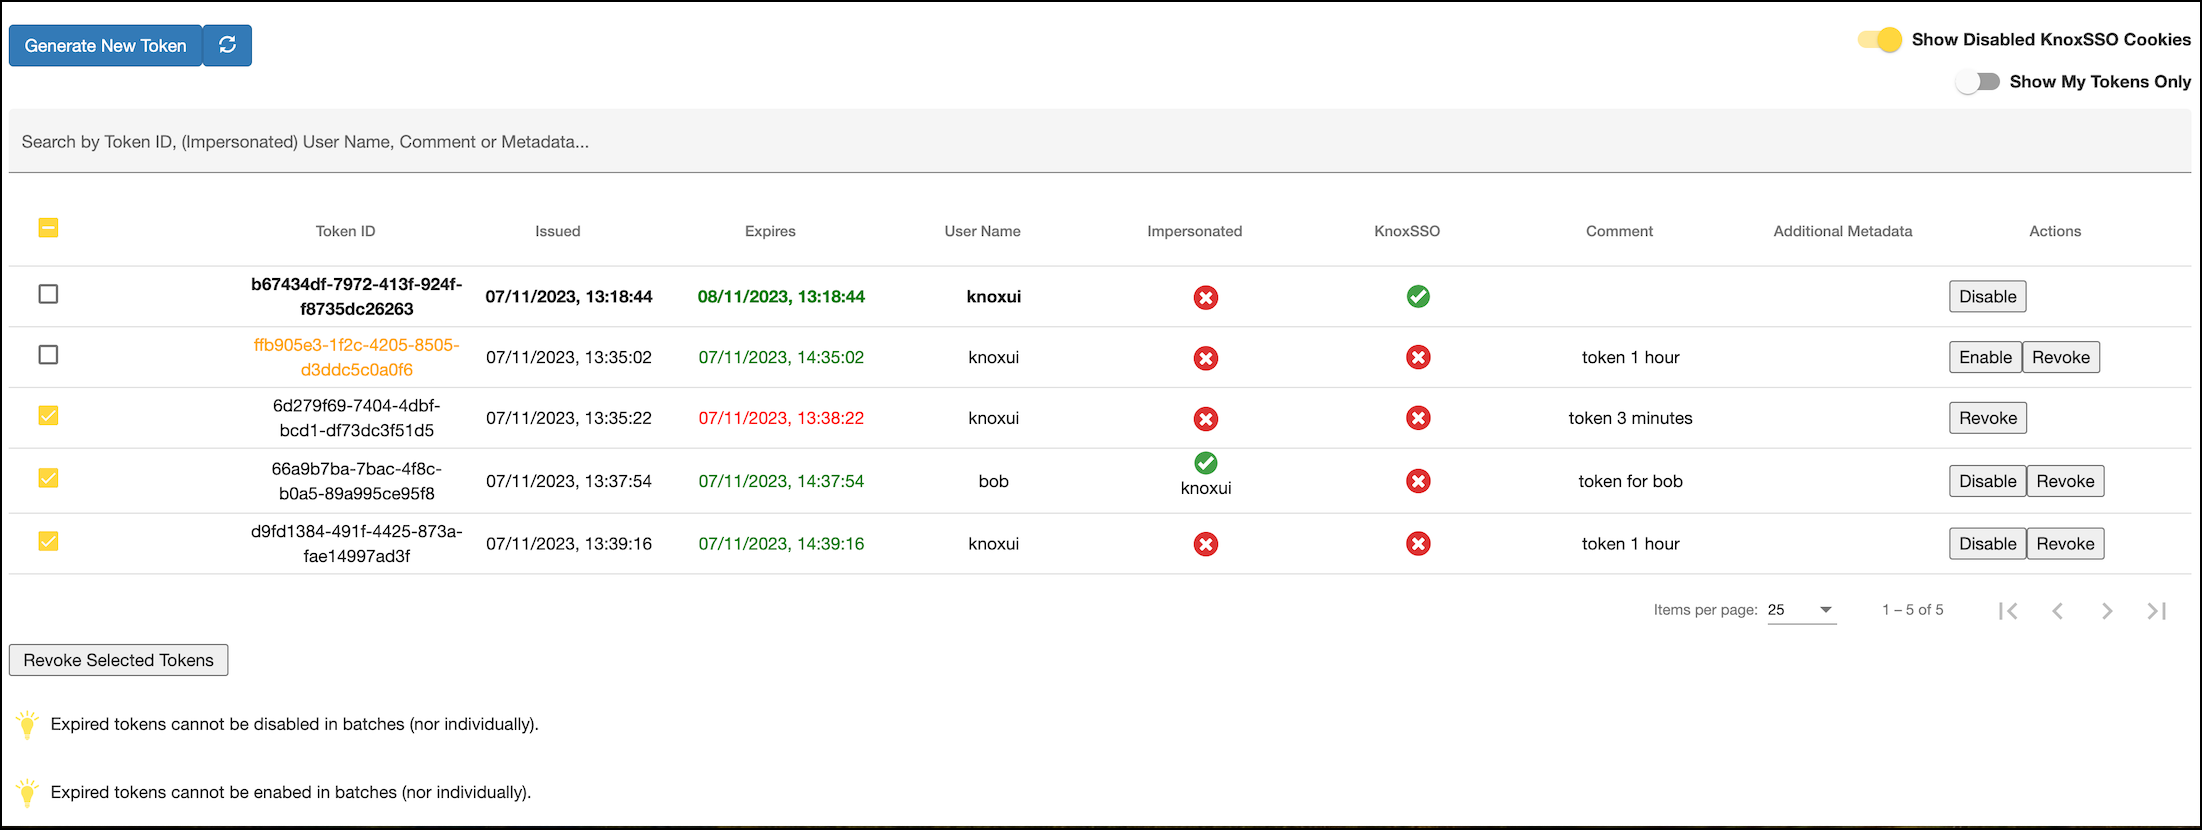
- Each row starts with a selection checkbox for batch operations (except for disabled KnoxSSO cookies, as there is no point in doing anything with them).
- A unique token identifier. Disabled token’s Token ID value is shown in orange.
- Information on when the token was created and when it will expire.
- If the token is already expired, the expiration time is shown in red.
- If the token is still valid, the expiration time is shown in green.
- Username indicates the user for whom the token is created for.
- Impersonated is a boolean flag indicating if this is an impersonated token:
- Green check: Yes, this is impersonated. You’ll see the user who created the token under the icon.
- Red cross: No, this is not an impersonated token.
- KnoxSSO is another boolean flag that indicates if this token is created by the
KNOXSSO service if the feature was enabled. The line is shown in bold if the token in
this line represents the SSO cookie currently used as the authentication token to
login to the Token Management page.
- green check: yes, this is KnoxSSO cookie (token)
- red cross: no, this is not a KnoxSSO cookie (it was created by a regular token API call or on the Token Generation page or the feature is disabled)
- Comment: users may add a short comment to the tokens they create to make it easier for them to distinguish certain tokens later (e.g. "1-hour token for user XY")
- Additional Metadata : In some cases, it's beneficial to add different metadata to the generated token as a key-value pair (e.g. shouldBeRemovedBy=09_Nov_2023). One token can have more than one associated metadata. In this column, we display that information.
- In the Actions column, you will see
- The enable/disable/revoke actions are visible for impersonated tokens too
- KnoxSSO cookies cannot be revoked nor re-enabled.